Geek Divers user guide

Version 2.2*
*Geek Divers Version 2.2 is a major release. It includes several new features as well as some minor bug fixes. Check the menu on the left to read about the features marked as (NEW). You might need to ask your administrator to rework your login and add menu items. Please refer to chapter 1.6 Users to request specific new menu items.
You will see the version in the bottom-right corner of every page within Geek Divers. Please make sure that you have the correct version.
Every new version of Geek Divers might come with additional menu items. If you have an administrator login you will see all the available menu items. If your login was created by an administrator, you will not see any new menu items. Please ask your administrator to modify your login to access the pages that you need to perform your tasks.
How to use this user guide
Please use the menu on the right of this document to check the content of the chapters. Every new version of Geek Divers will bring new features or improvements to the existing ones. You will find chapters marked as that explain what’s new in the current version. Feel free to contact us if you need any additional explanation or if you can’t find what you’re looking for at info@geekdivers.com
0. Intro
As an Administrator, the first time you log in to Geek Divers there are a few steps that you need to follow in order to make it work properly:
Set up your General Settings
Enter your price list
Add your cost centers and accounting codes
Set up your payment methods
Add staff members and their commissions/salary
Add your Agents and their commissions (not mandatory)
Add your Partners and their price lists (not mandatory)
Add your transportation (boats, vans, golf carts…)
Add your dive sites
Add your rental Equipment (not mandatory)
(AM) Add your Room settings, your accommodation calendar settings and your rooms (only if you choose to use the Accommodation Module)
These are the minimum steps required to start using the system. The chapters in this user guide will help you step by step. However, in case you’re not sure about how to set up your discounts, which type to choose for your price list, how to make sure that you set up the correct commissions for your staff or anything else, please feel free to contact us at info@geekdivers.com or WhatsApp: +49 1590 700 7654 or schedule a Skype/Zoom video call.
1. Settings
1.1 General Settings
Click on Settings in the menu on the left and choose the submenu General Settings.
You will see a page with 11 sections:
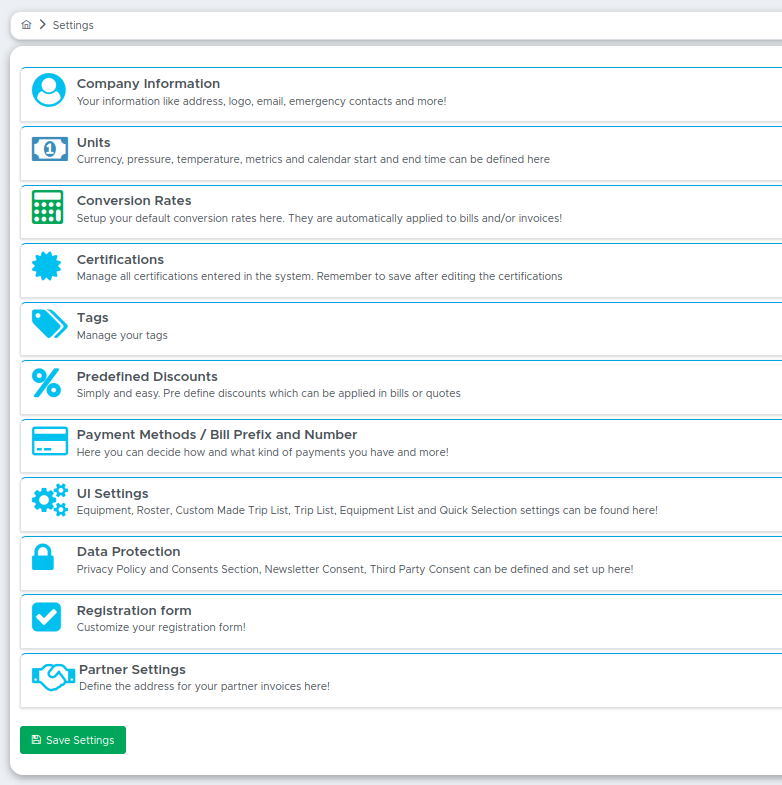
Unless specified, each of these sections refers to the current location. If your Geek Divers account has more than one location, please remember to switch to your other locations and complete the General Settings there as well.
1.1.1 Company Information
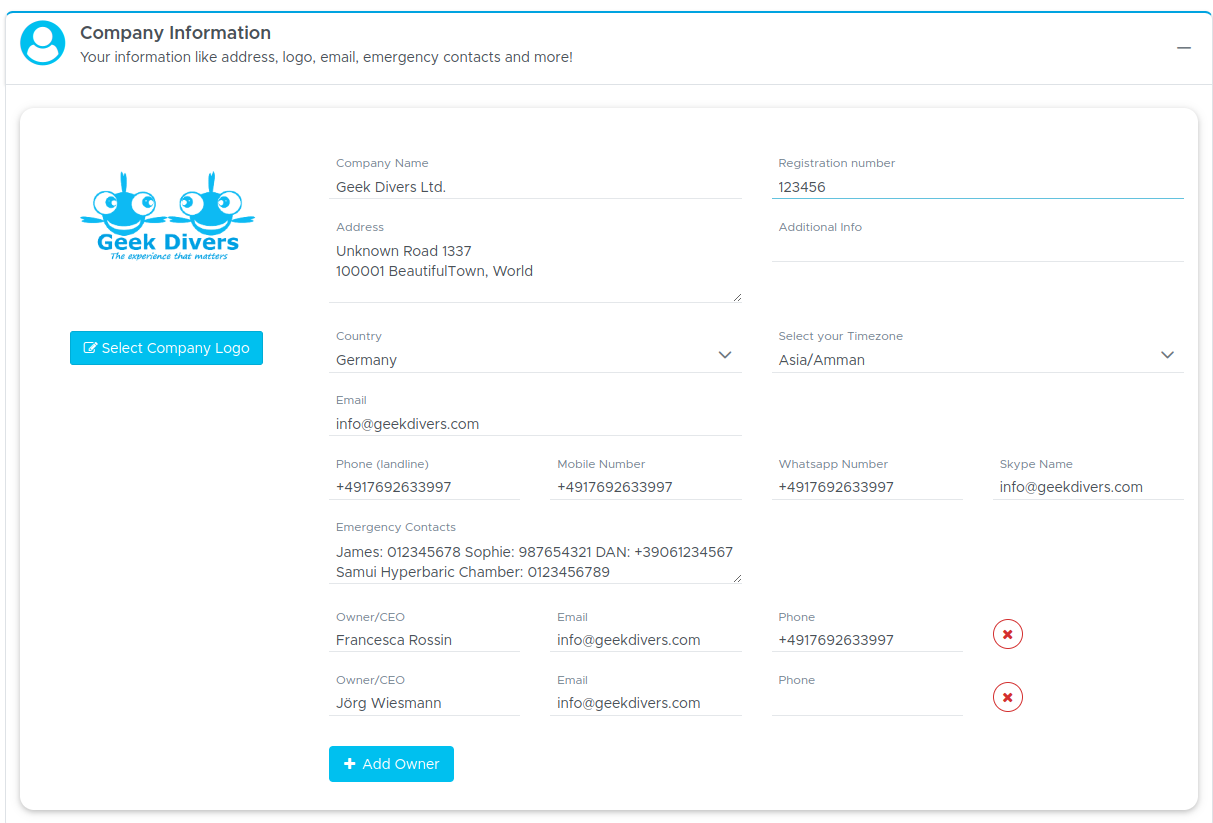
Click on Company Information to enter your company details and upload your logo. These will be used when you print a bill, a payslip or an invoice/credit note. Add all the details that you wish to see in a customer’s bill. Select your time zone and scroll down the page to click on Save Settings.
1.1.2 Units
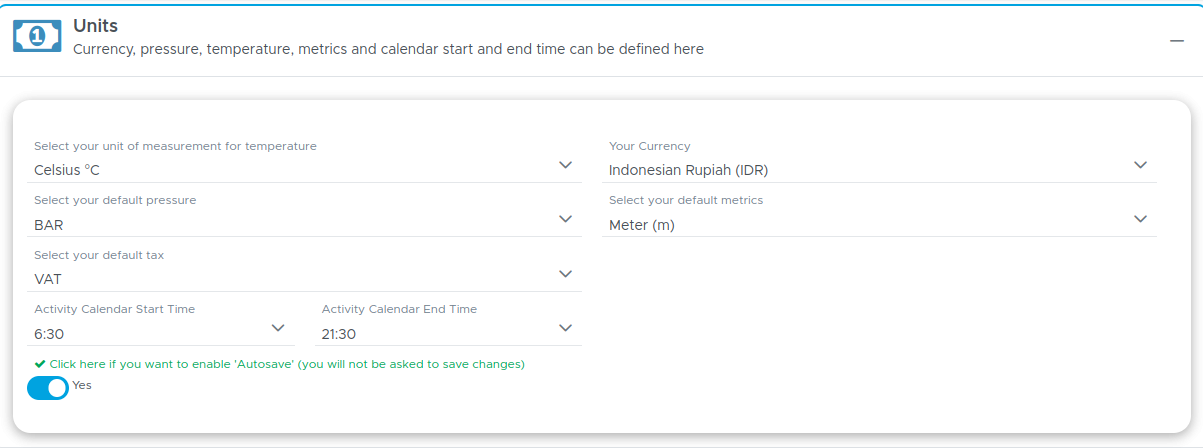
In Units you need to set your favorite units of measurement and the start and end time of your activity calendar. E.g. If the first dive of the day doesn’t start before 9am and you usually come back from your night dive at around 7pm, you might want to set 8am as start time and 8pm as end time. Keeping a buffer of one hour in the morning and in the evening is recommended.
On this page you can also choose if the sales tax in your location is called VAT or GST.
Scroll down the page to click on Save Settings.
👀 Important!
Before you start setting up your price list or before you click on your cash flow, the default currency must be set. This is the reason why your currency is already set. Once the currency is saved, it cannot be changed. In case you wish to change your default currency, please contact the Geek Divers support.
1.1.3 Conversion Rates
Here you can set the most frequently used conversion rates. Prerequisite: you need to set a default currency in General Settings - Units. These conversion rates will be proposed every time you wish to record a payment or enter an expense in a currency that is different from your default one. The proposed exchange rate can be manually changed in every recorded payment or expense.
You can come back to this section every time you wish to update your standard conversion rates.
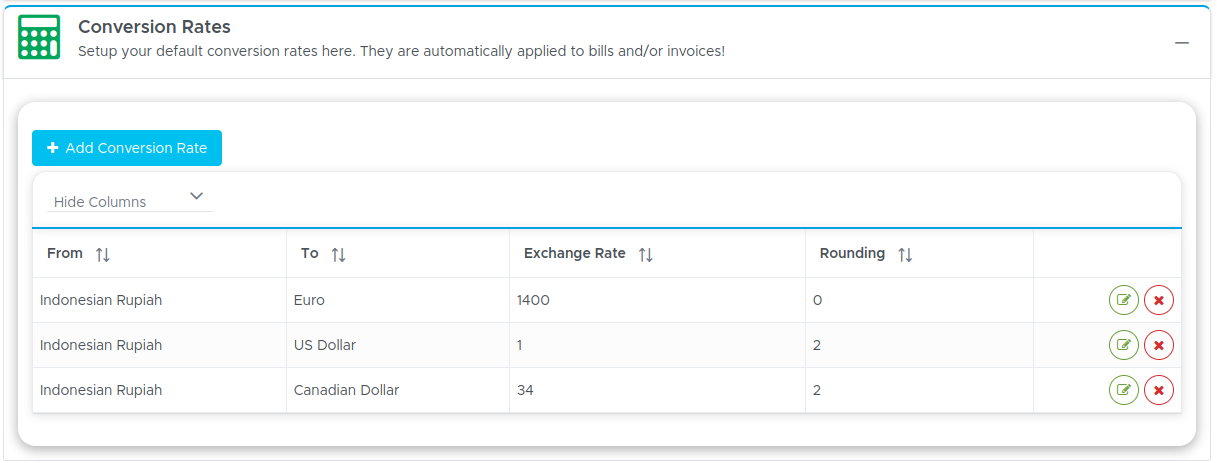
Click on the button Add Conversion Rate. Select a frequently used currency, type the exchange rate that you wish to use and the rounding. As soon as you type the rounding, you will see an example in a table, taken from your default price list. Feel free to adjust the rounding to match your preferences. If you haven’t set up your price list yet, feel free to do that first and come back to this part of the settings later.
As a rounding guideline, please consider the following:
Rounding 2 means 2 decimals - commonly used for EUR, UDS, AUD, GBP, CHF. E.g. €29.99.
Rounding 1 means 1 decimal - not very commonly used for currencies.
Rounding 0 means that the prices will be rounded to the unit - commonly used for THB, PHP, MYR. E.g. 450THB.
Rounding -1 means that the prices will be rounded to the tens - not very commonly used for currencies.
Rounding -2 means that the prices will be rounded to the hundreds - not very commonly used for currencies.
Rounding -3 means that the prices will be rounded to the thousands - it might be used for IDR. E.g. Rp375,000.
Please consider that the rounding will apply the mathematical rounding: floor rounding for digits from 0 to 4 and ceiling rounding for digits from 5 to 9.
Scroll down the page to click on Save Settings.
1.1.4 Certifications
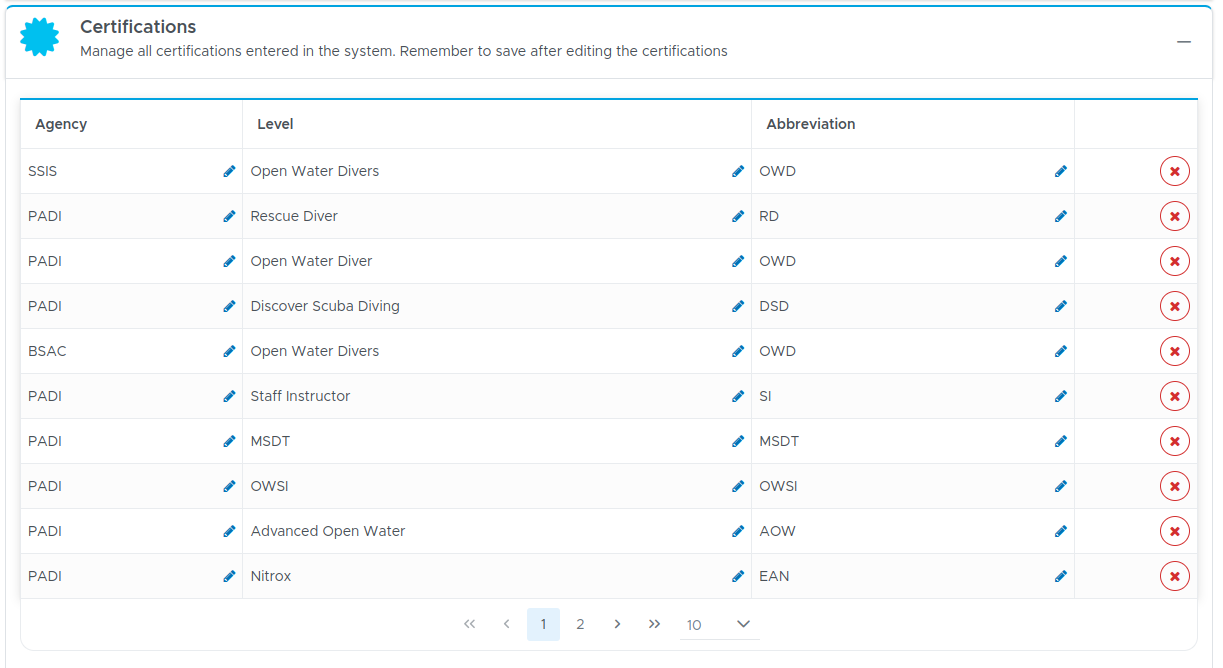
In Certifications you don’t necessarily need to do anything at the beginning. When you enter a new customer or staff member and write their certifications, Geek Divers will ask you if you want to save them. If you click Yes, they will be saved here. You can always come back to this tab in case you realise that there’s a typo and you want to remove or edit a wrong certification.
Scroll down the page to click on Save Settings.
1.1.5 Manage your Customer and Staff Tags
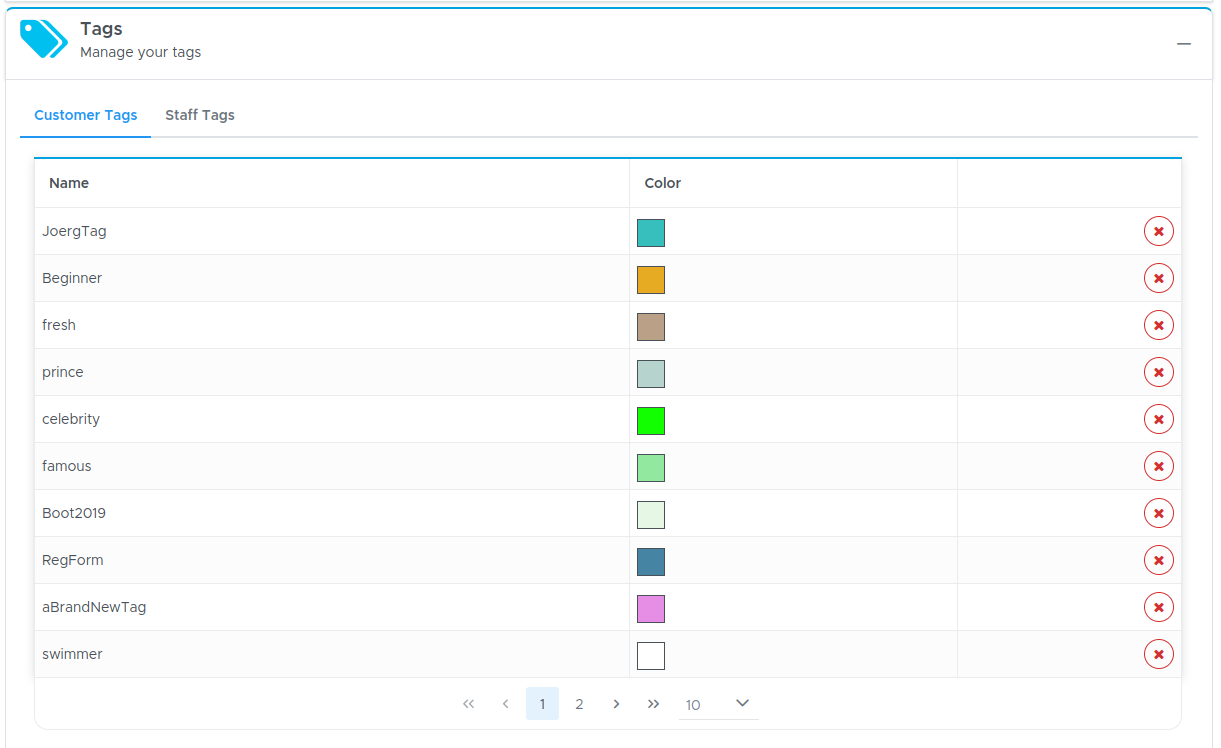
In this section you don’t need to do anything at the beginning. As a matter of fact, if you’ve just started using Geek Divers, this section will probably be empty. However, once you work with tags for a while, you might want to delete some tags that you’re no longer using. In this case, please make sure that the tag that you wish to delete is no longer in use. To do so you can go to All Customers or All Staff and filter by the tag that you wish to delete. If you see “No results found”, then you can be sure that the tag is not assigned to any of your customers or staff. You can then click on this section of your Settings (you can do it from any of your locations as your tags are global) and click on the X button to delete a tag that you no longer need.
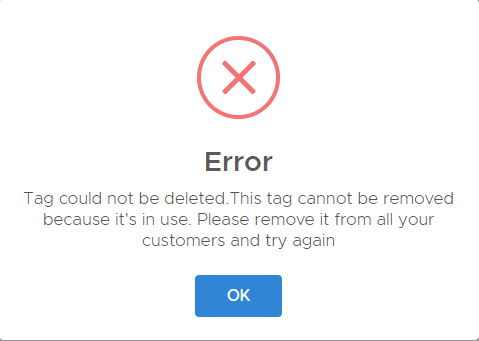
In case you skipped the first step and you try to delete a tag that is still assigned to one or more customers, Geek Divers won’t delete it.
You can also set a color for a tag to identify the customer's tag directly in a trip. In a trip your customers with a tag now have a symbol next to them with the color you selected.
1.1.6 Predefined discounts
The prerequisite to work on this section is that you’ve already entered your complete price list. If you haven’t done it yet, please go to chapter 2 and follow the instructions.
In this section you can define the most common discounts that you regularly offer to your customers. E.g. an early bird discount, a shop sale, a returning customer discount.
These predefined discounts will be available in every customer’s bill and quote and you only need to select them once: every existing or future bill position that matches the conditions that you defined in the settings will receive the appropriate discount.
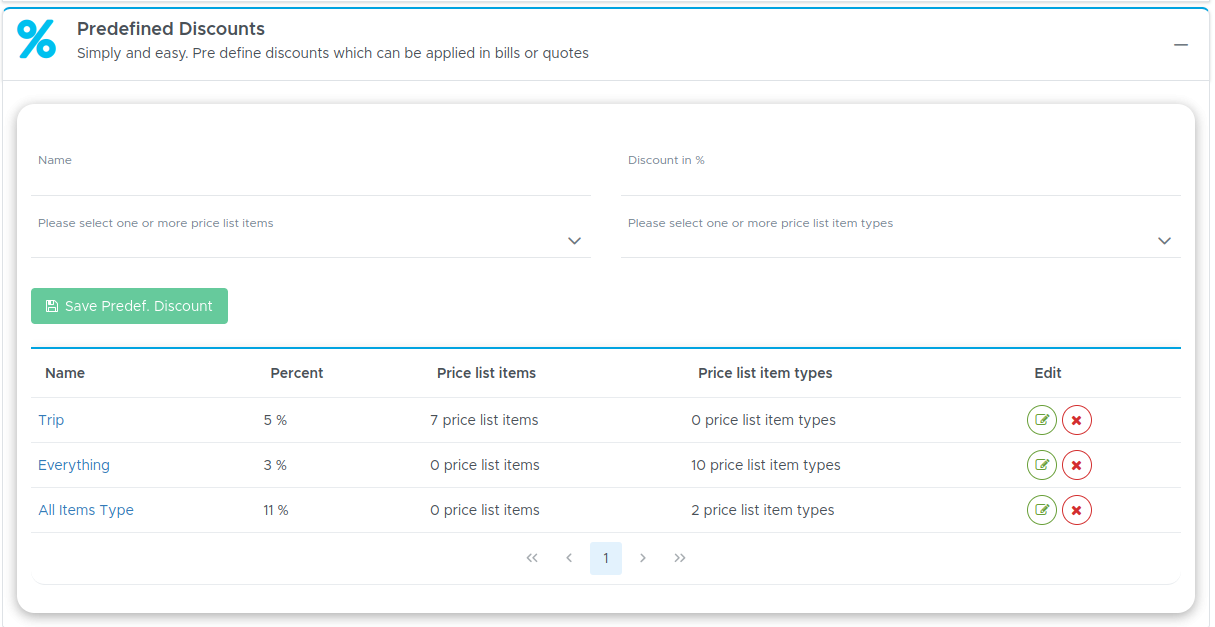
To create a new discount, type the name of your discount in Name and the percentage of discount that you wish to apply in Discount in %. You then have the choice to select specific items in your price list or one or more types. In the menu ‘Select Price list Item’ you will see your complete price list divided by type. In the menu ‘Select Price list item Type’ you will only find types. Select your choice of price list items or price list item types and click on button Save.
In case you choose to use the Accommodation Module and you wish to set up a predefined discount for room rates and meal plans, you can select Type Accommodation.
Suggestion: if you wish to select a lot of price list items, but not all, click on checkbox ‘Select All’ and then scroll through your list to deselect the items that should not be discounted.
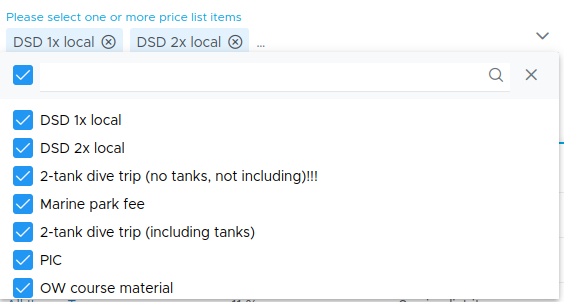
If you wish to delete a predefined discount you can click on the X icon. To edit an existing predefined discount you can either click on the green edit icon or on the discount name. Please consider that once a predefined discount is deleted, this will no longer be available in bills and quotes. However, if it was already applied, it will not be removed.
Scroll down the page to click on Save Settings.
In chapter Apply a predefined discount you can find out how to apply a predefined discount to a bill. In chapter Apply a predefined discount you can find out how to apply a predefined discount to a customer quote.
1.1.7 Payment methods/Bill Settings
Before you customize your payment methods, you need to set up your cost centers (see chapter Cost Center). If you’ve already set up your cost centers, please follow the instructions below here.
The first time you click on this tab you will see the standard payment methods with payment fees for credit card and PayPal.
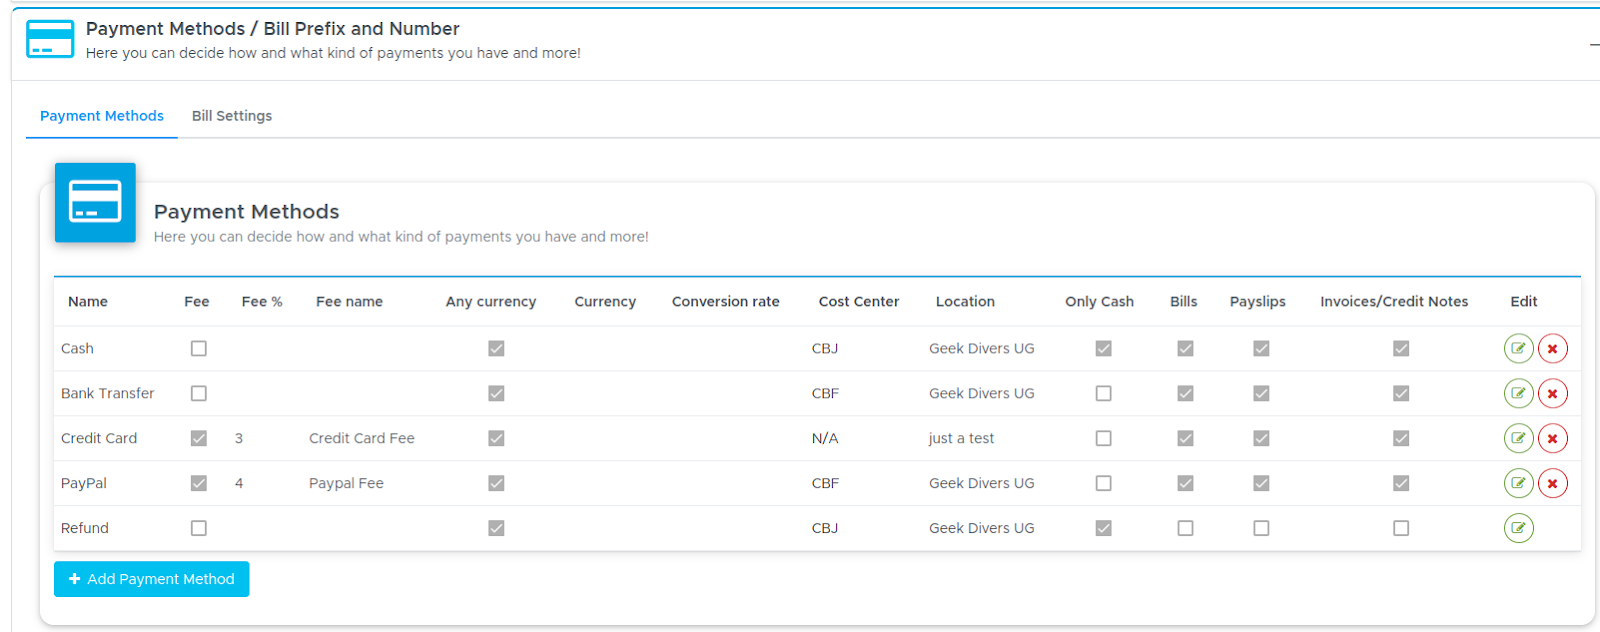
By clicking on the green icon at the end of a payment row, you can edit the payment method.
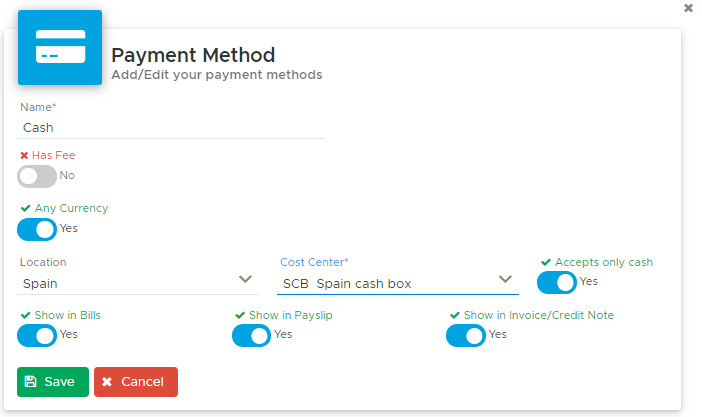
You can change the Name, add/remove a Fee, assign a cost center and choose where you wish to see the payment method: Bills, Payslips, Invoice/Credit Notes.
The cost center that is assigned to every payment method by default is the default cost center or DEF with a number - e.g. DEF-1 or DEF-2 and so on - that is related to your locations. Before version 1.0.6l this cost center was the ‘empty’ one.
The example above is for cash payments. Every time a customer pays cash, where do you store it? In the cashbox behind the counter? Then this should be the cost center to assign to this payment method. Every time you pay a payslip or a credit note or you record an expense in your cash flow and considering that you use cash, where does it come from? The same cashbox behind the counter? Then this should be the cost center to assign to this payment method.
Please consider that the changes that you make will only affect the new transactions. Every past transaction will not be updated with the new configuration.
It is recommended to create a cost center ‘Bank’ (or any other name that you prefer) that could be reserved for electronic transactions. E.g. bank transfers or credit card payments from your customers or partners and bank transfers to pay your staff members.
If you also use an online payment method like PayPal or Stripe or TransferWise, you might want to create a separate cost center for each of these payment methods.
Please consider that all the payment methods that you configure in one location will be available in the cash flow of the same location to record expenses and transfers.
In case you have more than one location you can configure a payment method that ‘feeds’ a cost center in another location.
E.g. Your headquarters is in Phuket and you have a second dive center in Koh Tao. Each location will have their own cash payment methods, but because your bank is in Phuket, all the bank transfers and credit card payments in both locations will show in your bank account.
In this case it is important that you first configure the payment methods in your headquarters location, Phuket, including the assigned cost centers. Once this is done, you can switch to your second location, Koh Tao, and do the same.
In Koh Tao (your additional location), go to General Settings and choose tab Billing. Click on the Edit icon of the payment method that uses a cost center in Phuket. Select the location of the cost center, Phuket.
At this point the field ‘Select Target Payment Method’ will show you the list of payment methods that you’ve configured in Phuket. Select one of the payment methods that is equivalent to the one that you’re configuring for Koh Tao. Click on the button Save.
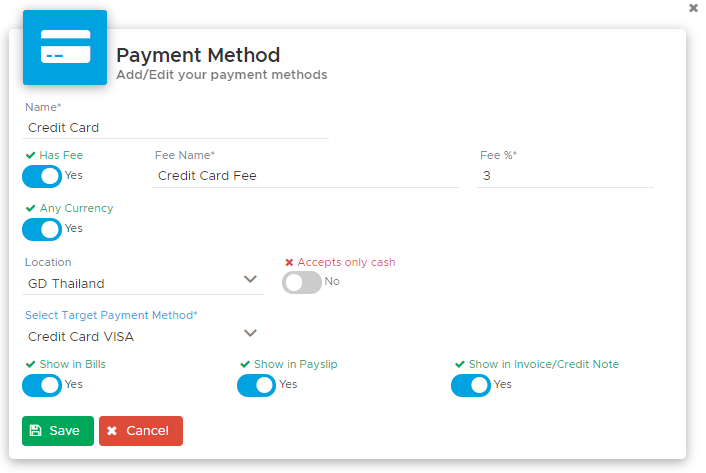
Every payment that you record in Phuket or Koh Tao will be shown in the cash flow of Phuket under cost center Bank.
If you configure a payment method with a target cost center in another location, in the payment methods table you will see N/A (= Not Available) in the cost center column. This is because the cost center is not available in the current location.
At 2nd Tab of this section you can change the bill settings and add a prefix to your bill numbers in each of your locations.
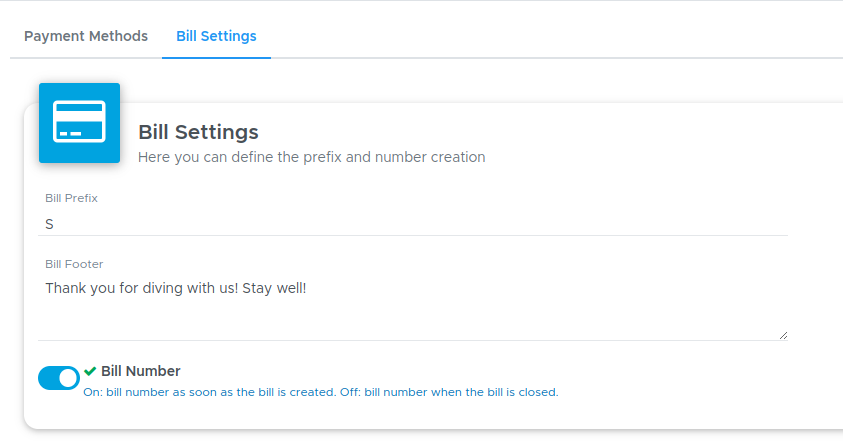
Enter a few characters or numbers that can easily help you identify the customers' bills of one of your locations. In the example above, I entered S for Spain and my customers' bills will have numbers: S2020-1, S2020-2...etc.
You can choose not to use a bill prefix, especially if you have only one location. However the bill prefix feature is particularly recommended if you have more dive centers under the same Geek Divers account. This will guarantee a unique bill number for your accountant.
Additionally you can choose to turn on the Bill Number toggle.
Leave it off if:
You don’t necessarily need a bill number when the bill is created, but only when it’s closed.
You need consecutive bill numbers for your accountant and tax office.
You don’t want to have closed bills with an amount of zero.
You want to be able to archive bills.
Turn it on if:
You need a bill number as soon as the bill is created.
You need to print (pdf) the bill whenever the customer pays a part of the open amount to provide an official payment receipt.
You don’t mind having bill no. 200 in Closed Bills and bill no. 12 in Open Bills.
You don’t need to use the archive bill feature (only bills without number can be archived).
Don’t forget to click on button Save Settings to record your changes!
1.1.8 UI Settings
In UI Settings you will see the following tabs:

Equipment
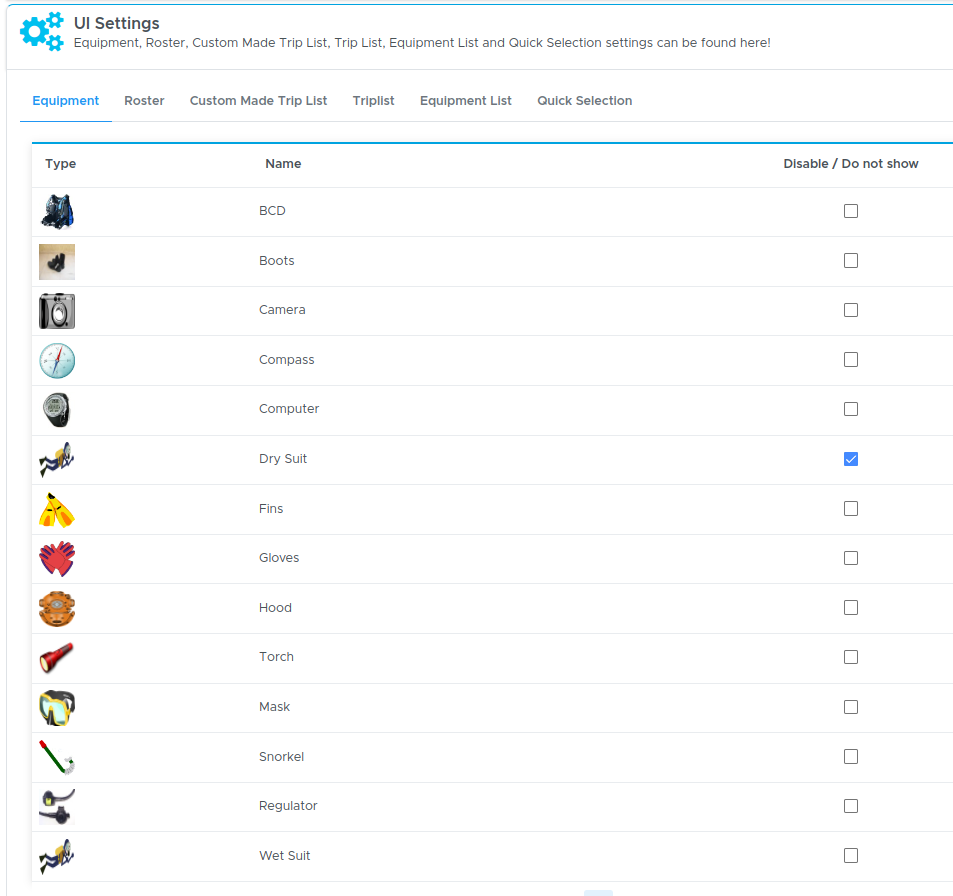
Here you can hide some pieces of equipment. E.g. If your dive center is in a tropical country it’s very unlikely that you will rent drysuits or hoods. Select the checkboxes of the equipment types that you want to hide. The remaining equipment types will be shown in the customer-equipment tab and in the online registration form and will be available for assignment.
Roster
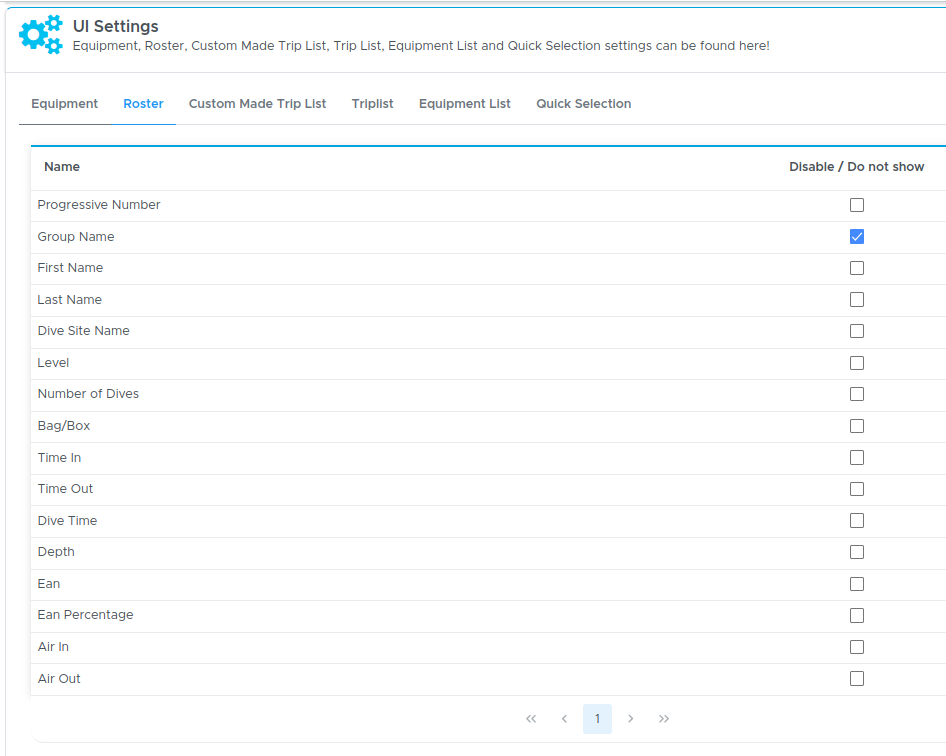
Here you can configure the columns to use in the dive roster in every trip. E.g. if you don’t offer EAN tanks you will probably want to hide EAN and EAN Percentage. Select the checkboxes of the columns that you wish to hide. The Roster will be available for every trip that you create in the Activity Calendar in tab Reports/Summary. In version 2.0 columns Air In and Air Out have been added.
Custom Made Trip List
Here you can configure a list of your choice using the available columns. This list will be shown in every trip in tab Reports/Summary. On this page you will see a number of dots in blue or green. The blue dots represent the columns that are hidden, while the green dots are the ones already selected.
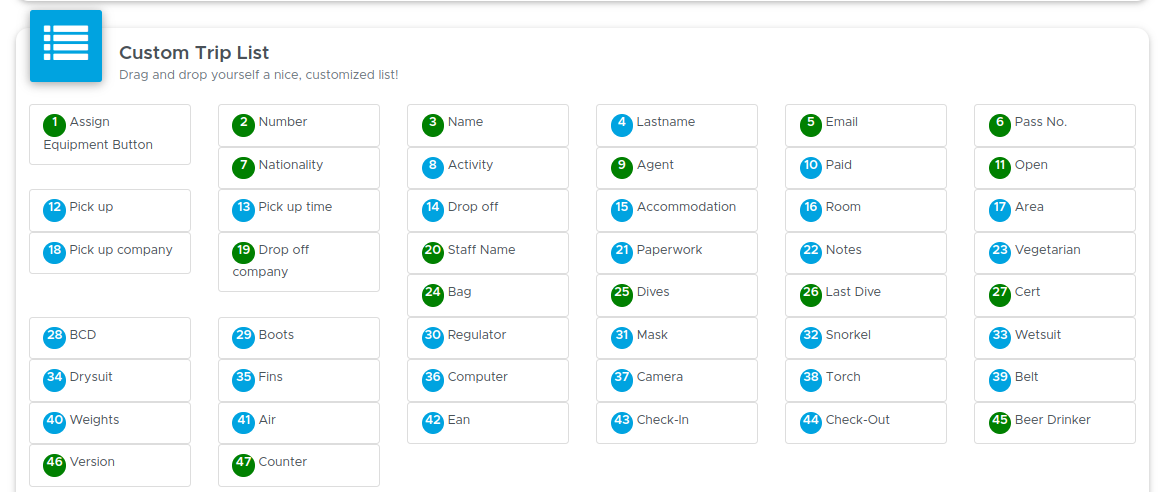
To create your own list click one of the blue dots and drag it to the bottom where you see “Drop items here”.
If you scroll down you will see the selected columns (green dots). If you wish to change the order of the columns you can use the buttons “Move Up” or “Move Down” to rearrange them.
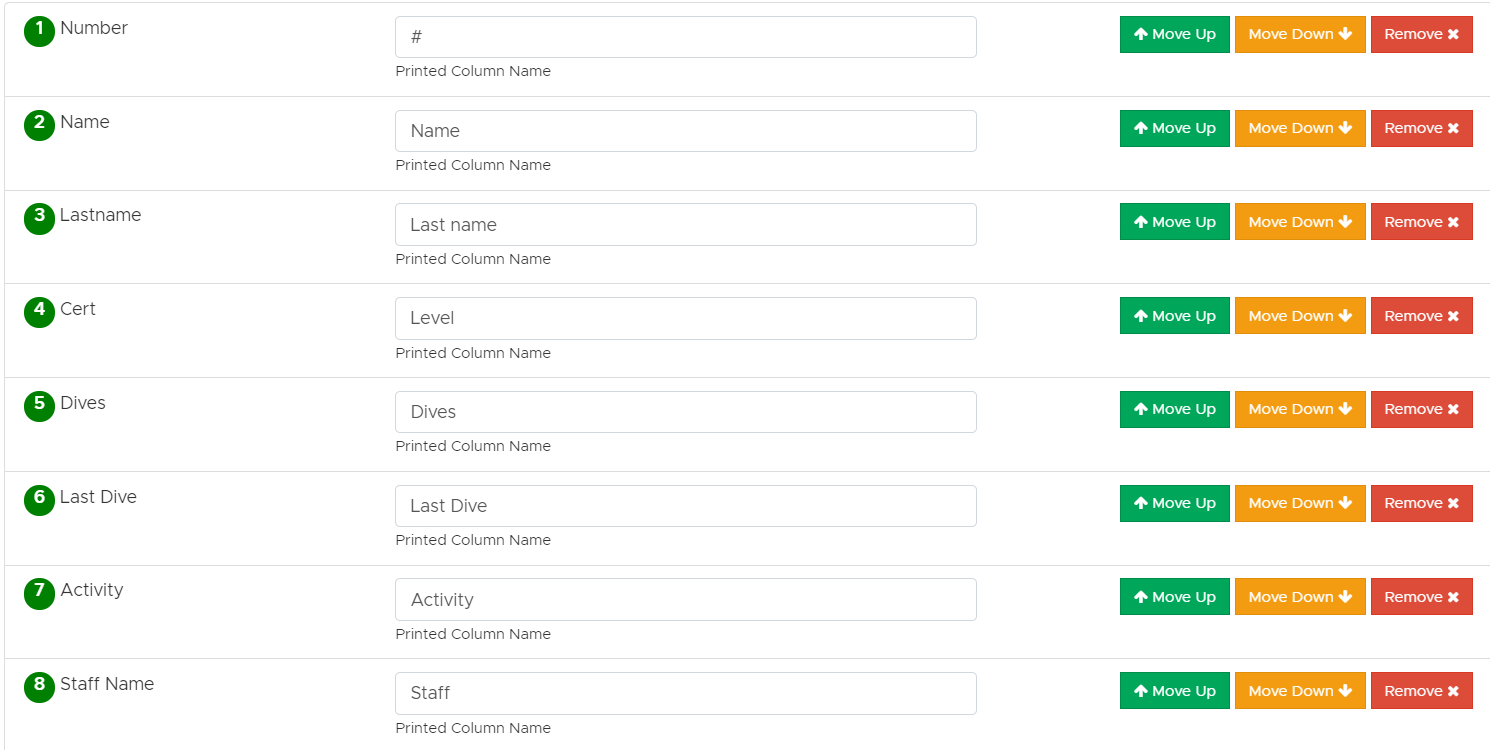
Once you’re satisfied with the order of the columns you can also choose a different name for the printed version. In the example above, column “Number” will be printed as “#” if you choose to print your Custom Made Trip List. In case you change your mind and you want to remove a column from your list, you can click on button “Remove” and this column will go back to the list of available columns with a blue dot.
At the top of this page you can also create your own columns.
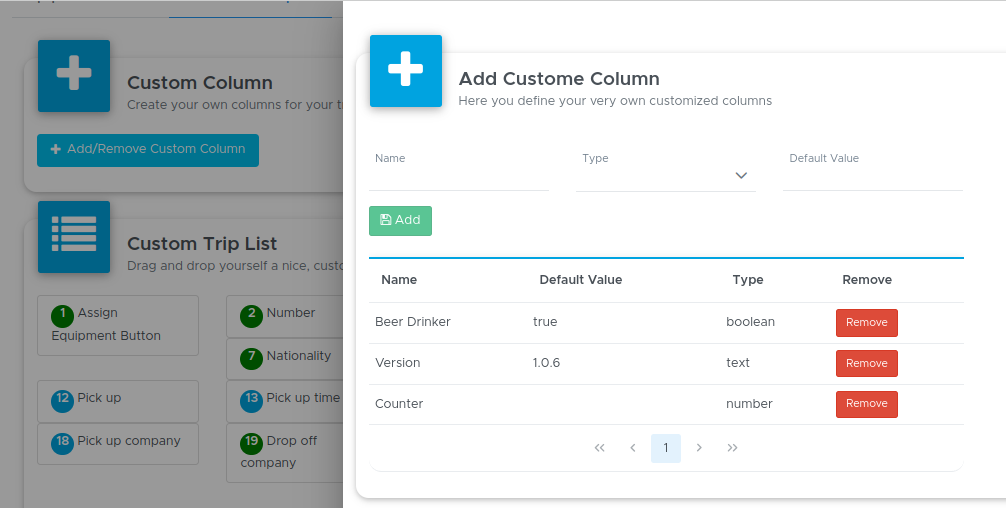
To expand this section, click on the “+” icon next to “Create your own columns”.
Type a name of your choice that will appear at the top of the column. To define the kind of content that you wish to see in this column you need to define a Type. The available types are: number, text, currency or checkbox. You need to write a name and select a type before you can click on button “Add”. If you wish, you can also define a default value that will be automatically written in every row of this column in every trip. The default value can be manually changed in the trip without affecting your chosen default value. Once you click on button Add, your column will be available among the other blue or green dots and you can drag it to the bottom to rearrange the order of your columns. If you change your mind and you wish to delete your custom columns, you can click on button “Remove” next to it.
Please consider that if you remove one of your custom columns, this will disappear from your list and from the available columns to select.
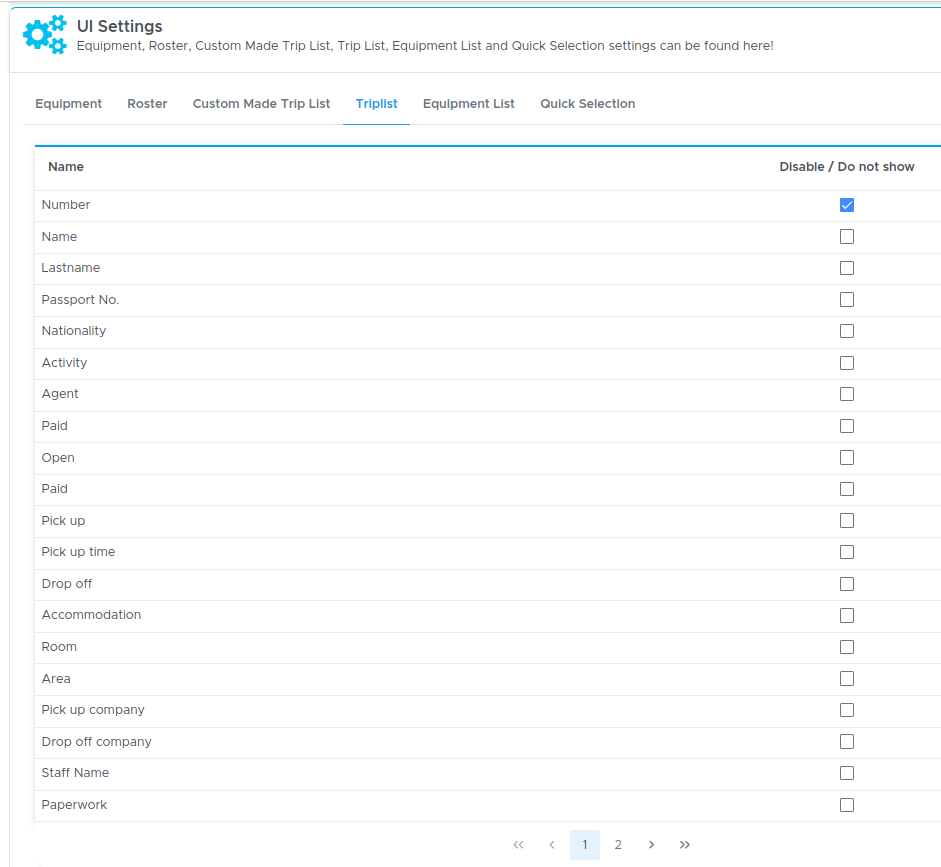
Trip list
Here you can define the columns to view in the trip list in every trip in tab Reports/Summary. Tick the checkboxes of the columns that you wish to hide.
* 
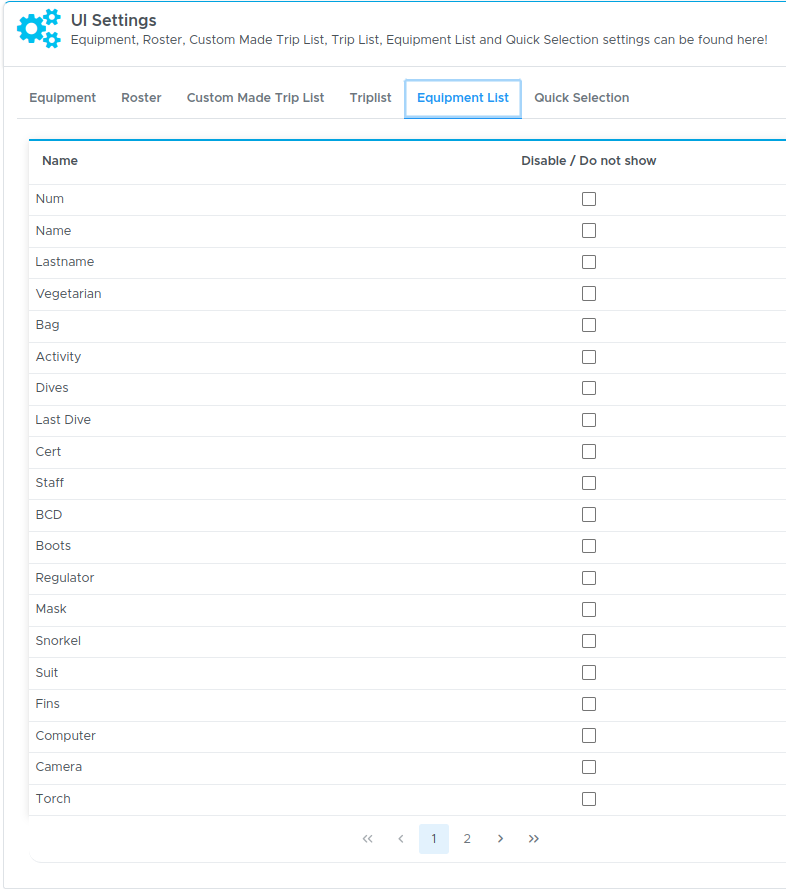
Equipment list
Here you can define the columns to view in the equipment list in every trip in tab Reports/Summary. Tick the checkboxes of the columns that you wish to hide.
Quick selections
Before setting up this section you need to enter your complete price list. Please go to chapter 2 and follow the instructions.
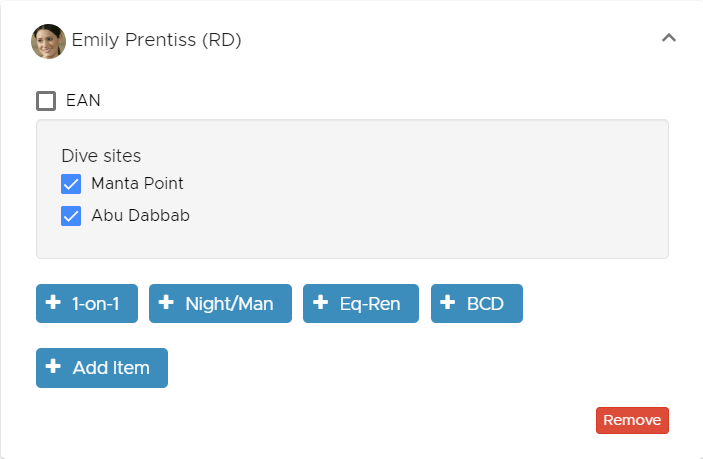
Here you can define up to 5 quick buttons to add to the customer card in every trip. These quick selection buttons are supposed to help you select the extra charges for each customer in a trip. We recommend setting up a few buttons for the most frequently used extra charges. Any other extra charge can still be added to the customer’s card (and consequently to their bill), but you will need to search for the correct item using button Add Item on the customer’s card.
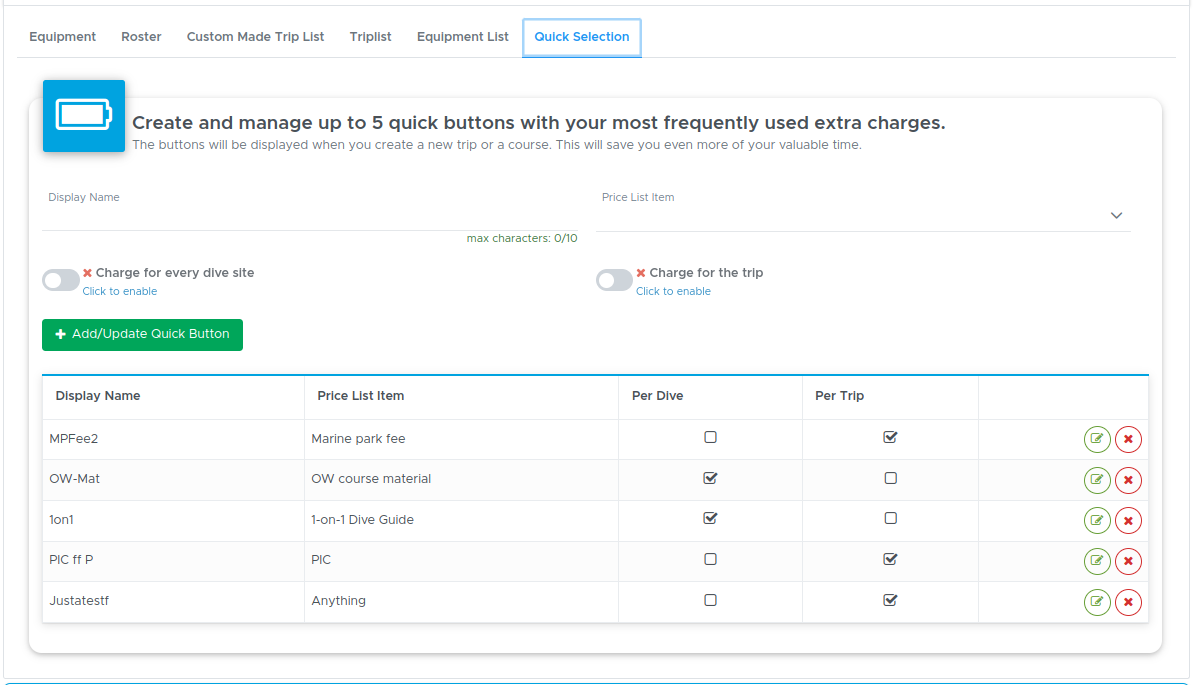
Select an item from your price list. In Name, type the name of the quick button. Please consider that only 10 characters are allowed due to the limited size of the button. Choose if the extra charge is per dive or per trip and click on the green button Add/Update Quick Button.
From the Activity Calendar create a new trip or edit an existing one, go to tab Groups and click on a group to view your customers and the buttons on their cards.
1.1.9 Tab Data Protection
In Data Protection you can inform your customers about what kind of data you collect, how you use it, store it, how long you need to keep your records and if you need to disclose some information to a third party. You’ll find some guidelines that can help you write easy sentences. In this section you can also find two paragraphs where you can ask your customer their informed consent to receive your newsletter or third party offers. The text that you write on this page will be visible in the online registration form.
Here you can find a template for your Privacy Policy:
At \[dive center name] we take good care of your data! The personal data that we collect is needed to provide you with our best services, such as reservations and diving. We need to disclose some of your personal data to \[SSI/PADI/other] in case you join a dive course to make sure that you receive your new dive certification. Your data is safe with us: all paper forms are stored in locked premises and the electronic data is on secure servers in Europe. If you wish to know which data we store about you or inform us about any changes to your personal data, you can send a message to \[insert email address here] together with a copy of your picture ID.
If you choose to use this template, please replace the text in the square brackets with the most appropriate text for your business.
Please consider that the above is just an example and it needs to be verified by your legal department. If your customers are in Europe you might want to make sure that you follow the GDPR (General Data Protection Regulation). According to the GDPR, Geek Divers represent your Data Processor and we do everything in our power to comply with the current law. However we cannot be deemed responsible for customer data written on paper, white boards, emails, computer screens left unattended or not protected by a password, shared usernames/passwords or any other medium outside of Geek Divers. Geek Divers is hosted on protected and encrypted servers in Europe (in Frankfurt, Germany) and currently only 2 people have access to them (both people are the managing partners of Geek Techware, the company that offers Geek Divers as a service to dive centers). Please protect your customers and business data and try to implement the following in your business:
Never leave a device (laptop, desktop computer, tablet or phone) unattended.
Never share a username/password - each Geek Divers user should have their own credentials.
Protect your devices with a pin, password, face recognition or pattern.
Log out of Geek Divers before sharing the device with someone else.
Log out of Geek Divers before ending your shift and going home.
When you export data from Geek Divers, do not save the files on your local drive, but on a cloud drive that can be accessed only by trusted people.
If you use physical drives (USB sticks or external hard drives) to back up your data, including files exported from Geek Divers, do not leave the drives unattended, protect them with password and, if possible, encrypt them.
If you wish to read more about the European privacy law and how to apply it to your dive center, please read our blog posts here.
In this section you can also choose how you wish to ask your customers if they would like to receive your newsletter and/or some third party offers.
1.1.10 Registration Form
In the Registration Form you can configure your online registration form. Starting from version 2.0, you can choose to have one registration form for all your locations or a different form per location. On this page you can also configure the sections that you wish to show/hide and add your personal touch.

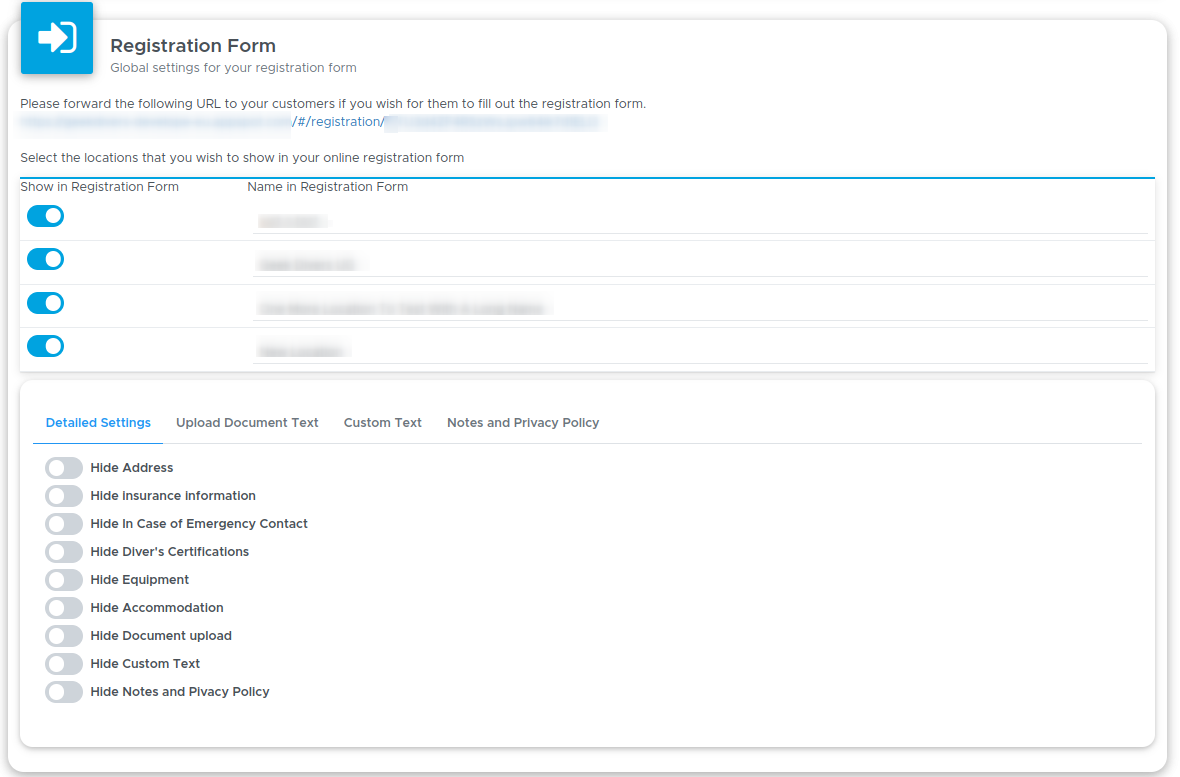
At the top of this page you will find your Global Settings. If you wish to have a different Online Registration Form for each of your locations, tick the first checkbox.
Global Settings - recommended for Geek Divers accounts with only one or more dive centers (locations).
Location-specific Settings - recommended for Geek Divers accounts with more than one location where the dive centers are in different countries, especially if rules and regulations and equipment rental differ greatly.
At the top of this page you will find the URL of your online registration form. If you choose to have a different Online Registration Form for each of your locations, you will find the different URLs in General Settings - Registration form in each of your locations.
The setup is very similar, whether you choose to have one or multiple forms. The main difference is that if you choose to have one form, you only need to set it up once in your first location. If you choose to have different forms, you will need to set up each one of them in the General Settings of each location.
Additionally, if you choose the global settings, you need to choose which of your locations should be part of your form.
If you choose to use one registration form for all your locations (Global Settings), tick the checkboxes related to the locations that you wish to see in your form. Next to them you will see the name of your locations, as written in Geek Divers at the top-right of the screen. Feel free to change their names if you wish to display them differently in the online registration form. This will not update the names of your locations in Geek Divers.
You can test your settings in real time: open your online registration form by clicking on the URL in blue at the top of this page. Please remember that your changes won’t be active until you save the settings by clicking on the Save Settings at the bottom of this page. You can then go to your online registration form and refresh the browser to view the changes.
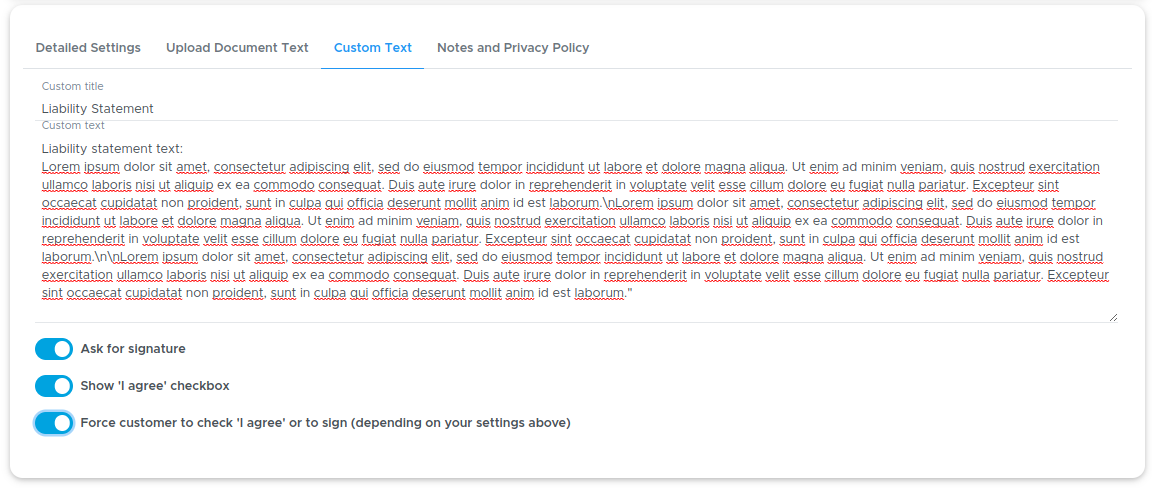
Use the toggles to hide or show sections in the form. Starting from version 2.0, you will find two more sections: Document Upload and Custom Text.
In Document Upload you can ask your customers to upload their medical statement, their certification cards and/or any other documents that you might need to offer your services. Feel free to customise the text in this section.
In section Custom Text you can be creative. If you wish to use this section you need to choose a title and the text that you wish to show to your customers. This could be your house rules, your liability statement, some general information that you wish to share with your customers before they come to your dive center or anything else. According to the text that you type here, you might want to add an ‘I agree’ checkbox or an electronic signature or both. Please check with your legal department if the electronic signature is legally valid in your country.
Most of the sections in the online registration form do not contain mandatory fields and your customers might just click on button Next without filling out the form. If you wish to force your customers to click on ‘I agree’ or sign or both, then you need to activate the third toggle button in this section.

If you use this section, once the customer completes the form, Geek Divers will generate a pdf document with the content of this section (the text that you used in Custom Text), the date, the customer information and the checkbox or the signature (or both). You will find this document in the customer’s profile, tab Documents.
If you choose to have a separate online registration form for each of your locations, remember to save the current settings, switch to another location and rework the Registration Form settings there.
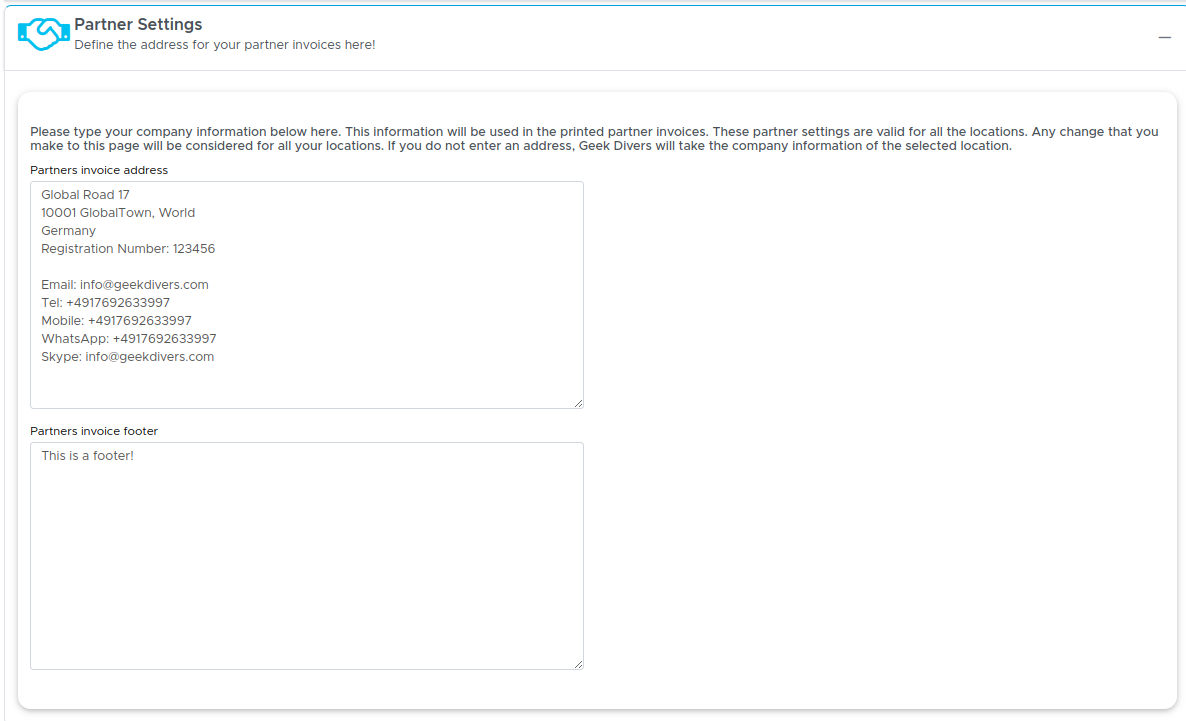
1.1.11 Partner Settings
In this section you can type your company details, which might differ from your location addresses. These details will be used for printed (pdf) Partner invoices.
1.2 (NEW) Online Settings
Menu Online Settings is new with version 2.2 and you can now set up your online booking page.
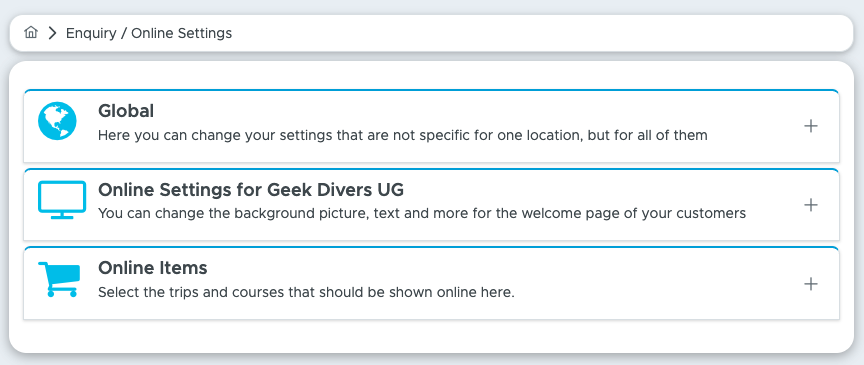
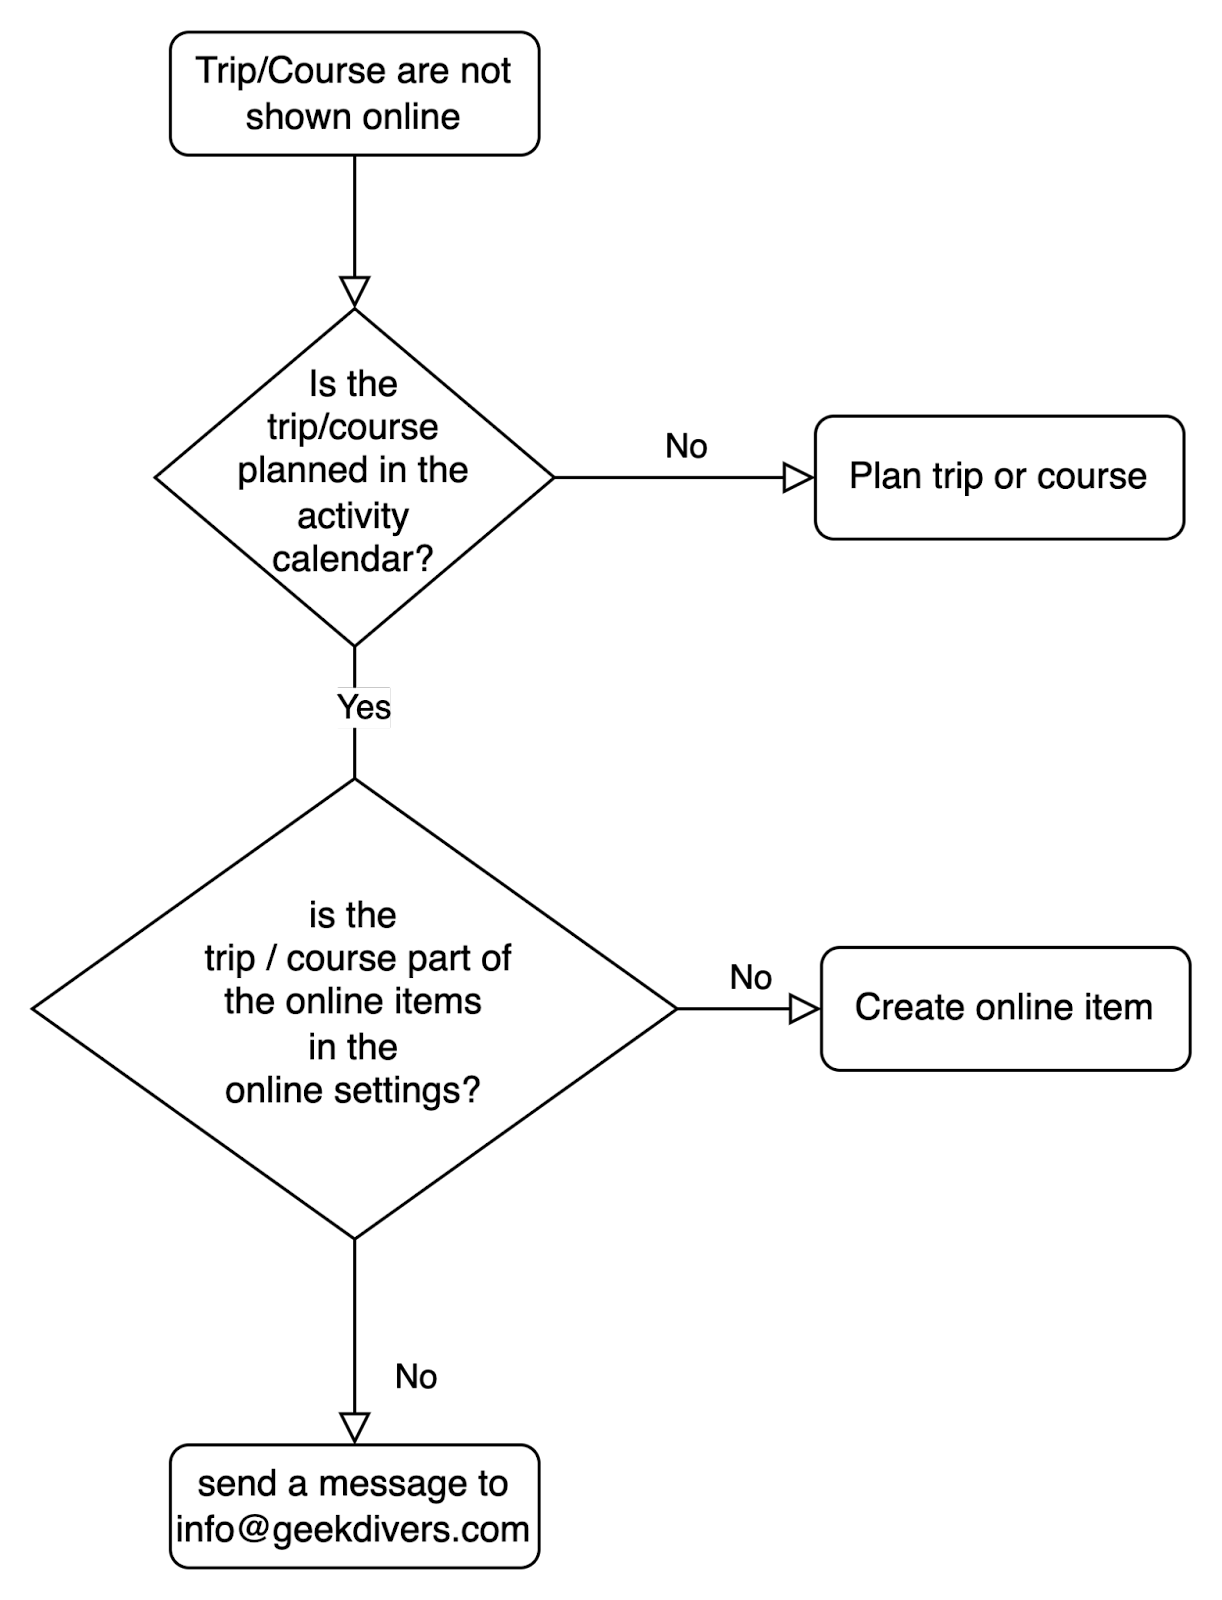
The courses and/or trips you want to offer online should be described here in 1.2.3 (NEW) Online Items and you need to plan the courses and/or trips in the activity calendar so that they can be booked online.
You can also find a video with a complete setup on youtube.
Geek Divers Online Booking - The complete setup
1.2.1 (NEW) Global
This Menu is only available to you if your dive center has multiple locations. Here you can describe your locations and give them a different name, add a description, and add a picture.
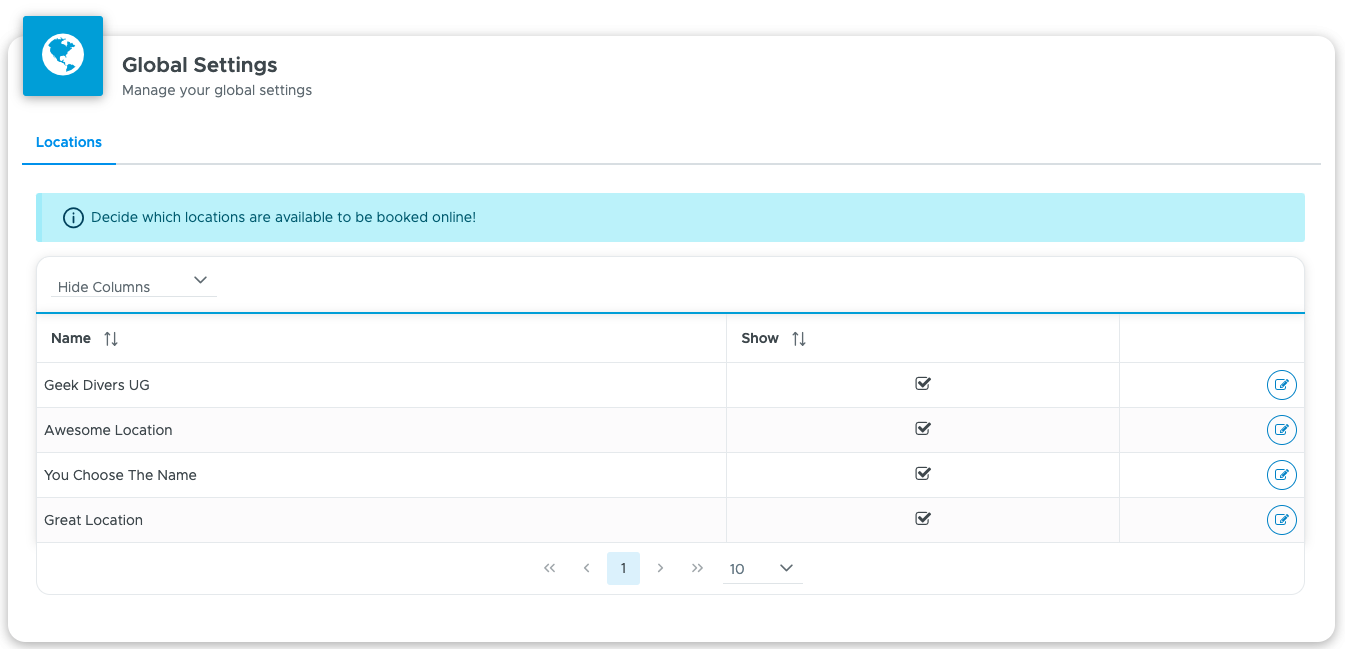
To see your location-specific settings, you can click on the pencil icon 
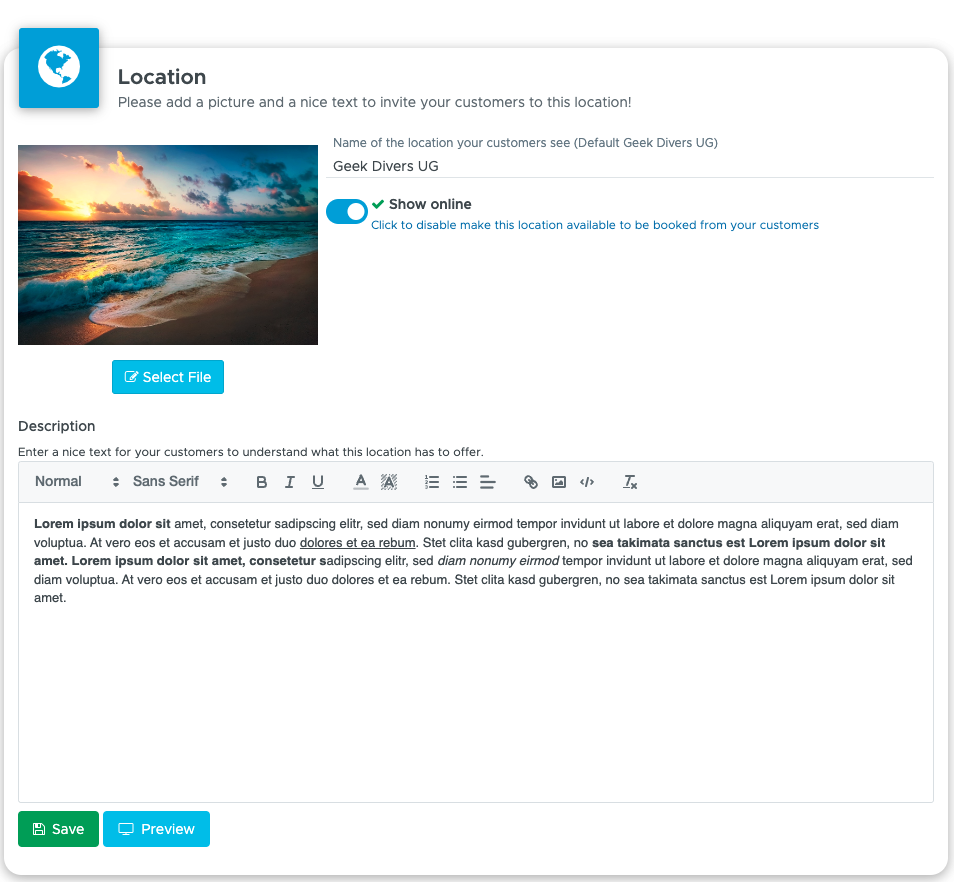
You can now decide if that location should be online and add a nice picture plus a description. Once that is done, you can click on “Save” to close the sidebar.
After you enter all your data, you can click “Online Settings for XYZ” and find a link to the page you just created.
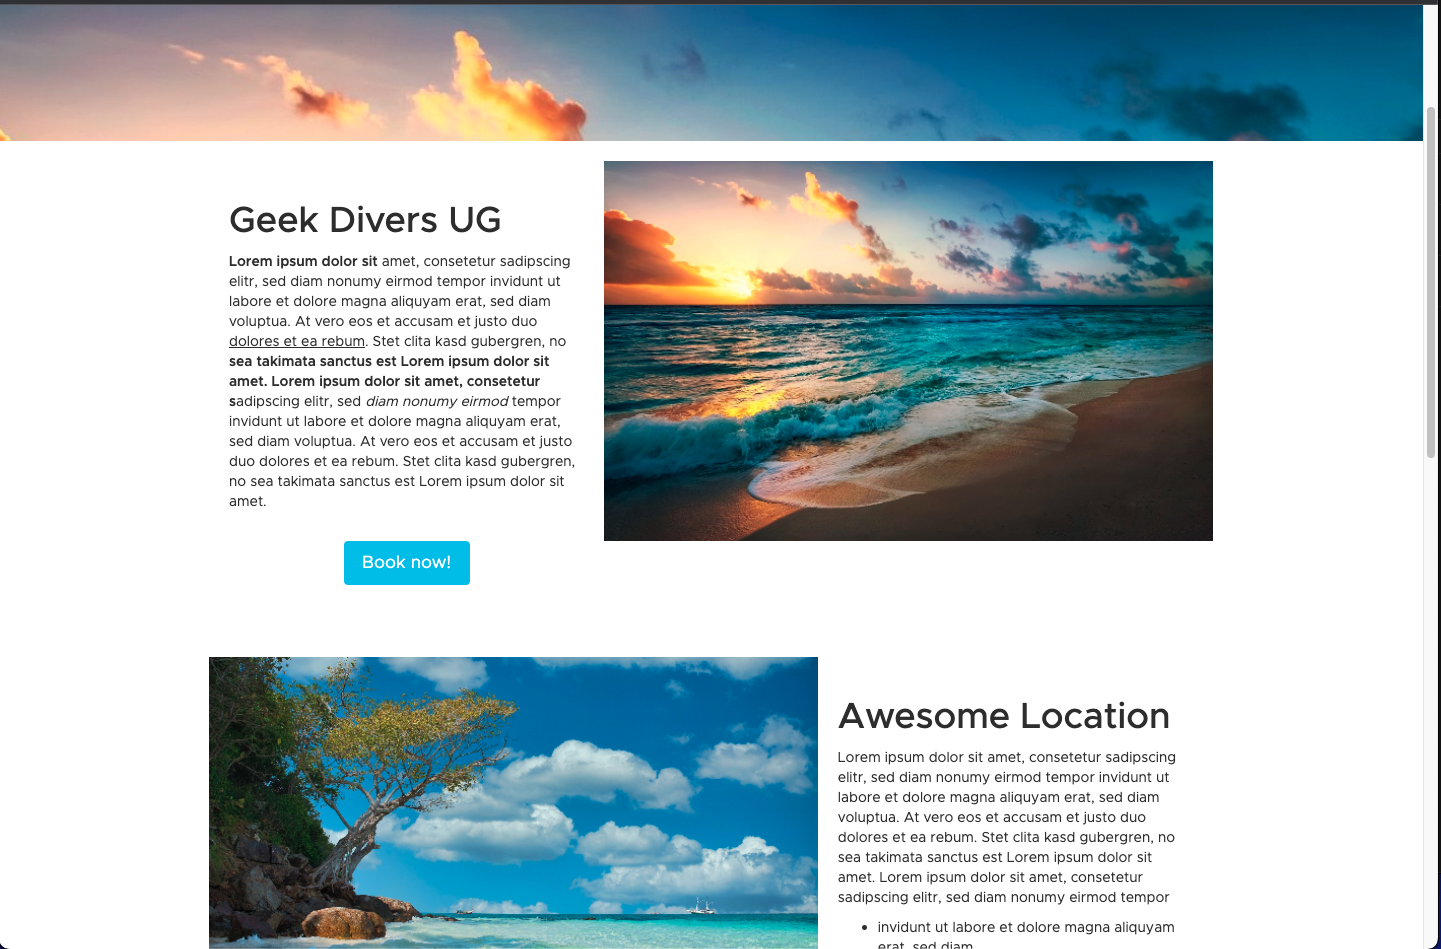
1.2.2 (NEW) Online settings for “Your Dive Center”
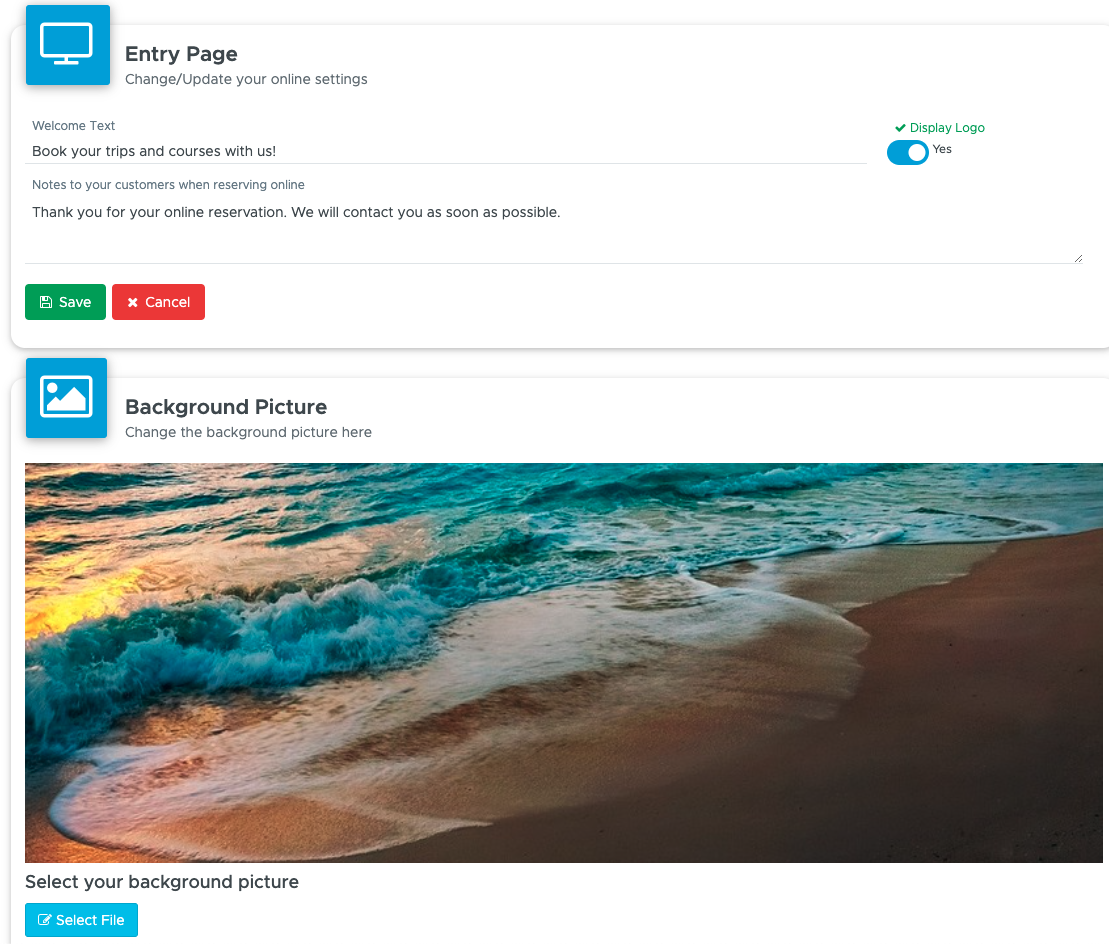
The first thing you will see is the URL to your personalized online page. If you have multiple locations, you will see two links. The first is a direct link to the location you are currently logged in to. The 2nd link shows you a page containing all locations that you enabled in 1.2.1 (NEW) Global.
If you do not have multiple locations, you will only see the first link.
Here you can find some basic settings for your online page. You can add a welcome text, decide if you want to show your logo, and add a note to your customers that is shown when they finalize their online booking. Please keep in mind that Geek Divers does not support online payments.
You can also add a background picture to your page.
1.2.3 (NEW) Online Items
Here you can decide which trips and courses you want to offer online.
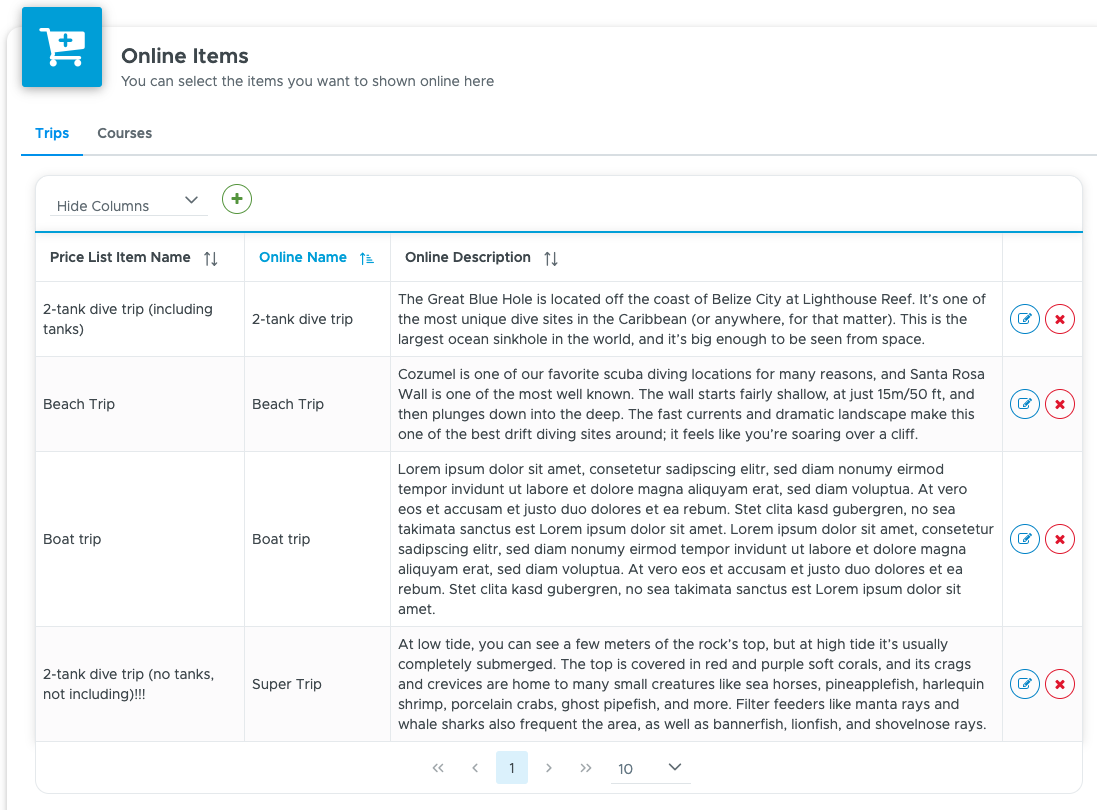
Click on the green + icon 

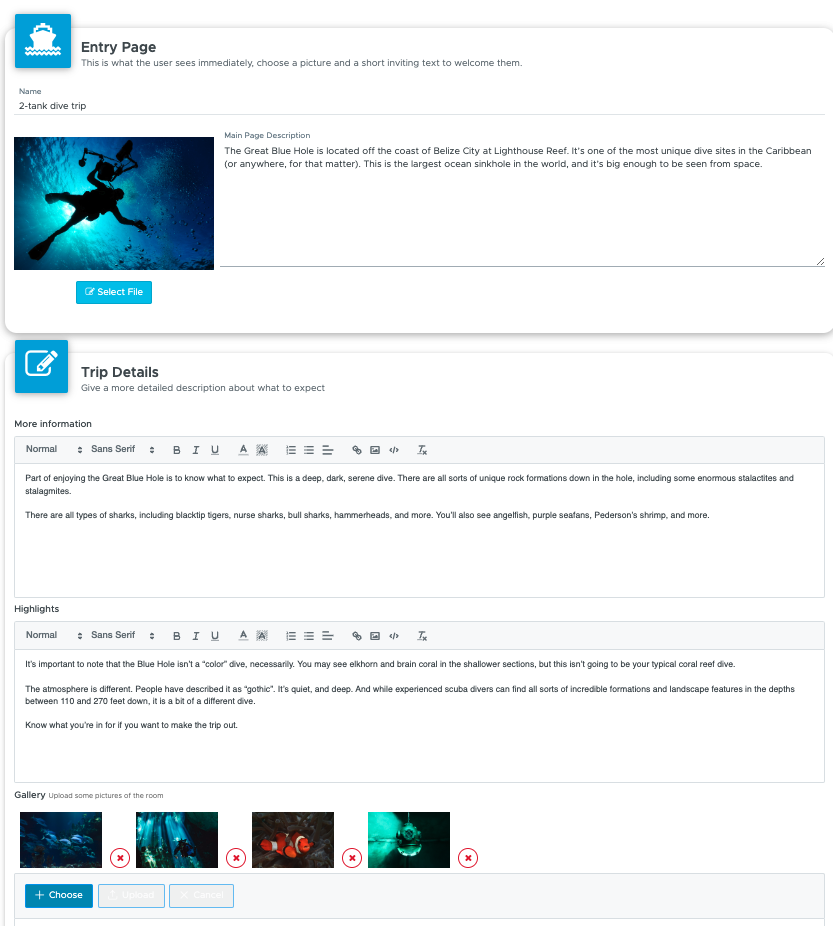
Please check the next pictures to see the reference to your online page.
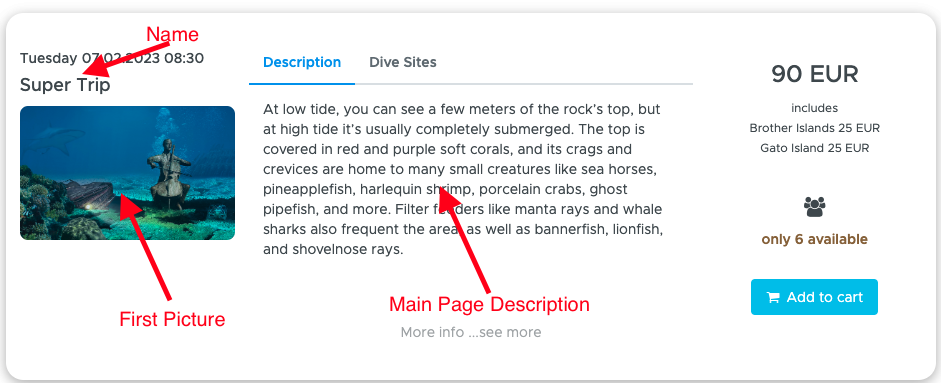
When your customers click on More info …see more. They will see the following.
The red text shows you what you can setup in the sidebar.
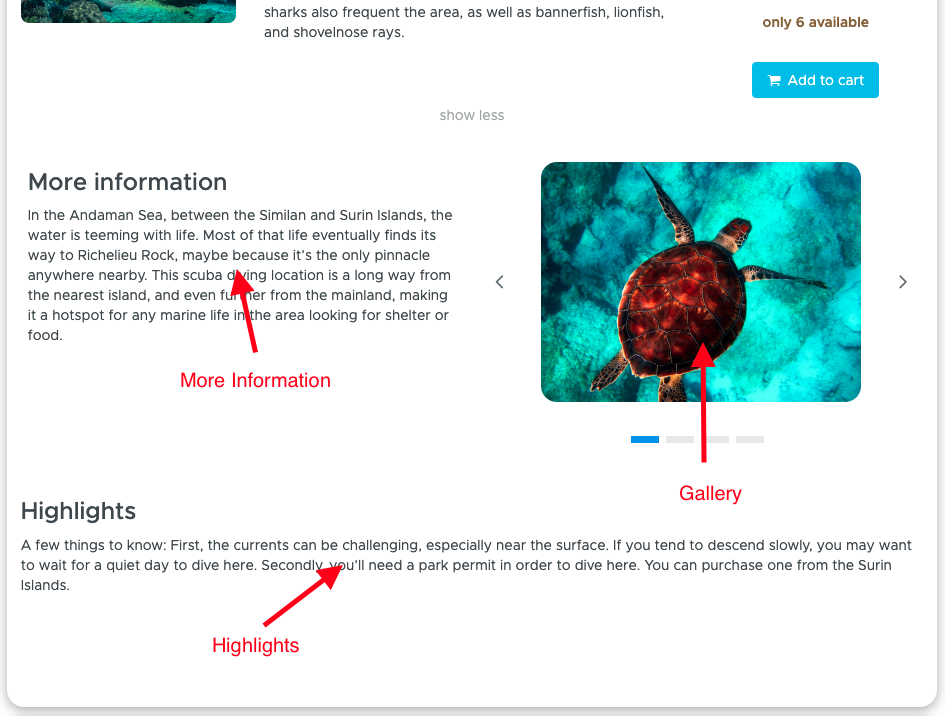
1.2.4 (NEW) Customers Perspective
Please check out the following video to see how your customers will see the page and the items that you just created.
1.3 Accounting Codes
Menu Accounting codes, previously named “Expense Coded” is the place where you can define your internal codes to record your expenses in the cash flow. In version 2.2 you won’t be able to define your Revenue Codes yet, but these are part of Geek Divers future development.
To enter an expense code click on Settings and Accounting Codes.
Type a code of your choice (e.g. 001), a Type and a Description. You can add more details in Additional info. If you’ve already created locations (read chapter Locations), please select in which location you want to use this code. If you wish to use the same code in all your locations, tick the checkbox Select All. Click the button Add Expense Code to see it in the table below.
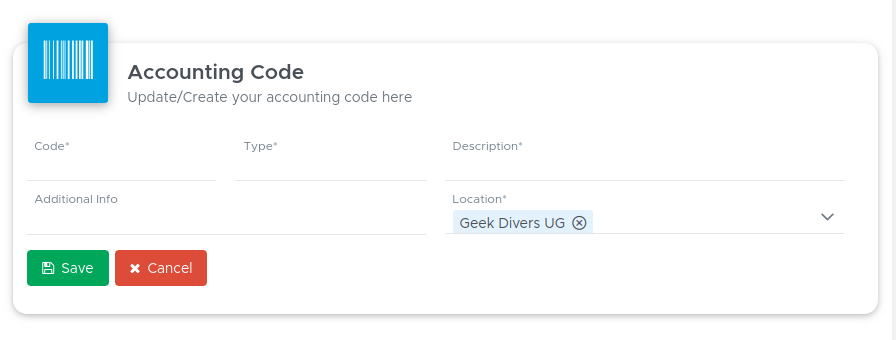
Example of codes could be the following:
100 - Office
200 - Diving
300 - Boats and transport
400 - Food and drinks
500 - Pool
600 - General maintenance
700 - Marketing
800 - Training
Etc.
Once you define the generic area of your 3 or 4 digit codes, you could then define more codes within the same area.
E.g. If code 100 refers to expenses related to the ‘Office’ in your dive center, then you could define some more specific codes as in the examples that follow:
101 - printing paper
102 - hardware (computers, tablets and printers)
103 - printer ink
104 - stationery
105 - office furniture
106 - phone bills
Etc.
Please consider that the above are just examples: your expense codes do not necessarily need to be composed by digits only: you can type any alphanumeric combination of your choice.
It is recommended to set up a code to transfer money from one cost center to another. Please read chapter 12.7 Transfer Money to know more about this feature.
It is also recommended to set up a code to adjust your cost center balance. E.g. 1111 - Balance Adjustment.
When you set up your cost centers, they will be empty. However, since they need to reproduce a real-life situation, you will need to set the initial balance. More info in chapter 12. Cash flow.
1.4 Cost Center
Cost centers represent your bank accounts, your online payment accounts, your cash boxes, your safe and anything else that you regularly use in your business to receive or spend money.
To view and edit your cost centers click on Settings, Accounting Codes and select tab Cost Center.
On this page you will see at least your default cost centers, one per location. If you’re configuring them for the first time, you will see their abbreviation as DEF-1 for your first location, DEF-2 for your second location...etc.
Click on the description or abbreviation to edit them. You will see them at the top of the page. You can change their description and their abbreviation and click on button Update Cost Center.
You can create as many cost centers as you need for all your locations. To do so, type a description and an abbreviation at the top of this page, select the location the cost center belongs to (if you have more than one) and click on button Add Cost Center. You will see the new cost center in the table below. If the cost center that you’re creating is actually a cash box (used for cash only), tick the checkbox Cashbox.
For your ease of use it is recommended to choose different abbreviations for each cost center or cash box across all your locations.
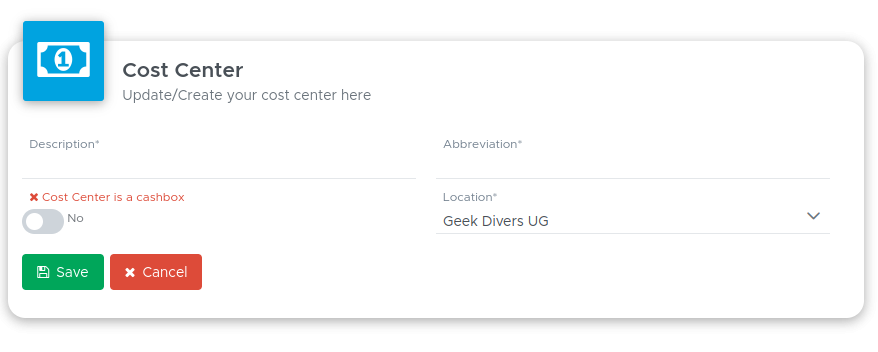
If you wish to configure the standard payment methods available in Geek Divers (see chapter Payment Methods/Bill Prefix) you’ll be asked to assign a cost center to each one of them. The default cost center is initially assigned to each standard payment method and you can change it according to your needs.
E.g. you might want to collect all the cash payments (both incoming and outgoing) in a cash box behind the counter and your electronic payments (bank transfers and credit cards) in your ‘Bank’ cost center. Additionally, if you use online payment methods like PayPal, Stripe or TransferWise, you might want to set up a separate cost center for each of them to monitor their status.
Every transaction in and out of a cost center will be visible in your cash flow in tab Cashflow Details. Additionally, in cash flow Balance Report, you will see a summary per payment method. More on this in chapter Cash flow - Cash flow details and Cash flow - Balance Report.
If you wish to deactivate a cost center that you no longer need, click on the button deactivate at the end of the cost center row. Before you deactivate a cost center, please make sure that it is not assigned to any of your payment methods in any of your locations.
If you wish to reactivate a deactivated cost center, click on button reactivate at the end of the cost center row.
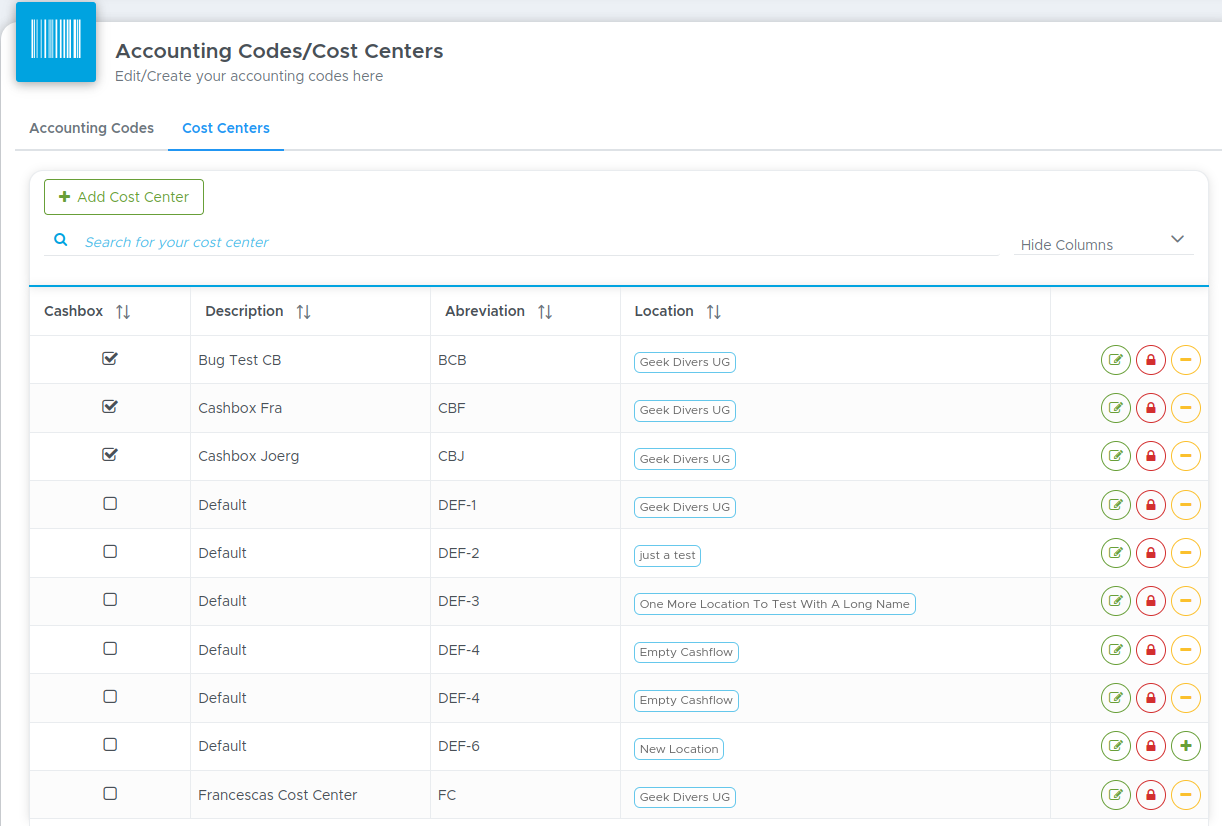
If you wish to hide a cost center from your cash flow reports (e.g. Balance Report), click on button Hide in Report.
It is not recommended to repurpose an existing cost center due to the history of transactions that have been recorded in and out of the cost center.
A good option is to deactivate a cost center that is no longer needed and create a new one. Please feel free to send us a message if you wish to discuss the best way to proceed in your specific scenario.
1.5 Locations
Geek Divers supports multiple locations, i.e. several dive centers that belong to the same company or owner. Once you’ve completed the initial setup for one of your dive centers (General Settings, Expense Codes, Cost Centers, Price List), you can then create additional locations. Contact the Geek Divers support to request the creation of an additional location for your business. Please provide the name of the new location as you wish to view it in the menu on the top-right and the default currency. A new location can be created as a copy of the first location and you can choose if your price list should be copied as well.
Once the second location has been added (you will receive a message from the Geek Divers support), you can easily switch between locations using the drop-down menu on the top bar.
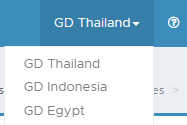
Please consider that the amount of your Geek Divers monthly fee depends on the number of locations that you wish to use in your account.
Menu Locations was available in previous versions of Geek Divers. Starting from version 2.0 this menu is no longer available.
1.6 Users
Geek Divers comes with an administrator user (Type: admin) that has full rights on the application. Among other features, this user has the power to create other users with the same rights or with restricted rights. You can create as many users as you need without affecting your Geek Divers monthly fee.
To maintain and create users click on Settings and select User.
In the top part of the screen you will find a table with the list of current users. If the users are administrators you won’t be able to Edit, Suspend or Delete them as the buttons are not available. If you wish to suspend or delete an admin user, please send a message to info@geekdivers.com. Every other user will be type user. In this case you can use the buttons on the right hand side to Edit the rights, temporarily suspend or permanently delete the login.
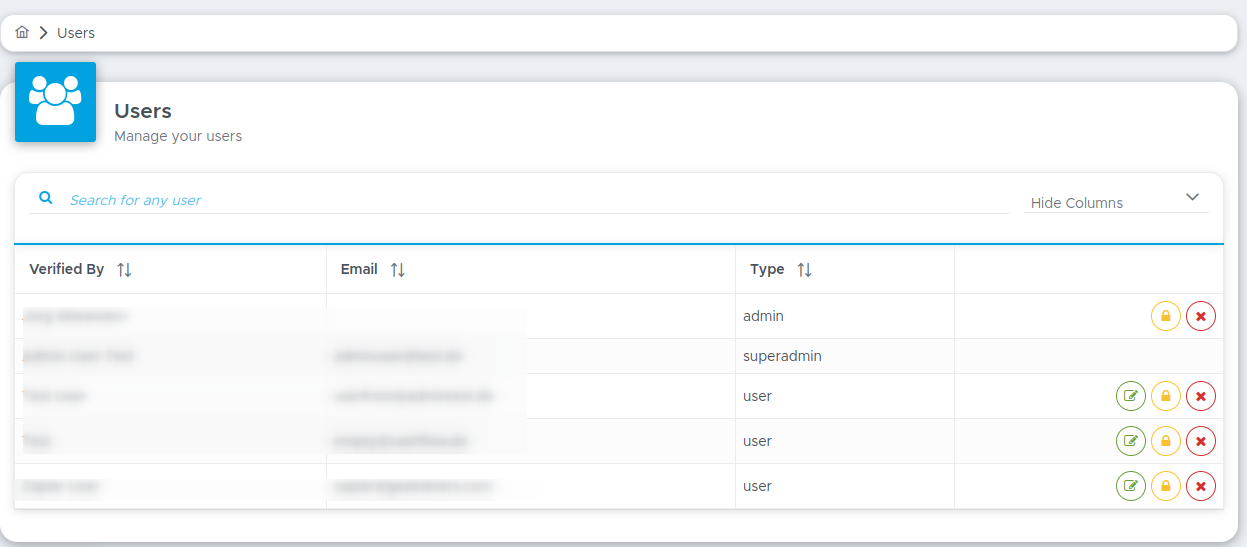
To create a new login go to the bottom part of the screen and enter a valid email address. It’s important that the entered email address is currently valid. In case the user forgets their password they can use the Forgot Password feature in the login screen and receive an email to reset their password. Geek Divers support won’t be able to access passwords and therefore cannot help in case of forgotten passwords.
Enter a temporary password, double check it by clicking on the “eye” and write a name.
E.g. Login: sam@awesomedivecenter.com Password: awesomedivecenter2020 Name: Sam
You can then proceed in the definition of how Sam’s menu in Geek Divers will look like. What you see in the bottom part of the screen is the representation in folders and subfolders of the Geek Divers menu that you see on the left. It is recommended to familiarize with what every menu item does before assigning it to a user.
To set up the rights of a new user, please select the first checkbox next to your location name: you will see that the complete location menu is selected. Proceed then by deselecting the menus that your user should not have access to. If your user should access one of your additional locations, please repeat the same procedure.
Once you’ve defined the user rights, click on the button Save at the bottom of the screen. Don’t forget to inform Sam of the username (her email address) and the temporary password that you’ve chosen. The first time Sam logs in to Geek Divers, she will be asked to choose a new password. To login to Geek Divers open a Google Chrome browser, go to www.geekdivers.com and click on button Login on the top-right of the page.
At the bottom of the list of rights you will see some Staff and Cashflow items. These are not proper menu items, but tabs in the staff profiles and in the cash flow. For example, if you wish your staff member to access staff profiles but they should not see payslips or the list of commissions and base salary, you can leave the following two checkboxes empty. In that case, please remember to leave an empty checkbox in Financial - Staff Payments as well.
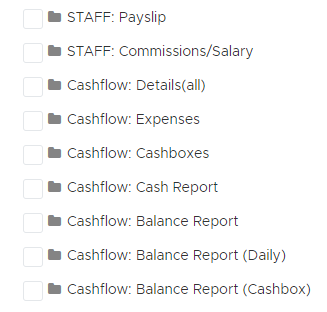
The Cashflow items that you see above here represent the available tabs in menu Financial - Cash Flow. For more details on the kind of data that is shown in these tabs, please refer to chapter Cash flow.
In case you need help to set up your users, please feel free to contact us at info@geekdivers.com. We will ask you the role of your staff members, their main tasks and what you wouldn’t want them to see. If you can answer these questions we will come up with some suggestions on how their login could look like.
In version 2.0 the following menu items were added:
Upcoming Customers - this menu replaces Pending Customers (see chapter Upcoming Customers for more details). If a user could previously access Pending Customers, they can now access Upcoming Customers. You don’t need to modify their login rights.
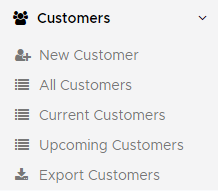
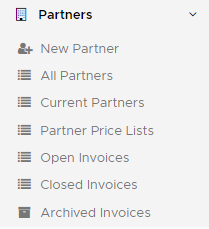
Partner Price Lists, Open Invoices and Closed Invoices in menu Partners. See chapters Partner Price Lists and Partner Invoices for more info.
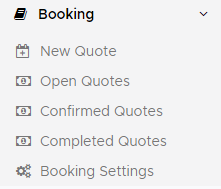
Menu Booking with all its sub-menu. This menu belongs to the Booking Module of Geek Divers. The usage of the Booking Module is free of charge for Geek Divers customers. More info on the Booking Module can be found in chapter Booking.
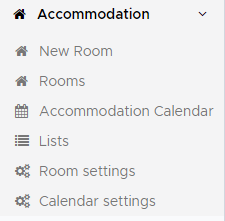
Accommodation menu with all its sub-menus. This menu belongs to the Accommodation Module of Geek Divers. The usage of the Accommodation Module is free to try for an initial period. After that it will only be on demand and charged a fixed price separately. More info on the Accommodation Module can be found in chapter Accommodation.
Menu Financial has been updated, including Archived Bills.
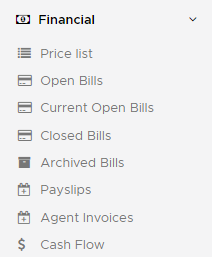
If you wish your users to access these new menu items, please modify their logins, save the changes and ask them to log out and log in again.
2. Price List
The price list in Geek Divers is the engine of the whole system and therefore it is important that the setup is done correctly.
The Default Price List contains all your retail prices for services, courses, items on sale and anything else that you would add to a customer bill. Please consider that your price list will use the currency that you’ve set in General Settings - Units and it will be used for your customers bills and customers quotes.
You can set up your price list items according to the available types:
EAN
Trip
Food and Drink
Course
Rental
Extra
Shop
Accommodation
Package
Fee
Material
Each of the above types is described in details throughout chapter 2 of this user manual.
You will find your customer price list in menu Financial - Price List. On this page click on Default Price List.
2.1 Single dive
Single dive is a special price list item that you will see in your Geek Divers account as soon as you log in. You can only have one Single dive item due to the special treatment that single dives have in the automatic calculations in Geek Divers.
Single dive can be used to define the cost of one or more dives according to your price list. This price list item does not include any extra cost that you can include in the Trip. You can rename this item, but you cannot delete it.
Example: You charge your customers per dive with some levels of discounts (the more they dive the cheaper each dive). Maybe there’s no extra charge for a shore dive without a guide in a buddy system. On top of the price per dive, you charge them if they wish to be guided by one of your dive guides and/or if they choose to go to a dive site that is only reachable by boat and/or if there’s a marine park fee and/or if they choose to join a day trip that includes lunch.
If what is described in the example is similar to your price model, then it is recommended to set up your prices and packages in Single dive.
If you don’t offer single dives (or dive packages) unless they are in combination with a Trip, you can skip this chapter and proceed with chapter Define additional charges. In Geek Divers a Trip is a generic outing with your customers: a day out on the boat, a shore dive...etc. A Trip might include the costs of diving or just the transportation: you can define what is included in the price.
In the price list, click on Single dive and set the price for one single dive in the Price field. You can also add your sales tax in percentage and define if it’s included in the price or if it needs to be added to the price that you specified. Tick and untick the checkbox “ VAT/GST included” to see what happens to the Total Price.
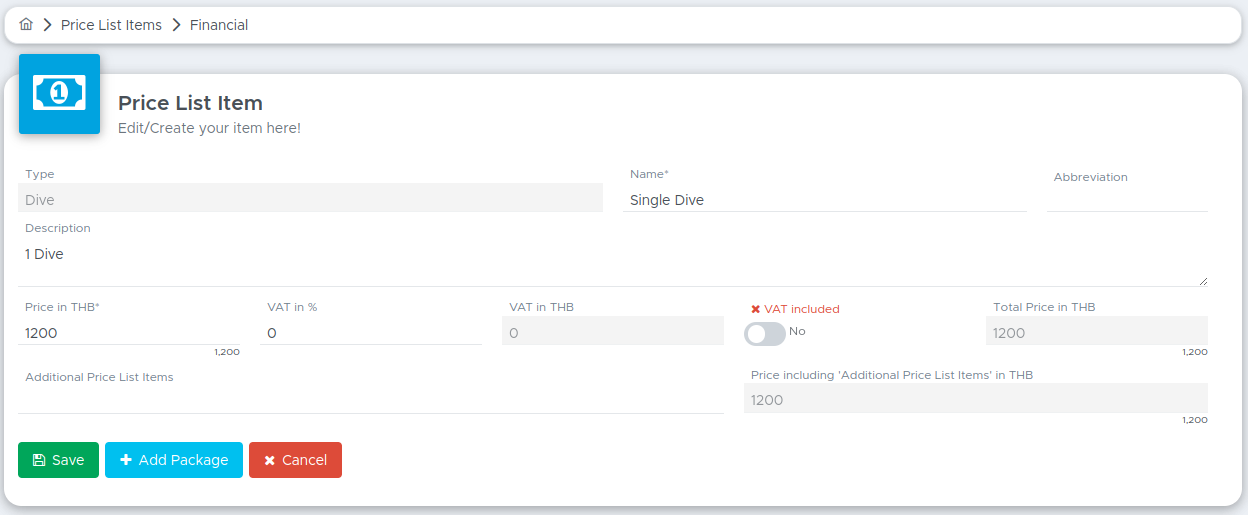
If you offer discounts after a certain number of dives, you can click on the Add Package button to define the discounts.
Here an example:
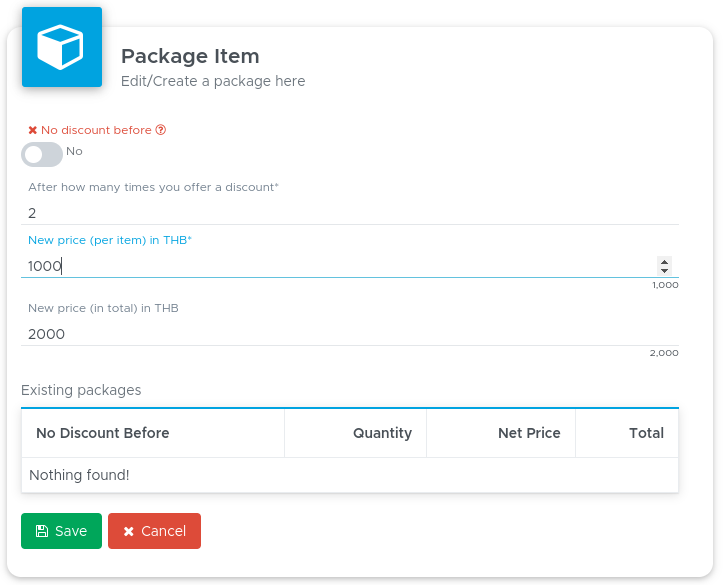
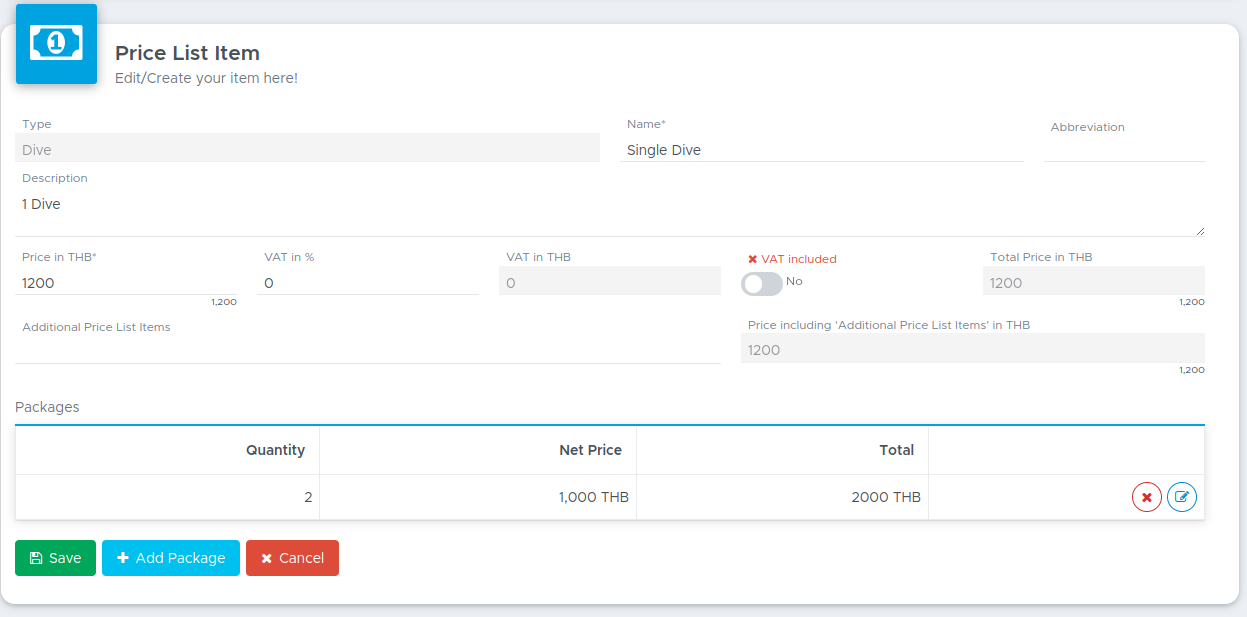
If you look at the two pictures above here, the customer will pay 1200 THB for the first dive, but as soon as there are 2 dives in his/her bill, each dive will cost 1000 THB. Geek Divers will calculate it automatically for you in the customer’s bill.
Do you want your customer to pay 1200 THB for the first dive and give them a discount only on the second? Then you need to tick the “No Discount before” checkbox.
This is an example of what you will see:
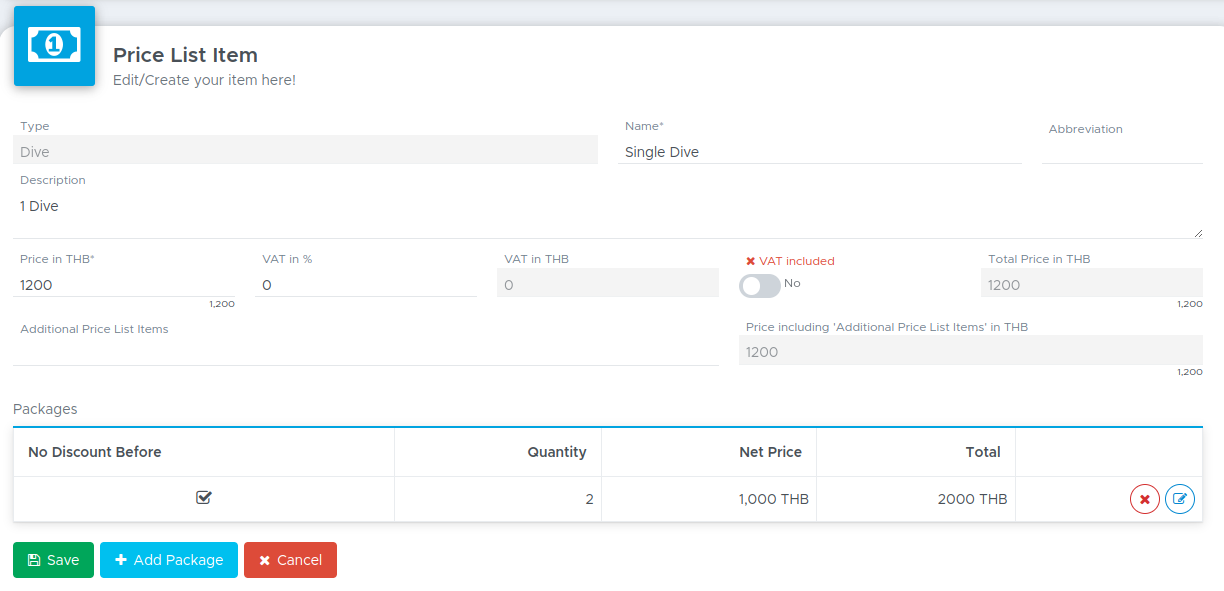
If you offer an additional discount after 3 or more dives, you just need to click on the Add Package button to set up the additional discount logic.
Don’t forget to click on the button Save!
Clearly you can set up any kind of package (e.g. 5-10-20 dive packages) and if in doubt, please send us a message and we can suggest how to set up your specific model.
The next step is to create some more price list items in your price list.
2.2 Define additional charges
If there is a marine park fee or any extra services that you need to charge to your customers whenever they join a specific trip or course, it makes sense to have a price list item reflecting these costs.
The extra charges can be added to a trip or course in the Additional Price List Items field or in an Activity (more about the activities in chapter Activity).
Within the price list click on button Add New Item.
Depending on what kind of additional charges you need to set up, please follow these suggestions.
Type Food and Drink
This type can be used if you charge your customers for food and/or drinks during a trip or a course or for à la carte meals if you run a resort. Please consider that if you use the Accommodation module you don’t need to use type Food and Drink to set up meal plans as there’s a separate setup for these. These items in your price list won’t be considered in case of commissions in percentage to your staff members or external agents. You can enter items like “Soda” or “Lunch on the boat” or “Buffet dinner” or “Sandwich with fries” or anything else that you offer in your dive center or dive resort.
Type Rental
If you charge your customers separately for equipment rental and/or your staff members receive a commission whenever your customers rent specific pieces of equipment (e.g. a computer, a camera or an underwater light), it is useful to set up price list items with this type. As you might have done for Single dive, you can set up packages for equipment rental. You can also specify the price for the rental of the full set of equipment by choosing Equipment type = Other.
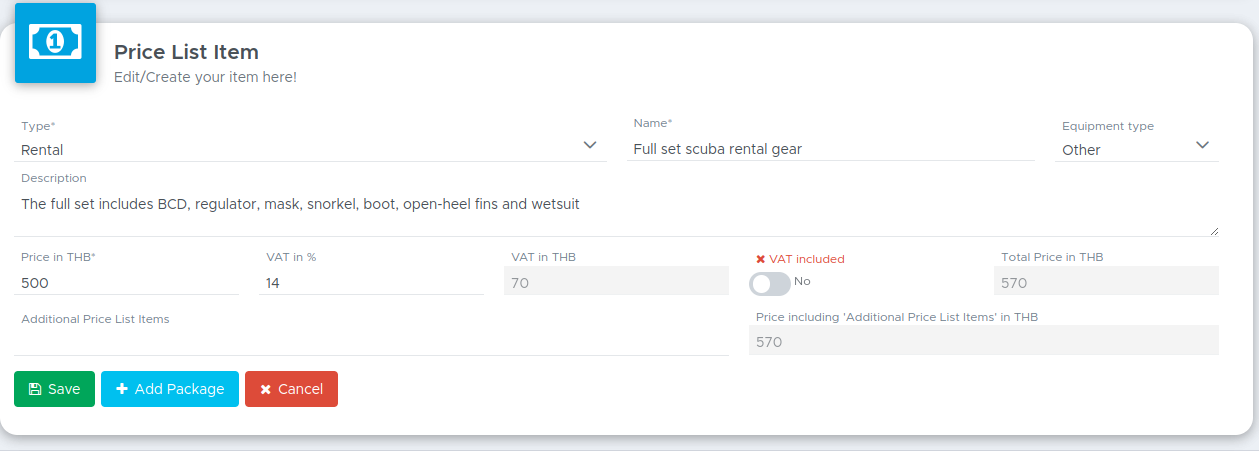
Type Shop
This type can be used for any item on sale in your shop. If you sell masks, BCDs, snorkel sets, mask straps, T-shirts...etc. you might want to enter their price (and sales tax, if appropriate) in your price list. You can add these items manually to the customer’s bill and you can also set up a sales commission for your staff members (more on this in chapter Commissions. Please consider that as of now (version 2.0), Geek Divers doesn’t offer a POS module yet.
Type Fee
This type can be used for certification fees, marine park fees and all those charges that could be considered a cost for you and therefore you need to charge your customers. These items in your price list won’t be considered in case of commissions in percentage to your staff members or external agents. Please consider that every price list item that you enter as type Fee generally does not generate revenue. For this reason you will find fees in a separate subtotal in the customer’s bill.
Type Material
If you charge course material separately (physical books, e-learning modules, pocket masks, SMBs, lift bags...etc.), you can use this type to set the price of specific course material. These items in your price list won’t be considered in case of commissions in percentage to your staff members or external agents.
Type Accommodation
If you own a dive resort or if you offer accommodation services, you can use this type to define the description and price of the accommodation that you offer. As you might have done for Single dive, you can set up discount packages. The price list items with type Accommodation will have to be used entirely manually (e.i you need to manually enter them in the customer bill). Starting from version 2.0, Geek Divers offers an Accommodation Module available on demand. If you wish to use this module you don’t need to use type Accommodation in your price list. Your hospitality offer will be defined in detail in the Accommodation menu. See chapter Accommodation to find more information.
If your choice is to not use the Accommodation Module, you can still use this type Accommodation to add your room rates to your customers bills. Please consider that using this type in your price list has no connection to the Accommodation Module.
Type Extra
You can use this type for any extra charge to your customers. E.g. a 1-on-1 fun dive supplement or a 1-on-1 course supplement, a cost in case your customers lose or break a piece of equipment, an extra fuel charge in case you take your customers to a more remote dive site...etc. Items with type Extra can be used to assign commissions to your staff and local agents.
If you’re not sure about the type to choose, please feel free to send us a message!
2.3 Price list item type Trip
Regardless of your kind of transportation (e.g. you go to your dive site on foot or by boat/car/van/bus) you need to set up a Trip in your price list. A Trip represents a generic outing with your customers.
If you charge your customers for transportation costs and separately for the number of dives (according to your dive packages, as explained in chapter Single dive, then follow example no.1. If you charge your customers for the complete package that includes transportation and dives (and anything else), follow example no.2.
In the Price list click on button Add New Item.
Example no. 1: Trip that does not include dives
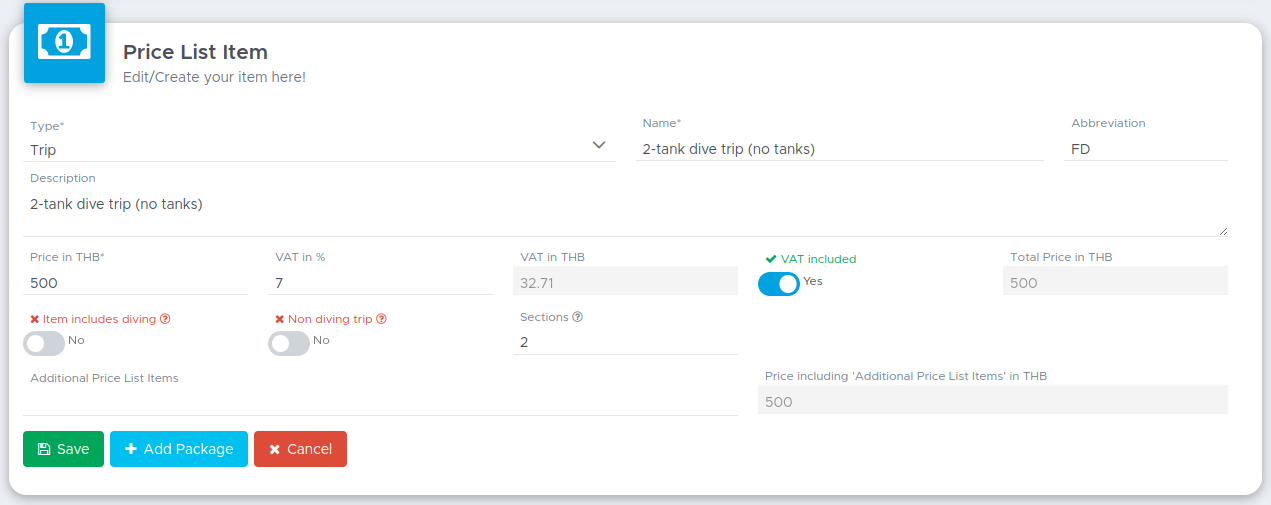
In the picture above here you can see that the Type is Trip. Write a name that lets you immediately understand what kind of trip it is and a short description (you can edit the description later if you prefer). Please consider that the name of your choice will be shown in the customer’s bill. The description will be visible in the Activity (more on this in chapter Activity.
In the Abbreviation field you can type a few characters and/or numbers that specify the activity of this trip. In the example above you can see “FD” that stands for Fun Dive. This will be shown in the Activity Calendar, in the Trip pop-up and in the Trip List that is available for every Trip that you will create (more on this in chapter Activity).
Write a price and a tax percentage (if applicable) and choose if the tax is included or excluded from your price. The trip can also have a price of 0 if you want to charge your customers just for the dives. Remember that in this case you have to set up the Single Dive prices.
If you offer discounts on the trip price you can use the button Add Package to select your preferences as you did for the dive packages.
This trip, as it is setup, does not include the costs for the dives that will be charged separately according to your dive packages written in Single dive. Geek Divers will do that automatically in the customer’s bill.
In case you need to add extra costs to this trip and you’ve already set them up in your price list, you can add them in the Additional Price List Items field. E.g. lunch on the boat (type Food and Drink), marine park fee (type Fee). Just click on this field and start typing: Geek Divers will show you the names of the price list items that you’ve already created. The items that you add in field Additional Price List Items will be automatically written in the customers bills whenever they join this trip.
If you set up a diving trip leaving the checkbox “Item includes diving” empty and you’ve set up your Single dive item, every time a customer joins this trip their bill will show one position with the name and the price of the trip and one position with the dive site and the price of your Single dive for every dive that they do. If you’ve set up packages for your Single dive item and/or for your diving trip, these prices will be automatically calculated in the customer’s bill.
In case you wish to create a snorkeling trip, please remember to select the checkbox “Non diving trip”. This means that Geek Divers will only charge your customers for the price written in this item. In the example below here the customer’s bill will show two lines: Snorkeling for THB1500 and Lunch on the boat for THB100.
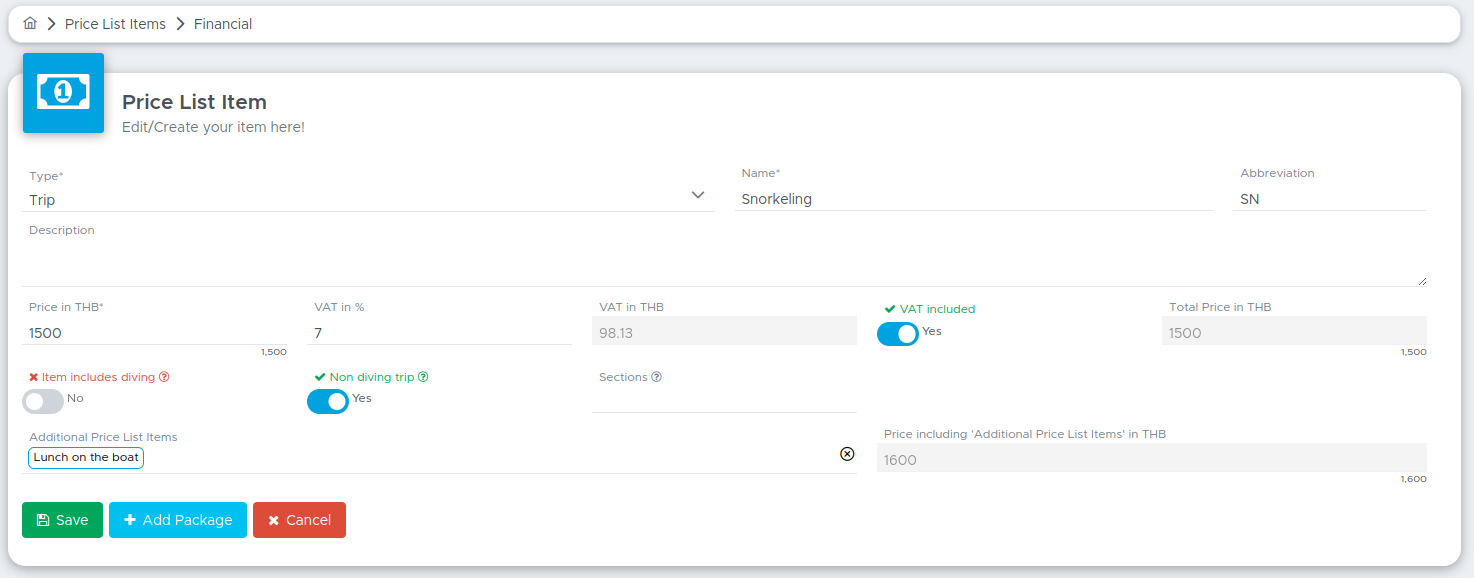
Don’t forget to click on the button Save!
Example no. 2: Trip that includes dives
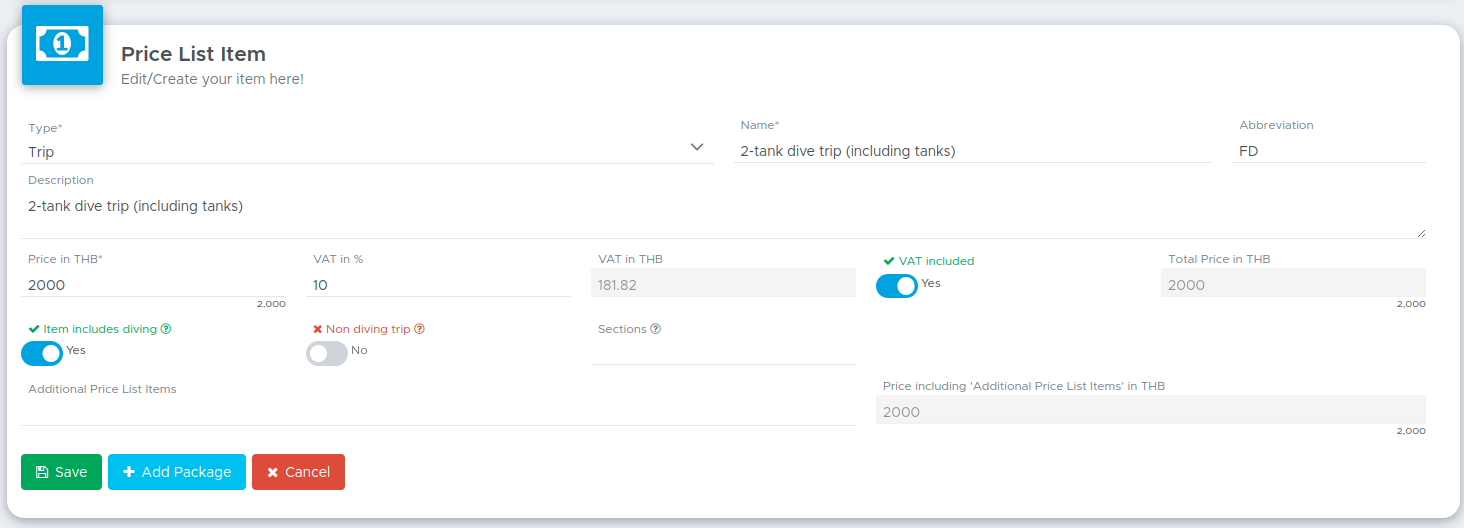
In the picture above you can see that the Type is Trip. Write a name that lets you immediately understand what kind of trip it is and a short description (you can edit the description later if you prefer). Please consider that the name of your choice will be shown in the customer’s bill. The description will be visible in the Activity (more on this in chapter Activity).
In this specific example you can see a “2-tank dive trip”, but you can set it up with the number of dives that you wish.
In the Abbreviation field you can type a few characters and/or numbers that specify the type of this trip. In the example above you can see “FD” that stands for Fun Dive. This will be shown in the Activity Calendar, in the Trip pop-up and in the Trip List that is available for every Activity that you will create (more on this in chapter Activity).
Write a price and a tax percentage (if applicable) and choose if the tax is included or excluded from your price.
Tick the checkbox “Item includes diving”. This is important! If you don’t tick this checkbox, Geek Divers will charge your customer for the trip AND for the number of dives according to your prices for Single dive.
In case you need to add extra costs to this trip and you’ve already set them up in your price list, you can add them in the Additional Price List Items field. E.g. lunch on the boat (type Food and Drink), marine park fee (type Fee). Just click on this field and start typing: Geek Divers will show you the names of the price list items that you’ve already created. The items that you add in field Additional Price List Items will be automatically written in the customers bills whenever they join this trip.
Set up automatic item package prices
Both in Example no.1 and in Example no.2, if you offer discounts on the trip price you can use the button Add Package to select your preferences as you did for the dive packages.
No discount before
Here you can see an example of Trip packages:

In the picture above here there are two packages: if the customer joins the trip a second time the price is reduced from the original 2000 THB to 1800 THB, if the customer joins a trip a third time the price is reduced to 1700 THB. In column Price for Position you will see that there’s no discount on the first trip, but for trip no.2 the customer will only pay 1800 THB and 1700 THB for trip no.3. In column Discounted Price you can see the total charges for your customer for 1, 2 or 3 trips.
Checkbox ‘No Discount before’ - taking the example above here, if you tick this checkbox you’re saying that the first time the customer should be charged the full price, the second time there’s a discount of 200 THB and the third time of 300 THB. The overall discount for 3 trips will be 500 THB.
Regular item package price
If you choose not to tick checkbox “No discount before” you’re saying that the customer should be charged 2000 THB for the first trip, 3600 THB (1800 THB x2) if the customer joins two trips and 5100 THB (1700 THB x3) if the customer joins three trips. Geek Divers will take care of recalculating the price of each item in the customer’s bill.
Below here is how it looks like without a tick on checkbox ‘No Discount before’:

Don’t forget to click on the button Save!
If you’re not sure about how to set up your trips or their package prices, please feel free to send us a message.
2.4 Price list item type Course
Here we set up your complete educational offer.
In the Price List, click on Add New Item.
Choose Type Course, write the course name, the abbreviation and the description. Remember that the course name will be shown in the customer’s bill, while the abbreviation and description will be shown only in the Activity more about Activities in chapter Activity).
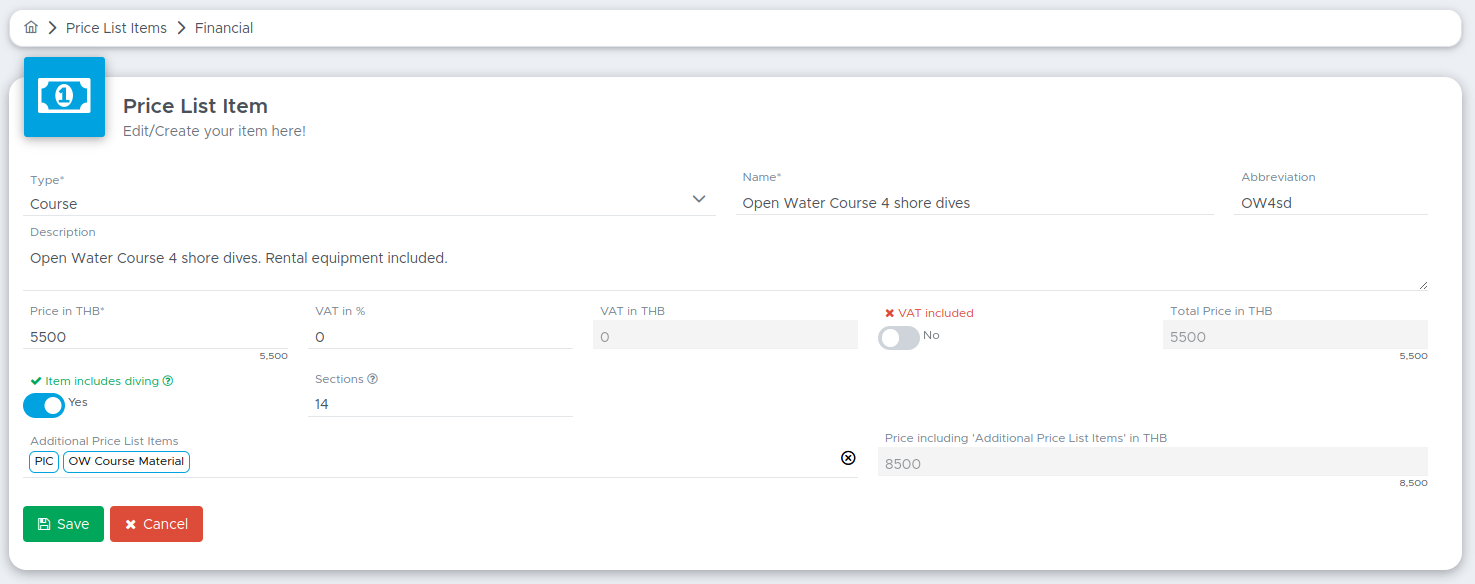
In the Abbreviation field you can type a few characters and/or numbers that specify the type of course that you offer. In the example above you can see “OW4sd” that stands for “Open Water 4 shore dives” . This will be shown in the Activity Calendar and in the Trip List that is available for every Trip that you will create (more on this in chapter Activity).
Enter a price, tax and tick the box Tax included (if appropriate).
In Additional Price List Items you can add the price list items that you’ve already created with types Fee, Extra, Material, Food and Drink or Rental. Just click on this field and start typing: Geek Divers will show you the names of the price list items that you’ve already created. The items that you add in field Additional Price List Items will be automatically written in the customers bills whenever they join this trip.
The field named “Price including ‘Additional Price List Items’” shows you the total price of this course that will be charged to your customer. In the customer’s bill you will see separate positions, each containing the costs for the course (above here in the picture it’s 5500 THB) and each additional price list item.
If your staff remuneration is based on commissions and the course commission is in percentage, the percentage of your choice will be calculated on the course price (in the above example 5500 THB), without considering the additional price list items.
Sections
If more than one staff member can be assigned to a course (e.g. one instructor will teach the theory, another one the confined water dives and another one the open water dives, maybe together with an assistant instructor or a divemaster), you can add the maximum number of sections that the course can be divided into. In the above example you can see 14 sections that are calculated as follows: 5 theory chapters, 5 confined water dives and 4 open water dives for a PADI Open Water Diver course. If you read further in chapter Activity - New Course and chapter Staff commissions/salary, you will see that each staff member can receive a specific commission based on the number of sections that they’ve taught. Potentially you can assign 14 staff members to the above course. Feel free to choose the number of sections that is most appropriate for your model. If you prefer, you can type 100 sections and in the Activity define a number of sections intended as a percentage for every instructor. E.g. 60 for one instructor and 40 for another. This way you are saying that this course was taught by one instructor for 60% and the other for 40%. If you expect one instructor to start and finish a course, then you don’t need to worry about the sections. You can leave this field empty.
Field Section is available both in price list item type Course and Trip.
Don’t forget to click on the button Save!
You will need to repeat the above for every course that you offer.
Please feel free to send us a message in case you’re not sure of how to set up your courses.
2.5 Price list item type EAN
If you offer Nitrox tanks at an extra charge, Geek Divers can calculate it automatically in your customers’ bills. If you don’t offer EAN tanks or if you don’t charge extra, you can skip this chapter.
Tip: if you offer Nitrox tanks at no extra charge we recommend setting up this price list item with a price ‘0’. Whenever you select the EAN checkbox for a customer in an Activity, a new row will be added to the customer’s bill with price ‘0’. This way you show the divers that they received a number of Nitrox tanks free of charge.
In the price list, click on Add New Item. Select type EAN, write a name and a description.
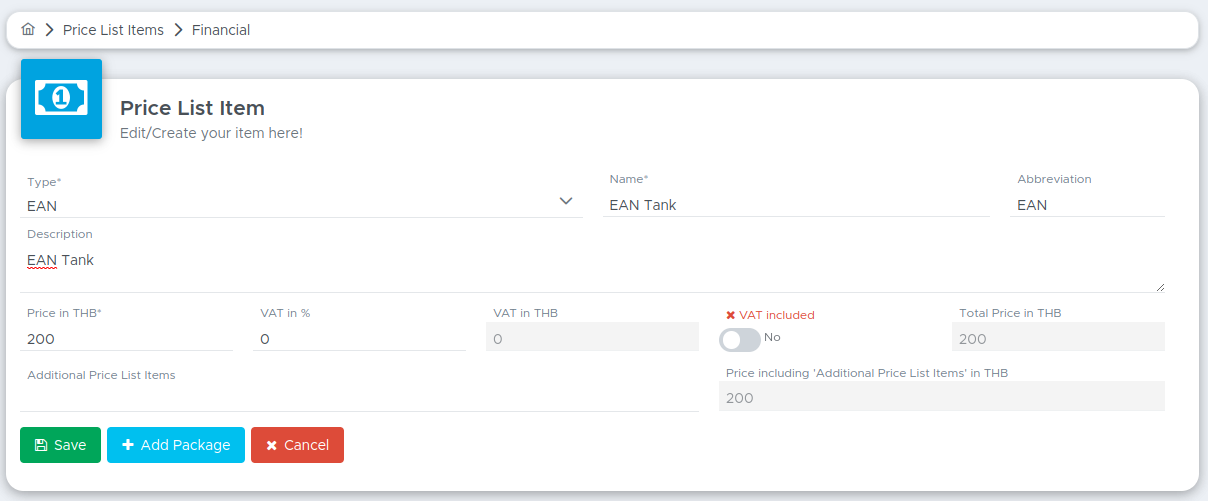
Enter a price, tax and tick on Tax included (if appropriate).
In Total Price you will see the charge for one EAN tank that will be added to the customer’s bill if the customer chooses to dive with Nitrox.
As you did for dives and trips, you can add packages for Nitrox tanks.
Click on Add Package button to add a discount package.
Here an example of EAN packages:
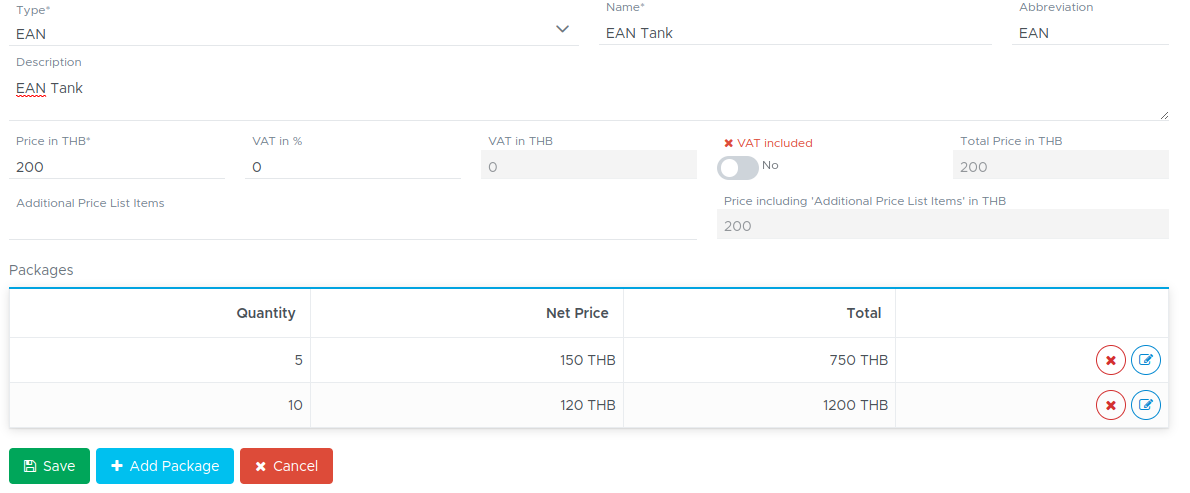
In the above example a customer who dives 5 times with a Nitrox tank will pay 150 THB per tank (instead of 200 THB) as additional charges and 120 THB per tank starting from the 10th dive.
If a similar package is set up in the price list, Geek Divers can automatically calculate the discounts in the customer’s bill, by counting the number of EAN tanks that the customer used and applying the discounts accordingly.
2.6 Add a Multi-package
If you offer a package including different items, you can create a multi package in your price list. E.g. Accommodation for 7 nights, airport transfer and Open Water course.
These are 3 different items in your price list and before you create a Multi-package you need to create the separate items first. If you offer a package price (probably cheaper than the sum of the single items) to your customers, then you can create a multi package in Geek Divers.
Click on Financials, Price List and Default Price List. Now click on button Add New Multi-Package. Write a Name (this will be shown in the customer’s bill), an abbreviation of your choice and a Description (these last two are for your internal use).
Starting from version 2.0 you can add a percentage for Tax and choose if it’s included in your package price or not. Please consider that the percentage of your choice will be applied to the package, not to the single items in it.
In field Price List Items start typing the name of the items that you want to include in your multi-package and Geek Divers will show you the price list items that match your search. Once you’ve selected the items of your choice, click on button Create Multi-Package.
You will see a table in the bottom part of your screen.
For each of the items that you’ve selected, add a quantity and the package price. In the example below you can see an Open Water course, a room (type Accommodation in the Price List) and a day trip.
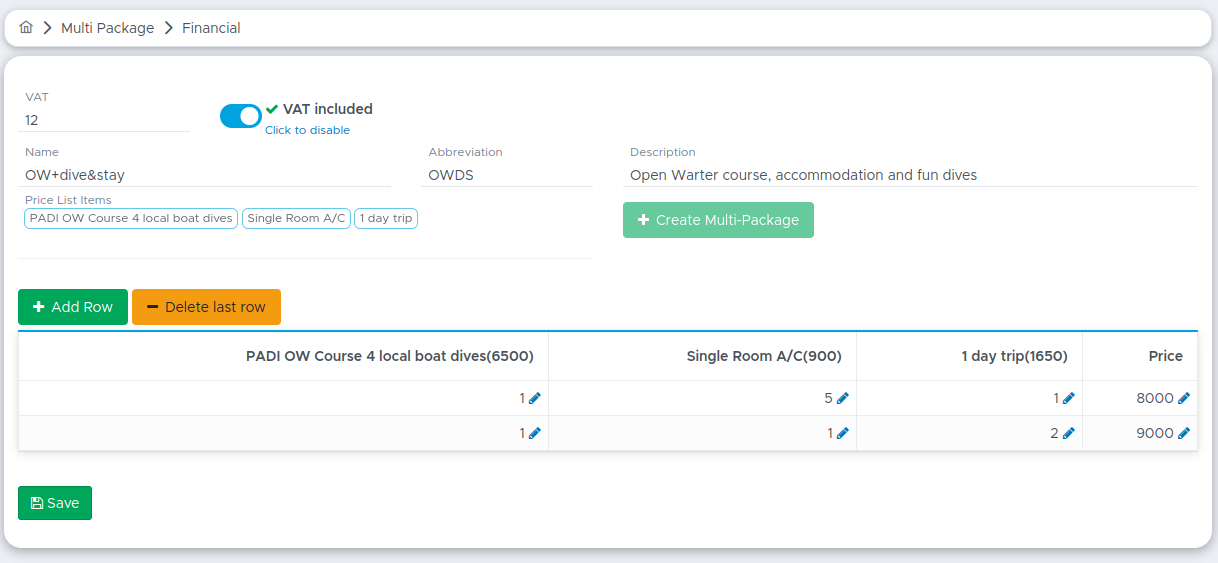
If your package price has some variations in the quantity of each item, you can click on the button Add Row to specify different quantities and price. In the example above the package offers an Open Water course, 5 nights in a single room and either 1 or 2 day trips.
You can create as many multi-packages as you like. E.g. IDC course + a number of nights of accommodation + a number of meals + airport transfers, Divemaster course + a number of weeks of internship + accommodation, OW course + AOW course + EAN course...etc.
See how the customer’s bill looks like with Multi-packages in chapter Multi-Package Discount.
2.7 Price list item type Package
If the packages that you offer include items with variable quantities, the Multi-package does not apply to your pricing model. E.g. you offer unlimited shore diving in your house reef or unlimited diving for a set number of days and one zodiac ride per day. In these cases the multi-package won’t work because it’s mandatory to set the exact quantity for each of the included price list items.
Your other option is the price list item type Package.
Once your customers start doing some activities you can tick them off in their bill as part of the package price. You can set up your package price very easily in the price list. Within your price list click on button Add New Item and select type Package:
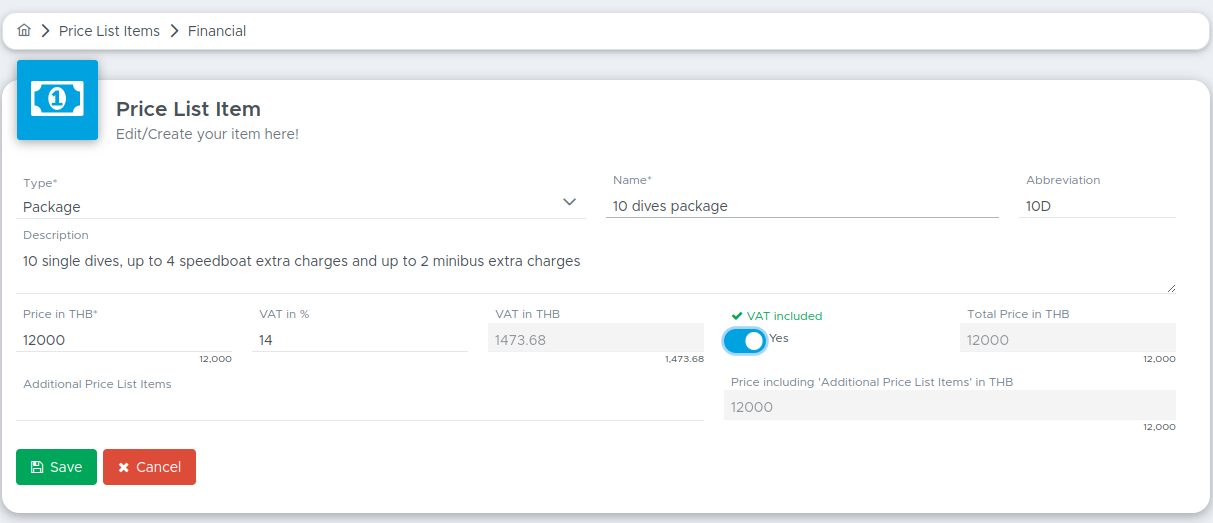
In your customer’s bill you can add this package by clicking on button Add Position (from Price List).
See how the customer’s bill looks with price list item type Package in chapter Discount with price list item type Package.
3. Dive Sites
From the menu on the left, click on Diving and Dive Sites.
To enter your dive sites, click on button Add Dive Site, enter the dive site name, description, maximum depth, maximum capacity and location(s).

Only name and description are mandatory fields to save a dive site. The maximum capacity of a dive site is the maximum number of people that you can take to that dive site on any given day. This might be due to limited availability of marine park permits or other reasons. Your current location will be automatically selected in field Location. If you share the same dive site among your other locations, select them in the selection box.
Click on button Save to see your dive sites listed in the table below.

In case you need to modify any of the data of a dive site, just click on the blue edit button and you will see the current data in the sidebar. Make the appropriate changes and click on button Update.
If you wish to remove a dive site from your list, click on the red Delete button. Please consider that you can only delete dive sites assigned to your current location. To delete a dive site that is assigned to another location, you will have to switch to that location first.
4. Staff
4.1 New Staff
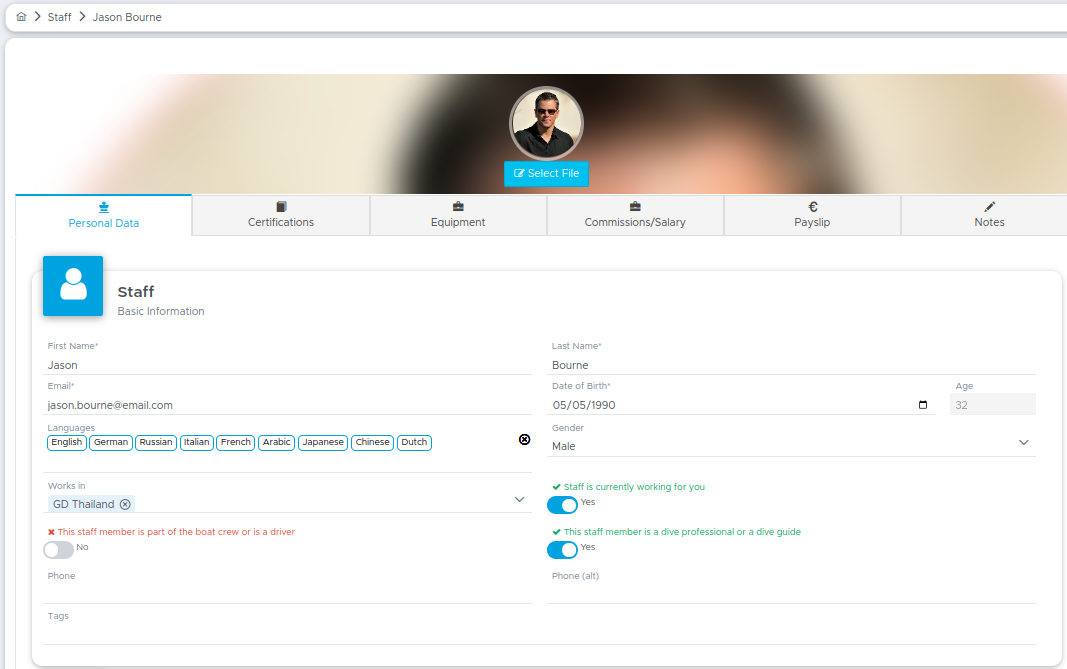
From the menu on the left, Click on Staff and New Staff. Enter name, last name, date of birth and email address as minimum mandatory information. You can fill out every other field in the Personal Data tab now or you can go back to them later. If you have more than one location, please type the name of the location(s) the staff member works for. The toggle “Staff is currently working for you” is automatically active when you enter a new staff member. If you are entering a dive professional or a dive guide, please activate the toggle “This staff member is a dive professional or a dive guide”. If you are entering a member of the boat crew or a driver for your bus/van, activate the toggle “This staff member is part of the boat crew or is a driver”. For every other staff member you don’t need to activate any other toggle. Scroll down and click on Save.
Click on Certifications tab and enter the highest diving certification for this staff member (if appropriate).
If it’s a new certification (meaning that you never entered this kind of certification before in Geek Divers), the system will ask you if you want to save it:
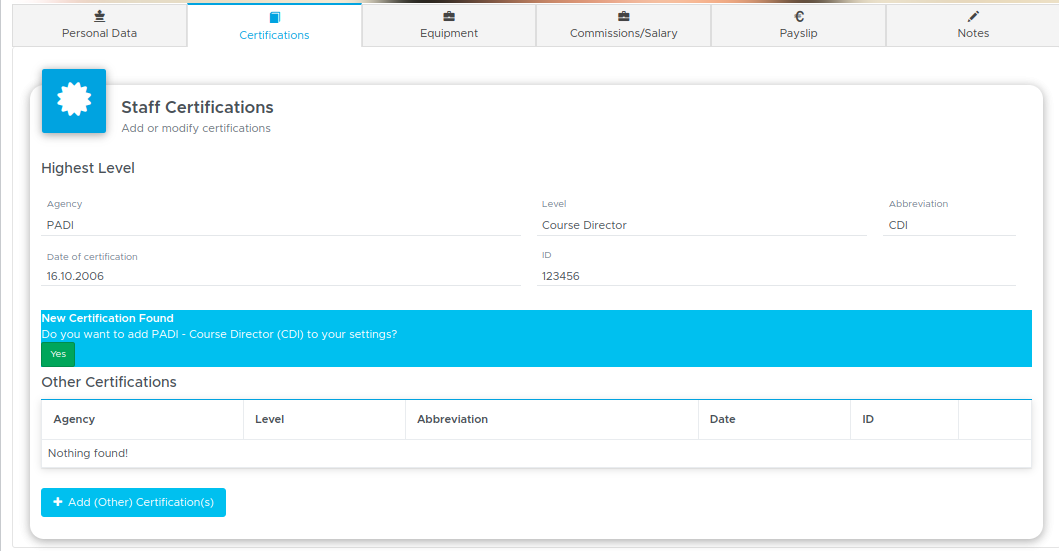
If you click Yes, you will find this certification under Settings - Certification ( Chapter Certifications and the next time you need to enter the same, Geek Divers will suggest it from your saved list.
You can also enter additional certifications (e.g. specialities or other) underneath the highest certification. You can also go back to this section later to add more information.
Scroll down and click on Update.
Your staff member profile is now successfully created in Geek Divers.
In case this staff member stops working for you, please deactivate the toggle “Staff is currently working for you”. This way you won’t see this staff member when you create an activity and their payslips won’t be automatically created. The staff member profile will remain in menu All Staff and it won’t be found in Current Staff.
4.1.2 Staff Equipment
In this tab you can have a list of the equipment that belongs to your staff member, including make and model of every piece. The bag/box number will clearly identify their set. In case of newly certified Divemasters or in the unlikely event that a piece of equipment is malfunctioning, staff members can rent equipment from your dive center. Before you do that, you need to define a check-out date. This is because the equipment that you assign today is immediately considered unavailable for the assignment to another staff member or a customer and cannot be assigned forever.
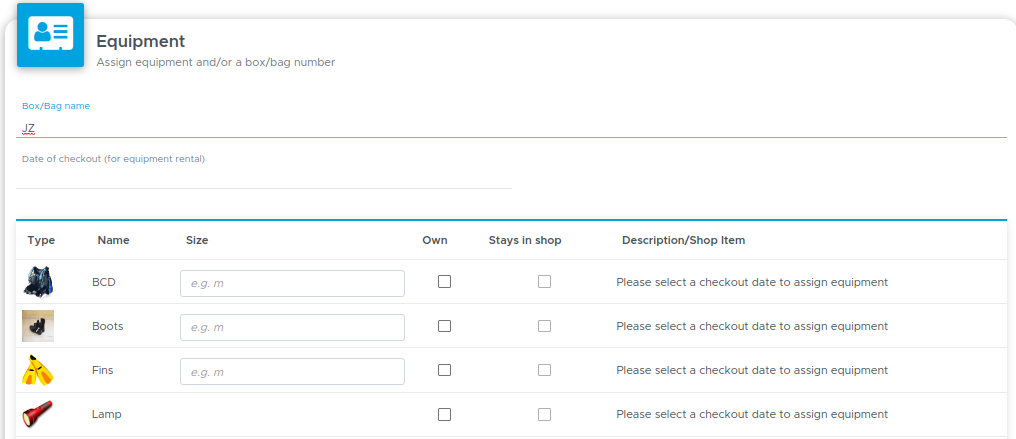
As soon as you enter an equipment check-out data, the buttons “Search in shop inventory” will be available.
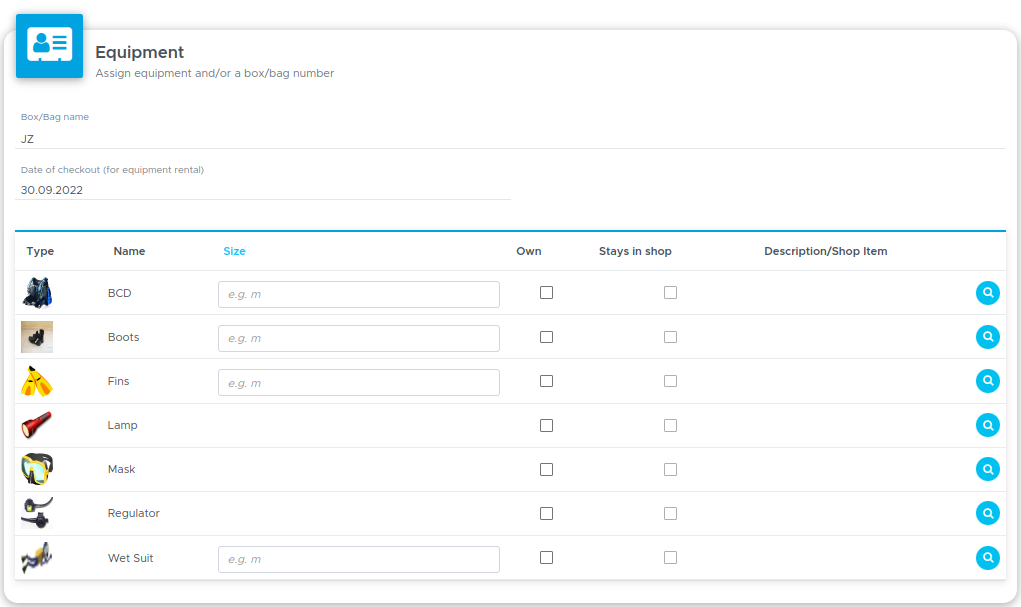
Before assigning equipment to a staff member you need to set it up in Geek Divers. Read how in chapter Equipment.
4.1.3 Staff commissions/salary
In Geek Divers you choose how frequently you pay your staff. In chapter Payslips you will learn how to “freeze” a staff member’s payslip whenever you decide that it’s time to finalise the payslip, check the content and pay the amount due.
If you wish to automate the calculation of base salary and/or commissions for your staff members, on each of your staff members’s profiles you can set up how much you pay them, both in terms of base salary and commissions.
Geek Divers will consider the base salary and/or the commissions that you set up on a staff member’s profile and write their payslip positions according to what they actually did (depending on the activities that you set up in your Activity Calendar).
On a staff member page, click on tab Commissions/Salary.
4.1.3.1 Base Salary
If you give your staff members a base salary, enter the amount in the field below and click on Add Salary. Please remember that this base salary is related to the period between one payslip and the next. E.g. if you pay weekly, you need to enter the weekly base salary.

If you now scroll down, you will see a table with this base salary.
Once you enter a base salary the Add Salary button will be disabled. In case you need to change the base salary for this staff member you need to delete the row in the table at the bottom of the page and enter a new salary in the Base Salary field.
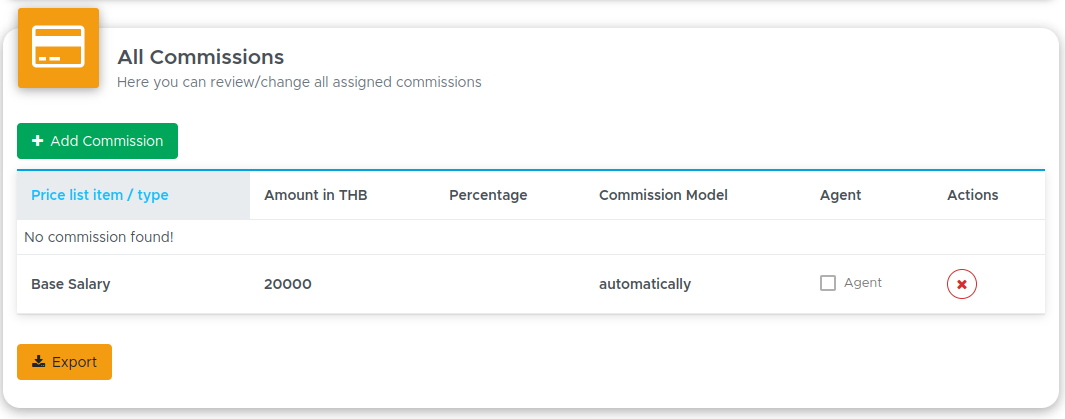
4.1.3.2 Commissions
If your staff members receive commissions for the activities that they do or for the services or retail items that they sell, you can set them up by clicking on button Add Commission. The pre-requisite to set up commissions is that you’ve completed the setup of your price list.
A sidebar will open and a menu will ask you to select what kind of commission you would like to set up.
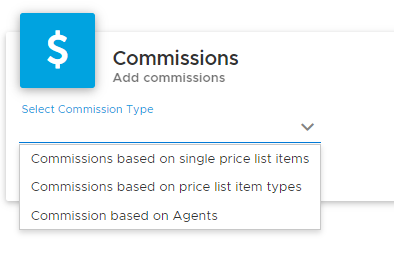
Commissions based on single price list items
Select this item to define a specific commission in fixed amount or in percentage for each price list item in your price list. You can select the commission model (per Customer, per Tank, per Dive or per Activity) and type either a fixed amount or a percentage. If you select a course, the only commission models available are per Customer or per Activity. If you type a percentage, the commission will be calculated on the price list item price, without the additional items that you might have specified.
Example:
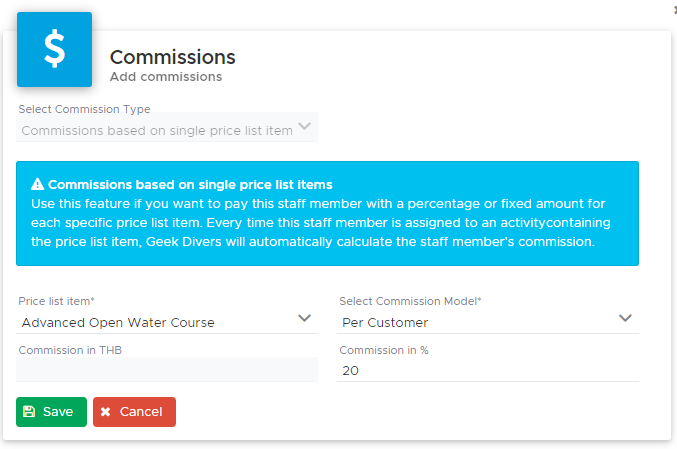
In the picture above here, the instructor will receive a 20% commission on the Advanced Open Water Course per customer. The commission will be calculated automatically by Geek Divers as the 20% of the total cost for the course, excluding fees, course material, food and drink or extra costs, in case you’ve specified these extra charges in field Additional Price List Items in your price list.
Click on the button Save and check the new row in the table.
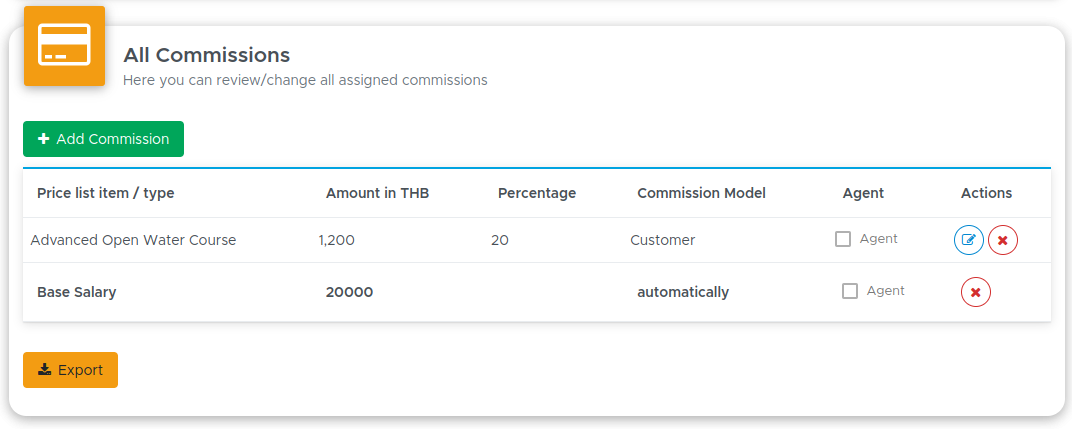
Repeat these steps for each item of your price list that could provide a commission to your staff member.
Commissions based on price list item types
Select this item to define a specific commission in fixed amount or in percentage for a price list item type in your price list. You can select the commission model (per Customer, per Tank, per Dive or per Activity) and type either a fixed amount or a percentage. E.g. your instructors receive a 25% commission on every course that they teach (excluding fees, course material, food and drink or extra costs).
If you select type Course, the only commission models available are per Customer or per Activity. If you type a percentage, the commission will be calculated on the price list item price, without the additional items that you might have specified.
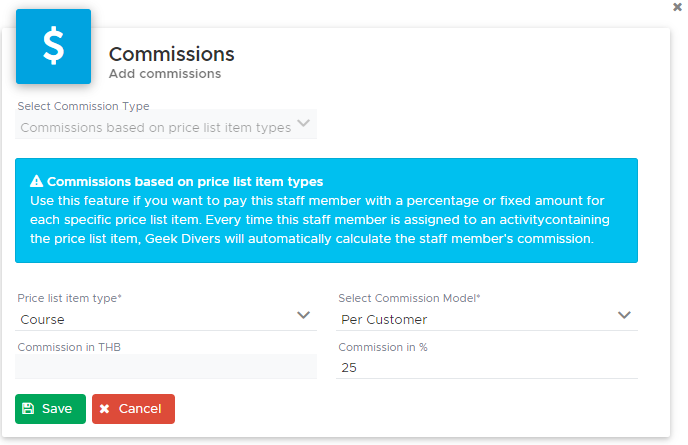
Click on the button Save and check the new row in the table.
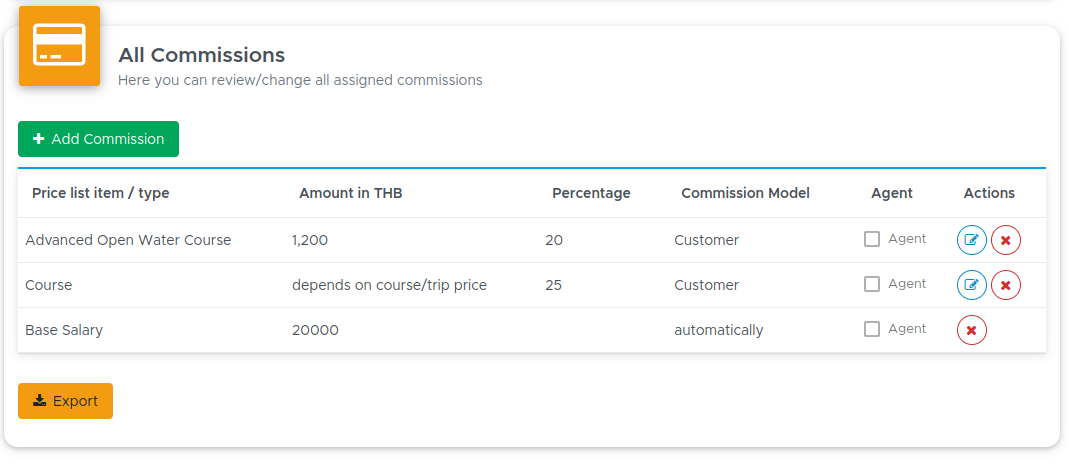
If you look at the above table, this instructor will receive a 20,000 THB base salary, a 20% commission on an Advanced Open Water Course per customer and a 25% commission on any course (including the AOW!) per customer. Please make sure that you use either the commissions on price list items or the ones on price list item types or your staff members might receive double commissions for the same course or trip. They might be very happy, but I’m not sure if you like it! :)
Repeat these steps for each price list item type that could provide a commission to your staff member.
The commission models are intended as follows:
Per Customer - the commission will be repeated and written separately in the staff member’s payslip for each customer in the activity.
Per Activity
Commission per activity - the commission will only be written once for a specific activity, regardless of the number of customers joining the activity

Commission per no. pax - you can define a different amount based on the number of customers joining the activity.
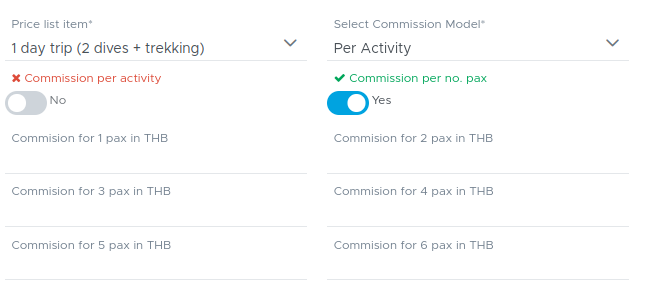
Per Dive (not available for courses) - the commission will be repeated and written separately in the staff member’s payslip for the number of dives, done by the staff member, in the activity.
Per Tank (not available for courses) - the commission will be repeated and written separately in the staff member’s payslip for the number of customer’s tanks in the activity. E.g. 4 divers in a group for 2 dives - the commission will be repeated 8 times.
Please consider that the staff commissions will be written in the staff members’ payslips when the activity is completed and closed.
Commissions based on Agents
An agent can be:
an external individual or company that sells your services - you can enter this person or company as a New Partner in Geek Divers (more on this in Partners chapter);
an internal staff member who acts as an agent when they bring a new customer or receives a commission on sales.
The commission model for agents is only per customer.
Select this item in the Add Commission sidebar to define a specific sales commission in fixed amount or in percentage for a price list item in your price list. Select the price list item and type either a fixed amount or a percentage. E.g. your instructors receive a 10% sales commission on every course that they sell (excluding fees, course material, food and drink or extra costs).
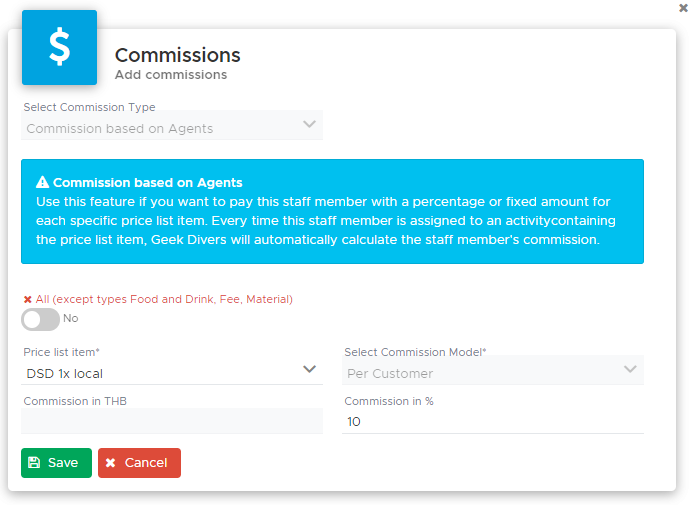
Click on the button Save and check that you see it in the table.
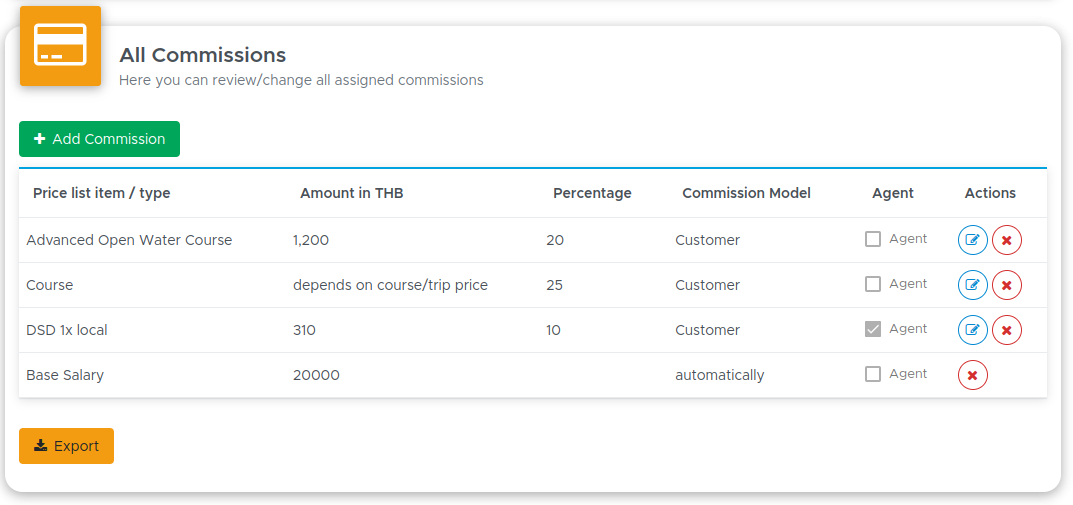
As you could probably see, the sales commission is marked as Agent commission in the table.
Repeat these steps for each item of your price list that is promoted by your staff member.
To make sure that these commissions are correctly calculated and added to your staff member’s payslip, you will need to assign the staff member as agent to a customer in an activity. When you close the activity, the agent commission will be calculated and written in the staff member’s payslip.
If you have a special agreement with your staff members and you offer a commission in percentage for whatever the customer does or a fixed amount per customer, then you need to activate the toggle “All”.
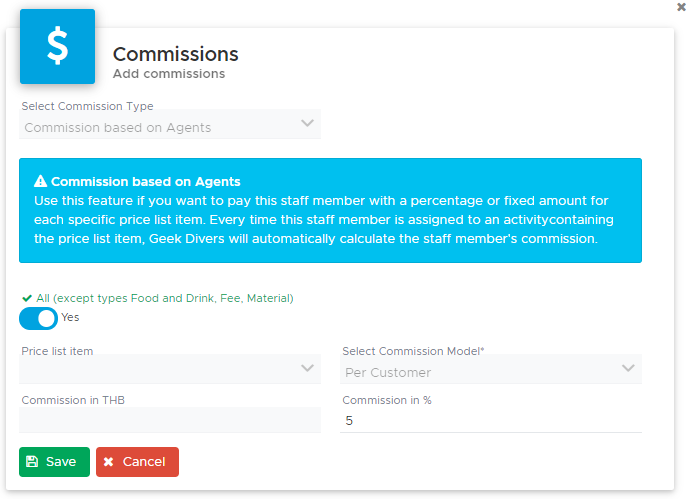
Write the amount or the percentage and click on button Save. Check this “All” commission in the table.
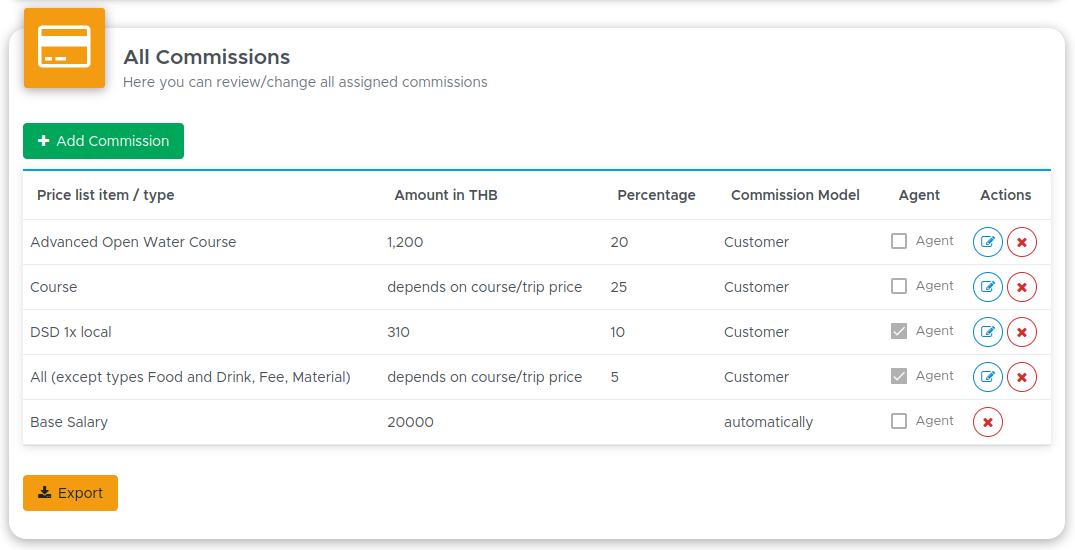
This commission will be calculated and written in the staff member’s payslip when you close the customer’s bill. If you choose a commission in percentage, the calculation will exclude types Food and Drink, Fee and Material. Additionally, if the customer’s bill has an applied voucher, all the bill positions that match voucher positions will not be included in the calculation of this commission.
To make sure that this commission is correctly calculated and written in the staff member’s payslip, you need to assign the staff member as agent to the customer in the customer’s profile.
In the All Commissions table you can see which commissions are “teaching” commissions and which ones are “sales” commissions: the sales commissions will have a tick in the Agent column. You cannot modify any row of this table, but you can delete a row and define the correct commission once again.
This table can be exported by clicking on button Export at the bottom of the page. Additionally, by clicking on the column names, you can sort the content of the table.
4.1.3.3 Copy remuneration model
You don’t need to repeat the commission setup for every staff member: you only need to set up your staff remuneration model for the staff members who have different commissions/base salary. If two or more staff members receive the same remuneration (or very similar) you can use the copy feature at the top of this page.
Here’s what you need to do:
Create a New Staff member as described in chapter New Staff
Click on Save button
Click on Commissions / Salary tab
Select the staff member in Geek Divers who has the same (or very similar) remuneration model and click on button Copy

Scroll down and verify that the table is complete.
In case you need to change one or more rows of this table you can click on button Delete in the row that you need to change and set up a different commission.
4.2 All Staff
From the menu on the left, Click on Staff and All Staff. If your login has access to this menu, you will see all the staff members in all the locations, both currently working for your dive centers and past staff members. At the top of the page you’ll see a search string where you can type the staff member’s name. As soon as you start typing some characters, you’ll see the search results that match your search. Once you’ve identified the staff member that you’re looking for, click on the card to go to the staff profile. Here you can apply changes and save or update the profile.
4.3 Current Staff
From the menu on the left, Click on Staff and Current Staff. If your login has access to this menu, you will see all the staff members that are currently working in the location that you’ve chosen at the top of the screen.
At the top of the page you’ll see a search string where you can type the staff member’s name. As soon as you start typing some characters, you’ll see the search results that match your search. Once you’ve identified the staff member that you’re looking for, click on the card to go to the staff profile. Here you can apply changes and save or update the profile.
In case a staff member doesn’t work for you anymore, click on their name and on the toggle “Staff is currently working for you” to deactivate it.

Scroll down and click on button Update. The staff member will remain in your All Staff menu, but you won’t find their name in Current Staff, nor in the activities that you plan in the Activity Calendar.
4.4 Staff Calendar
From the menu on the left, Click on Staff and Staff Calendar.
Starting with Version 2.1 you will have a new calendar to display all your staff activities. The staff calendar updates itself automatically, every time you assign a staff member to a trip or course. You can also enter manual dates like ‘no-show’, ‘day off’, ‘leave’ or ‘other’.
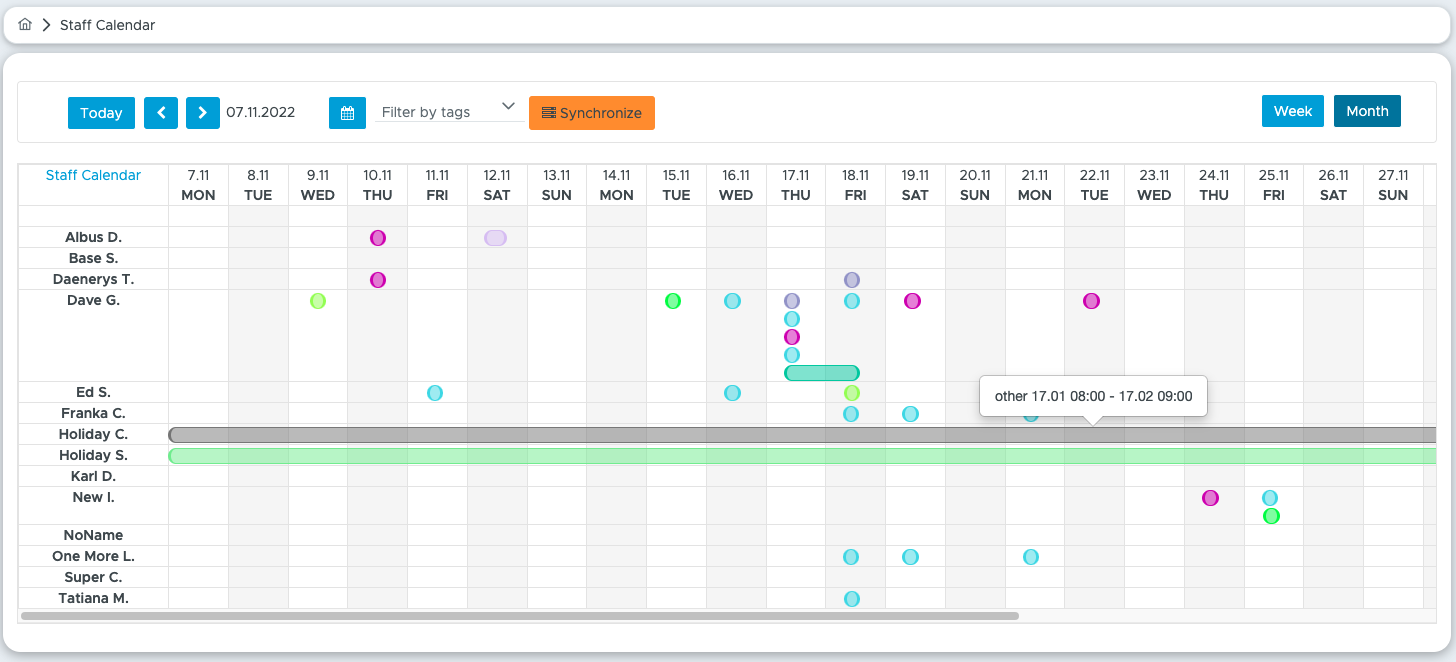
To create a new entry, simply click on the date and start time and a side bar will open.
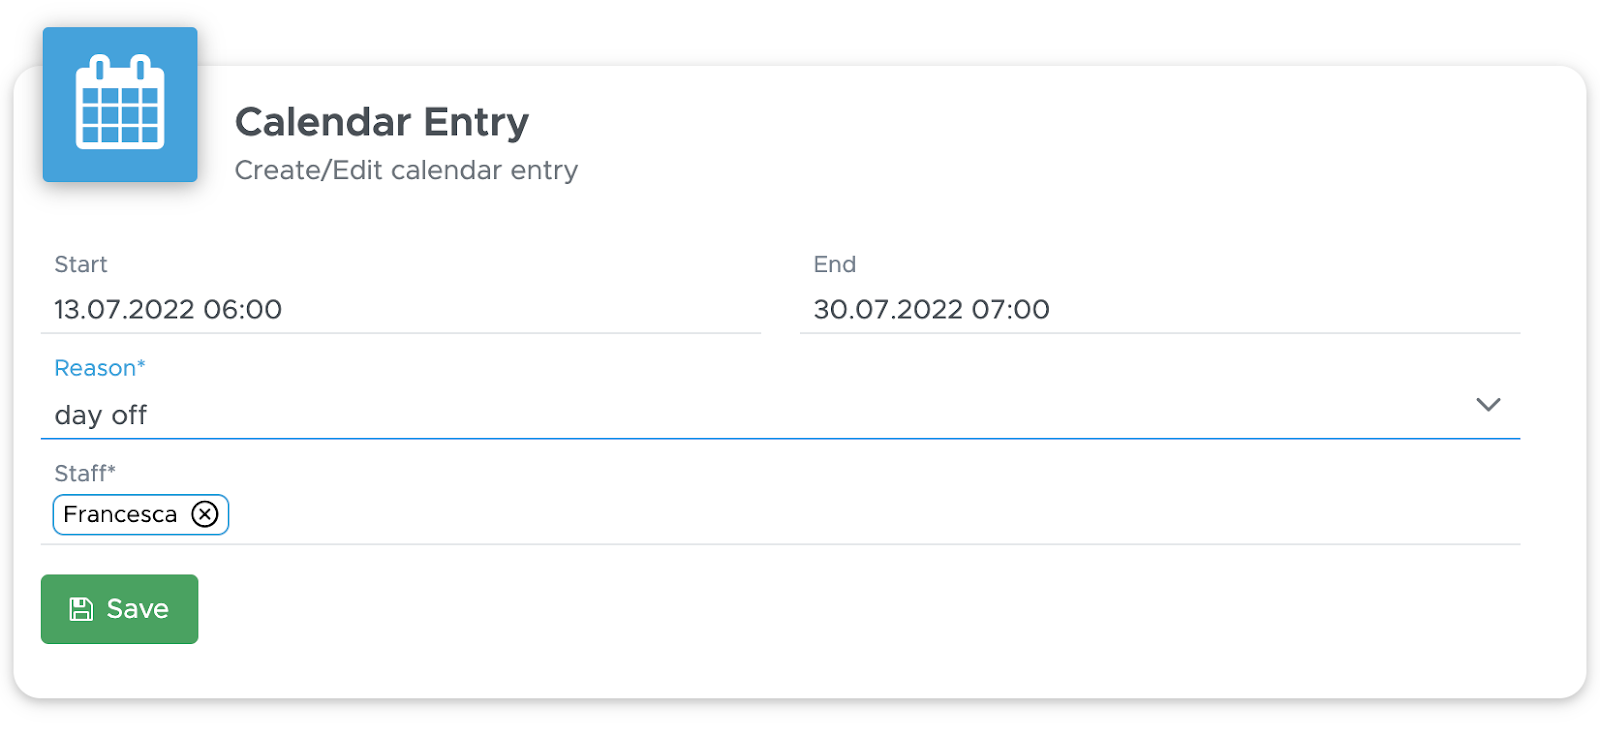
Enter reason and select the dates accordingly. When you are done click on the save button.
You can now find the entry in the staff calendar.
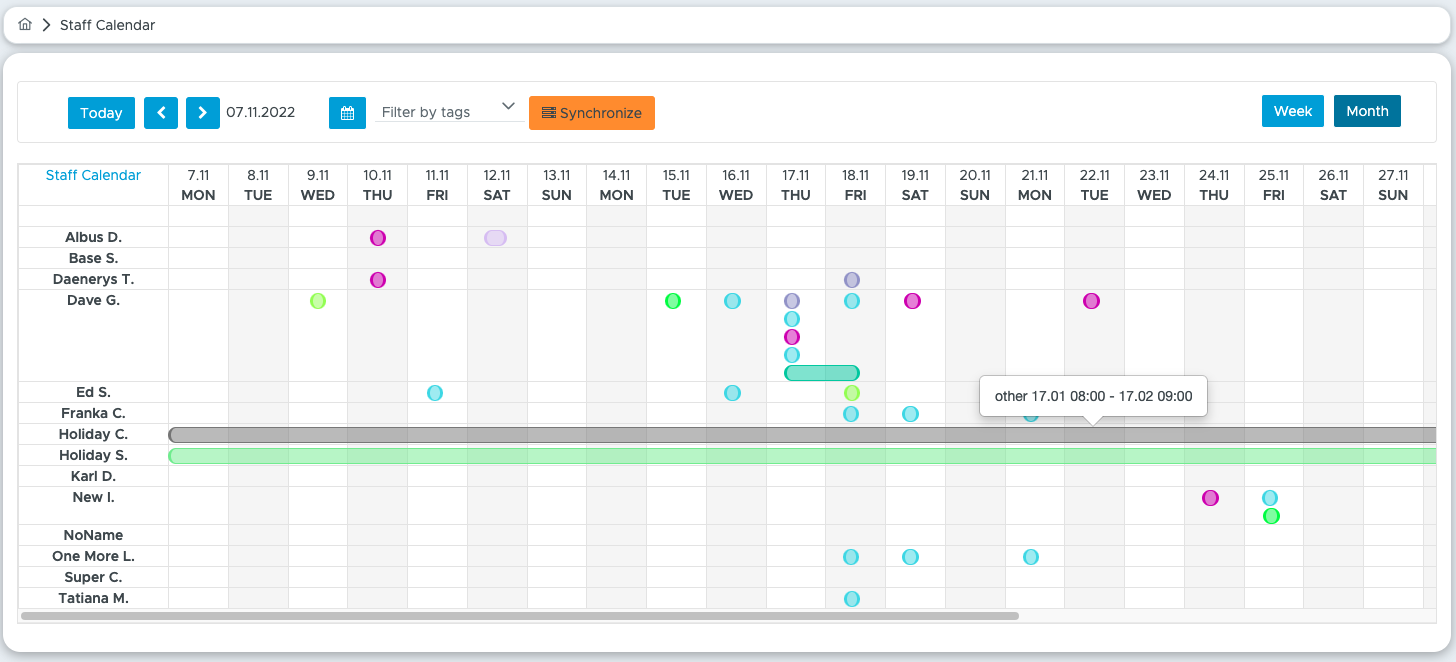
In case you need to change the entry you can just click on the colored part in the staff calendar and update it as needed.
If you hover over an entry, you can see more information about it.

You will see different colors in the staff calendar:
Red: you created an entry with the reason ‘no-show’
Gray: you created an entry with the reason ‘other’
Green: you created an entry with the reason ‘leave’
Light Blue: you created an entry with the reason ‘day off’
Dark Green: automatically created and entry from a course
Other colors: automatically created entry from a trip. The color represents the color of the selected transportation.
Synchronize Button
In case some entries are missing from the calendar and you want to synchronize your staff calendar with your activity calendar, you can click here. Your calendar entries will now be sychronized.
If you click on an automatically generated entry, you will be navigated to the event accordingly.
When you create a new trip you will now see if your staff already has an entry on that day and time in the calendar.
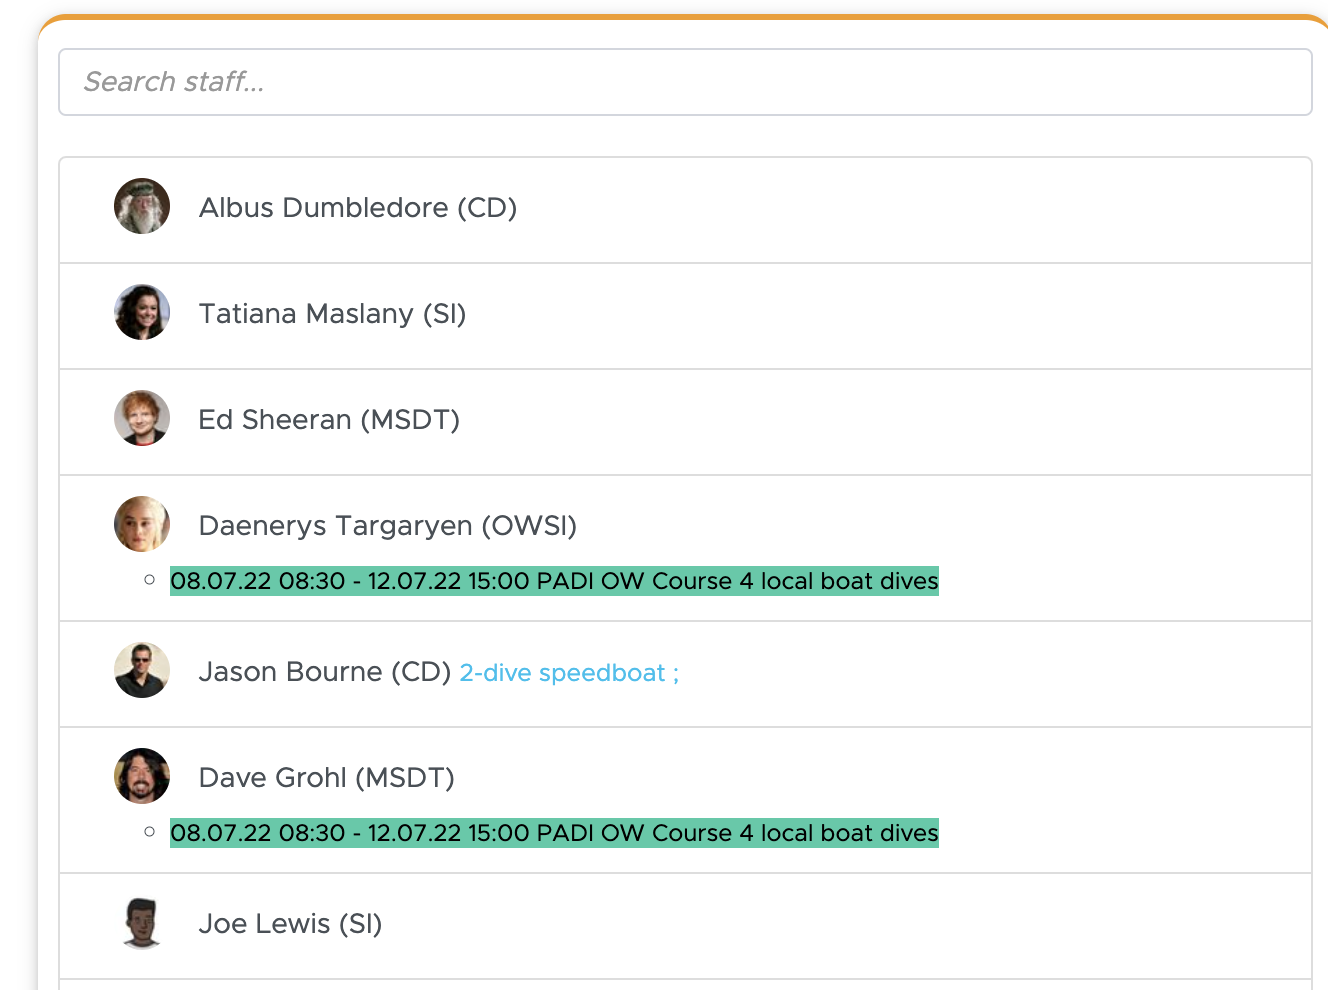
5. Partners
In Release 1.0.2 we introduced the Partners menu to collect all the external partners and agents that sell your services and promote your business.
In Release 2.0 the Partners menu has been enhanced due to several new features. We can now distinguish between a local Agent who only works on commissions and a Partner that is intended as a company working with you on a B2B basis.
In Geek Divers both Agents and Partners can be managed in menu Partners - Current Partners.
A partner in Geek Divers is a company (usually a travel agency) or an individual who sells your services. If they sell your services and receive a full payment from customers, then in Geek Divers you will set up your partner price list and use it for quotes and automatic invoices. If they promote your services in exchange for a commission (you receive the customer’s payment), then in Geek Divers you will set up agent commissions.
5.1 New Partner
From the menu on the left, Click on Partners and New Partner. Here you can enter the contact data and/or the company information of your agent or business partner. In the field ‘Works for’, please select the locations of your business that this agent or partner can promote.
In section Company Contacts you can add some direct contacts with your partner.
Just click on the button “+ Add Contact” to open the sidebar.

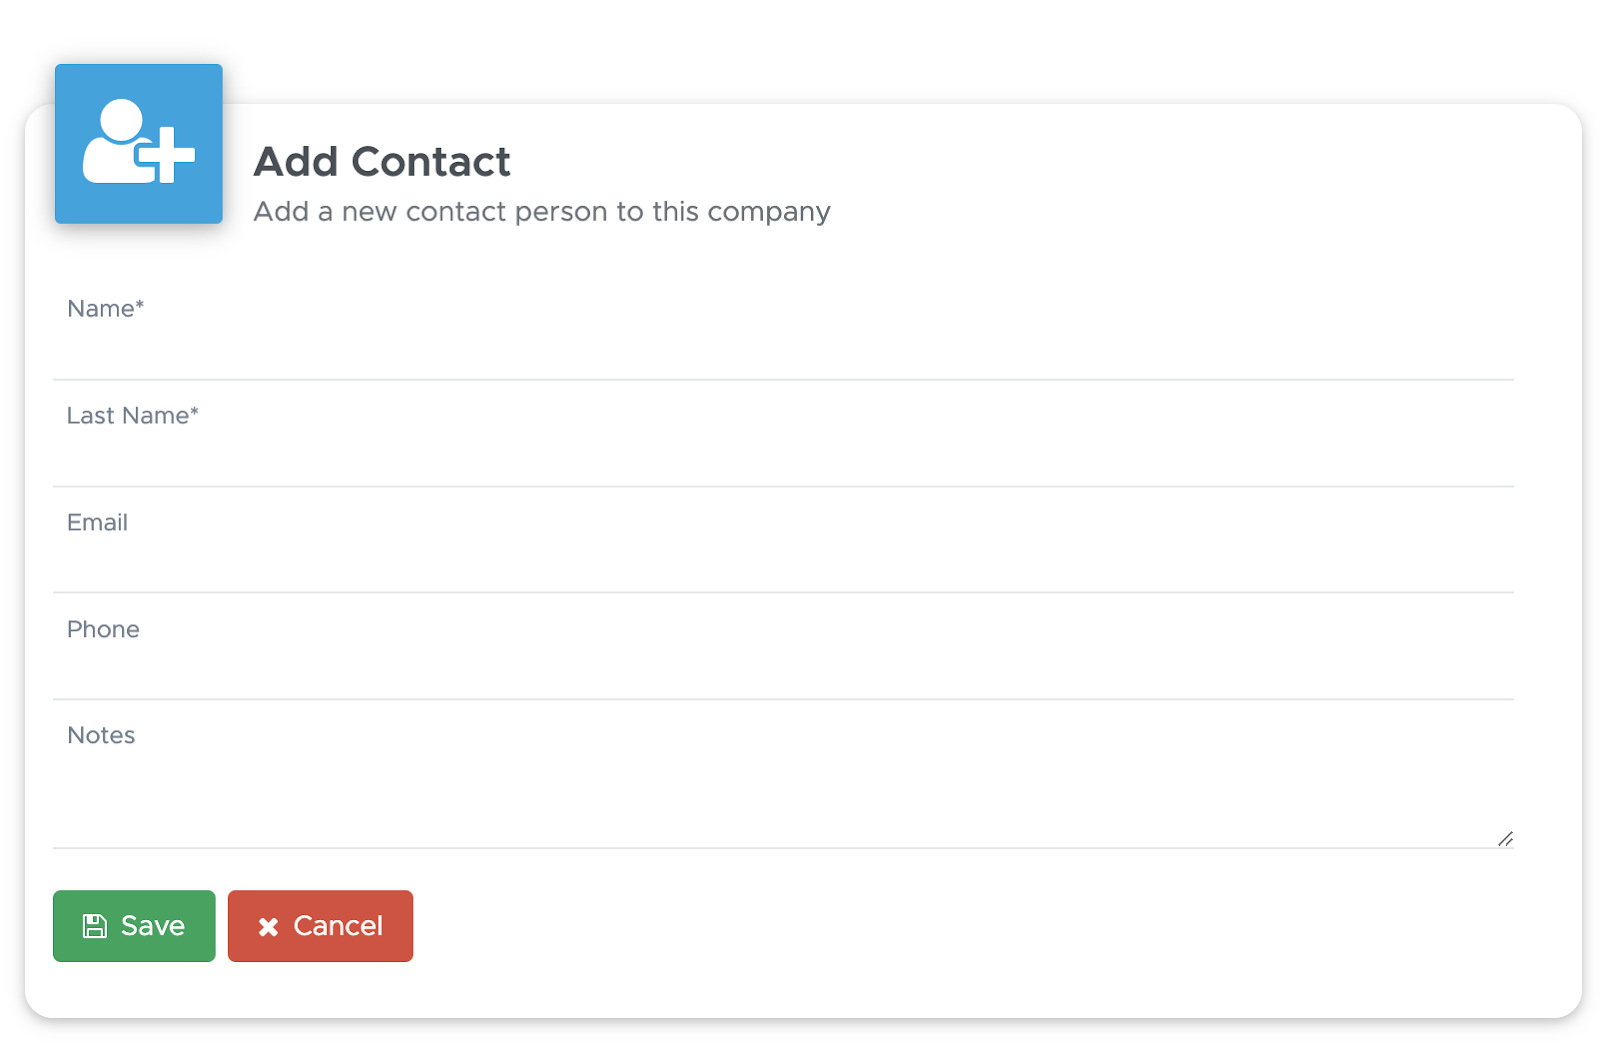
These could be useful when these contacts request a quote.
At the bottom of the page click on button Save.
If this partner works on commissions, click on tab Commissions/Price List to set up your Agent’s commissions. Please read chapter Commissions based on Agents to find out how to set up commissions for your agents.
When you assign this agent to a customer (more on this in chapter Activity) and you close the Activity, the agent’s commissions will automatically be calculated and added to the agent’s invoice or credit note once you close the activity. You can view the current credit note together with the past ones in tab Invoice/Credit Note. The last tab, Notes, provides you with a text area where you can write any note about this agent or partner. These notes are only for your internal use.
If the Partner that you just created is a travel agent working on an agreed price list, please follow chapter Partner Price Lists to set up a correct price list.
5.2 All Partners
From the menu on the left, Click on Partners and All Partners. If your login has access to this menu, you will see all the agents and partners in all the locations, both currently working with your dive centers and past partners. At the top of the page you’ll see a search string where you can type the partner’s name. As soon as you start typing some characters, you’ll see the search results that match your search. Once you’ve identified the partner that you’re looking for, click on their name to go to the partner’s profile. Here you can apply changes and save or update the profile.
5.3 Current Partners
From the menu on the left, Click on Partners and Current Partners. If your login has access to this menu, you will see all the agents and partners that are currently working in the location that you’ve chosen at the top of the screen. At the top of this page you’ll see a search string where you can type the partner’s name. As soon as you start typing some characters, you’ll see the search results that match your search. Once you’ve identified the partner that you’re looking for, click on the partner’s name to go to the partner profile. Here you can apply changes and save or update the profile. Should you decide not to work with a partner/agent anymore, you can remove the tick from the ‘Current’ checkbox.

Scroll down and click on button Update to confirm the changes.
5.3.1 Tab Commissions/Price List
When you click on a Partner’s profile, either from menu All Partners or Current Partners, you end up in the tab Contact Data. Here you’ve entered the Partner’s name, company information, contacts and address.
Click on tab Commissions/Price List.
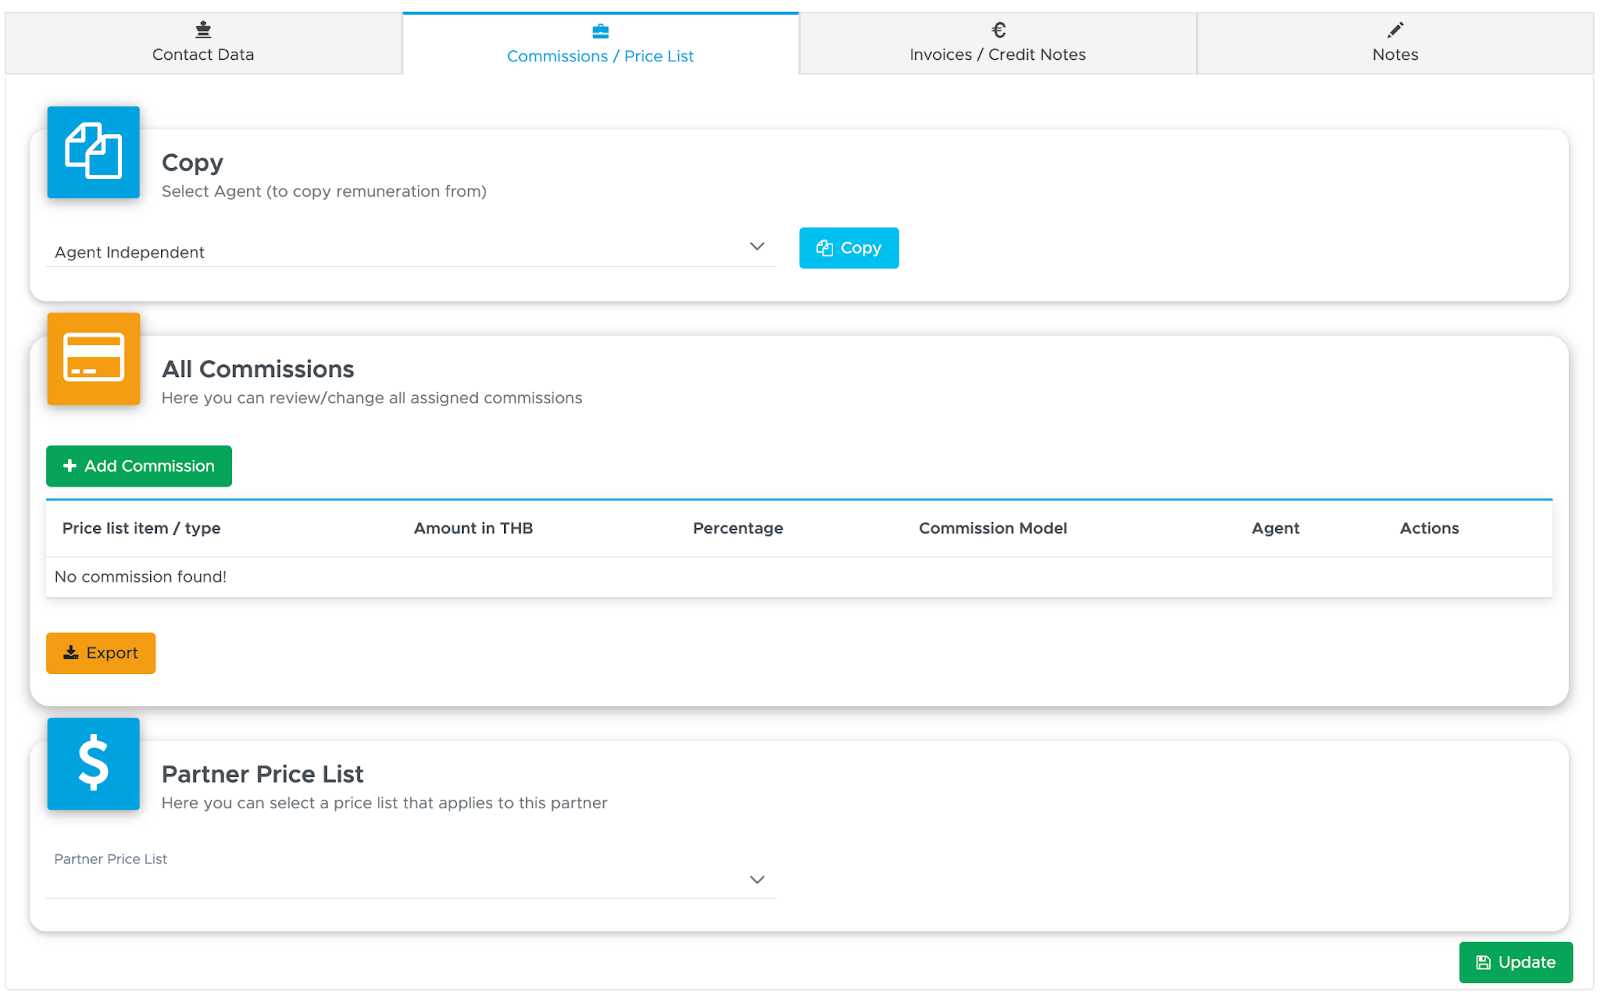
On this page you will see two sections: All Commissions and Partner Price List.
Agent Commissions
In section All Commissions you can set up the commissions that you’re going to pay to this partner/agent when they send customers your way. The pre-requisite to set up commissions is that you’ve completed the setup of your price list.
Please make sure that you’re in the correct location by checking the Geek Divers status bar on the top-right of the page.
Click on the button Add Commission to open the sidebar.
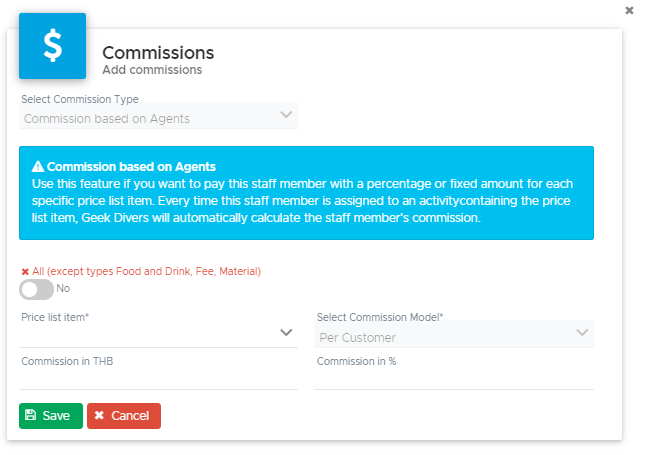
Select a price list item and type either a fixed amount or a percentage. E.g. your agent receives a 10% sales commission on a specific course that they sell (excluding fees, course material, food and drink or extra costs). The commission model for agents is only Per Customer.

Click on the button Save and check that you see it in the table.

As you could probably see, the sales commission is marked as Agent commission in the table.
Repeat these steps for each item of your price list that is promoted by your agent.
To make sure that these commissions are correctly calculated and added to your partner’s credit note, you will need to assign the agent to a customer in an activity. When you close the activity, the agent commission will be calculated and written in the partner’s credit note.
If you have a special agreement with your external agents and you offer a commission in percentage for whatever the customer does or a fixed amount per customer that they send your way, then you need to activate the toggle “All”.

Write a fixed amount or a value in percentage and click on button Save. Check this “All” commission in the table.

This commission will be calculated and written in the partner’s credit note when you close the customer’s bill. If you choose a commission in percentage, the calculation will exclude types Food and Drink, Fee and Material. Additionally, if the customer’s bill has an applied voucher, all the bill positions that match voucher positions will not be included in the calculation of this commission.
To make sure that this commission is correctly calculated and written in the partner’s credit note, you need to assign the partner as agent to the customer in the customer’s profile.
In the All Commissions table of a partner, all the commissions will be marked as Agent commissions. You cannot modify any row of this table, but you can delete a row and define the correct commission once again.
This table can be exported by clicking on button Export at the bottom of the table.
Copy remuneration model
You don’t need to repeat the commission setup for every agent: you only need to set up commissions for those agents who have different commissions. If two or more agents receive the same commissions (or very similar) you can use the copy feature at the top of this page.
Here’s what you need to do:
Create a new Partner and save it or click on the Partner’s profile
Click on tab Commissions / Price List
Select the Partner in Geek Divers who has the same (or very similar) commissions and click on button Copy

Scroll down and verify that the All Commissions table is correct and complete.
In case you need to change one or more rows of this table you can click on the button Delete in the row that you need to change and set up a different commission.
Partner Price List
In this section you can select an existing Partner Price List to assign it to this Partner. If your partner works only with commissions (you receive the customer’s payment), then you can skip this part.
If your Partner works with an agreed price list or special discounts on your regular retail prices and pays you directly for the services (the customer pays your partner), then set up your Partner Price List and assign it to this partner here in this section.
5.4 Partner Price Lists
In this menu you can set up your Partner Price Lists. You can set up a price list to assign to several partners or a price list per partner or even several price lists for one partner. Below here you can find a few examples of scenarios.
You offer a generic 20% discount on your regular published rates to your travel agents in Europe. In this case you could create a EU-price list with currency in EUR and the discount of your choice. You can then proceed to assign this price list to all your travel agents in Europe. You can repeat this scenario for your travel agents in Asia or in North America or anywhere else in the world.
You have very specific and different price lists for each of your travel agents. In this case you will create a price list for each travel agent and proceed to assign it only to that partner.
You offer any of the above scenarios to travel agents who wish to sell your services in EUR and in USD. In this case you will create at least 2 price lists per partner, one in EUR and another one in USD. You will then assign them both to your partners.
For every price list you can define a name, the currency, currency conversion, rounding and if the prices are fixed or if they can change according to the changes to the default price list. According to the most appropriate scenario for your business, you might want to choose a partner price list name that helps you remember how it is set up. The name of the partner price list will only be visible internally in Geek Divers.
When you choose a name for your new partner price list, please remember the following:
Partners that sell your services that belong to more than one of your locations will need at least one price list per location. It would be easier for you if something about the location is written in the price list name. E.g. the location abbreviation.
A partner price list can be assigned to more than one partner in case your B2B offer is the same.
A partner price list can be set up in a different currency.
A partner price list can have fixed prices or discounted prices according to the prices in the default price lists.
Here you can see a couple of examples of price list names:
T_USD-2020-discount20-VAT - from this name it’s easy to understand that the price list is in USD, it’s for the year 2020, it provides a 20% discount on the regular prices and it has an applied sales tax. The initial “T” identifies my Thailand location.
E_EUR-2020-discount15-noGST - the price list is in EUR, it’s valid for the year 2020, it provides a 15% discount on the regular prices, it doesn’t charge any sales tax and the prices will change according to the changes to the default price list. The initial “E” identifies my Egypt location.
S_GBP-2020-blocked-noVAT - the price list is in GBP, it’s valid for the year 2020, it has fixed prices (blocked) and there’s no applied sales tax. The initial “S” identifies my Spain location.
The above are just examples. Please feel free to use a system of your choice to pick the price list that you’re looking for just by reading the name.
Partner Price Lists are location-specific and they represent a copy of your customer price list (the one in menu Financials - Price List). Therefore, if you wish to create a partner price list for one of your locations, please go to that location using the menu at the top-right of the screen.
To create a new Partner Price list, click on the Add Price List button.
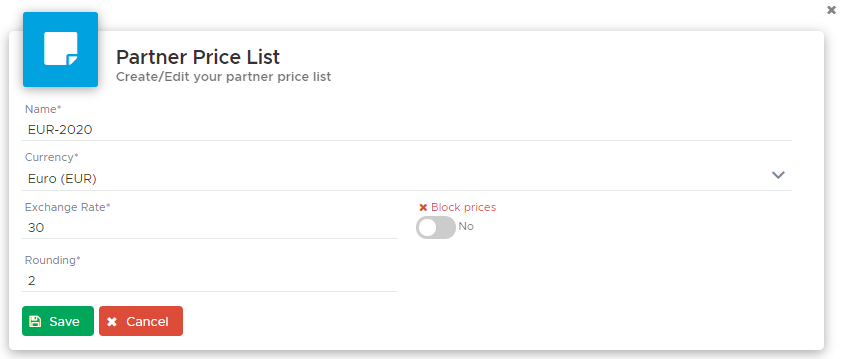
To save a new price list you need to at least type a name. The proposed currency will be your default currency: you can leave it or select a different one, if needed. If you’ve selected a different currency and if you’ve already set up the standard currency conversion between your default currency and the selected one in Settings - General Settings - Conversion Rates (see chapter Conversion Rates), the exchange rate and the rounding will be automatically written. You can change them, if needed. The changes made here in the partner price list will not affect your settings.
In the Rounding field you can choose how the conversion should be rounded.
Rounding 2 - in your Partner Price List you will see 2 decimal digits. E.g. $160.75
Rounding 1 - in your Partner Price List you will see only one decimal digit. E.g. $160.8
Rounding 0 - in your Partner Price List you will only see the units. E.g. $161
Rounding -1 - in your Partner Price List you will see units mathematically rounded to the nearest tens. E.g. $160
Rounding -2 - in your Partner Price List you will see units mathematically rounded to the nearest hundreds. E.g. $200.
Please consider that the mathematical rounding works as follows:
Digits from 1 to 4 will be subjected to a floor rounding. E.g.
160. E.g. 160.43. Digits from 5 to 9 will be subjected to a ceiling rounding. E.g.
161. E.g. 160.44.
The toggle “Block prices”, deactivated by default, means that every time you update your default customer price list, the partner price list will be automatically updated.
Leave it off if:
You offer a generic percentage discount on your current published rate. Whenever your prices change, the partner price list will be automatically updated to reflect the discount in percentage of your choice (you can define different discounts in percentage in the next step). E.g. 10% discount on all your courses, 20% discount on all your trips, 5% discount on your airport transfers. Whenever your retail prices change, the partner prices will change according to the discount in percentage that you’ve set.
Turn it on if:
You have a specific agreement with your partner, you have defined and set prices for every item in your price list and you want to make sure that no changes to the default price list (your published rates) could affect your partner price list. E.g. OWC is €300, AOW is €280, regardless of their prices in your Default Price List.
All the above can be modified after the creation of the price list if you choose to leave the toggle off. Please consider that once you activate the toggle to block the prices, this cannot be deactivated again and the currency, conversion rate and rounding cannot be changed anymore. This is to prevent an unwanted update to your partner price list in case of any changes to your customer prices. If you choose to turn the toggle on and block the prices in the partner price list you will however be allowed to change the price list name.
Click on button Save and you’ll see your new Partner Price List in a table together with your other partner price lists. To modify the content of the fields described above here click on button Edit (green button at the end of the row). To delete a partner price list click on the red trash bin button at the end of the row.
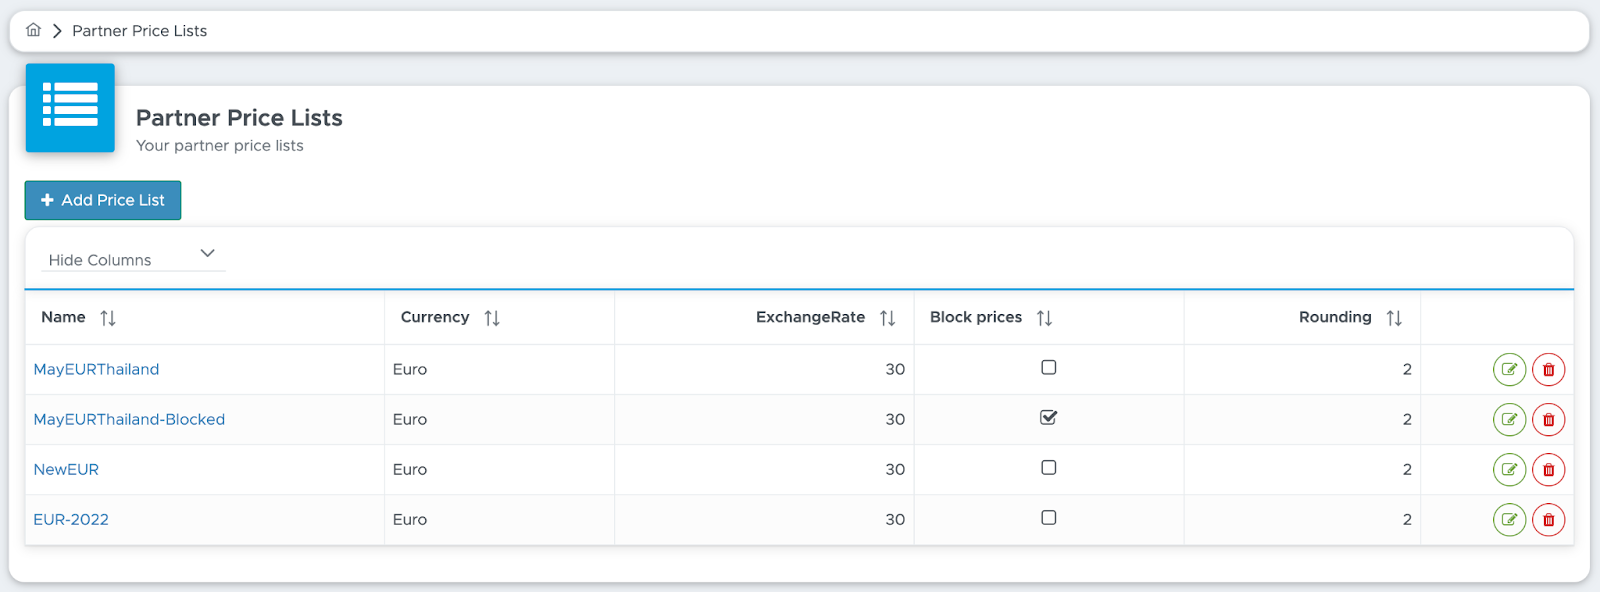
To view the content of the price list click on the price list name.
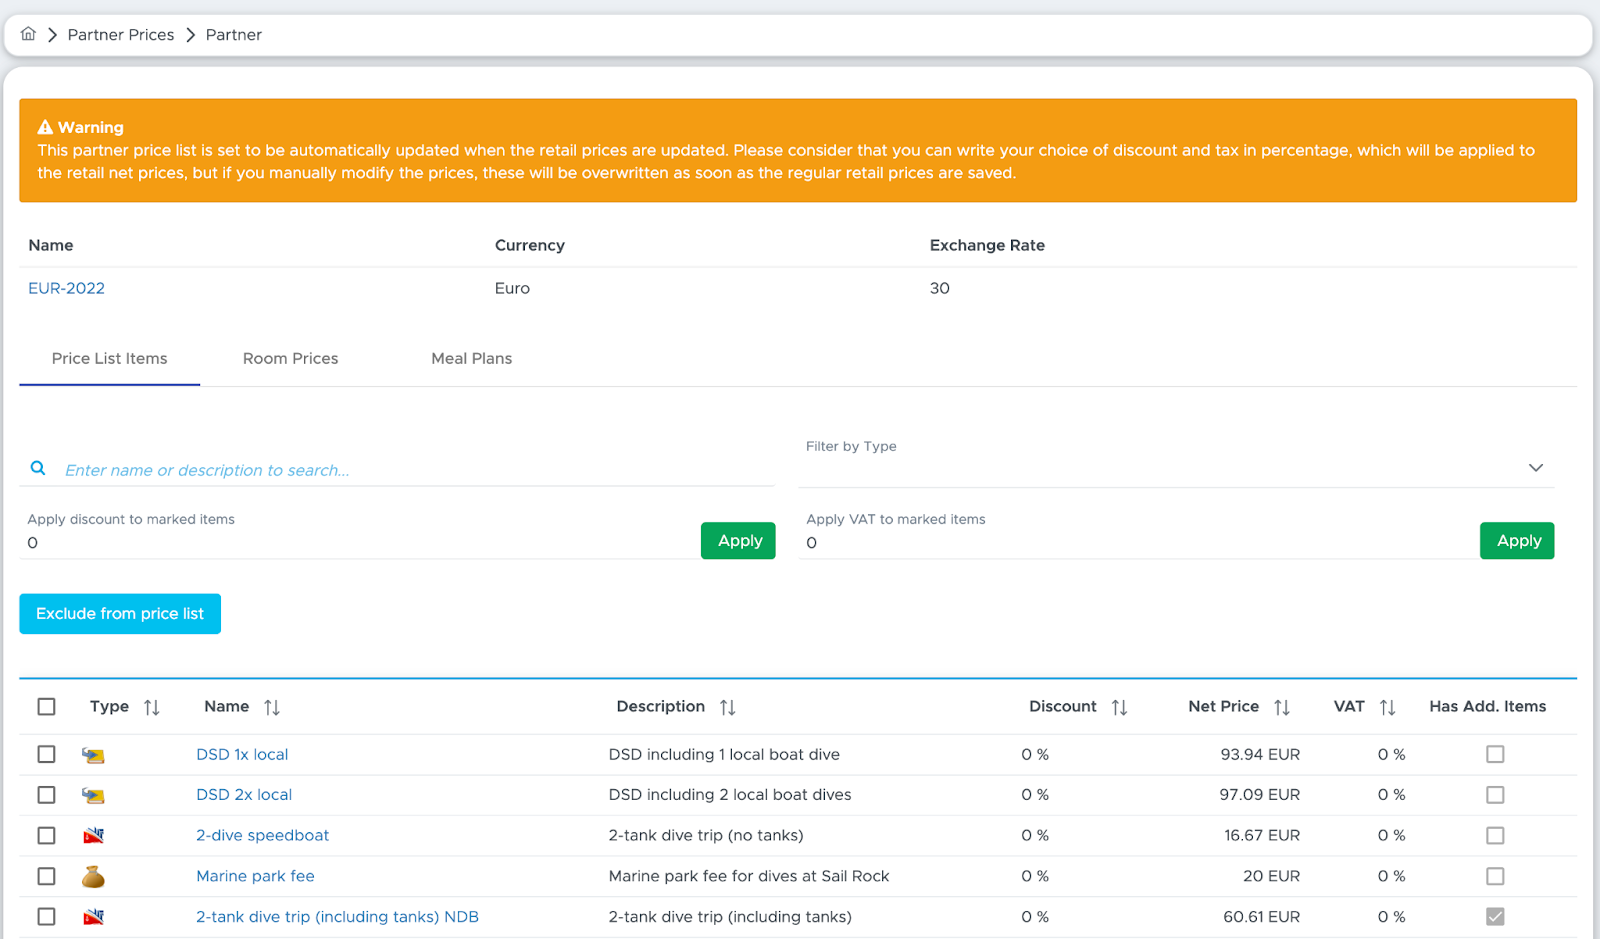
At the top of this page you will find the name, currency and exchange rate that you’ve chosen in the previous step.
At the bottom of this page you will find a table containing your customer price list converted into your partner’s currency. Initially the prices that you see in this table are the net prices (total price minus sales tax) in your default price list converted according to the exchange rate that you’ve chosen and the rounding of your choice.
Before defining a discount in percentage or typing the partner prices, please consider if it makes sense to list all the items that are currently in your Default Price list. It might be, for example, that you don’t need to list items with type Shop (retail items like a mask, a T-shirt or other) or type Food\&Drink in your partner price list. Please identify the price list items that you wish to exclude from your partner price list by ticking their checkboxes and clicking on button Exclude from Price List.
You can select them one by one or filter the price list by type and select the results or start typing the name of an item in the search field and select one or more of the search results.
The excluded price list items won’t disappear, but they will be listed in the table at the bottom of this page.

In case you’ve made a mistake and excluded the wrong item, click on the blue button to include the item once again.
Excluded price list items won’t be available for selection in partner quotes and invoices.
Toggle “Block prices” set to off
If you’ve chosen to leave the Block prices toggle off, the most sensible option to define your partner prices is to apply a discount in percentage and the sales tax (if appropriate).
To apply a discount in percentage to one or more items, use field Search Item or Filter by Type to view the list of items that you wish to modify.
E.g. select Trip in Filter by Type to view the list of trips in your price list.
Select all the items in the list (or only the ones of your choice), write the discount in percentage and click on Apply.
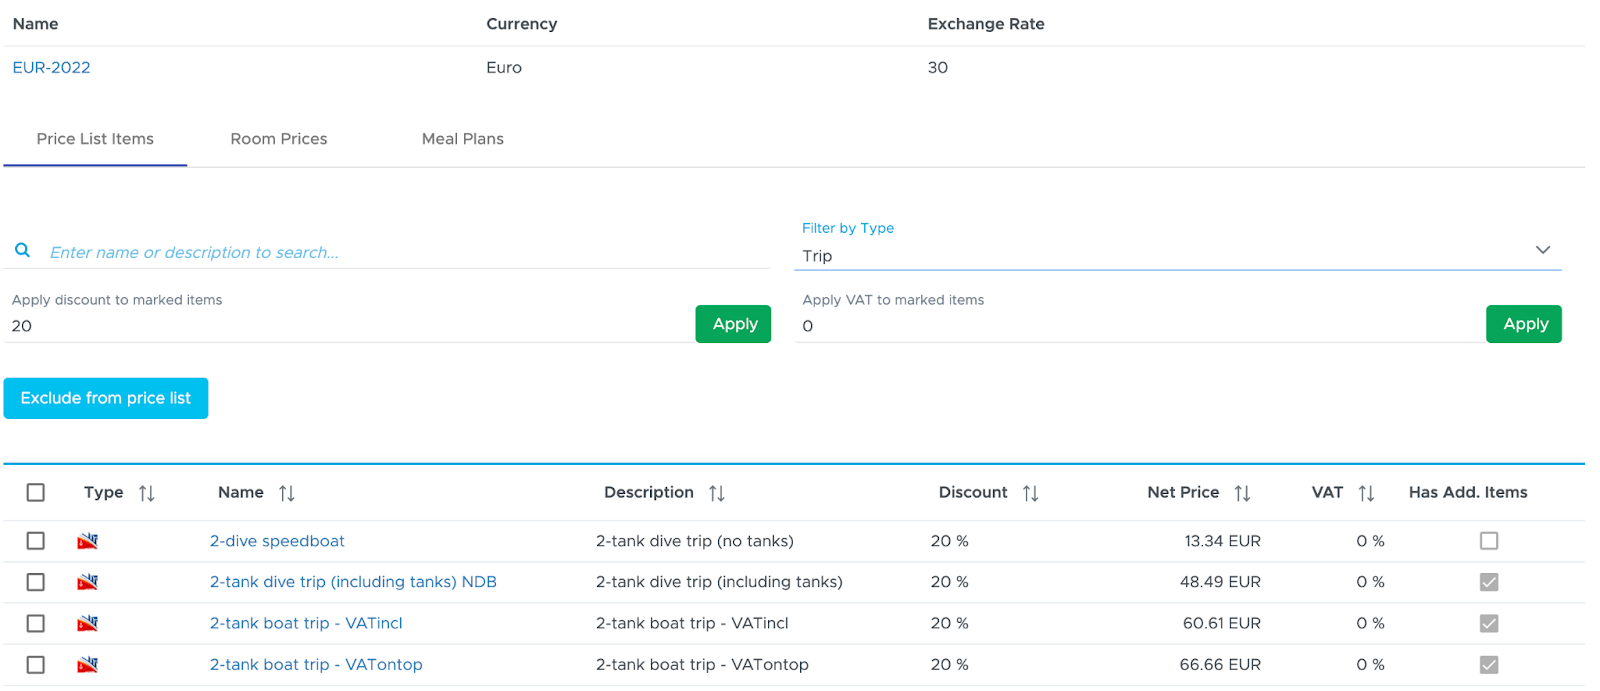
After applying the discount to the selected items, you will see your chosen discount in percentage in column Discount. If you don’t like the prices that you see in column New Price, you can click on a price list item and manually modify the price.
Example: after applying a discount of 10%, my DSD price is 87.38 EUR.
I clicked on this item name and manually changed the net partner price to 86 EUR.
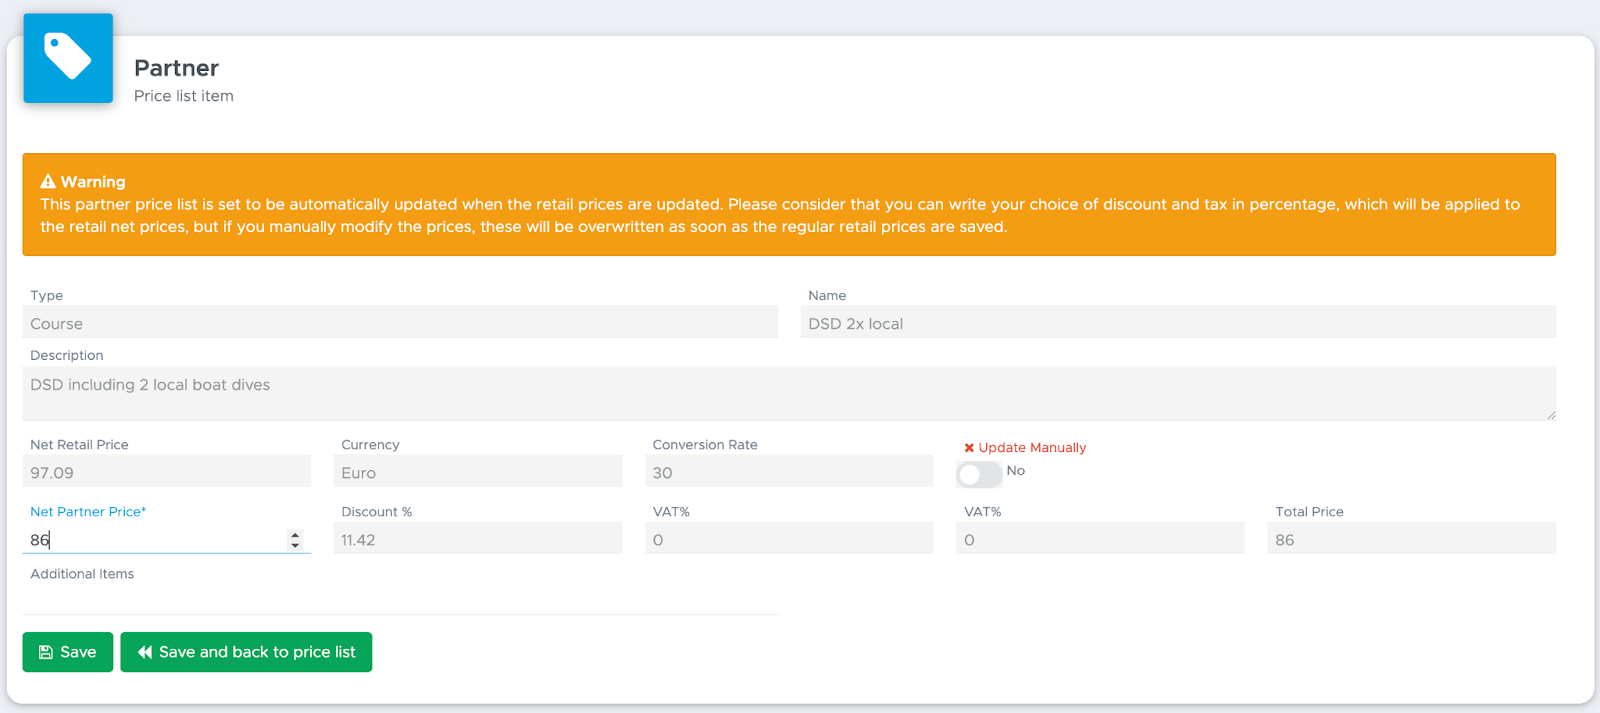
The discount in % for this item was automatically recalculated to 11.42% and it is displayed in the main table as well.

Please consider that there’s no guarantee that the DSD price will remain 86 EUR in this price list: in case the price of this item is modified in the Default Price list, a discount of 11.42% will be applied on the new net retail price. If your aim is to set and keep fixed prices for your partner price list, then please follow the following paragraph Toggle “Block prices” set to on.
Repeat the above steps to define your partner price list.
Similarly to the application of a discount in percentage, you can apply your sales tax (if appropriate), by selecting all or some items, write your sales tax in field “Apply VAT/GST to marked items” and click on button Apply.
After applying the sales tax, in column VAT/GST you will see the tax percentage. The final prices, including your sales tax, will not be visible in the price list table, but only in partner quotes and invoices.
In case of mistakes, please select the items with the wrong discount and re-apply a discount in percentage of 0% to go back to the initial net price. Similarly, in case of wrongly applied sales tax, select the items with the wrong sales tax and re-apply a tax of 0% to go back to the initial values.
Toggle “Block prices” set to on
If you’ve chosen to turn on the toggle Block prices, you can not only define a discount in percentage for every item in your partner price list, but you can also click on every single item to manually refine the prices and these prices will not be changed in case your Default Price List is updated. E.g. if after the application of a discount you see a price of €54.87 you can click on this item and manually change this net price to €55.
It is recommended to first define both discounts in percentage and sales tax (if appropriate) and then manually refine the single item prices.
To manually change an item price click on a price list item. You will be redirected to the price list item details:
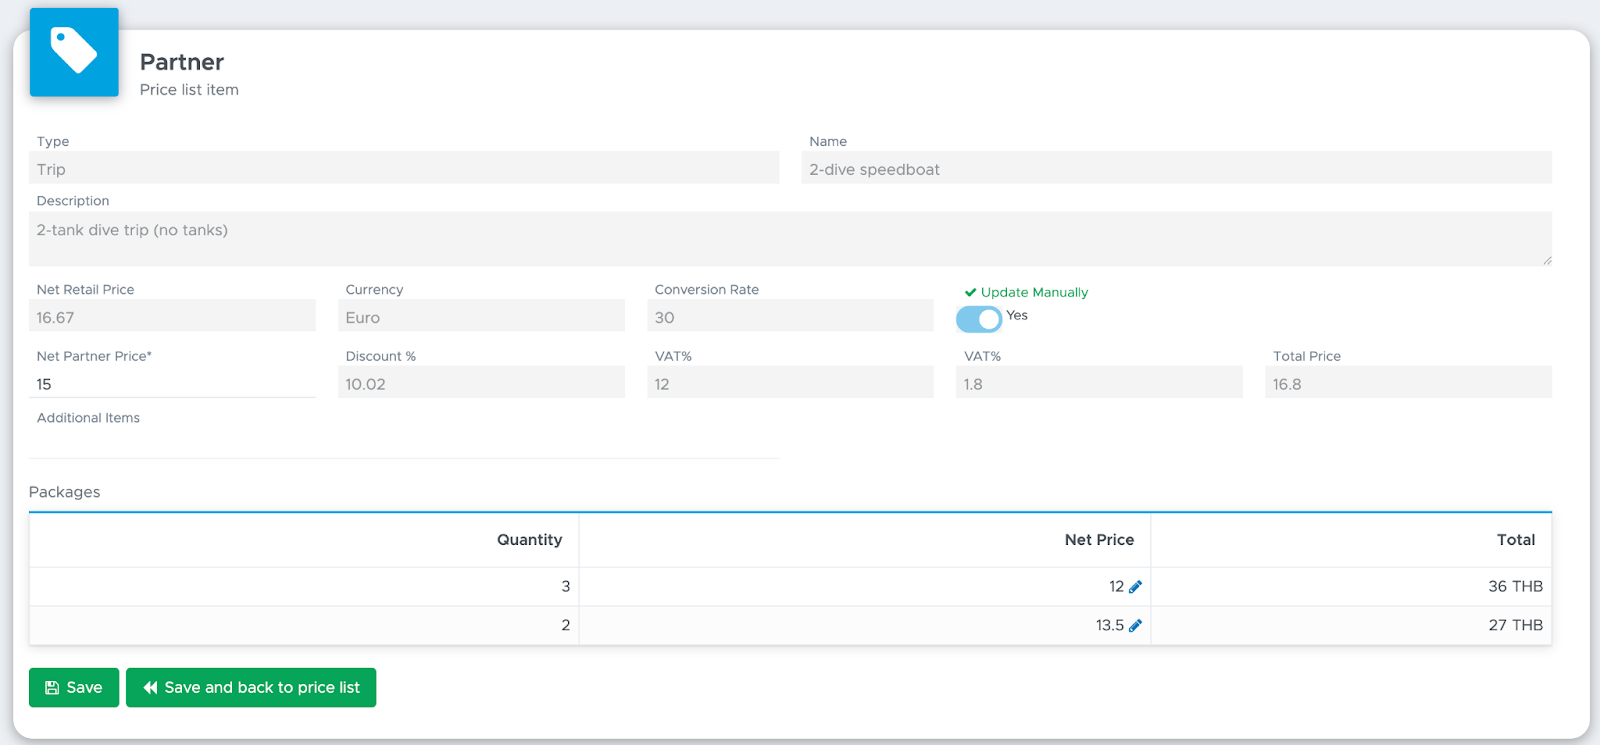
Modify the value in Net Partner Price and click on Save button.
If you wish to change the price for your item packages, you can do so at the bottom of this page in column Net Price. Click on the pencil icon and modify the price.
Assign a Partner Price List to a Partner
Now your partner price list is ready to be assigned to one or more of your partners.
To assign a price list to a partner go to Current Partners and select the partner of your choice. Click on tab Commissions / Price List and scroll to the bottom.

In the selection box select one or more price lists and click on button Update.
Repeat these steps for each current partner.
In case you need to modify the content of a partner price list, you don’t need to assign it to a partner once again.
5.4.1Partner Price Lists - Room Prices and Meal Plans
In a partner price list you will notice two additional tabs: Room Prices and Meal Plans.
In these two tabs you can define the prices, discounts and sales tax related to the Accommodation Module. If you choose not to use the Accommodation Module, these two tabs won’t be available.
Before you define your partner prices for rooms and meal plans you need to set up the Accommodation Module. Find more info in chapter Accommodation.
Room Prices
In tab Room Prices you will see your room types, their prices and package prices. As for your partner price list, these prices are originally the net prices of your published rates converted to the currency of the price list.
At the top of the screen you will find a field to define the sales tax. If this needs to be applied to your partner prices, please write a value representing the percentage to apply.
Below this sales tax field you will find all your room types and prices definition as you’ve set them up in the Accommodation Module. In every block you will see the Net Retail Price converted into the Partner Price List currency.
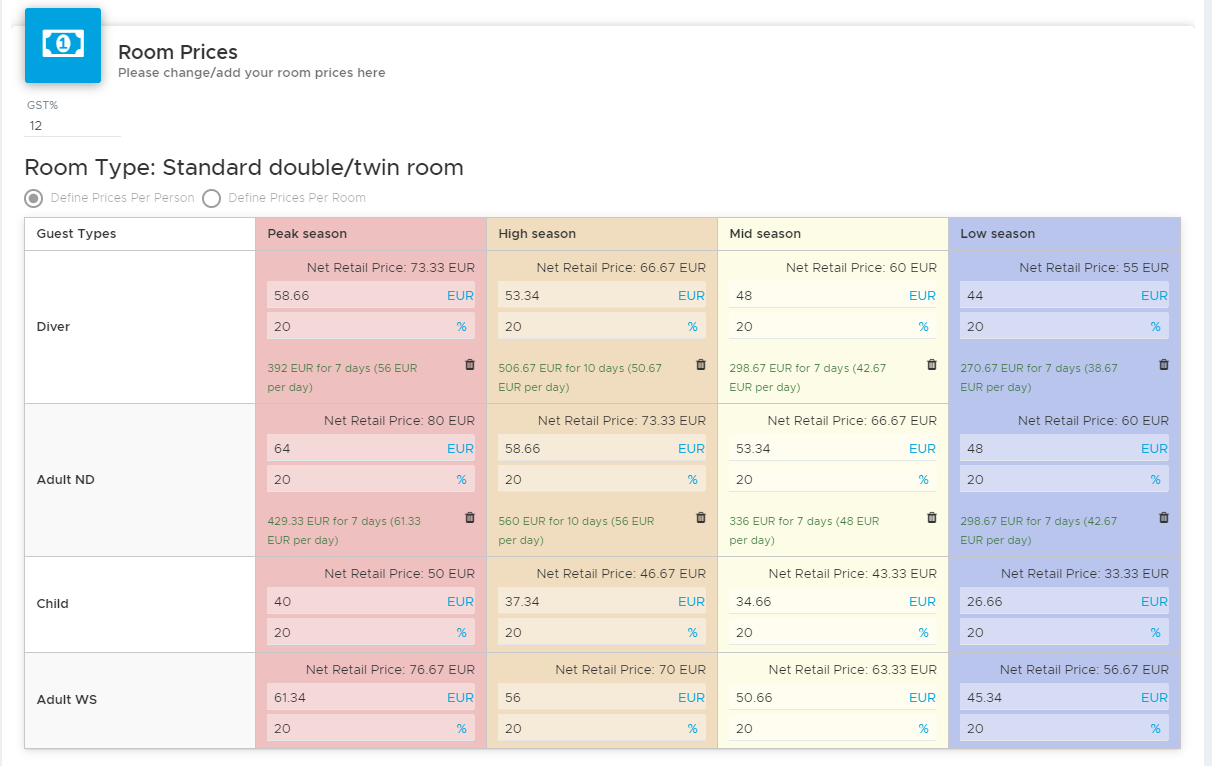
To modify these prices, please consider the same principle applied to the Partner Price List:
Toggle “Block prices” set to off - In this case it is recommended only to apply a discount in percentage.
Toggle “Block prices” set to on - In this case you can choose to apply a discount in percentage or refine the prices manually.
According to the above, click on the fields containing a percentage symbol to apply a discount in percentage or directly on the price to modify the amount. The TAB key on your keyboard will help you move from one field to the next.
If you apply a discount in percentage, the same discount will be applied to the room packages. If you choose not to offer these packages to your partners, click on the trash bin icon to remove them. However, please consider that the same principle of blocking prices applies to the deletion of a package: if the toggle “Block prices” is off and you delete a room package price, any change to the Room Prices will update the Partner Price List and the room package price will be added once again. If the toggle “Block prices” is on, not only can you delete a room package price, but you can also modify it (pencil icon) and your choice will stay.
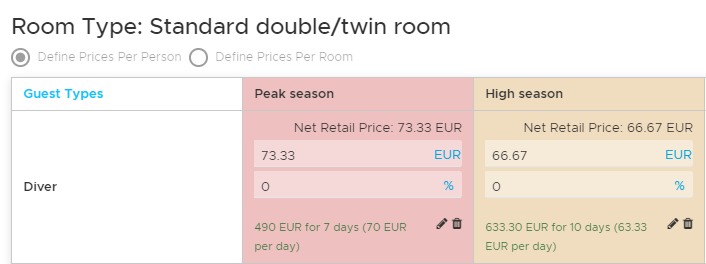
Don’t forget to click on the button Save at the bottom of the page to save your changes.
Meal Plans
In tab Meal Plans you will find the same meal plans that you’ve set up in the Accommodation Module. As for the partner price list, the prices that you initially see represent the converted prices in the currency of the Partner Price List.
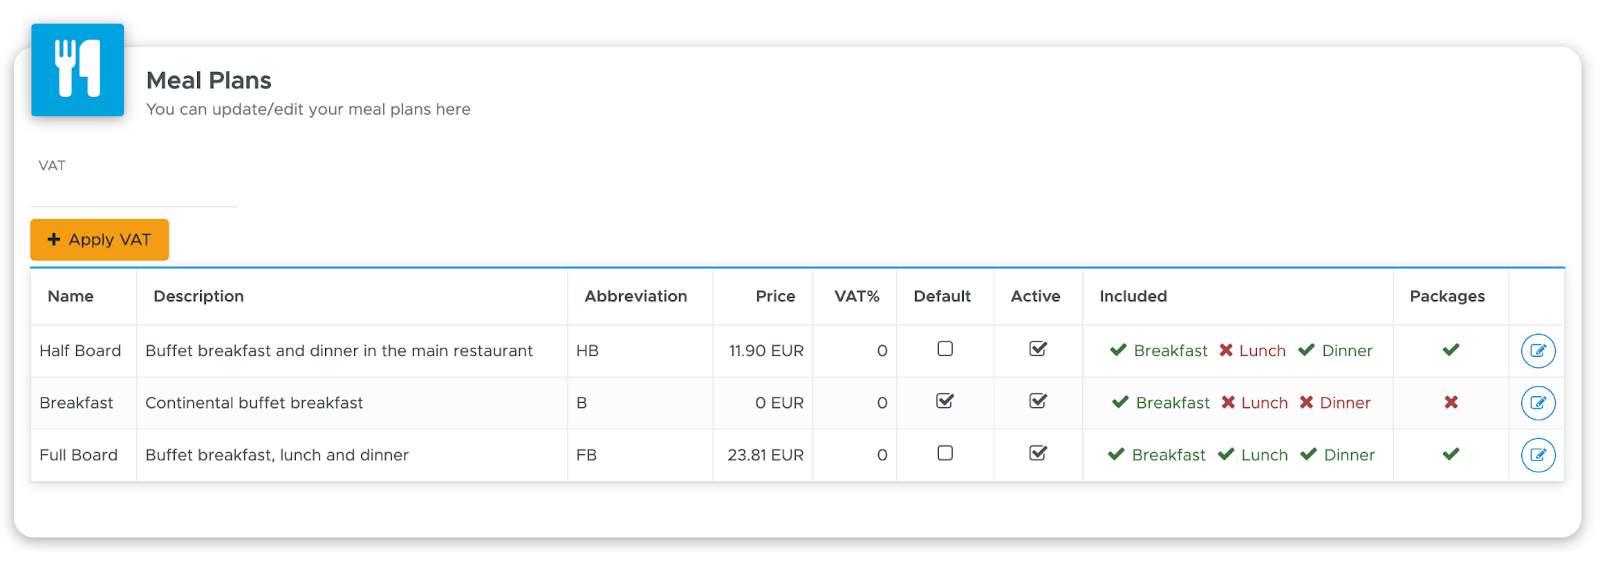
To modify the prices of a meal plan, click on the blue edit icon in the last column. A sidebar will open, showing the prices (converted to the currency of the Partner Price List) and packages that you’ve defined in Room Settings.
According to the same principle described above, if toggle Block prices is off, it is recommended to define a discount in percentage, if toggle Block prices is on, you can choose to set a discount in percentage or define specific prices.
The same discount in percentage defined for the daily rate, will be applied to the existing packages. Click on the button Save to save your changes.
Above the meal plans table you can define the sales tax, if applicable. Please write a value and click on the button Apply VAT/GST. All the meal plans will be updated and you will see this value in column Tax%.
Meal plans cannot be deleted in the Partner Price List.
5.5 Partner Invoices
In menu Partners you will find three new menu items: Open Invoices, Closed Invoices and Archived Invoices.
In these pages you will find only the invoices that were generated through partner price lists. The invoices/credit notes related to agent commissions have not been changed, compared to the previous Geek Divers versions, and you will find them in menu Financial - Agent Invoices (previously called Financial - Partners).
Starting from version 2.0, Partner invoices can be automatically generated once a partner confirms one or more quotes that you’ve sent them. Please read chapter Partner Quote to find out how to create a partner quote.
5.5.1 Open Invoices
Click on Open Invoices to view the list of currently open partner invoices.

In this table you will find the summary of the invoice information. The Due Date is the date that you initially set when you chose to create a new invoice (more info in chapter Confirm a Partner Quote). This date can be changed within the invoice. If the due date is today or in the past, it will be shown in red in this table.
To view the content of an invoice, click on open.
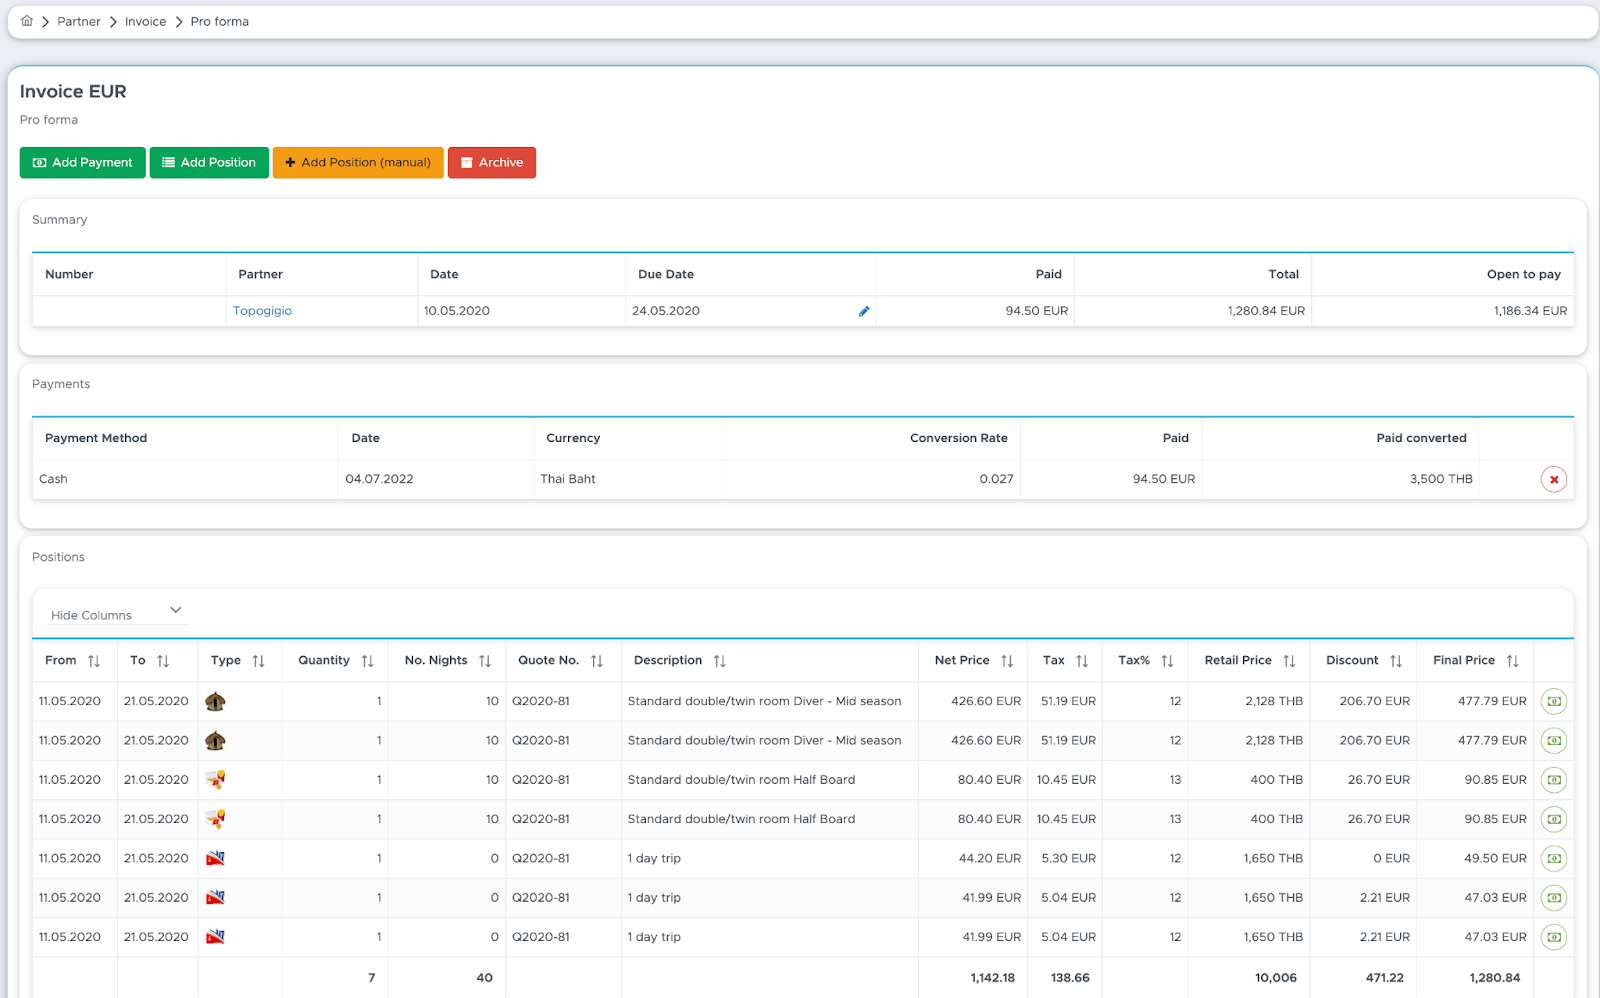
An open invoice doesn’t have an invoice number. The invoice number will be automatically assigned to the invoice when you manually close it, after recording one or more payments.
A partner invoice consists of 3 sections: Summary, Payments and Positions.
In the Summary you will find all the most important information, such as the partner name, creation date, due date, total amount, amount paid and open balance.
In Payments you will find a list of all the recorded payments for this invoice. This list might be empty if no payment has been recorded yet.
In Positions you will find the list of items that your partner agreed to buy. If a quote number is written in column Quote no., this means that the position was automatically created when the partner quote was confirmed.
To add positions to a partner invoice you can confirm a partner quote (see chapter Confirm a Partner Quote) or click on button Add Position at the top of the page.
👀 Important!
Please consider that any position added directly to the Partner invoice will not be considered as a voucher item once the customer checks-in. To make sure that the positions are considered as voucher items, these need to be part of a confirmed quote.
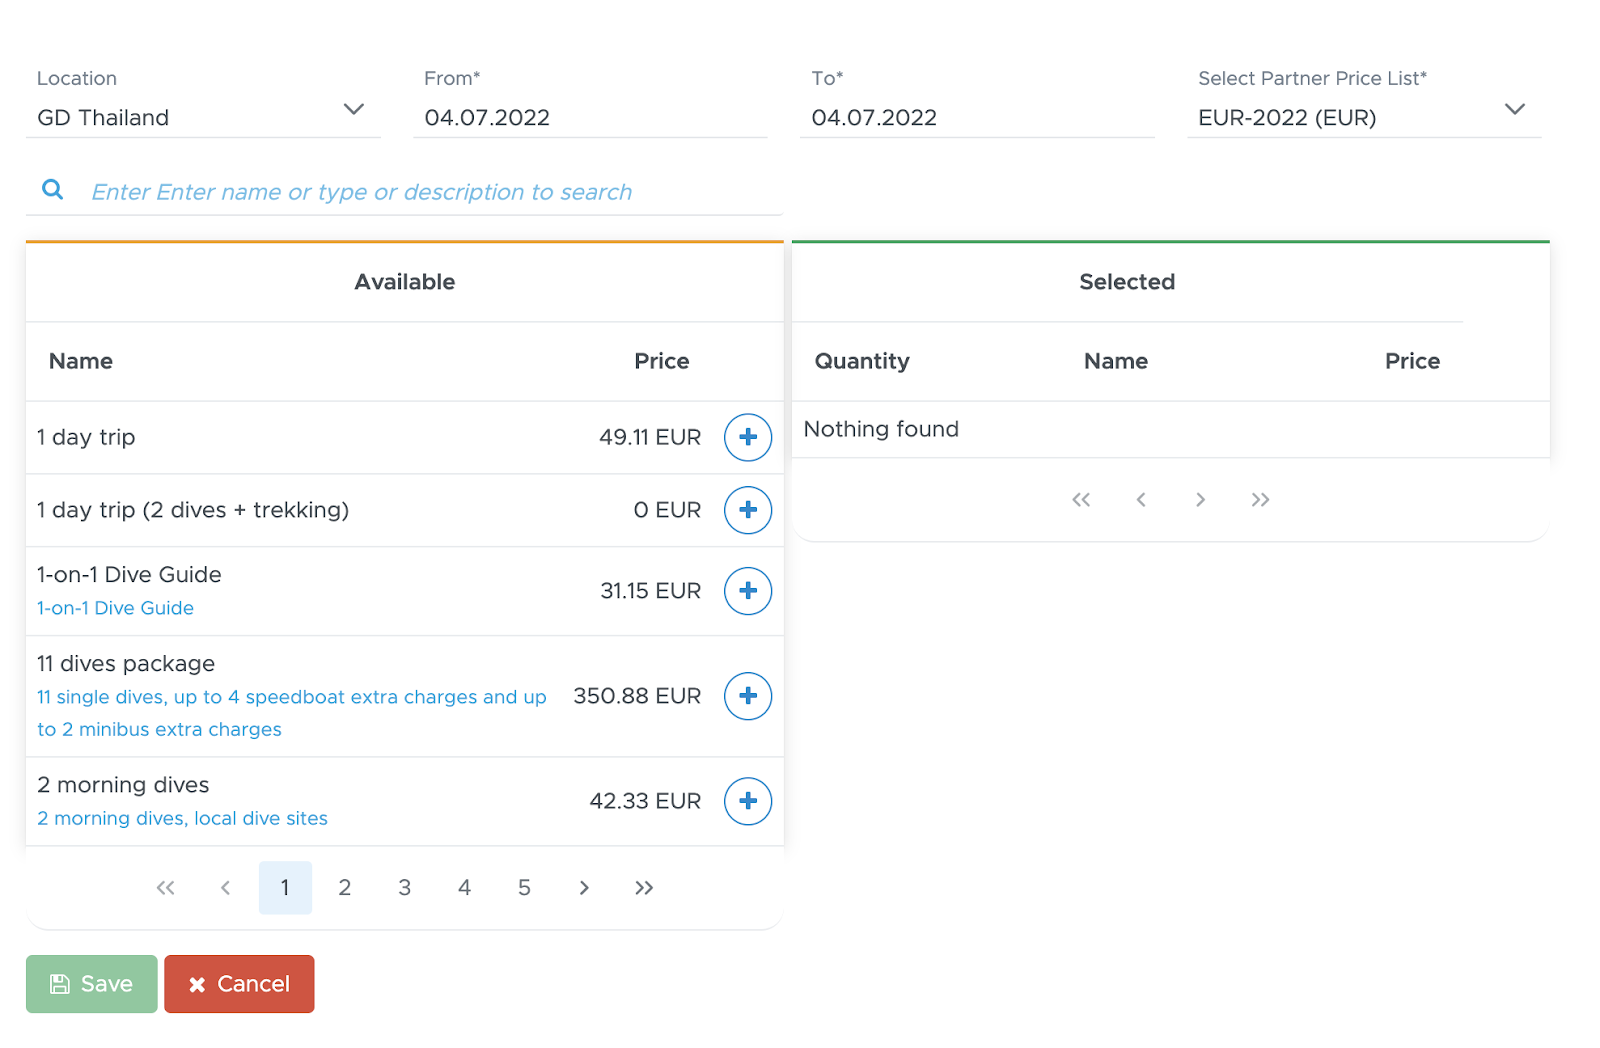
After clicking the button Add Position you will see a sidebar. Select the location (if needed), the dates (From and To) and the partner price list that you wish to use (if you’ve assigned more than one to your partner). Please consider that only the partner price lists with the same currency of the invoice will be available for selection.
Search for a price list item or use the paging at the bottom of the list to find the price list item of your choice and click on plus button. You will see the selected items on the right-hand side of the sidebar here you can update the quantity if necessary.
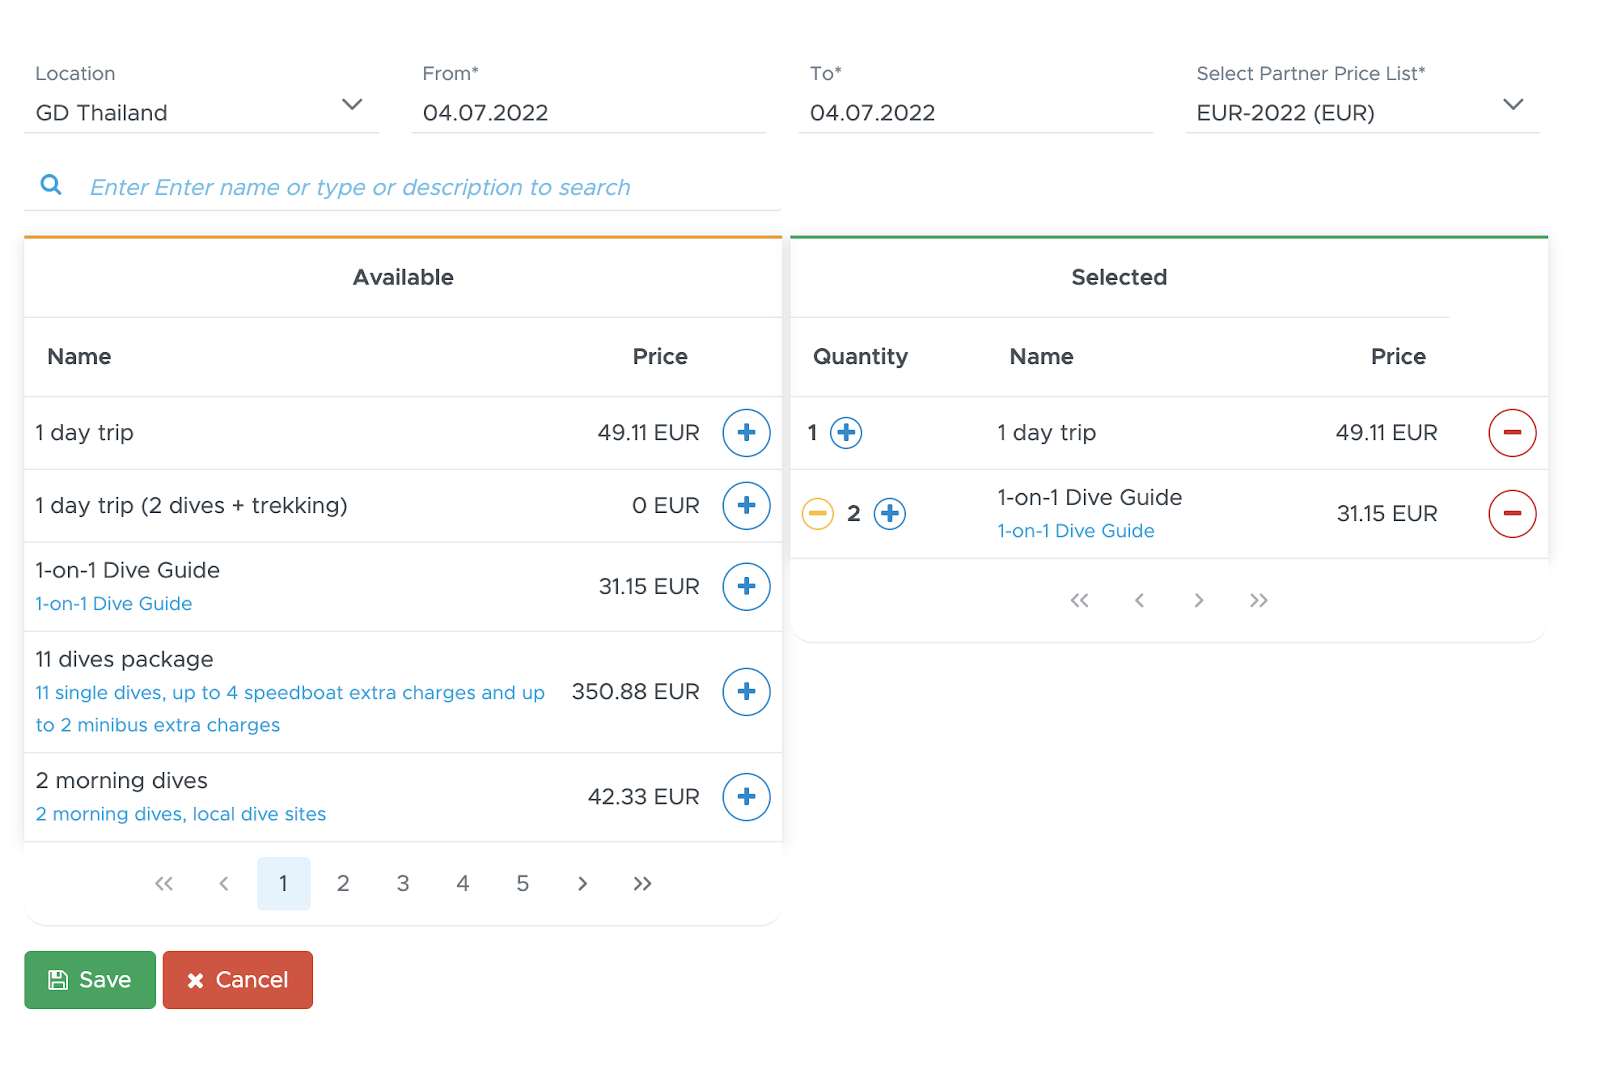
Once you’re satisfied with your selection, scroll down and click on the Save button. The sidebar will be automatically closed and your selected items added to the positions in the partner invoice. In case of mistakes, you can click on the red icon at the end of a position to delete it.
If you wish to add something that is not part of your price list, you can do so by clicking on button Add Position ( manual).

Modify the date (if needed), type a description, choose a type, define the quantity and unit price. If needed, you can add a sales tax in percentage. The sales tax is always applied on top of the net price for partner invoices.
Click on the button Save to add this position to the invoice.
👀 Important!
Please consider that every position added manually to a partner invoice, both with button Add Position and Add Position (manual), won’t be considered in a customer voucher and it won’t update a quote.
You can record a payment to a partner invoice by clicking on button Add Payment.

Select the payment date, the payment method and type the amount received either in your default currency or in the invoice currency. Write the correct currency conversion if you record the payment in the invoice currency or 1 if you record it in your location's default currency. Click on the save button to confirm the payment. The open balance will be recalculated and the payment will be automatically recorded in your cash flow.
At any time you can generate a pdf of the invoice by clicking on button Print at the bottom of this page.
You can close the invoice at any time by clicking on button Close. However, it is recommended to close it after recording a full payment (Open to pay = 0).
5.5.2 Closed Invoices
Once you click on the button Close Invoice at the bottom of an open partner invoice, a pop-up message will ask you to confirm your choice and if you do, the invoice will be permanently closed.
Closed invoices will disappear from the list of Open Invoices and will be available in menu Partners - Closed Invoices. Closed Invoices are no longer editable, but they can be opened to be viewed and/or printed. Once you manually close an invoice, Geek Divers will assign an invoice number to it.

In the paragraph Confirm a Partner Quote you will find some suggestions on how to manually modify a partner invoice in case you need to archive a confirmed partner quote and the content of the quote is part of a closed partner invoice. Both in page Open Invoices and Closed Invoices, you can search by quote number if you need to identify the partner invoice that contains the quote that you wish to archive. If the partner quote is included in an open partner invoice, Geek Divers will automatically cancel the quote positions from the partner invoice (red strike-through). If the partner quote is included in a closed partner invoice, if you wish to refund your partner for the unused services, you might need to identify the closed partner invoice number and the quote positions that Geek Divers cannot automatically cancel. Searching by quote number in Closed Invoices will show you the partner closed invoice that includes the quote that you wish to archive (or that you’ve already archived).
5.5.3 Archived Invoices
You can archive a partner invoice if the following conditions are met:
The invoice is still open.
The invoice has no payment positions or the payment positions are deleted.
You will find button Archive at the top of the partner invoice and you can successfully archive a partner invoice only if the above conditions are met.
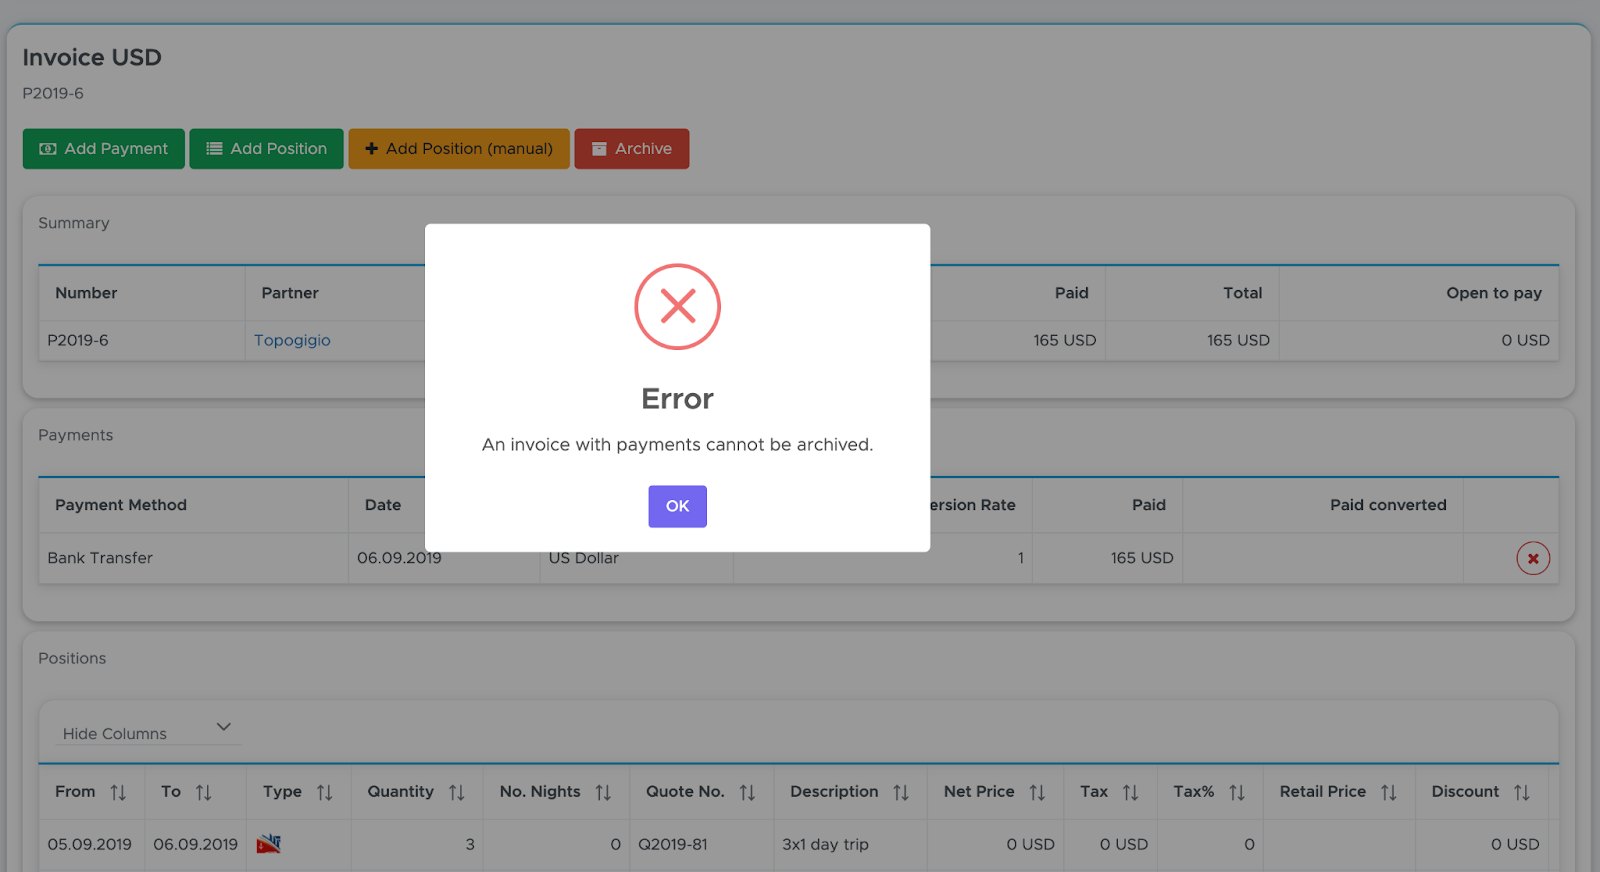
An archived invoice represents either a mistake or a peculiar situation. E.g. The partner has requested and confirmed one or more quotes, but hasn’t paid your invoice or has become unreliable. If you know that you will never receive a payment for this invoice and you’re not willing to close it, archiving it might be a good choice. Please remember that as long as the invoice is still open, it can be considered a pro forma invoice, listing the correct content, but without an official date or invoice number. When you close an invoice, Geek Divers will assign a progressive number to it and therefore it becomes an official accounting document.
You will find your archived invoices in menu Partners - Archived Invoices.
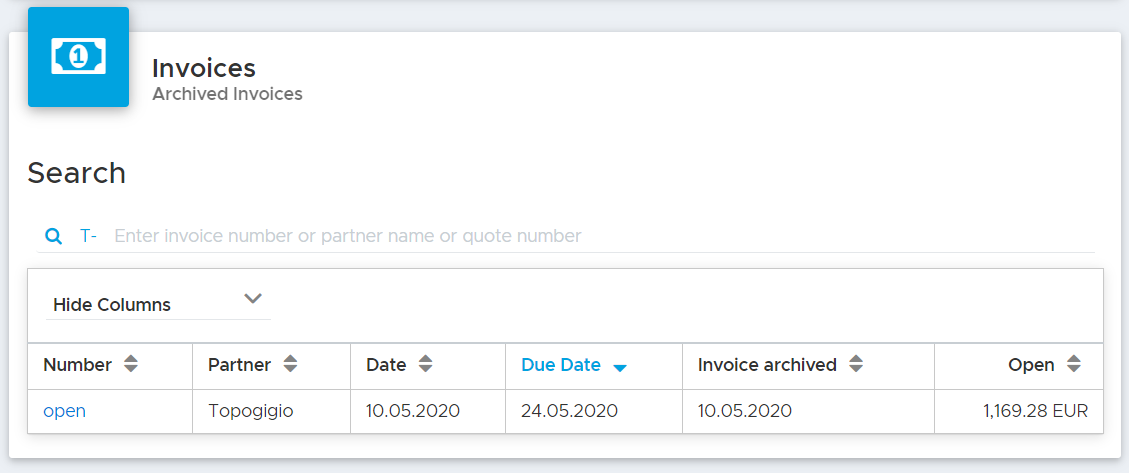
In column Number you will see the word “open”. This allows you to view the content of an archived invoice, but you won’t be able to edit it or close it.
6. Equipment
In this section you can list all your rental equipment, your boats/cars/vans and safety equipment. During the initial setup of Geek Divers it is important that you enter at least your Transportation as this will be used to set up an Activity type Trip.
Within menu Equipment you will see the following sub-menus: New Equipment, All Equipment and Equipment Calendar.
6.1 New Equipment
In the menu on the left, click on Equipment and New Equipment.
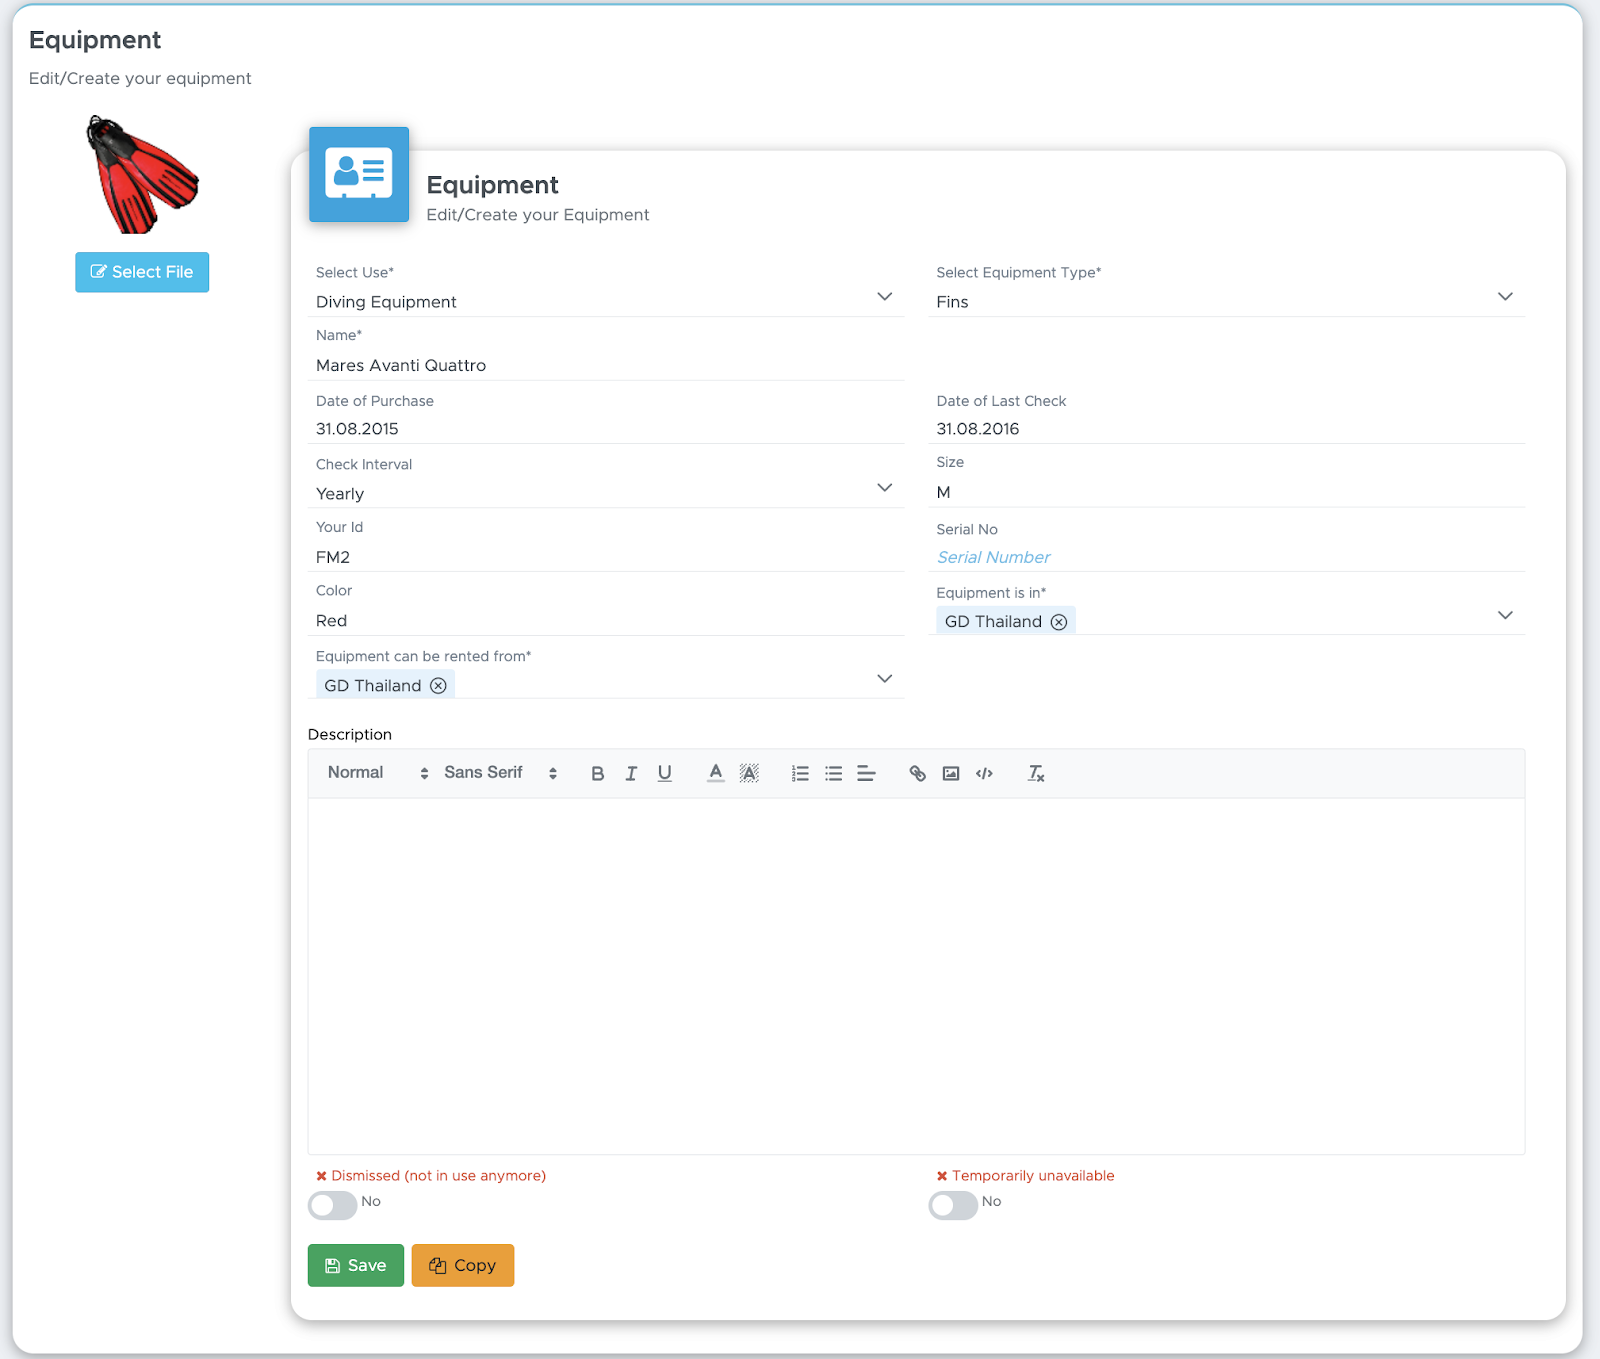
Select the use and the equipment type from the drop-down menus, type a name, enter the purchase date and the date of last check. Define the period between checks in the Check Interval drop-down menu.
Write a size (if appropriate), type your internal ID, the serial number (if appropriate) and the color.
In the text box at the bottom you can add any kind of comment or description about this piece of equipment, including the latest check report.
At the bottom of this page you will also find a Dismissed checkbox that you can tick if you decide to dismiss this piece of equipment. You will still see it in the system, but it won’t be available to be assigned to a customer. The ‘Temporarily unavailable’ is for your convenience, in case a piece of equipment is being serviced and not available for a few days.
If you wish, you can add a picture by clicking on the Change Picture button.
Once you’re ready you can scroll down and click on button Save.
6.2 Copy Equipment
At the bottom of the equipment page, next to the button Save, you will see a Copy button. You can copy this piece of equipment and change any of the information. E.g. size, internal ID and serial number. This way you only need to click on New Equipment to create one BCD, one pair of fins, one tank...etc. If your rental BCDs are all the same, you only need to create one and copy it several times (changing size and internal ID).
You can view all your rental equipment by clicking on Equipment and All Equipment.

To view more details or to modify the equipment data, click on a name (in blue) and you will be redirected to the equipment details. Don’t forget to click on the Update button if you make any changes!
6.3 Transportation
In the menu on the left, click on Equipment and New Equipment.
Select Transportation from the Select Use menu and choose a type from the Select Equipment Type menu.
Enter a Name and Capacity, as well as the Date of Purchase, Date of Last Check, the Check Interval, the Tank capacity ( if appropriate), your internal ID, the Serial No. and color. In the text field below you can enter any note. You can also change the predefined picture if you wish.
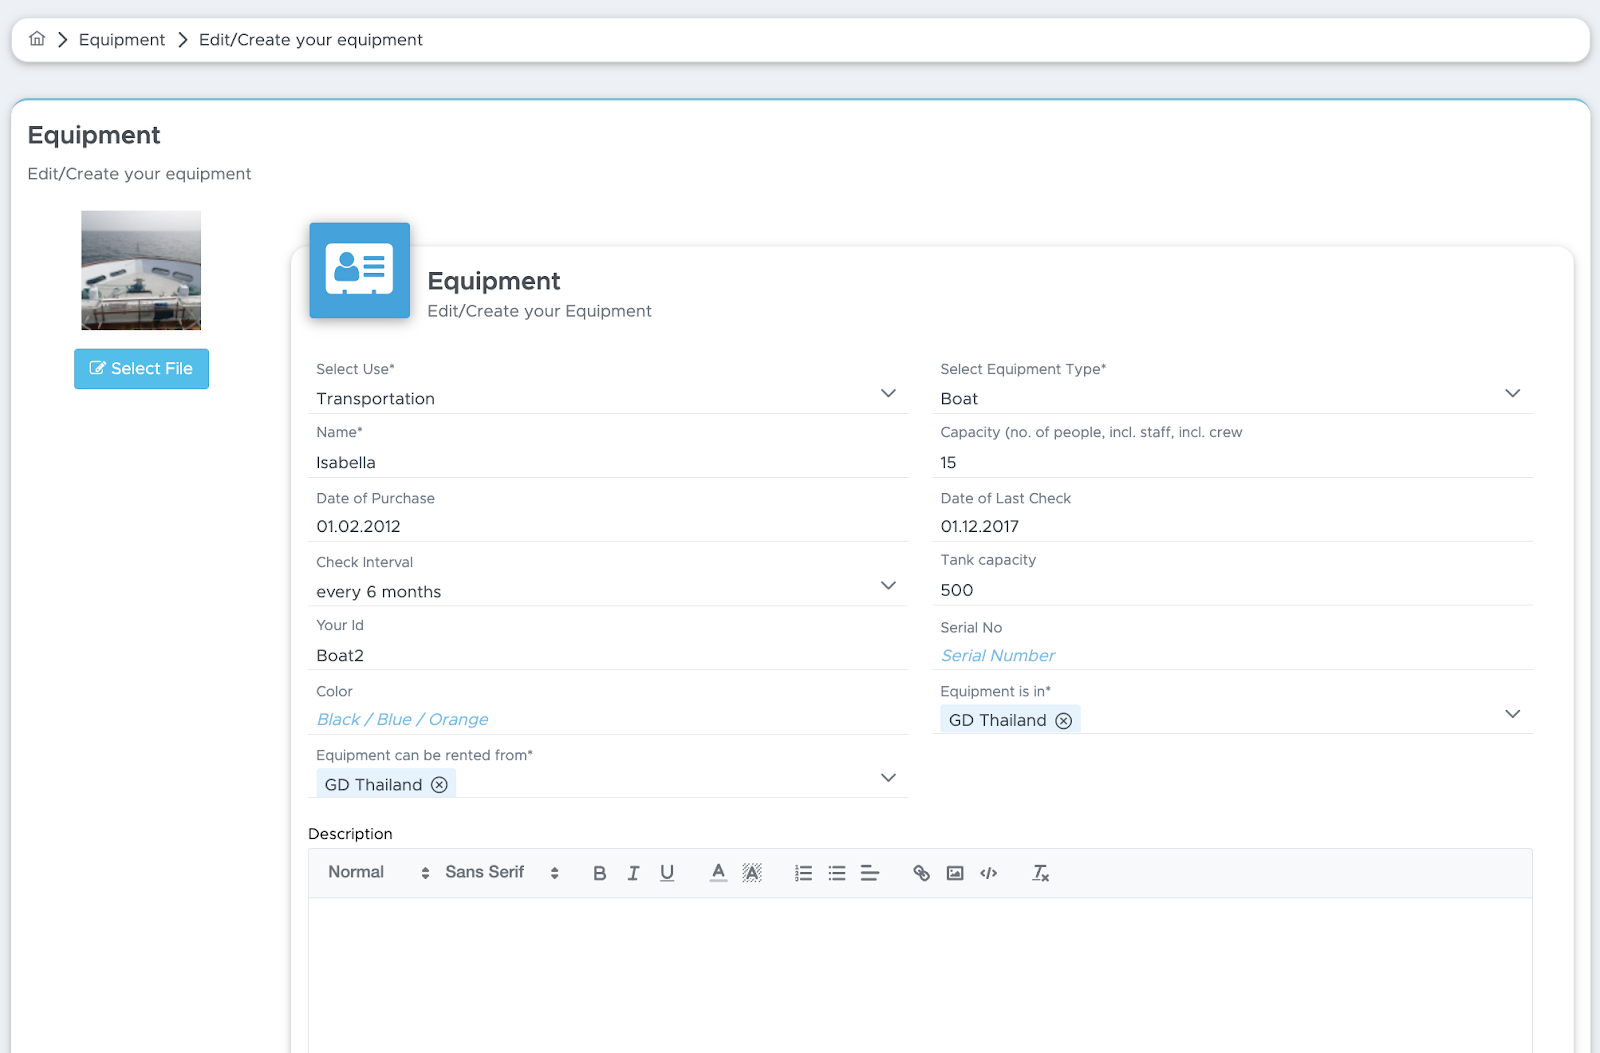
Once you’re ready you can scroll down and click on the Save button.
6.4 All Equipment
Click on Equipment - All Equipment to view the complete list of your equipment. Starting from version 1.0.6 this page will show a table containing all your equipment.
Starting from version 2.0 you will find all your equipment in all your locations. A column “Is in” will show you where the piece of equipment is. In column Name you will find the equipment name in blue and clickable if you’re currently in the same location as the equipment. If you wish to view or edit a piece of equipment in a different location, you will need to switch to menu All Equipment of that location.
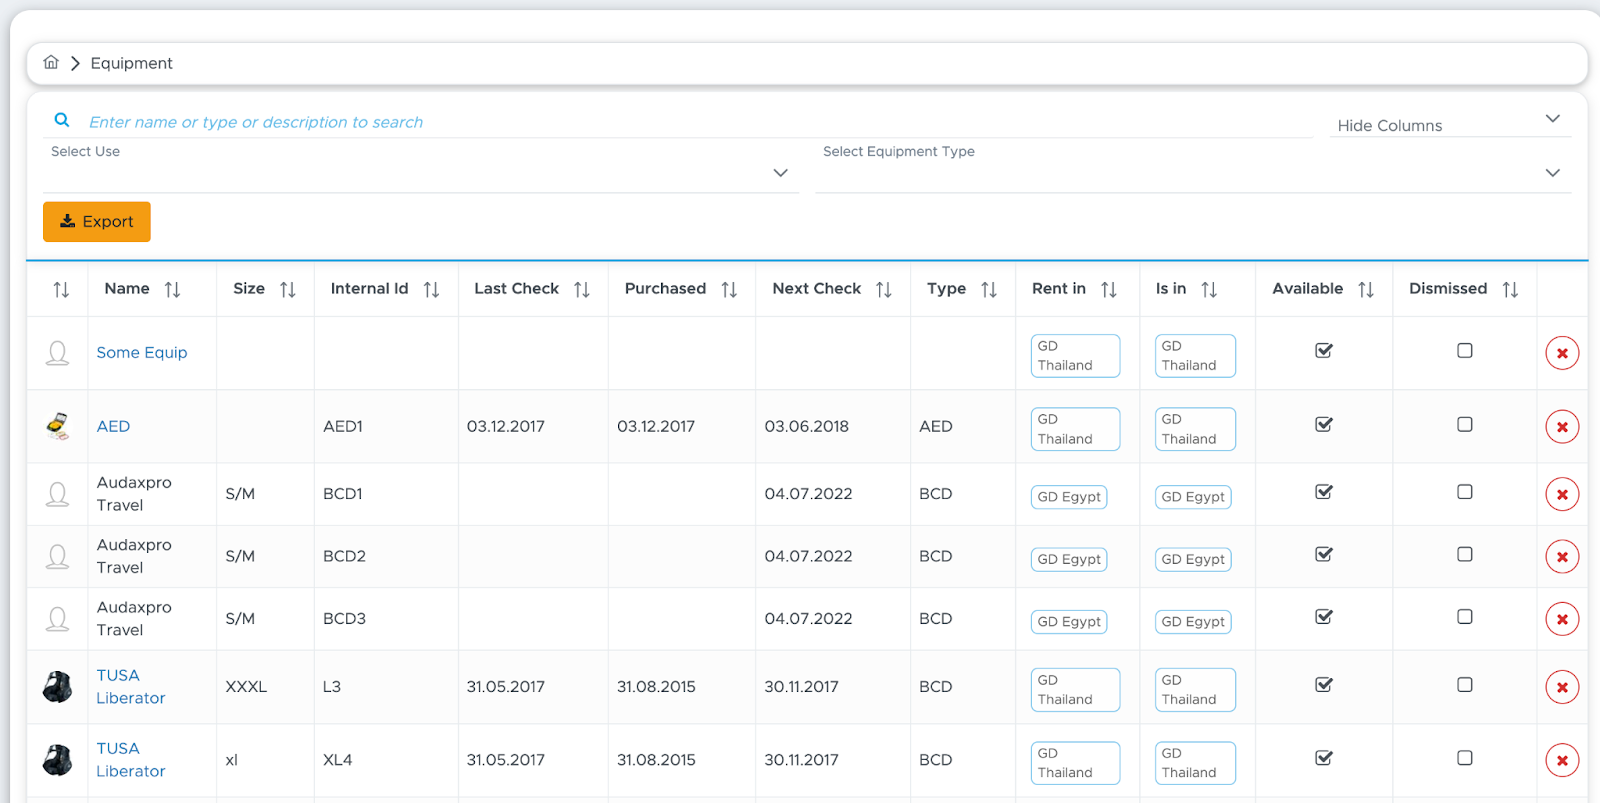
At the top of this page you can either search for a specific piece of equipment or use the filters “Select Use” and “Select Equipment-Type. You can also click on the names of the columns to sort them.
Once you are satisfied with the content of this list and how it is sorted, you can scroll down and click on button Export.
6.5 Equipment Calendar
Starting from version 1.0.6 you can choose to assign the equipment to the customer for the whole stay (from check-in date to check-out date) or just for the duration of a trip. You can assign the equipment for the whole stay in the customer’s tab Equipment (more on this in chapter Equipment) or for the duration of a trip in the Trip List or in your Custom Made Trip List (more on this in chapter Reports/Summary).
Either way you will see if a piece of equipment is available or busy in the new Equipment Calendar.
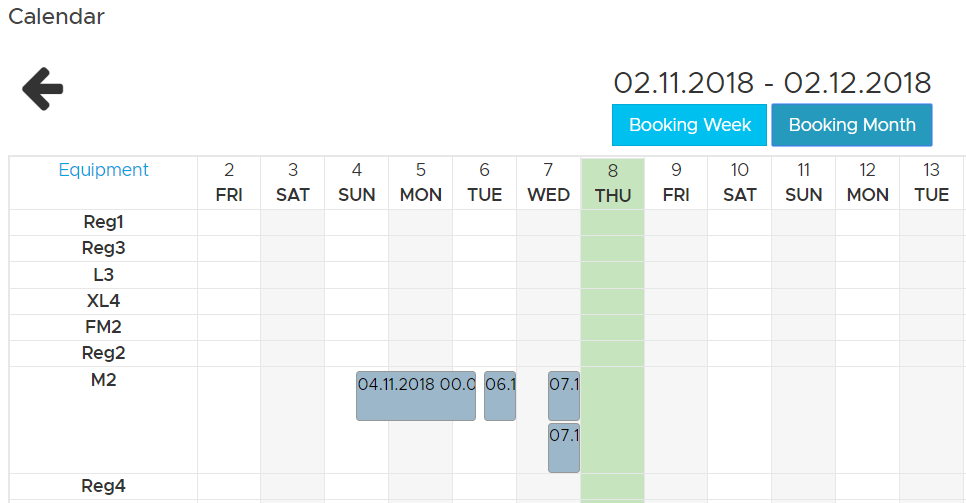
If you move your mouse over a block in the calendar a tooltip will show you the name of the customer whom the equipment is assigned to for a specific interval of time. You can choose to view the equipment calendar by week or by month using buttons “Booking Week” and “Booking Month”.
If you click on a block in the calendar a pop-up message will ask you if you wish to release the equipment.
7. Customers
If you click on Customers in the menu on the left, you can see 5 sub-menus:
New Customer - this is the menu to click to manually enter a new customer in Geek Divers as an alternative to the Online registration form.
All Customers - here you see all the customers that you’ve entered in Geek Divers in all your locations.
Current Customers - these are the customers that have checked in your dive center (your current location) and have not checked out yet.
Upcoming Customers (previously named Pending Customers) - here you’ll find the customers that are coming to your dive center (your current location) today or in the future.- Export Customers - here you can export your list of customers to feed to your newsletter contact list or for any other purpose.
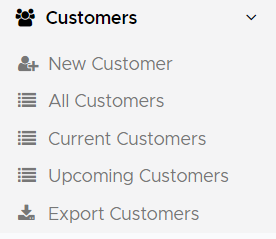
7.1 New Customer
Click on New Customer and enter the customer’s personal data. The mandatory fields are Name, Last Name, Date of Birth and Email address. If you have no time to enter the remaining information you can do it later or give a tablet to your customer and ask them to enter their personal data through your online registration form. Scroll down and click on button Save.
Customer Merge
Every time a new customer is saved, Geek Divers will check if the same customer (same name, last name and email address - the date of birth could be different) is already in your customer base. If not, a new customer will be created. If there’s a match, Geek Divers will update the customer’s profile with the most recent information. If no new information is provided, the old data will be maintained. This new feature is called Customer Merge and it’s happening automatically in the background. In case of a merged customer’s profile, you will be notified by a new message on the top-right of the screen.

By clicking on this envelope icon, you will see the name of the customer that has been merged with an existing profile.
Example:
A customer checks in with the online registration form or they fill out your paper form and one of your staff members clicks on New Customer to enter their data in Geek Divers, without checking that this customer is already in your customer base. They provide a new passport number, but their home address is the same. Geek Divers will not create a new customer in the system, but update the one that is already in your customer base, providing that this customer enters the same name, last name and email address. Geek Divers will update the passport information and leave the home address untouched.
While the existing customer is filling out the online registration form to update their data, it is important that you step out of the customer’s profile in your Geek Divers account (e.g. click on another menu, like Dashboard or Activity Calendar or anything else that is not related to Customers). Once the customer has successfully completed the registration form, you can go back to All Customers and search for their name or last name or email address to find an updated profile. All the activities that you’ve created for this customer, their bill and the assigned equipment will remain untouched.
Customer’s Tag
Starting from version 2.0 you can tag your customers. In the customer’s profile, tab Personal Data, you will find a field named Tags.
You can enter any word of your choice, select it as soon as it appears under the field and view it as a “bubble” in the field.
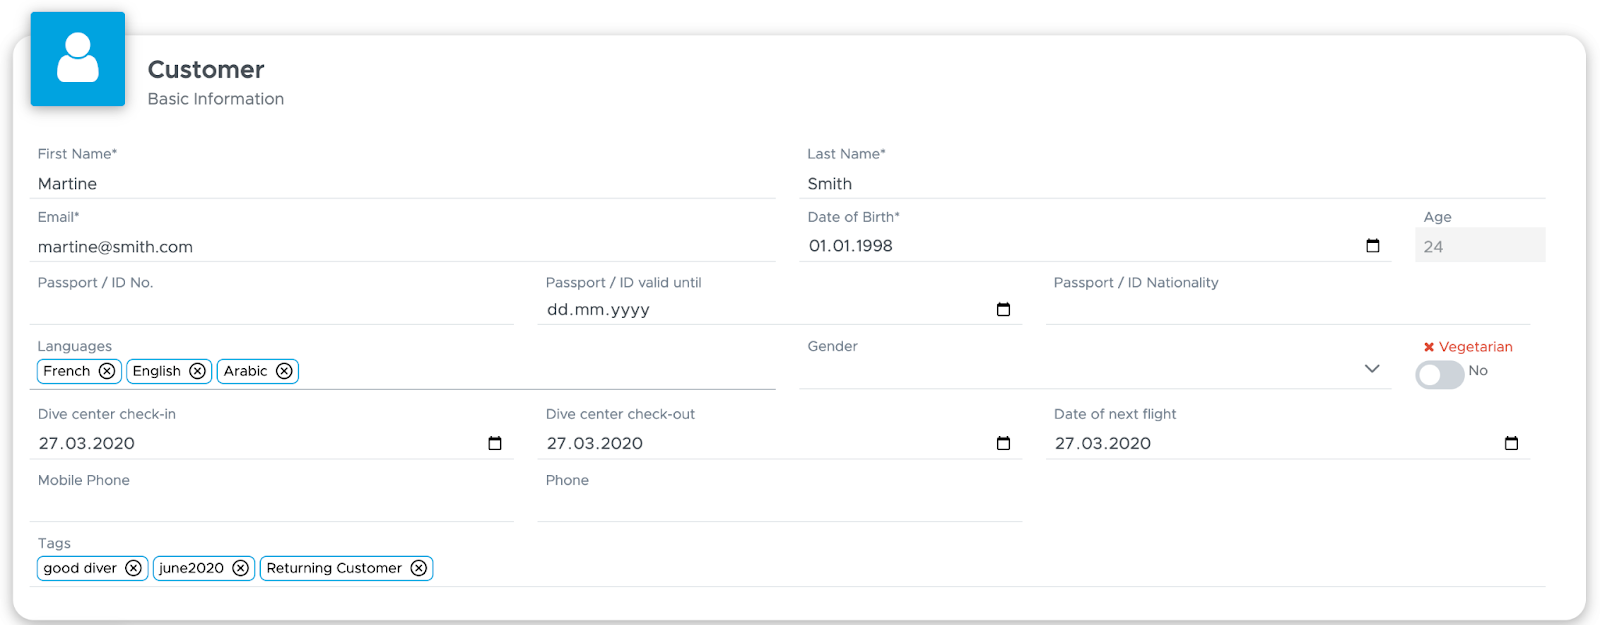
If you wish to remove a tag from a customer’s profile, you just need to click on the “X” next to the tag.
You can filter by tag in All Customers, Current Customers, Upcoming Customers, Current Open Bills and Open Bills. On the top-right of the tables, click on the down-arrow next to Tag and select the tag that you wish to filter by. If you select more than one tag, you will see only customers (or bills belonging to customers) who have all the selected tags ( logical AND).
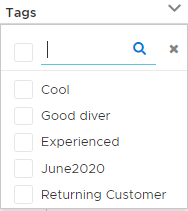
Please consider that all your locations share a common customer base and therefore the tags that you add to a customer in one of your locations will be available in all your locations. Similarly, if you remove a tag from a customer’s profile, this tag will be removed from all the locations.
You can define tags:
to specify the customers’ skills (e.g. Good diver),- to remember when the customer is coming (e.g. June2020),
to remind the front office of an outstanding balance to settle (e.g. Payment),
to remember if the customer is a direct booking (e.g. Direct customer) or if they came through a travel agent (e.g. ABC Travel),
for anything else that you might think of.
Please consider that all the customers who use your online registration form will be tagged as “RegForm”. You can remove this tag whenever you like. However, filtering by RegForm in All Customers should provide the list of new customers (or existing customers, but merged) who have recently filled out the onliner registration form.
If you wish to delete tags that you no longer use and make them disappear from the list of tags to filter among in All Customers, Current Customers and Open Bills, please check paragraph Manage your tags.
7.1.1 Diver’s certifications
In the customer’s profile, click on Diver’s certifications tab and enter the highest level of certification. If your customer has no diving certifications you can go to paragraph Verify and Check-in below here.
You can enter as many certifications as you wish, by clicking on Add (other) Certification(s).
Enter an approximate number of dives or the real number of logged dives and the date of the last dive.
7.1.2 Verify and Check-in
This feature will allow you to check-in your customer and see this customer listed in Current Customers.
In the customer’s profile, go to tab Diver’s Certifications, scroll down and click on Verify and Check-in button. Geek Divers will show today’s date and the name associated with your username in Verified On and Verified by fields.

You will now find this customer in Current Customers. Please remember that you should only click the button Verify and Check In when the customer has arrived in your dive center.
Don’t forget to click on the button Update!
7.1.3 Equipment
In this tab you can enter the box/bag name or number and define the content.
Before you start assigning equipment to the customer, please remember to enter a check-in and check-out date if they are not yet there. You can do so in the first tab: Personal Data.
If the customer has previously filled out the online registration form and you’ve chosen to show the equipment section there, you might see the customer’s height, weight and shoe size and which pieces of equipment they will bring. With this data it should be easy for you to write a size in the equipment that they wish to rent.

If the customer has brought their personal equipment you can tick the checkboxes in Customer’s equipment column (if they’re not already ticked) and write a non-mandatory description (e.g. brand, model and color). If the customer chooses to leave their equipment in your equipment room for the duration of their stay, you can tick the checkbox “Stays in shop”. This way you can make sure to prepare the complete customer’s equipment before every trip or course.
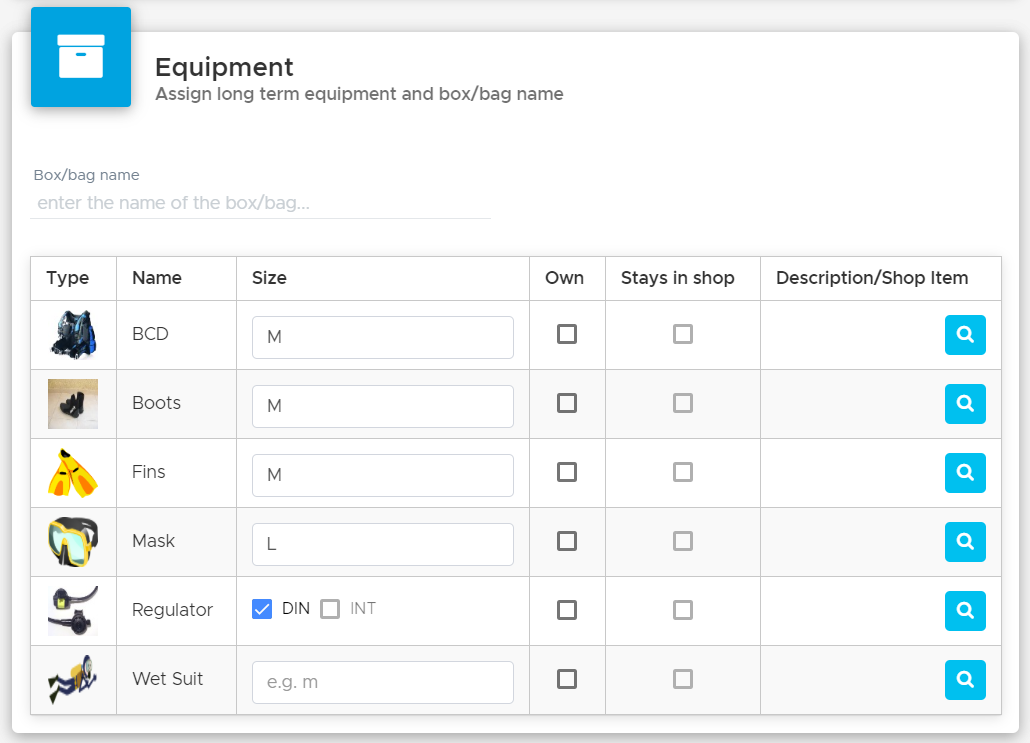
You can assign the equipment by clicking on Search in equipment inventory. This feature works only if you’ve previously set up your rental equipment. If you haven’t, please go to chapter Equipment to find out how.
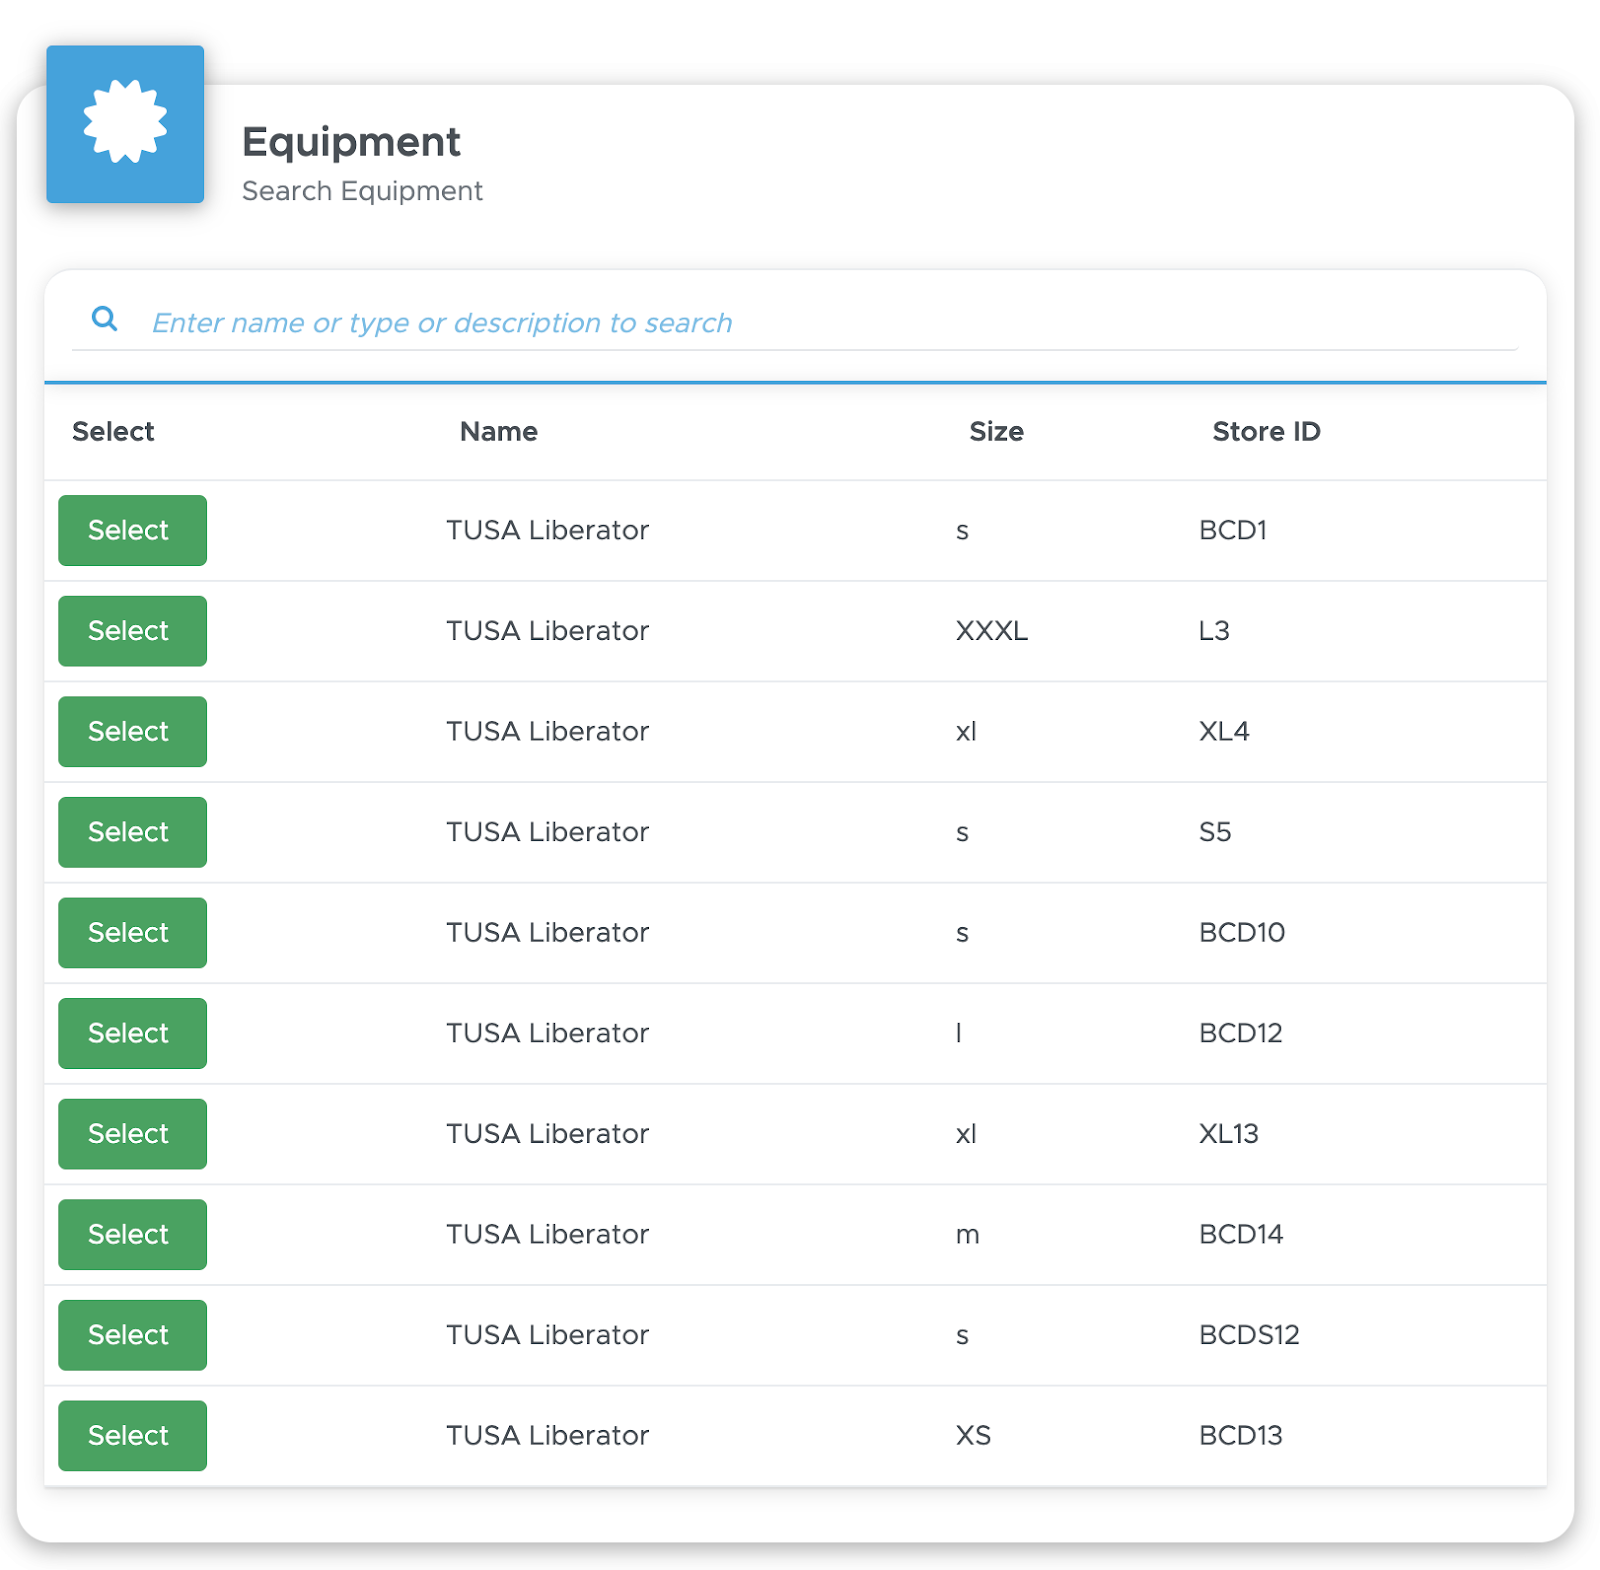
Select the equipment to assign to this customer by clicking on button Select. The equipment that you assign here will be permanently assigned to the customer from check-in to check-out date. If you wish to assign equipment only for one day ( or one trip), you can do so in the Equipment List that you can find in the Trip. Read chapter Reports/Summary to find out how.
7.1.4 Bill/Agent
Click on the Bill/Agent tab.
7.1.4.1 Bill
If you’ve just entered the customer’s data or if the customer just entered their data through the online registration form, you won’t find a bill.
Geek Divers will automatically create a new open bill as soon as you add this customer to an Activity (more on this in chapter Activity).
However, if your customer has only bought retail items from your dive shop, you can add the items and record the payment information by manually creating the customer’s bill. Click on the button Create Bill.

Starting from version 2.0, every new bill won’t have a bill number until you close it. Every bill in status Open will show only the word “open”. You can click on “open” to view the content of the bill. If you’ve set up a bill prefix, you will see just the prefix and you can click it to view the content of the bill.
Within a bill, click on button Add Position (from Price List) or Add Position (manual) to add items to the bill.
Click on Add Payment button to record the payment. Select payment method, currency, add a currency conversion rate, the amount and save the payment. You will find more information about the bill in chapter Customers Bills.
If your customer only sent a deposit, please read the next paragraph.
7.1.4.2 Credit
In this section you can view the customer’s Current Credit and add one.

If your customer sends you a deposit or full payment as a confirmation of a quote, you can record the payment here. Click on the Add Payment button, fill out all the information and save the payment. You will see the recorded payment in the list below.

The same payment will be automatically recorded in your cash flow, according to the payment method that you’ve selected and the cost center that you’ve set up in General Settings - Payment methods/Bill Prefix. You can print a receipt of payment by clicking on the green button at the end of the payment row. The button is available only in payment rows, but the printout will include the payment fee, according to the selected payment method.
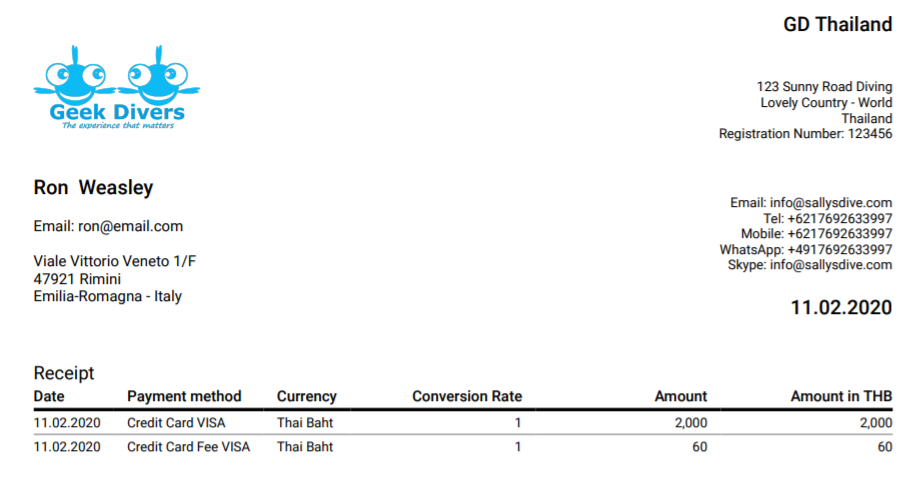
The Current Credit will be updated with the current value. This current credit will be visible in the customer bill once they have one.
Please consider that the customer credit is visible in the customer’s profile and available in any location.
In case of mistakes -e.g. You’ve recorded a payment in the wrong customer’s profile - you can’t delete a customer credit. However you can enter a new credit with exactly the same data of the wrong one and add a negative sign before the amount. If I had to fix a mistake in the example above here, I would enter the following:
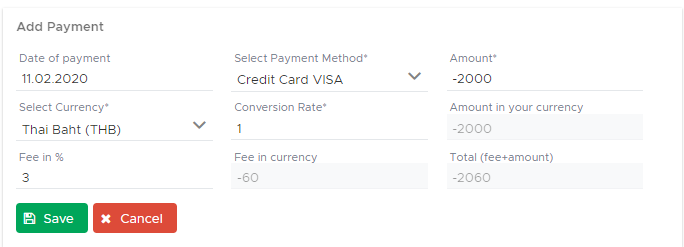
Both payments will be recorded in your cash flow, but they would balance themselves out.
7.1.4.3 Agent
In the Bill/Agents tab you can assign an agent to your customer. If you assign an agent here, the agent commission will be calculated on the whole customer’s bill (except fees, course material and food and drinks) once you close it. To assign an agent in this tab, the agent must have an ‘All’ commission (please read Agent Commissions).
Click on button Add Agent, locate the agent that you wish to assign to this customer and select the commission from the drop-down menu. Then click on the button Assign agent.
Please consider that in Geek Divers the word “Agent” means an external partner or a staff member that acts as an agent. Agents will receive an automatically calculated sales commission that you have previously set up.
You can assign as many agents as you wish and you will see them in the bottom part of the tab Bill/Agent.

Once the customer’s bill is closed, the agent’s commission will be automatically calculated and written in the agent’s invoice/credit note (more on this in chapter Agents Invoices/Credit Notes) or in the staff member’s payslip.
7.1.5 Activities
Click on the tab Activities to see what your customer is doing with you.
You can also click on the Activity to navigate to it.
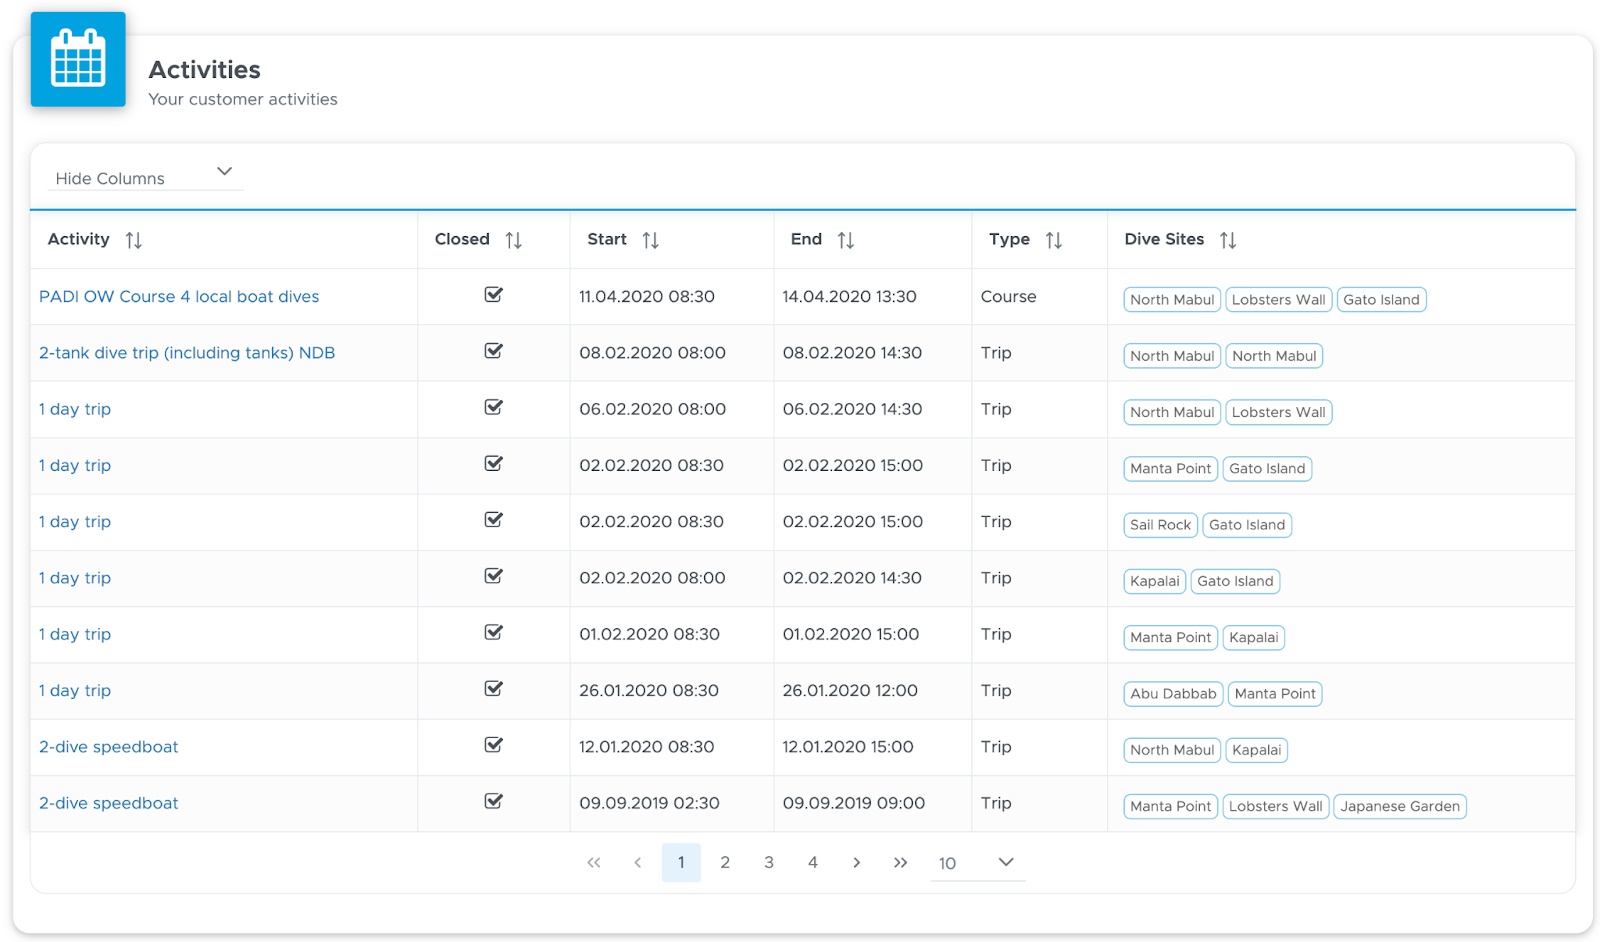
7.1.6 Notes
Click on tab Notes to read the message or comments that your customer might have written in the online registration form. This is the last step of the online registration form: Notes. If you’ve chosen to keep it active, your customer might have shared their allergies or made some special requests. On this page you will see a copy of what they’ve written.
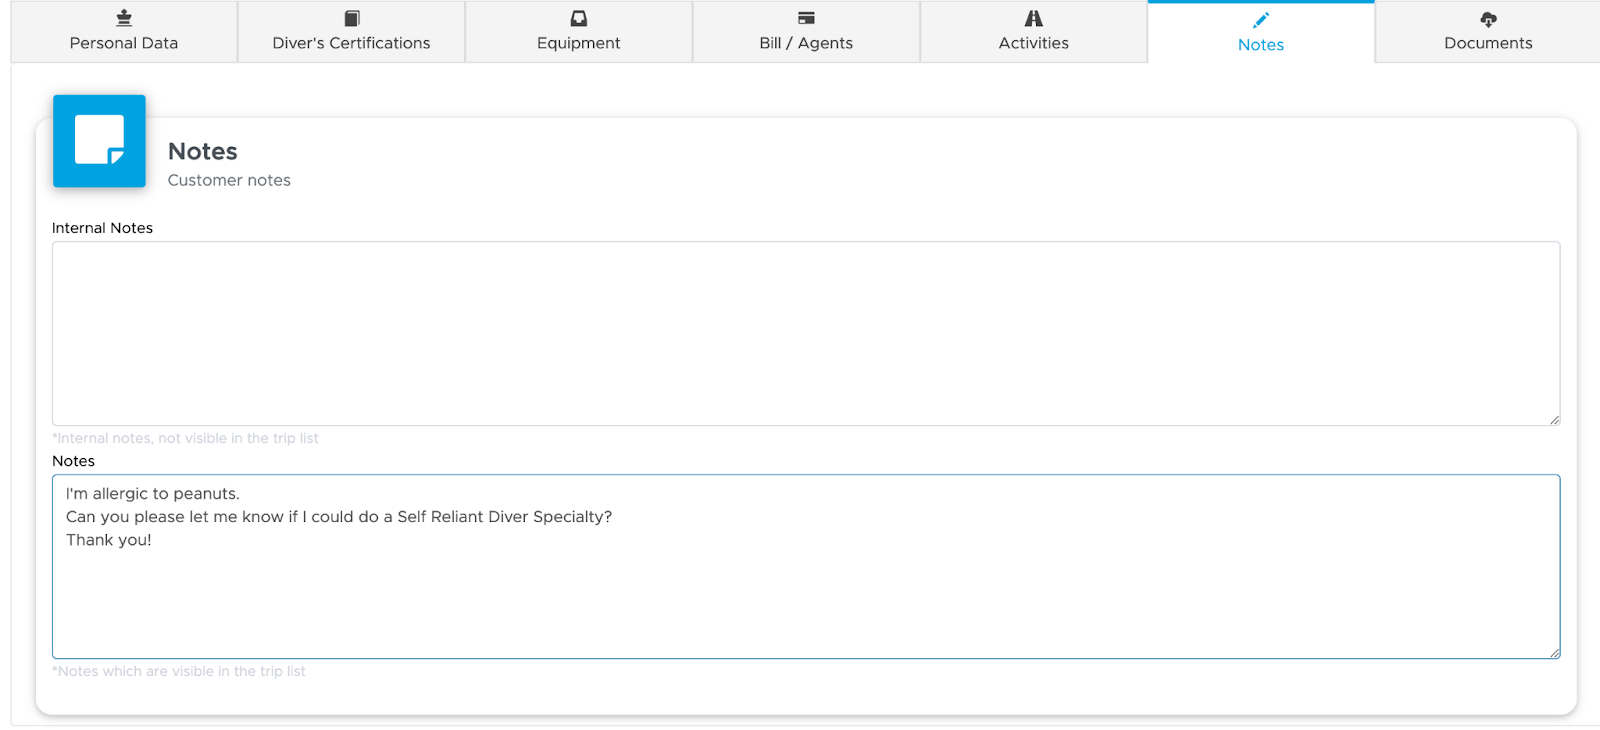
Additionally on this page you will find Internal Notes. This text field is reserved for Geek Divers users: your customers don’t have access to it. You can use it for special instructions and comments about the customer. It is recommended to write the date and the name of the person who writes anything in the Internal Notes.
7.1.7 Documents
Click on tab Documents to manage the documents that you or your customer uploaded to their profile.
Your customer can upload documents (medical form or anything else) from the online registration form if you’ve chosen to keep this section active. Additionally, if you’ve set up and activated section Custom Text, a copy of your custom text with date and signature (if requested) will be uploaded to this page as soon as the customer confirms the online registration form.
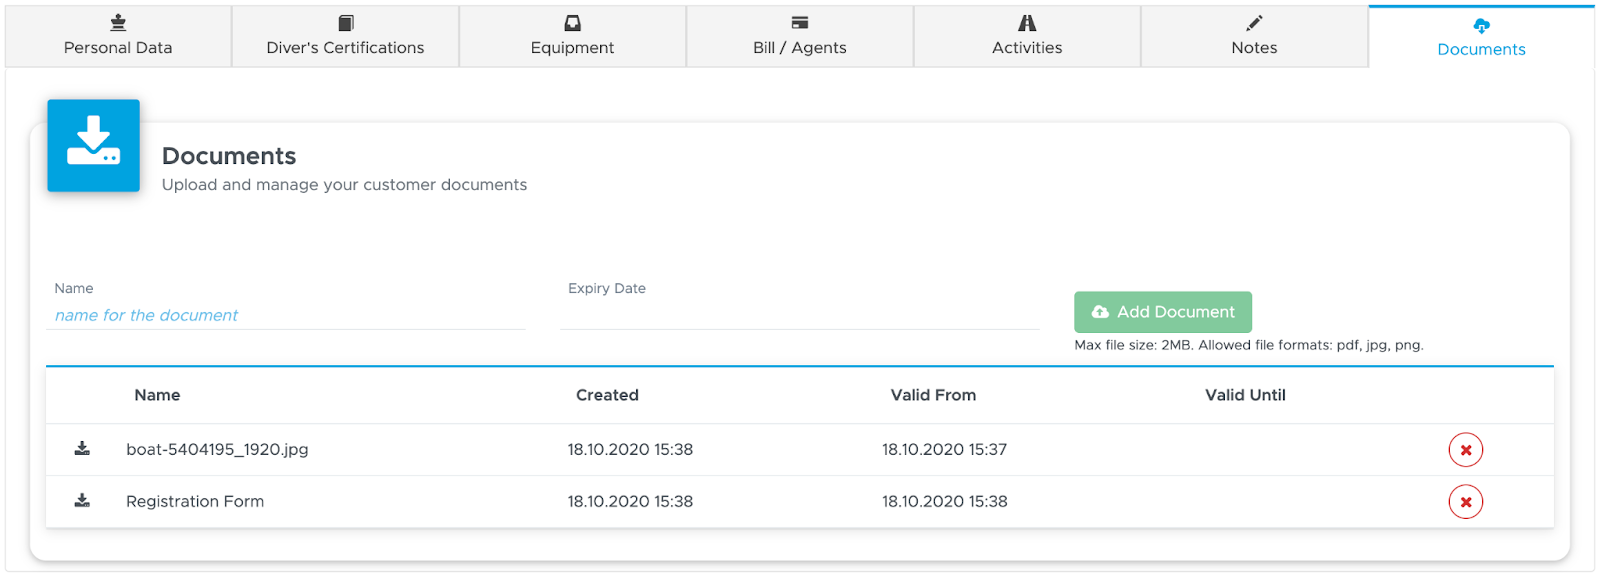
You can download the document by clicking on the icon on the left or remove it by clicking on button Remove.
If you wish to upload a new document write a name in field Name, an expiry date (this might be useful for medical statements) and click on button Add Document. Select the document from your device and wait a couple of seconds for the upload. Your uploaded document will then be available in the list.
Please consider that the maximum allowed size is 2MB and the allowed file formats are: pdf, jpg and png.
7.2 All Customers
Click on Customers - All Customers to view all your customers, past and present in all your locations. At the top of the page you’ll see a search string where you can type the customer’s name or last name or email address. As soon as you start typing some characters, you’ll see the search results that match your search. Once you’ve identified the customer that you’re looking for, click on the customer’s name to go to the customer’s profile. Here you can apply changes, print a pdf file with the customer’s data or delete the customer. Please consider that in case you choose to delete a customer, the bills associated with this customer will not be deleted.
Customers have a color-coded status:
Green - Checked out - for customers that have spent some time in one of your dive centers and have already left.
Blue - Verified - for customers that are currently checked-in one of your dive centers. Please consider that in the All Customers view you will see checked-in customers in any of your locations.
Orange - New - for customers that have just been entered in Geek Divers through New Customer or the online registration form.
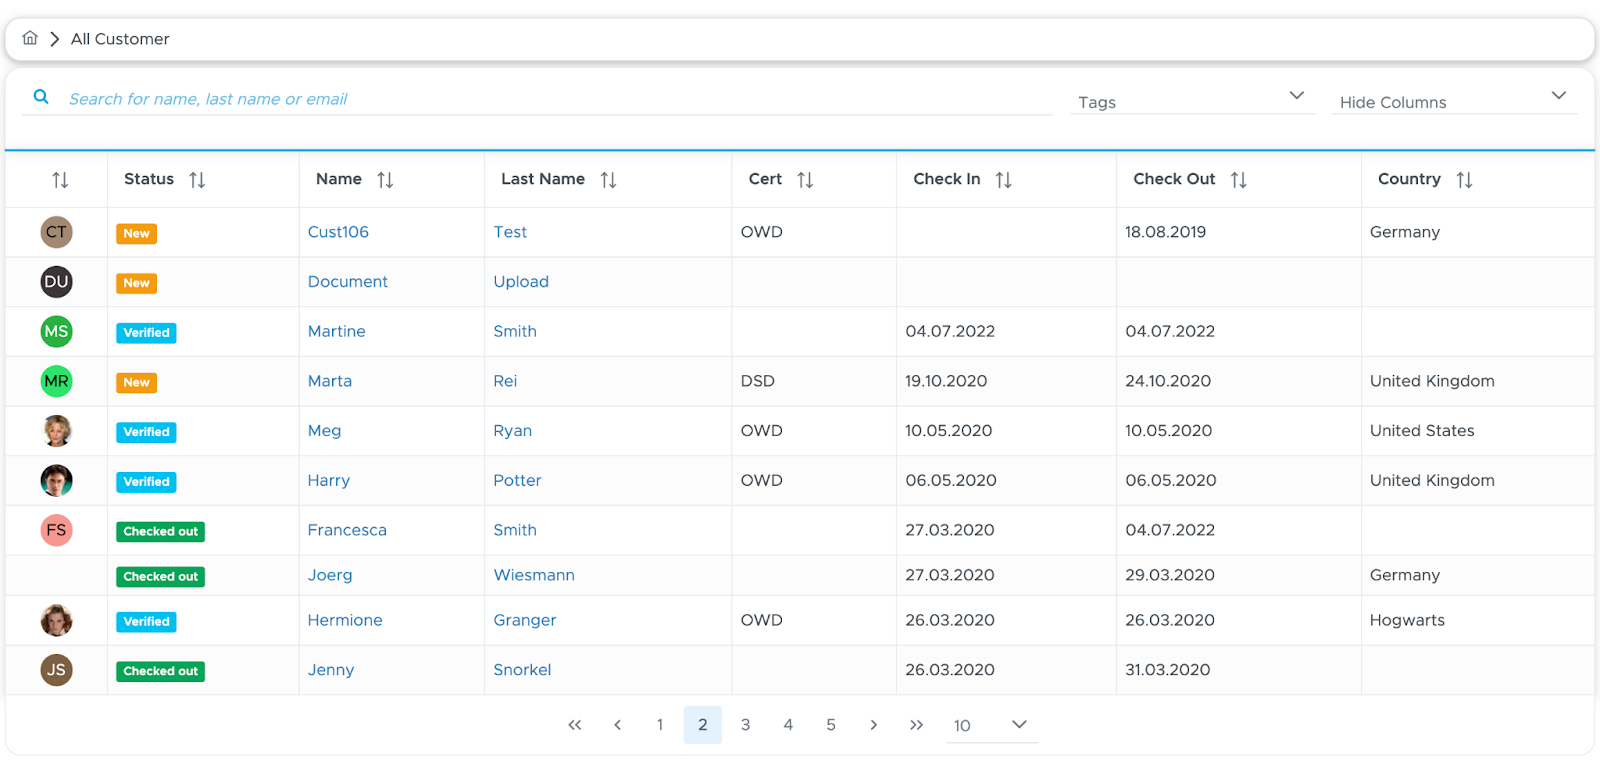
7.3 Current Customers
Click on Customers - Current Customers to view all the customers that are currently checked-in your dive center in the location that you’re currently viewing. Please check the top bar to verify that you are viewing the correct location. At the top of the page you’ll see a search string where you can type the customer’s name or last name or email address. As soon as you start typing some characters, you’ll see the search results that match your search. Once you’ve identified the customer that you’re looking for, click on the card to go to the customer’s details. Here you can apply changes, print a pdf file with the customer’s data or delete the customer. Please consider that in case you choose to delete a customer, the bills associated with this customer will not be deleted.
The status of the customers that you see in Current Customers is always Verified: these are the customers that are currently checked-in the location that you’re viewing.
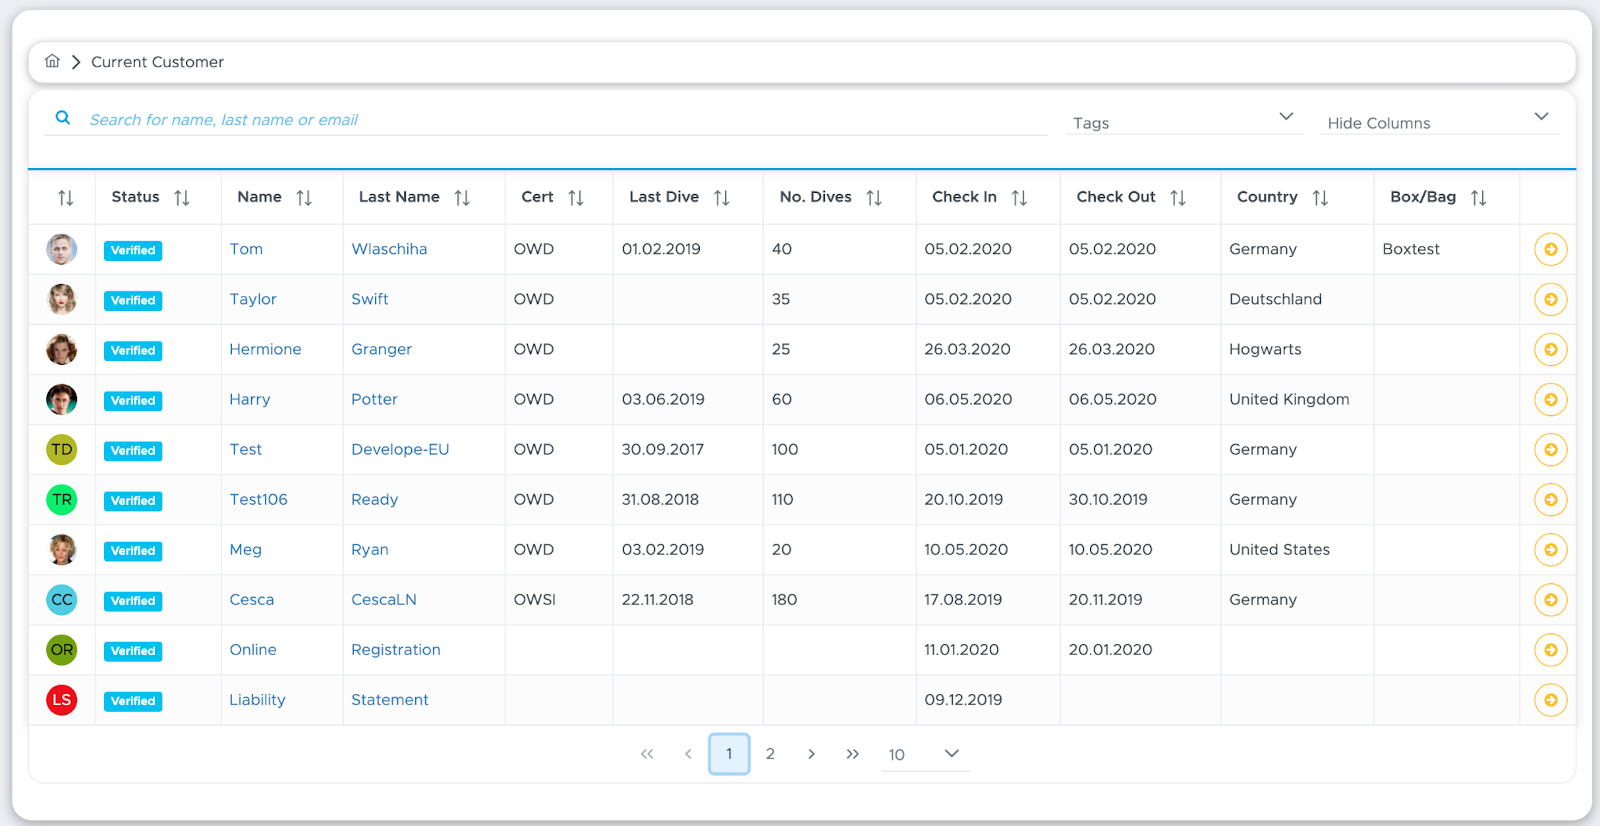
In Current Customers you will find a Check Out button for every customer (orange button on the right-hand side). Normally you don’t need to use this button because a customer is automatically checked-out when you close their bill. However, as a backup solution, you can use this button to check-out the customer and release any assigned equipment and rework their bill later.
Starting from version 1.0.6c the Current Customers table shows more information: date of last dive, number of dives and Box/Bag number. Every column can be sorted according to your preference. Additionally, the check-out date is highlighted in red if it’s today or tomorrow. This can give you a heads up to prepare the bills for the customers that will check out soon.
7.4 Upcoming Customers (previously named Pending Customers)
Click on Customers - Upcoming Customers to view the list of customers with a set check-out date in the future in the location that you’re viewing.
At the top of the page you’ll find a search string. You can type the customer’s name or last name or email address to search for a customer. As soon as you start typing some characters, you’ll see the search results that match your search. Once you’ve identified the customer that you’re looking for, click on the name to go to the customer’s details. Here you can make changes, print a pdf file with the customer’s data or delete the customer.
Once you save or update a customer profile, this won’t disappear from Upcoming Customers as it used to do with Pending Customers. The purpose of Upcoming Customers is to give you a better idea of how to plan your activities, knowing that this list of customers are coming. Order by check-in date (click on the column title) to see a tidy list of customers.

This menu was previously named Pending Customers to identify those customers who used your online registration form and needed to be validated manually. Additionally, before version 2.0, all the customers who used the online registration form were visible in Pending Customers in every location, regardless of the location that they were going to.
The manual validation is now no longer needed because Geek Divers will automatically search for duplicate customers in the system and if one (or more) is found, the information will be merged, keeping the most recent.
Upcoming Customers is now showing you the customers that are coming specifically to your location. As soon as you check them in or when their check-out date is no longer in the future, these customers will disappear from Upcoming Customers and will only be visible in Current Customers or All Customers.
7.5 Export Customers
Click on Customers - Export Customers. From this page you can define which customers you want to export to feed into your CRM software. There are two checkboxes, “Agreed to newsletter” and “Agreed to third party offer”, and two buttons, “Export All Customers” and “Export Current Customers”. Depending on your choices, you can export a list of customers in a .csv file, containing all the most important information. In the current Geek Divers version you can export customers’ data in 32 columns.
Please consider that if you haven’t set up any text for newsletter or third party offers in your General Settings - Data Protection, you won’t see the check boxes at the top of this page.
8. Activity
An Activity in Geek Divers is any kind of activity that you organize for and with your customers. It could be a trip or a course, you can add as many customers as you wish and assign staff members who will take care of them. Setting up an Activity will help with your planning and Geek Divers will automatically calculate your customers’ bills, your staff payslips and your agents’ commissions. It is important therefore that you create an Activity for everything that you do with your customers, whether it’s a course, a dive trip, a car or boat transfers, a snorkeling tour or any other service that you offer.
When you save an Activity with customers and any extra charge:
customers' bills will be updated with the charges according to the prices in your price list.
When you close an Activity:
your staff payslips will be updated with their diving commissions and
your staff payslip and your agents credit notes will be updated with their sales commissions.
So if you’re wondering if you need to set up an activity for a specific service, ask yourself the following questions:
Should my customers be charged for this service?
Should my staff members receive a commission for this service?
Should my agents receive a sales commission for this service?
Is it important that I have a record of the service that we’ve provided?
If you’ve answered “yes” to at least one of the above questions, then you definitely need to set up an activity in your Activity Calendar.
Below here you’ll see how it works.
8.1 Activity Calendar
To set up an activity in Geek Divers the easiest way is to click on menu Activity and choose Activity Calendar. Choose the type of view that you prefer (Day, Week or Month) and move left or right with the arrows to display the right time frame for the activity that you wish to set up.
In your activity calendar you’ll see columns with days and rows with hours. Every row represents 30 minutes. If you haven’t done it yet, please set your calendar start and end time in General Settings - Units.
👀 Important!
Your Activity Calendar displays the activities that you’ve set up in your dive center according to the time zone that you’ve specified in General Settings . If you are currently in a different time zone and your device (laptop, tablet, phone) shows the correct time according to where you are, you might see your activities shifted to an apparently wrong time. Before modifying the start and end time of all your activities, please consider the time difference between your current time zone and your dive center time zone. You could quickly check if everything looks alright by changing your device time to your dive center time zone.
Starting from version 2.0, you will see confirmed quotes at the top of the Activity Calendar by clicking on the green and blue icon in the Week and Month views.
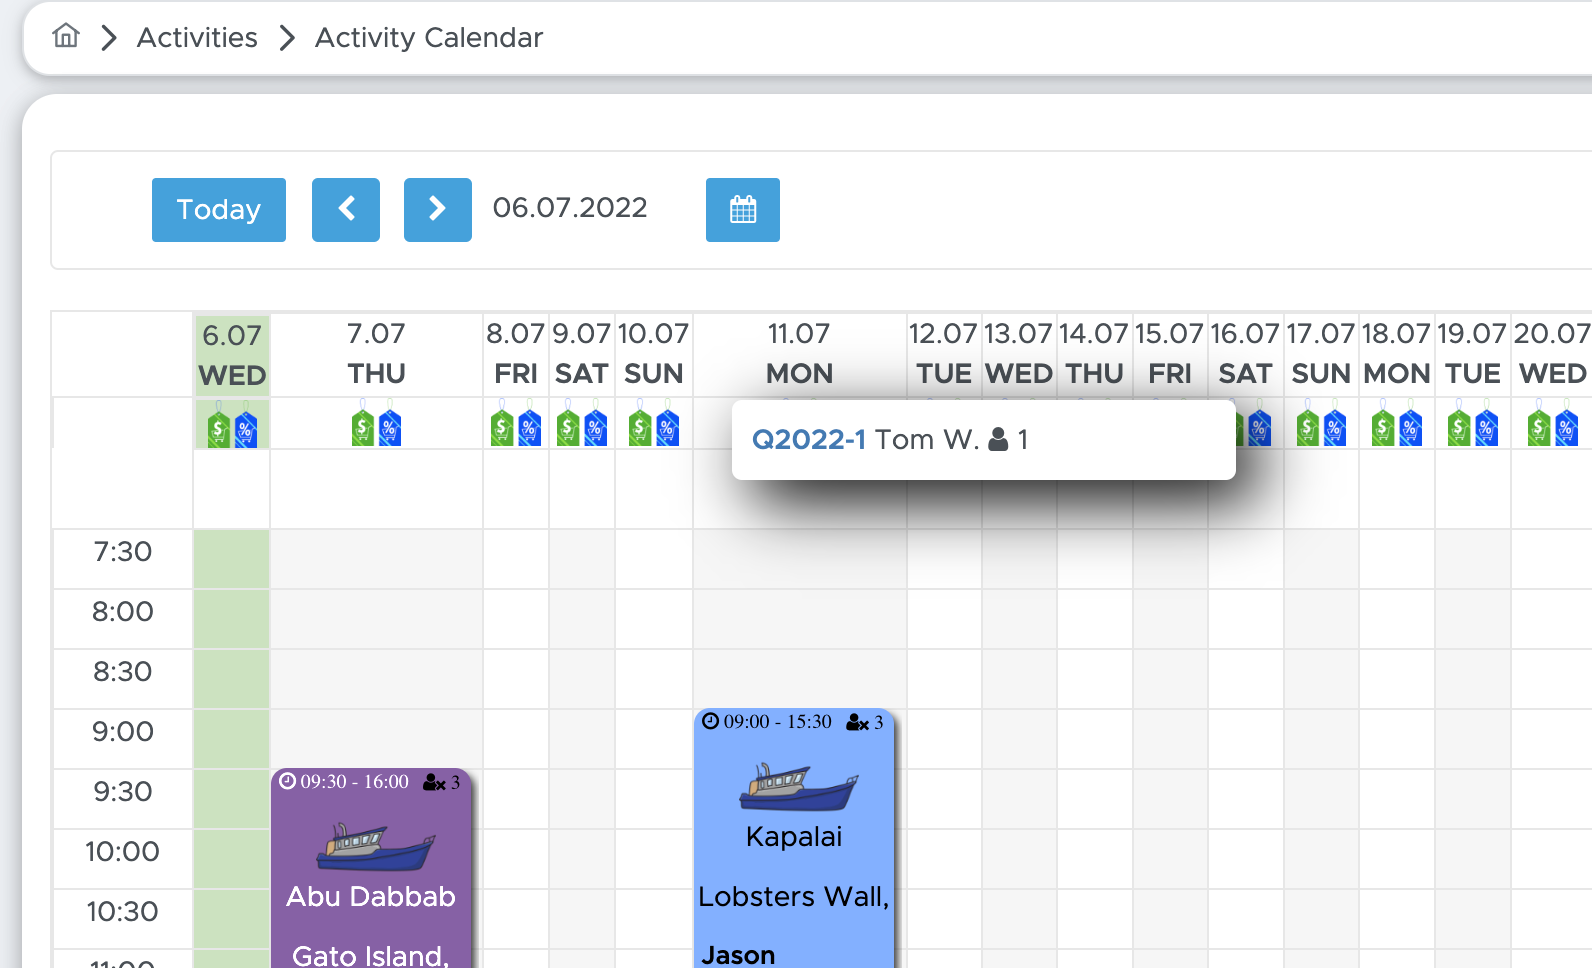
If you don’t see the green and blue icon it’s because there’s no confirmed quote for that day. Click on the icon to open the pop-up. Here you will find all the quotes that are confirmed for that day. Next to every quote number you will see either the customer’s name or no name, if the quote is a partner quote. The icon will also show how many customers are included in the quote.
You can click on the quote number to view its content in a sidebar.
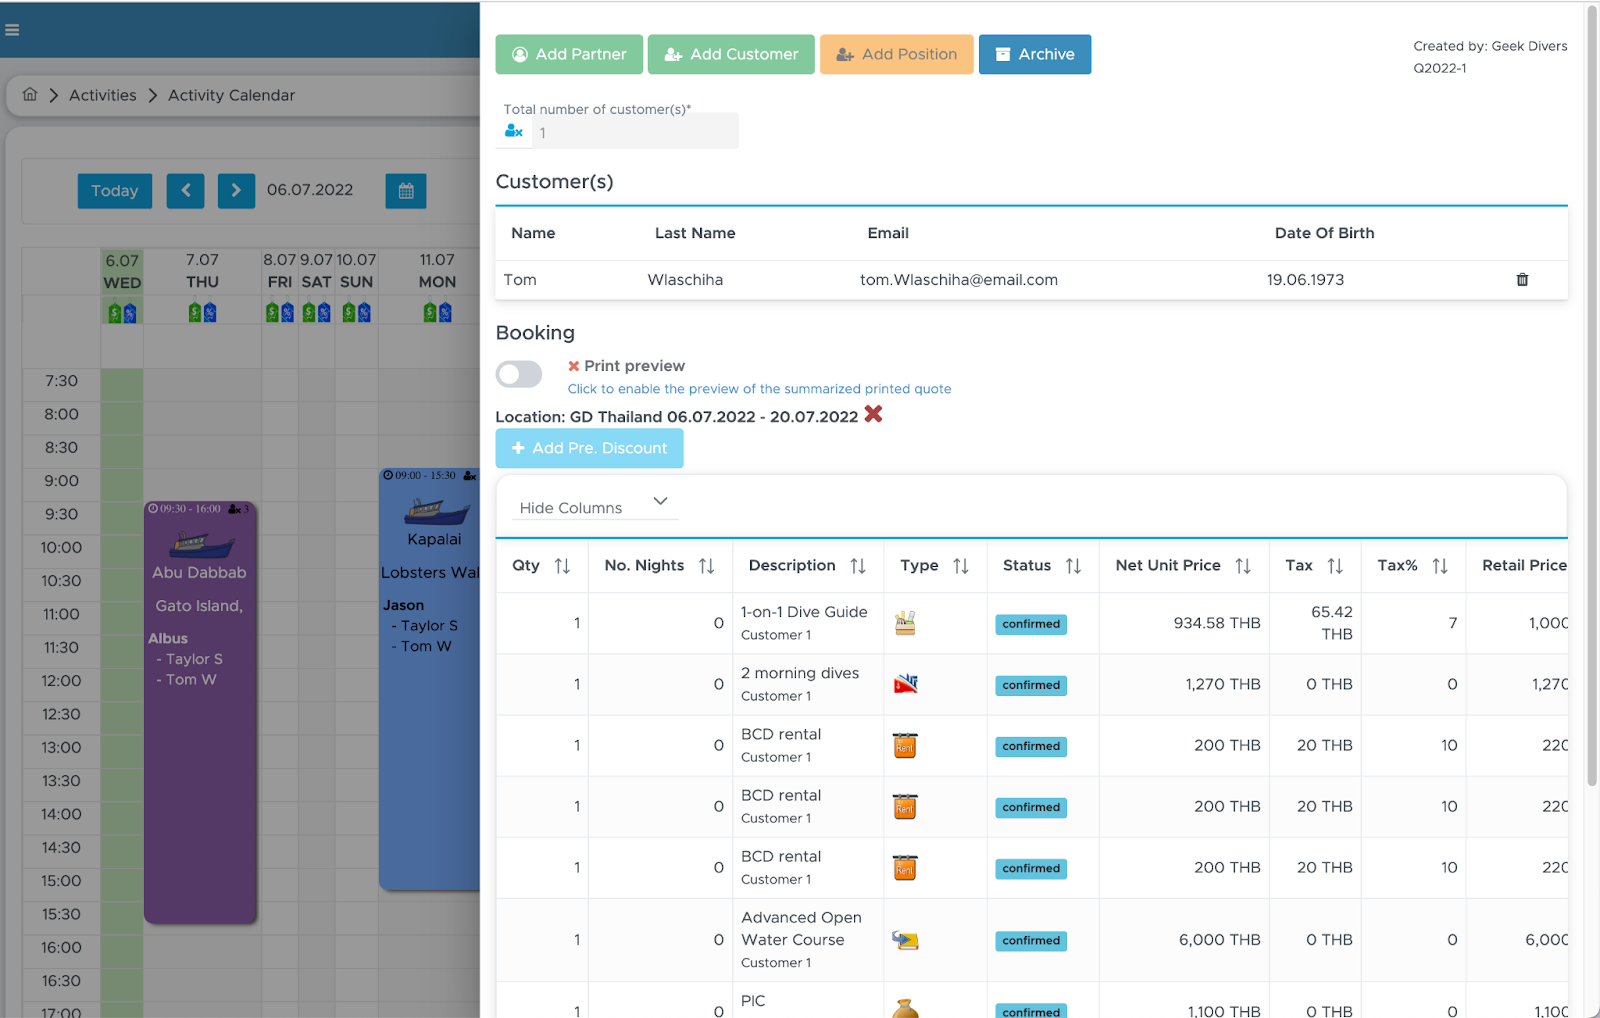
By viewing the content and considering the status of every quote position, you should get an idea of how to plan your activity calendar accordingly. The status of each quote position will be updated automatically once the confirmed quote is applied as a voucher in the customers bills.
You will find more information about the meaning of each status in chapter Booking. What you need to know in the Activity Calendar is very simple:
Confirmed and Voucher → if they are trips or courses, they need to be planned for these customers.
Applied → these activities have already been planned for these customers.
Additionally, starting from version 2.0, you will find a Quick Month view. This view is read-only and it’s meant to give you an idea of which ones are your busiest days and which ones are the quietest ones.
Starting from version 2.1 you can now click on the events to open the activity.
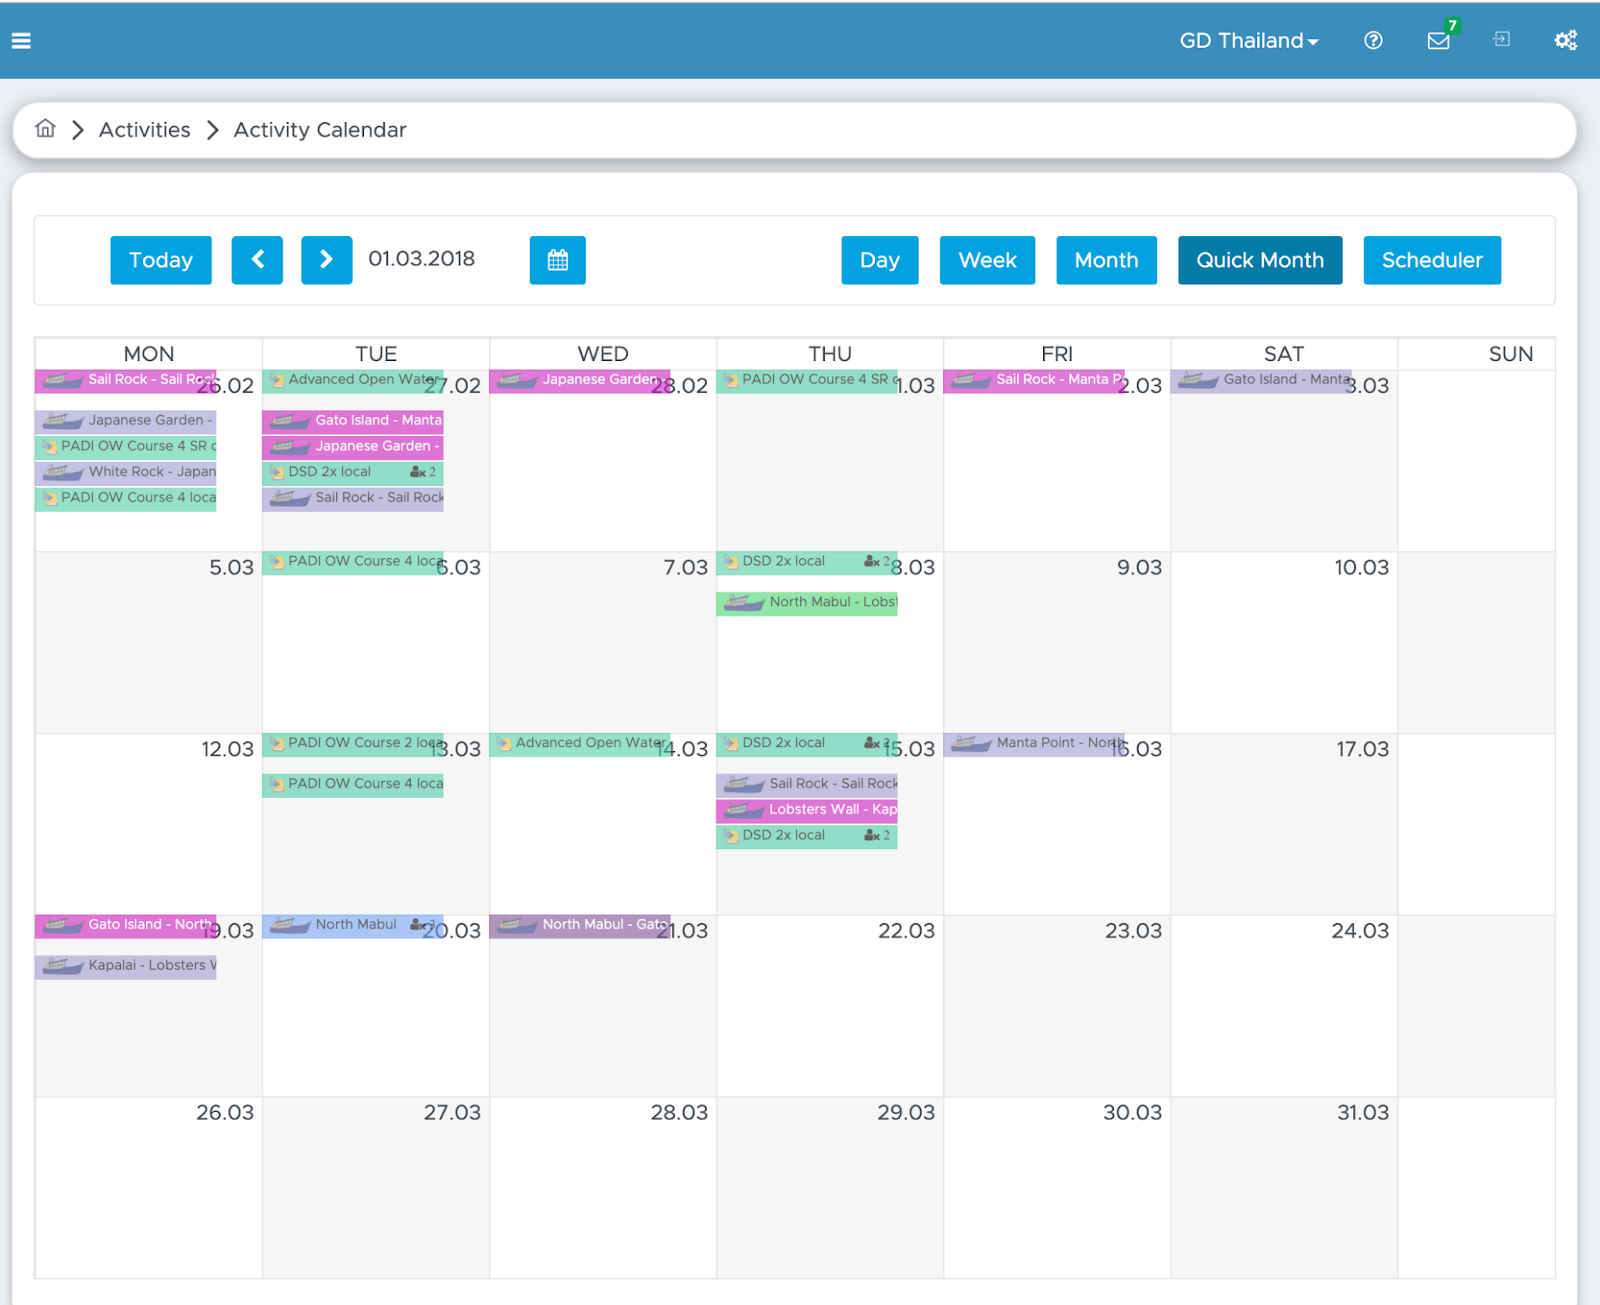
8.2 New Activity
Click on the calendar on a day and time representing the start date and time of the activity that you wish to set up. You will see a pop-up asking you which type of activity you wish to use:
Select a type and click on the OK button.
According to your choice you’ll find instructions in the paragraphs below here.
8.2.1 New Trip
A trip in Geek Divers represents any outings with your customers. E.g. a dive trip, a snorkeling trip, a shore dive, a day out on the boat, a transfer service, a special tour...etc.
To set up a new trip you’ve clicked on the activity calendar and chosen Trip in the pop-up. Alternatively you’ve chosen the menu Activity and New Trip.
Geek Divers will take you to the first step of the trip planning: Transportation, Dates, Dive sites.
On the right of the page you will find a card with information about activities that you’ve already planned on the same day. If you have more activities, you can also scroll down in this information card.
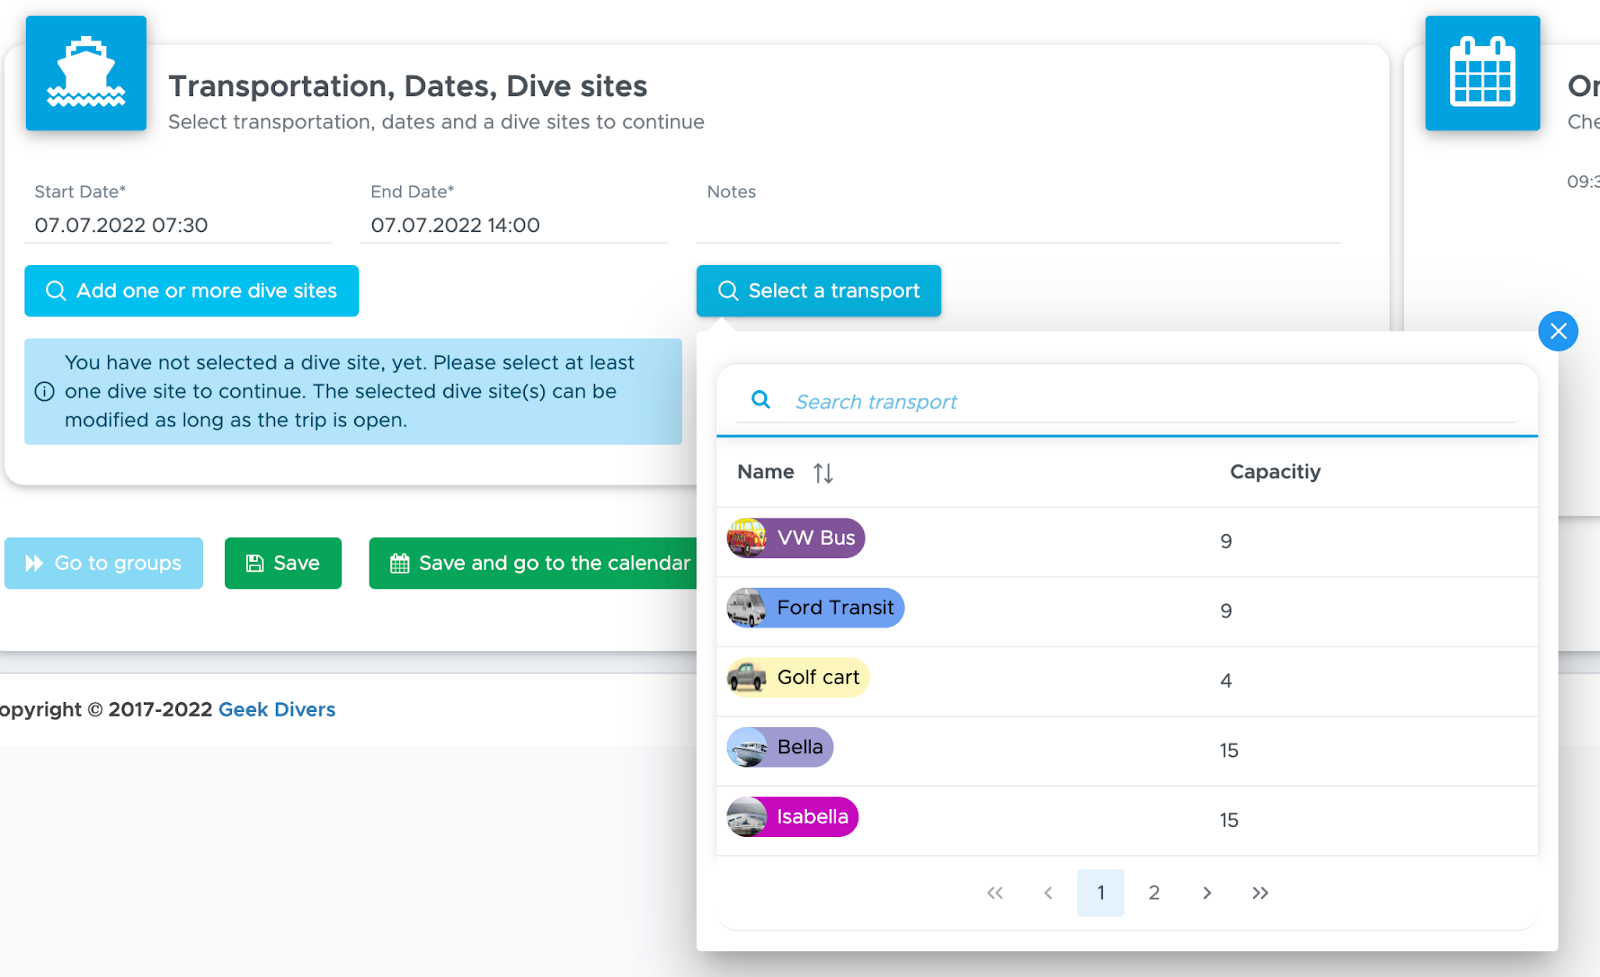
Select the transportation that you are going to use for this trip. The boats, cars, vans and golf carts that you see are the same that you set up in your Equipment. If you haven’t set them up yet, please go to chapter Equipment - Transportation to see how. If you are planning a shore dive and you don’t need to use any cars or vans, please select “No transport”.
The start date of your trip is set to the date and time that you clicked in the calendar. Click on the date to modify the start date and time, if necessary. Do the same for End Date and time.
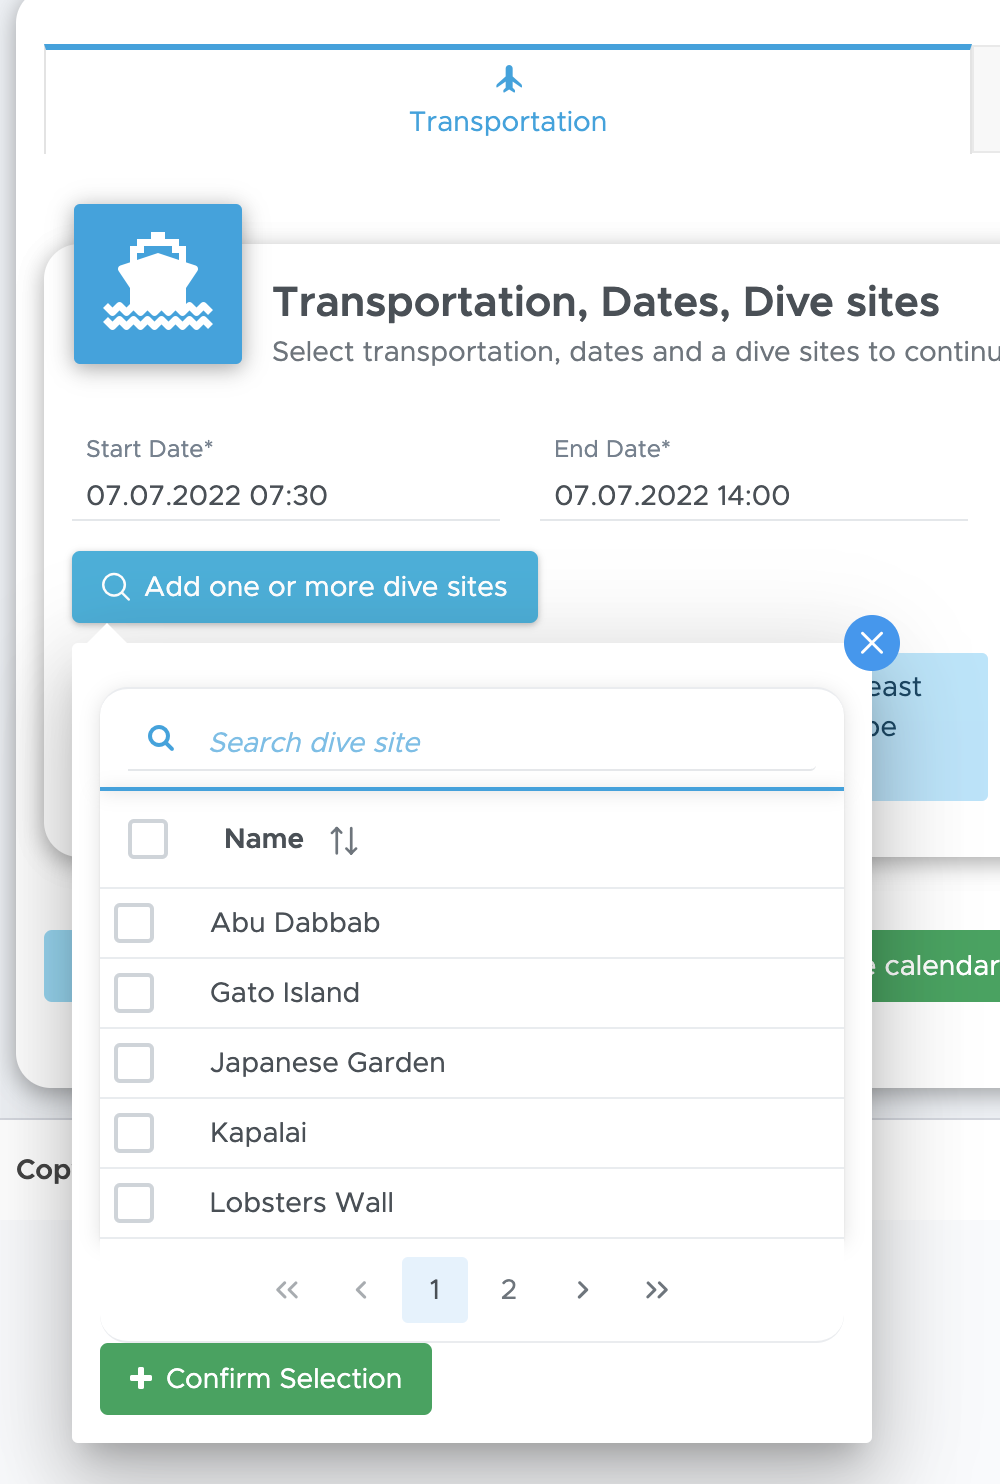
Select one or more dive sites from the drop-down menu. If you don’t know yet which dive sites you will go to, you can add any dive sites and modify them later, as long as the Trip is still open.
When you select the dive sites, please consider that Geek Divers will take your first selection as the first dive site of the day, the second selection as the second dive site of the day and so on.
If you haven’t set up your dive sites, please go to chapter Dive Sites to read how.
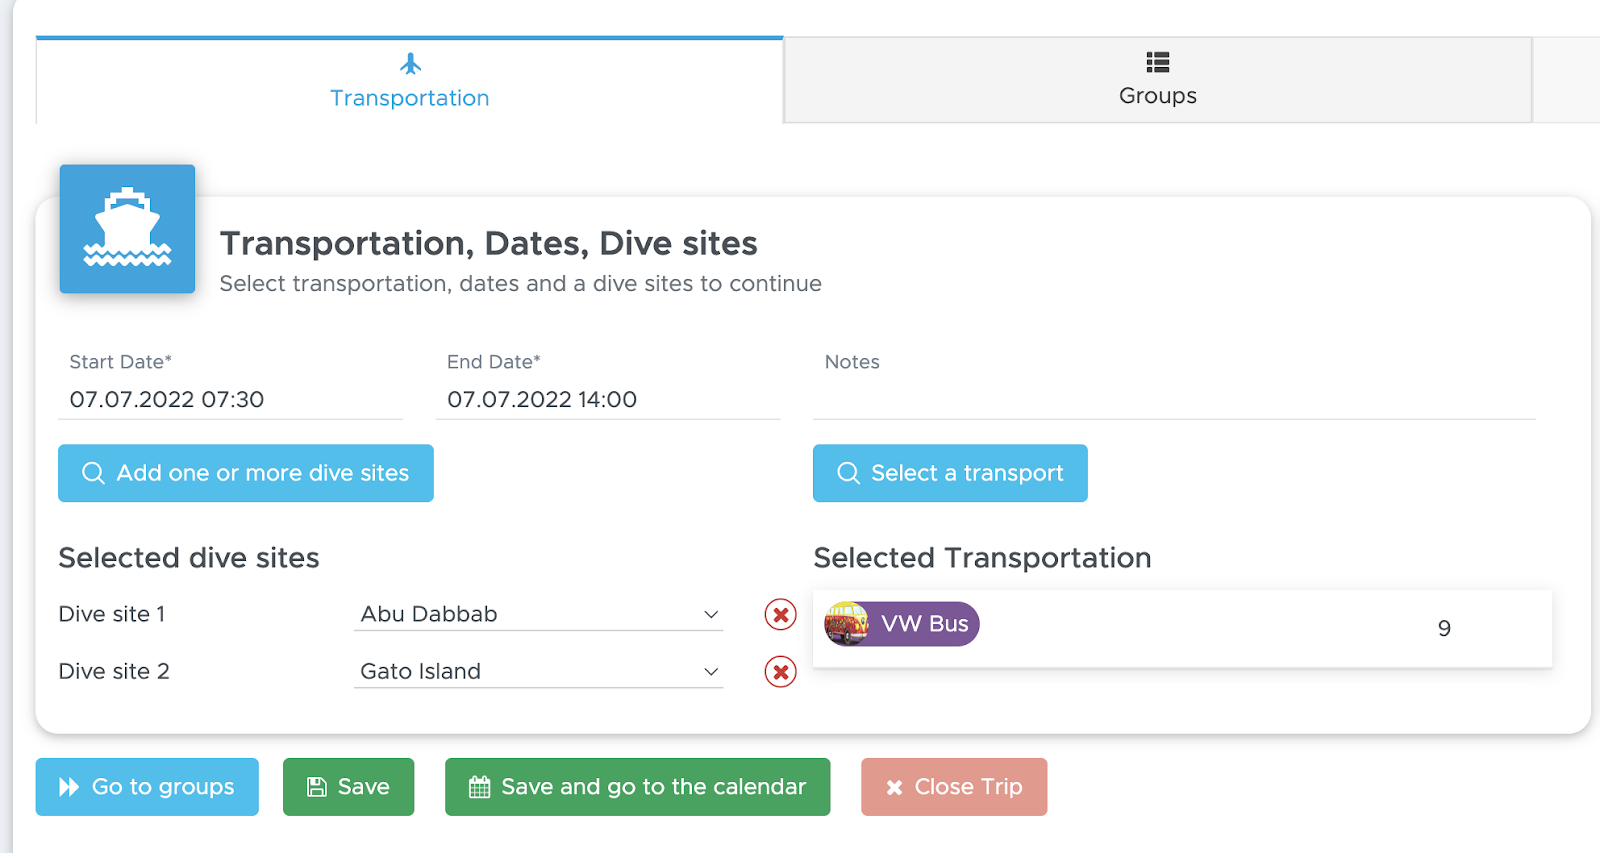
Now you can either click on the button Go to trip selection at the bottom of the screen or on the Groups tab at the top of the screen. Geek Divers will take you to the selection of the groups of customers and staff members who will join this Trip.
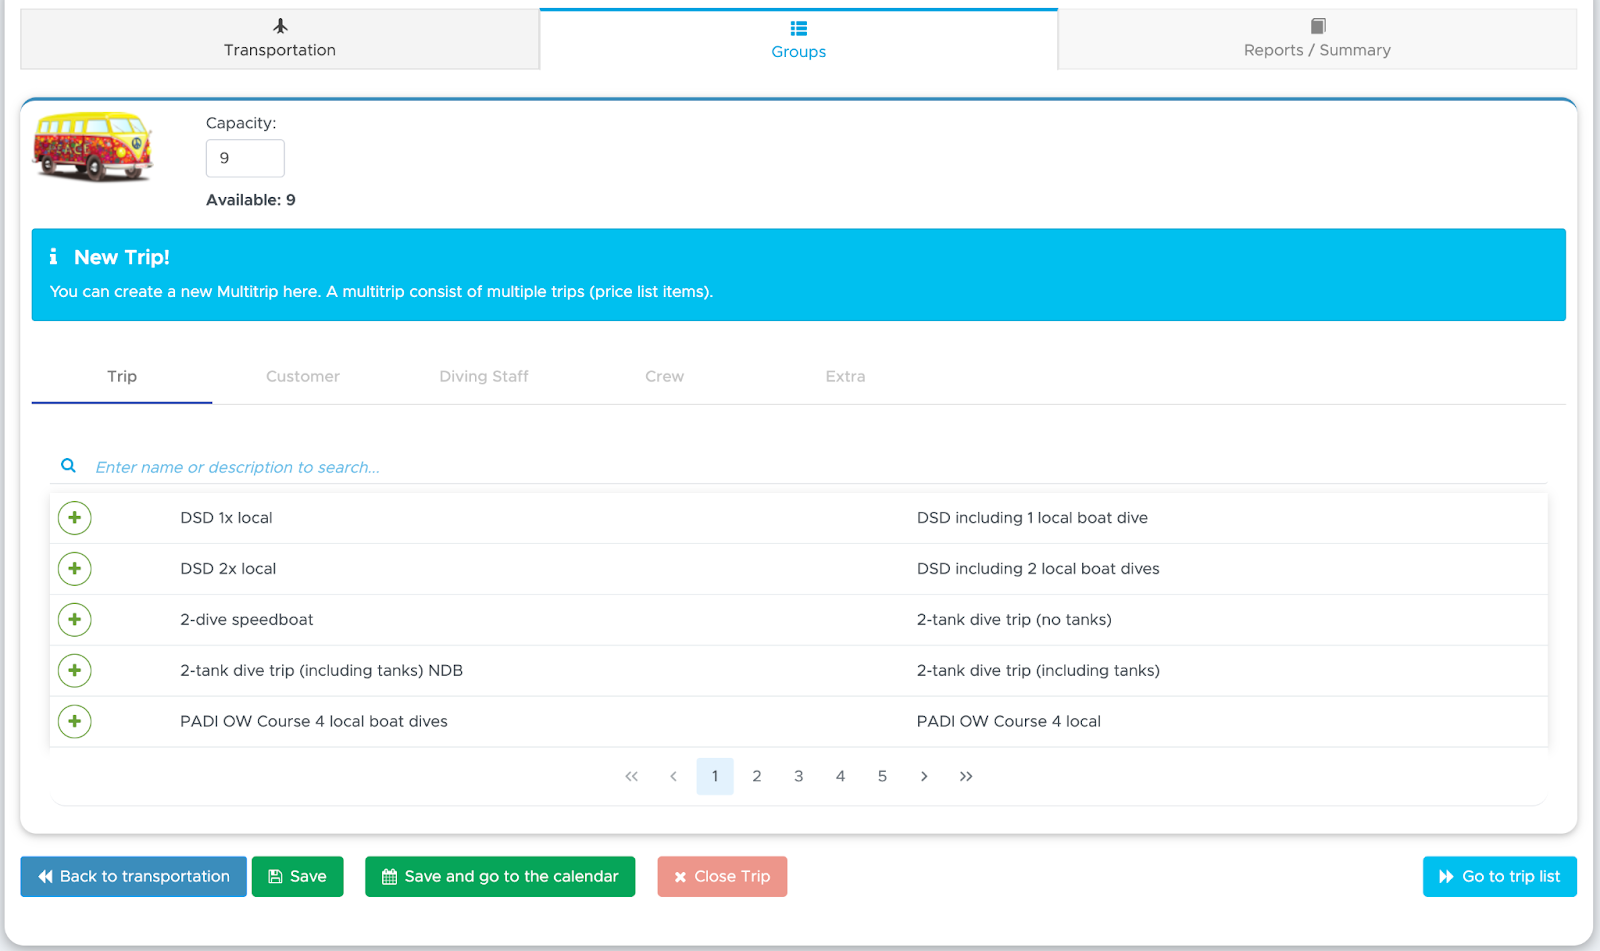
At the top of this screen you will see the transportation that you’ve previously selected with the picture of your choice (as defined in your equipment) or no transportation for shore dives. Next to the picture you will see the capacity (as defined in your equipment) and availability.
At the bottom of the screen you will see all your price list items type Course or Trip. If you’re looking for a specific course or trip you can start typing the name in the Search Item field or use the paging system to view your options.
Once you’ve found the course or trip of your choice, click on the plus button to be directed to the selection of customers. Below here you’ll see the difference between the selection of a Trip and a Course.
8.2.1.1 Selection of a Trip
You’ve selected a trip.
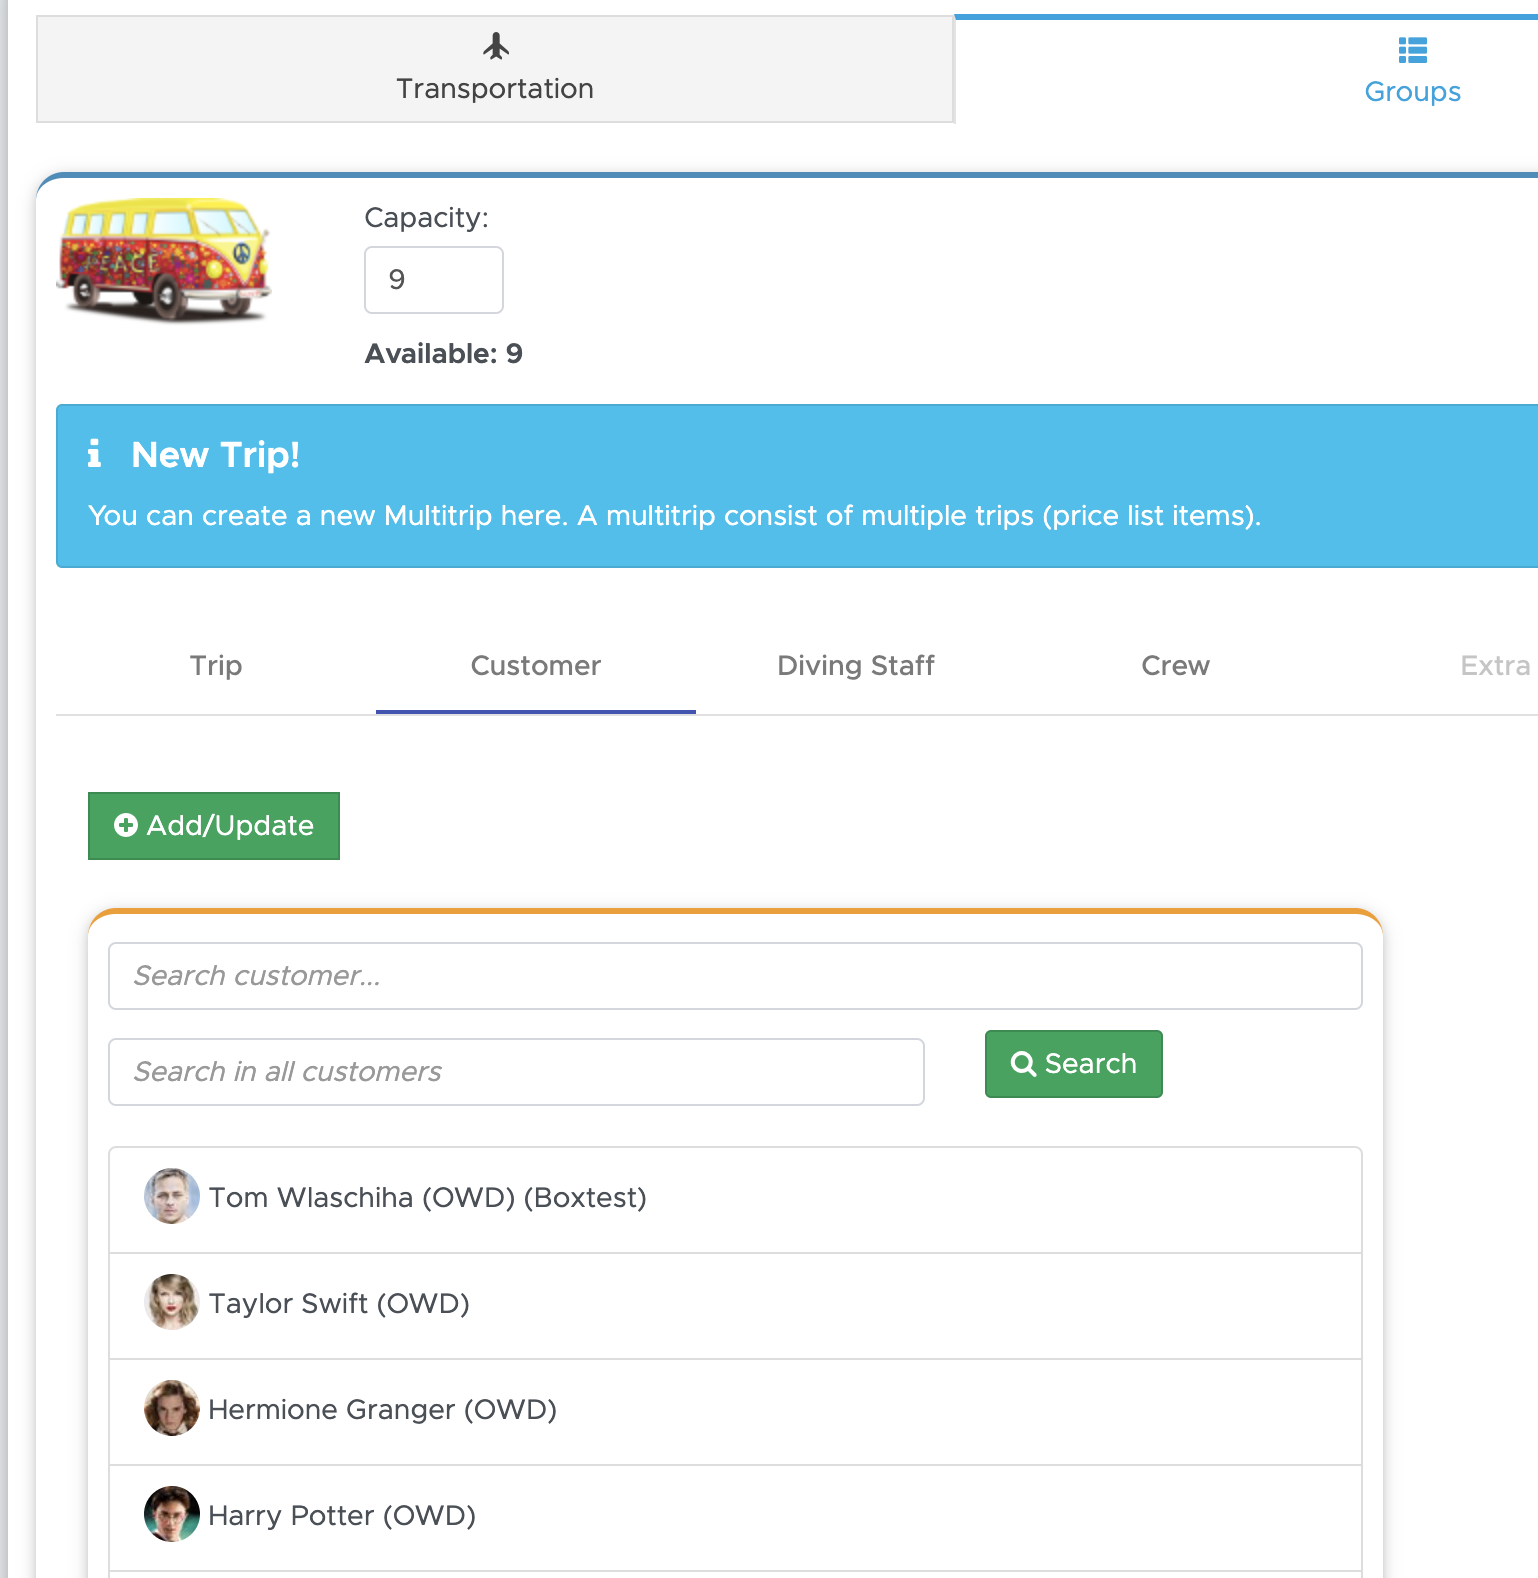
At the bottom-left of the screen you will see the list of all your current (checked-in) customers. Click on the customers who are joining this trip. Geek Divers will show your selections at the bottom-right of the screen.
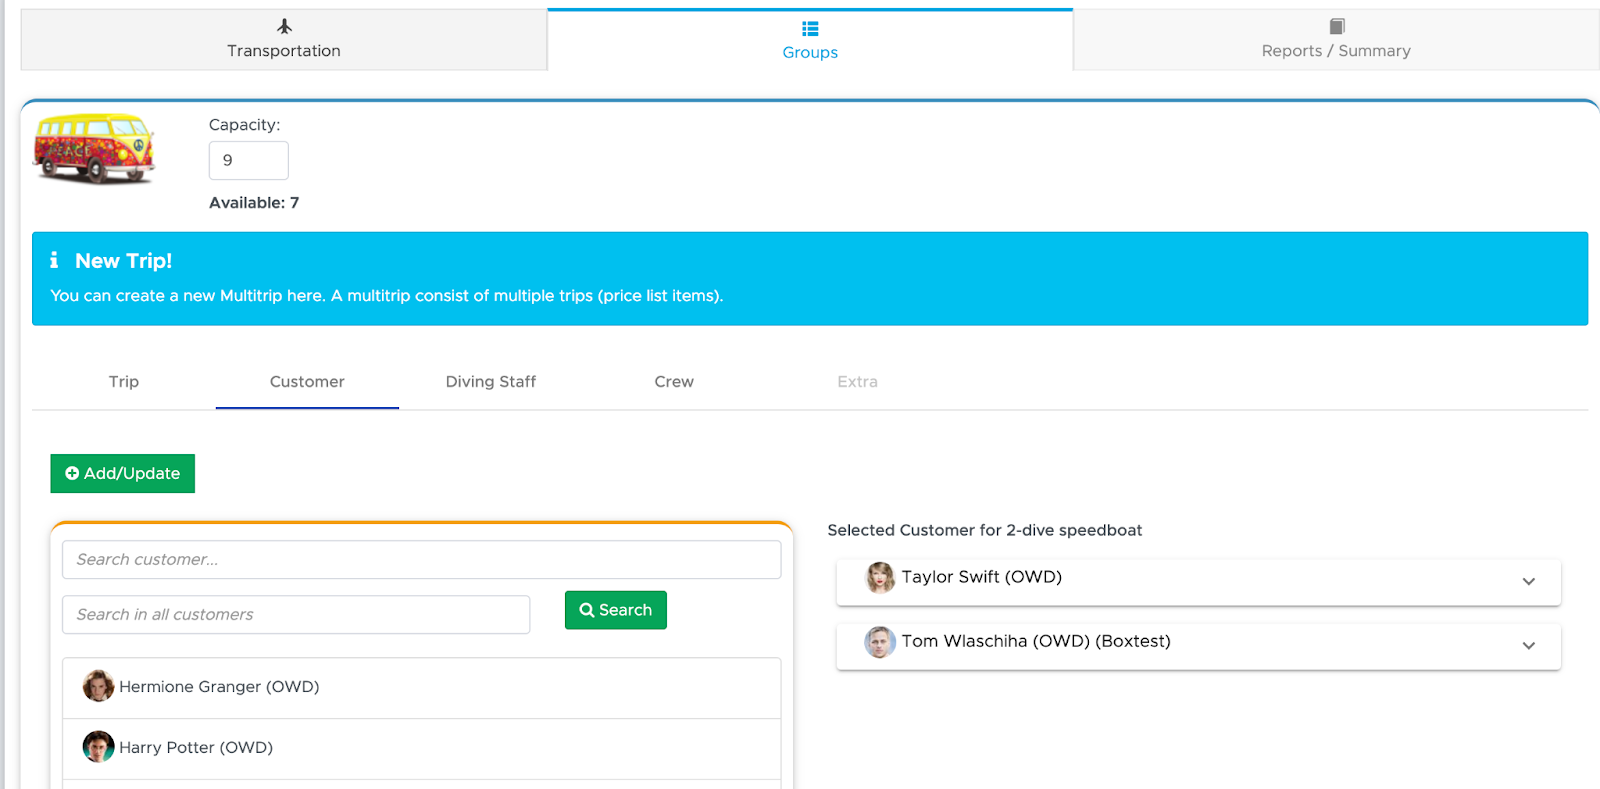
If the customers that you wish to select are not immediately visible, you can start typing their name or last name or bag/box number in the search string “Search customer”.
Starting from version 1.0.6 you can also search for customers that have not yet arrived at your dive center (All Customers). Write their name or last name in the search field “Search in all customers” and click on button “Search”.
A pop-up will show you the customers that match your search.
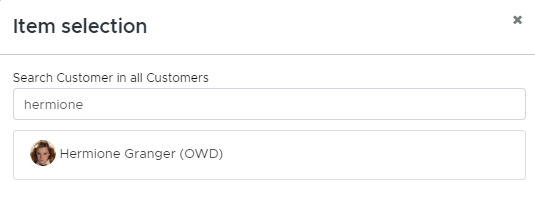
Click on the customer that you wish to add to your trip. You will see the pop-up disappear and the selected customer moved to the right-hand side.
If you wish to add extra costs to one customer or if they choose to dive EAN, click on the down-arrow on the right. This will show the customer’s card and the options that you can select.
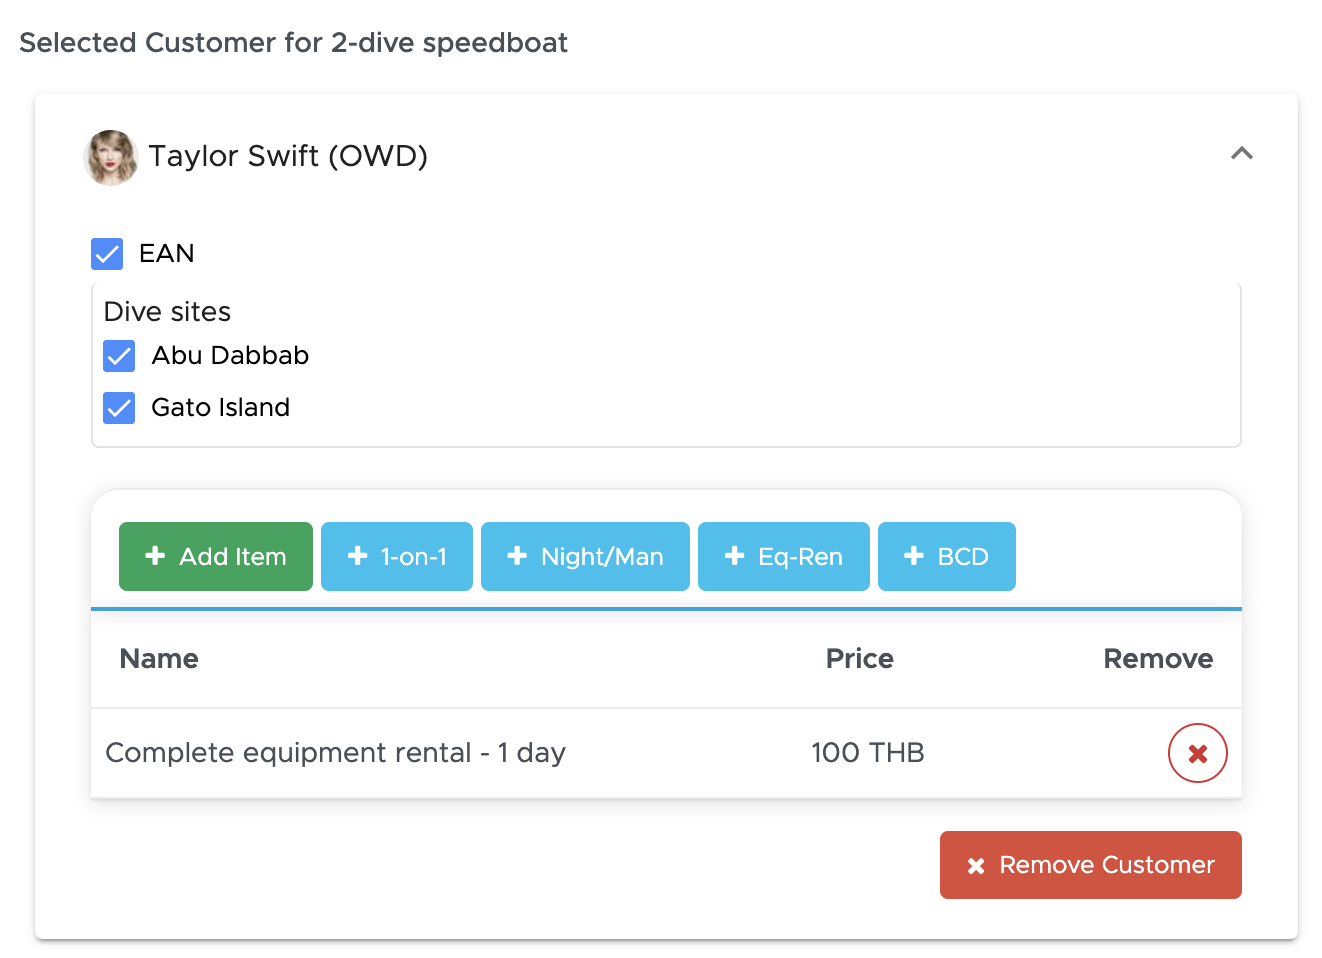
In the example above, the customer is diving nitrox (2 nitrox tanks will be added to her bill because 2 dive sites are selected) and needs to rent full equipment. If you haven’t done it already, you can set up your quick buttons in General Settings - UI Settings - Quick Selection.
If you have set up quick buttons you just need to click on them to see the extra charges written at the bottom of the customer’s card. You can click any of your quick buttons multiple times to add extra charges. Please consider that according to your quick buttons setup, some extra charges might be “per day” and others “per dive”. If the quick button is set up “per day” it will show just one extra charge, if it’s set up “per dive” it will automatically show the charges according to the number of dive sites that you’ve selected in your trip.
If you need to add an extra charge that is not listed in your quick buttons, you can click on the Add item and select any of the extra costs that are part of your price list as type Food & Drink, Fee, Rental or Extra from the pop-up.
Any extra charge can be removed by clicking on the trash bin icon next to them.
If you’ve selected the wrong customer you can click on the button Remove Customer.
Now click on Diving Staff and select a diving staff member who will lead this group. On the bottom-left of this screen you will see all the staff members that currently work with you and are marked as Dive Professionals or Dive Guides ( Diving Staff toggle in every staff member’s profile).

Starting with version 2.1 you can also see if the staff is busy during this time.
As soon as you click on their names, they will be moved to the bottom-right of the screen.
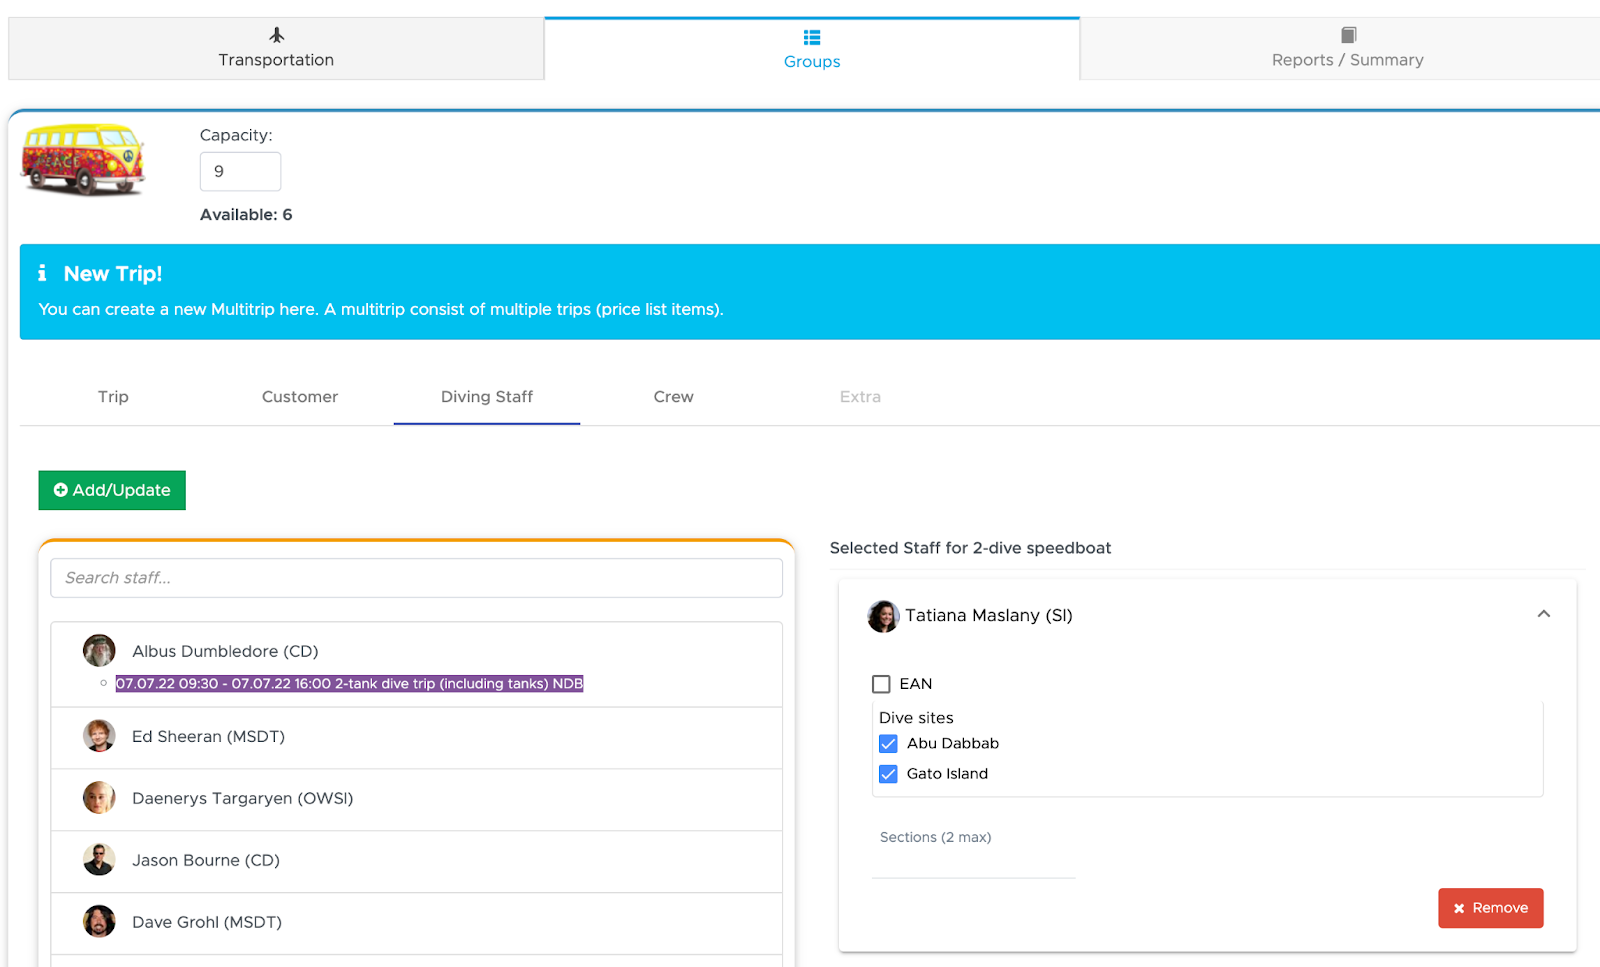
As you did for the customers, you can tick the checkbox EAN if the staff members are diving with Nitrox. The checkbox EAN on staff cards won’t be used to charge staff members for EAN tanks, but only to calculate the correct number of tanks that you need for this trip.
If you wish to add boat crew members or drivers to this group you can now click on tab Crew.
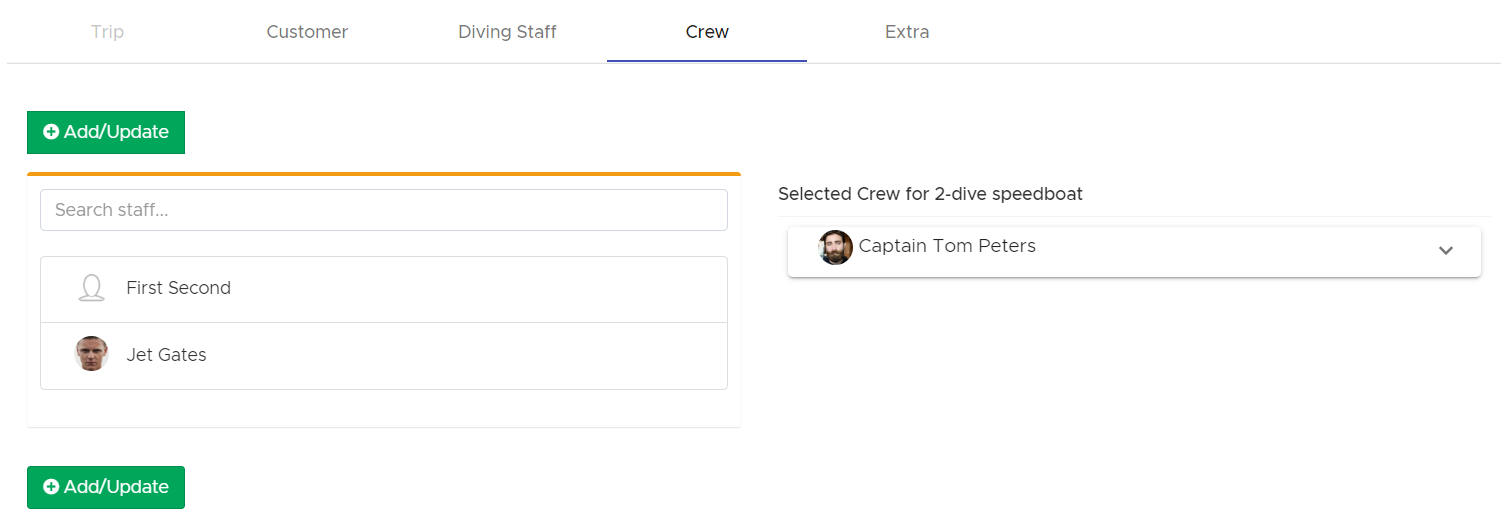
In this list you see all your staff members that have the toggle “Crew” set to Yes on their staff profile.

As you did for customers and Diving Staff members, select the crew members for this group.
It is recommended to select crew members, either in one of the groups or in a separate group for the following reasons:
to make sure that they receive the correct commissions once the activity is closed;
to correctly calculate the available seats on your transport.
Click on button Add/Update to save this group.
Geek Divers will take you to the Groups screen where you can proceed with the creation of another group.
You can see the group that you’ve just created at the top of the screen.

The number of people in this group will reduce the availability of seats on your transport and in case of dive sites with maximum capacity, you will see the name of the dive site and the number of people over the maximum capacity. In the example above here, for ‘Dive site 4’ there are 3 people over the 4 maximum allowed. When you reach the maximum number of people allowed (the smallest between the transport and the dive sites), you will see a warning message:
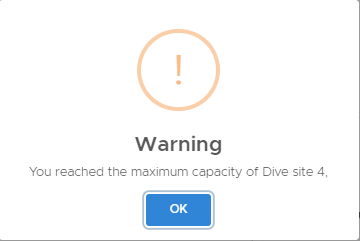
You can click on OK and proceed with your trip setup. Please consider that this is only a warning message. You can exceed the maximum capacity both for transport and dive sites. However, once the capacity is reached, in your activity calendar your trip will show a warning icon.

If you now scroll down and save the trip, the scheduler at the top will be updated with your new trip.

8.2.1.2 Selection of a Course
When you go out with your boat/van/car to take your customers to the dive sites you probably have different activities going on. You might have a group of beginner fun divers, advanced fun divers, snorkelers, free divers, technical divers and some students doing training dives.
You can add students who will do their training dives. In the scheduler at the top of the page you’ll find which course is ongoing.
Search for the same course in the Search Item field or click on button Select if it’s already visible.
Geek Divers will show you a pop-up window.
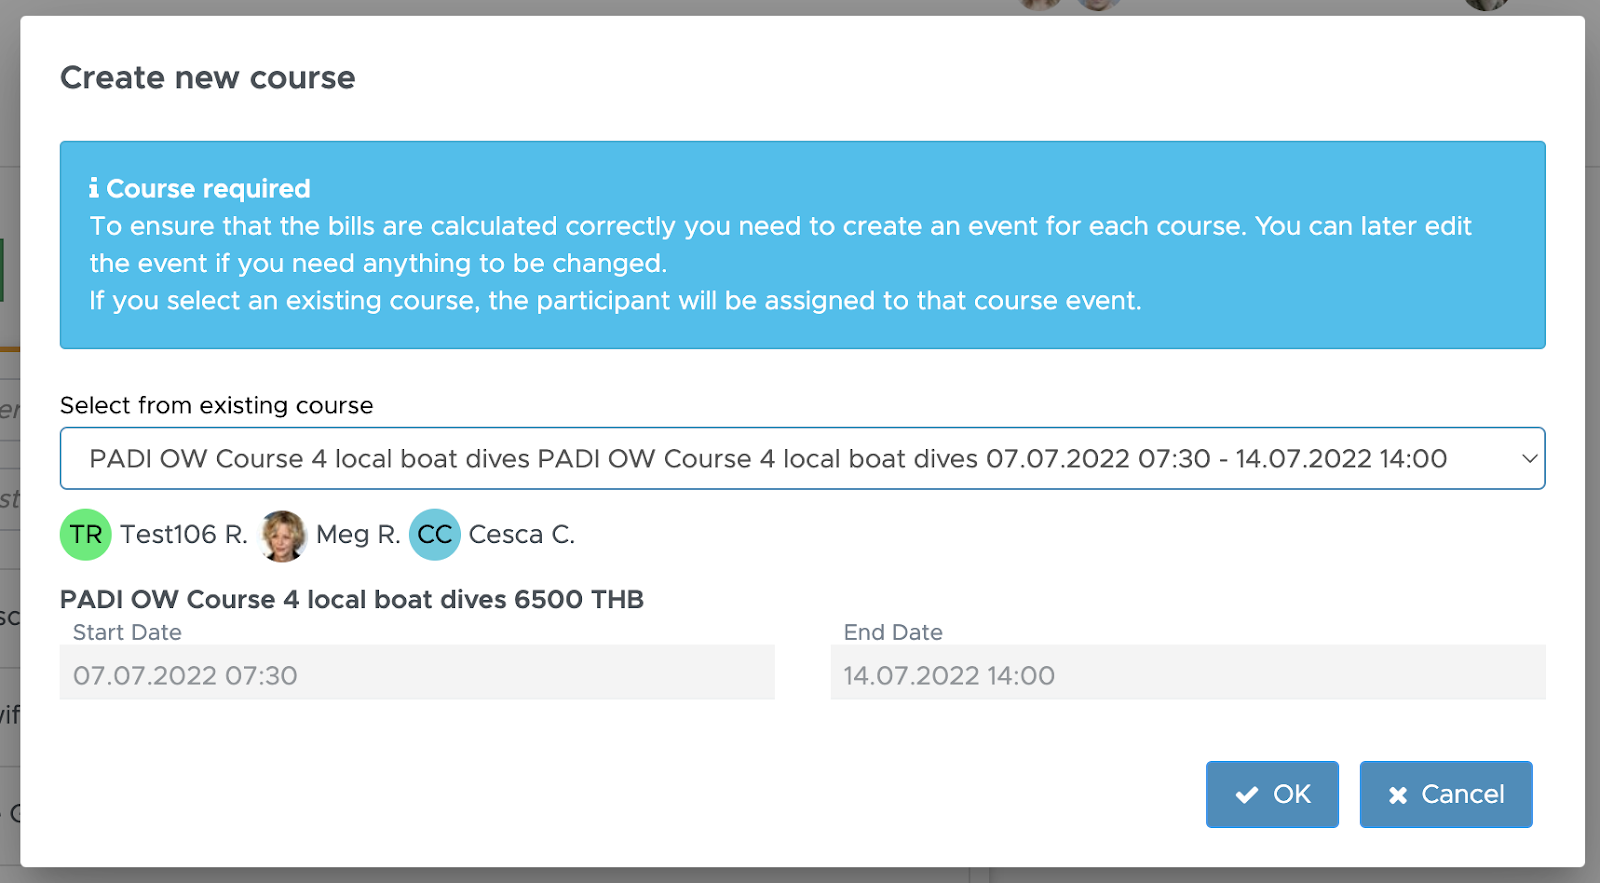
If you’ve already created a course in your calendar and you just need to add it to your trip, you can select it in the selection box “Select from existing course”. In the screenshot above here you can see an example of it.
If you click on the button OK, customers and staff members will be automatically selected in this group and the group will be saved.
Tip: when you create a course in your calendar or from menu New Course, it’s always a good idea to extend the start and end date/time to make sure that the course is found in a trip. E.g. if you set up your Advanced Open Water course to start at 8am and your boat leaves at 7.45 Geek Divers may not find the course among the existing ones. As a good practice, please make sure that your courses start before your morning trips and end after your night trips.

If you need to make changes to the course that you’ve just selected, please refer to chapter Modify a Trip or a Course.
If you now select another course that you haven’t previously created in the system (e.g. an Advanced Open Water Course) another pop-up window will appear.
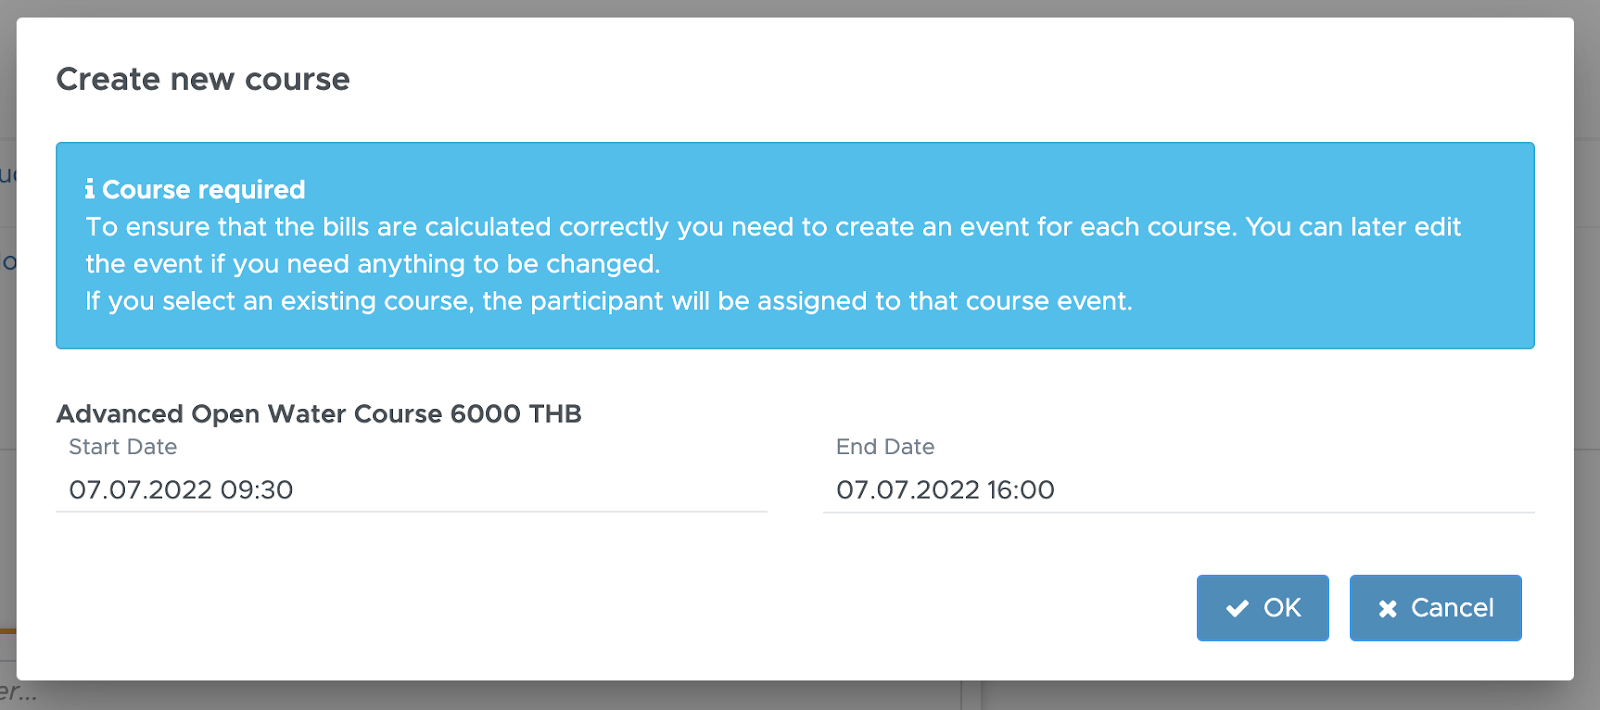
As there’s no ongoing Advanced Open Water course in the calendar, the pop-up won’t show a selection. However you can set a start and end date by clicking into the date fields and click on the button OK.
Select the students and the staff members and save the group.

Now Geek Divers has not only created an Advanced Open Water group for this trip, but also an Advanced Open Water Activity type = Course in the calendar with the same customers and staff members. You can view both the course and the trip in All Activities and in the Activity Calendar.
The customers who join the Trip while doing a Course will only be charged for the Course.
Don’t forget to save the trip!
8.2.1.3 Extra
Within the trip and in every group, you can add extra charges for the whole group. This is an alternative to the button Add item or the quick buttons that you can find in every customer’s card once they are selected in a group. If the extra charges should be applied only to one customer (e.g. camera rental), please use button Add item or your quick buttons in the customer’s card. If the same extra charge is supposed to be applied to all the customers in the group, you can now use tab Extra.
In a saved trip, click on the group that should be charged and on tab Extra.
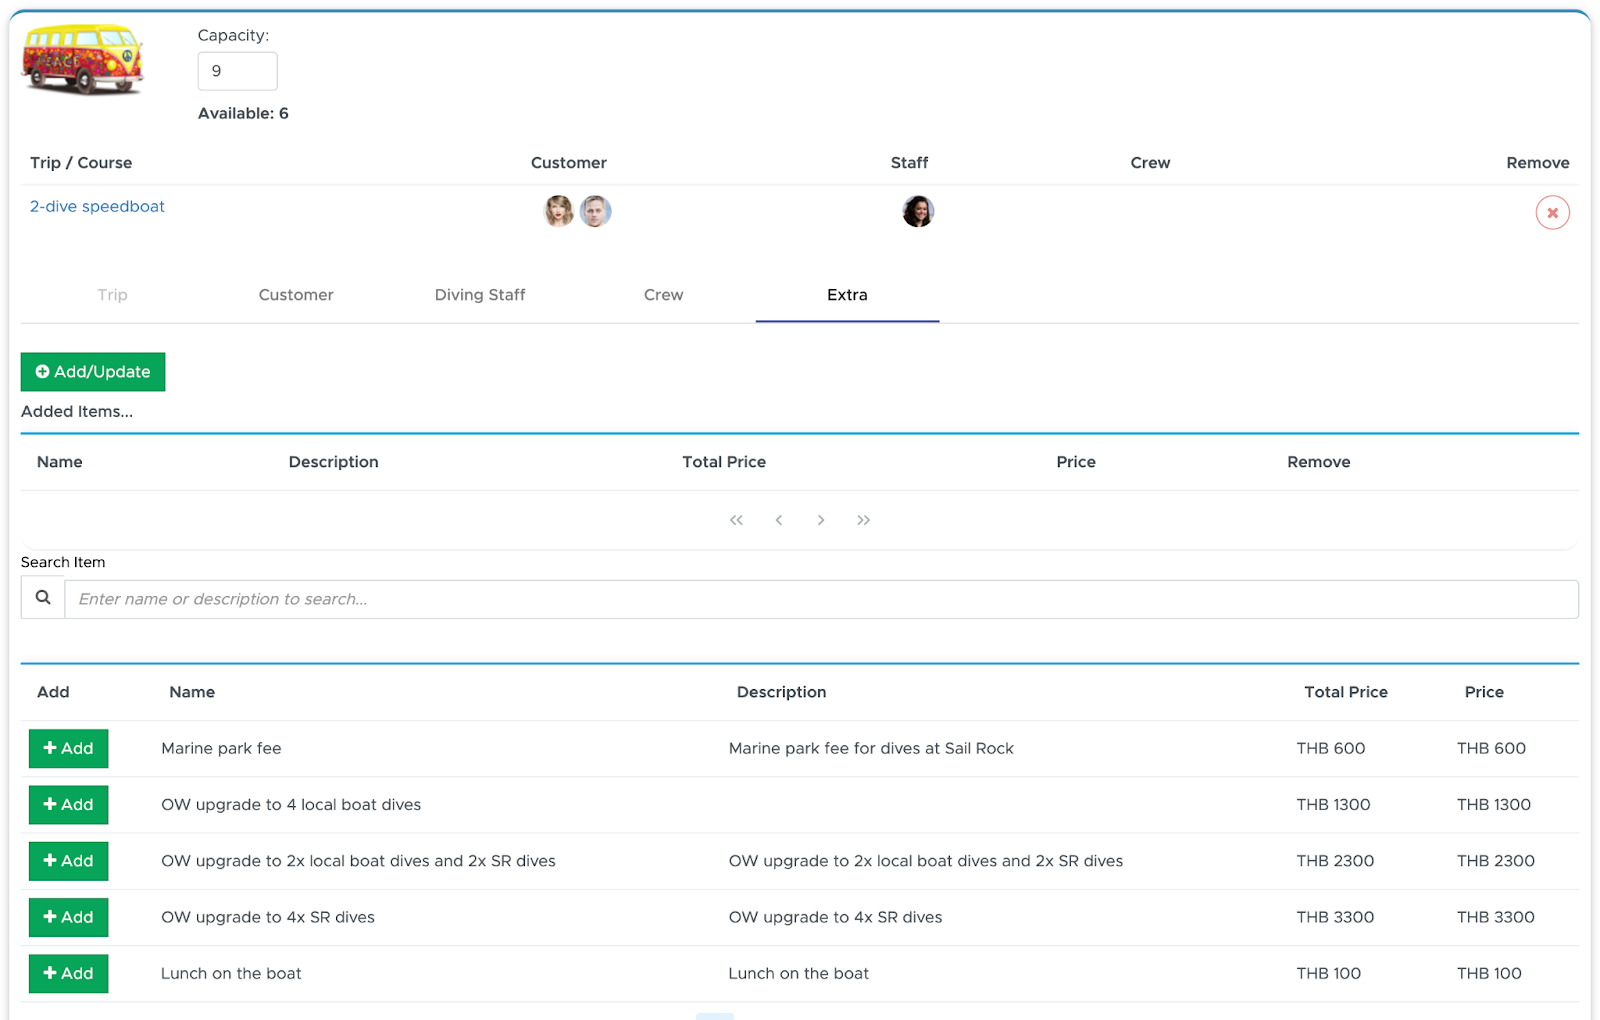
At the bottom of this screen you will see the list of extra charges that you’ve added to your price list. Here you will only see types Extra, Food & Drink, Fee and Rental. If the extra charge is not immediately visible, use the search field and then click on button Add.

If you’ve added the wrong extra charge, you can click on the button Remove.
This extra charge will be automatically applied to the customers in the group as soon as you click on button Add/Update. You will see the extra charge in their bills.
Please remember that the tab Extra is only available after you confirm the group (button Add/Update).
8.2.1.4 Reports/Summary
If you wish to use the automatic lists that Geek Divers creates for every trip you can either click on the button Go to trip list at the bottom of the screen or on tab Reports/Summary at the top of the screen.
At this point Geek Divers is creating all the lists, fetching data from customers and staff members.
You will see 7 headers with a plus icon. By clicking on the plus icon you can expand the header to show the list that you wish to view.
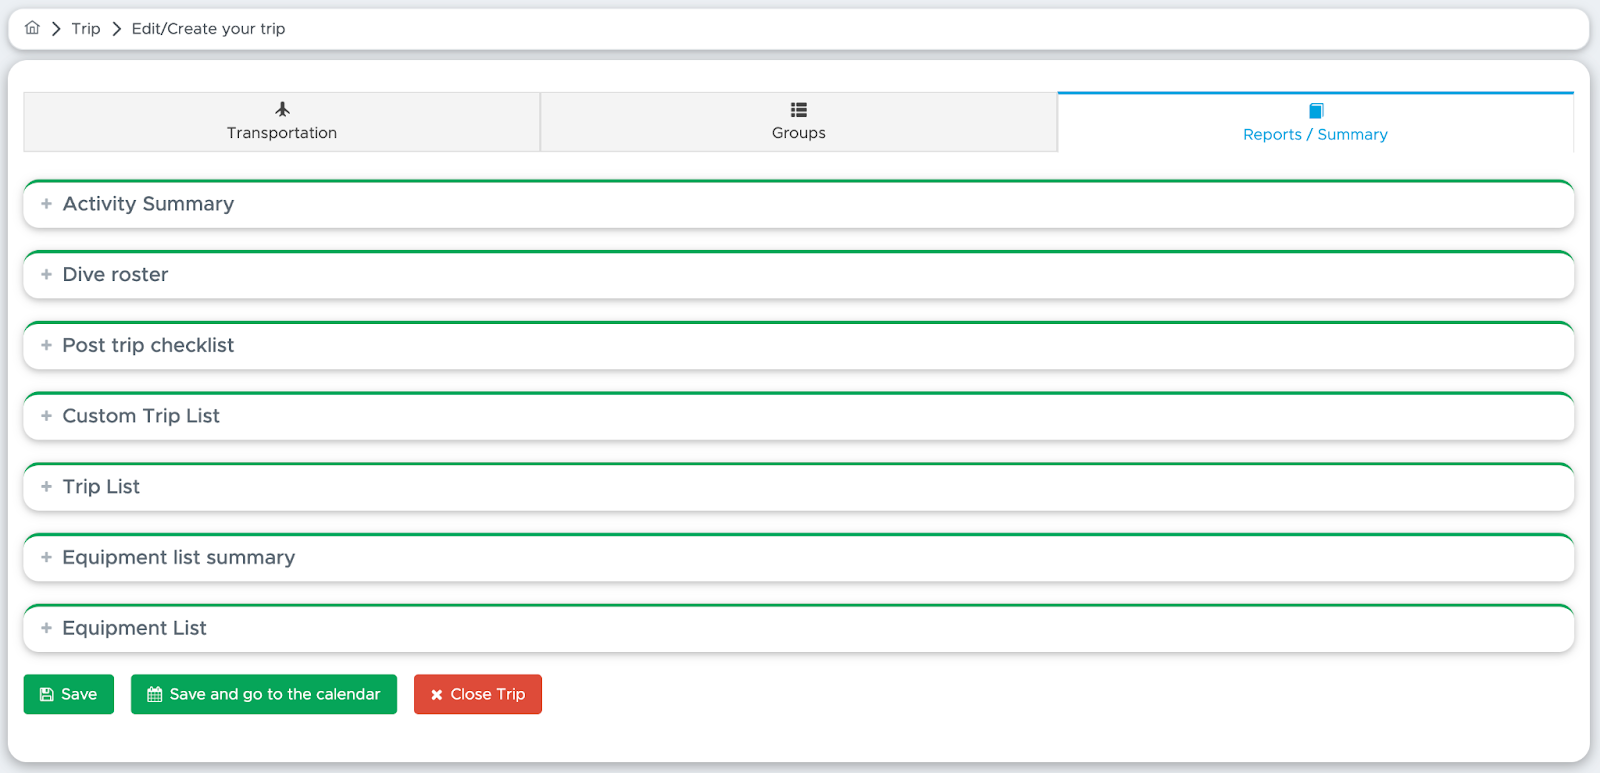
In the Activity Summary you can choose the Trip Leader/Boat Master from the list of current diving staff members.
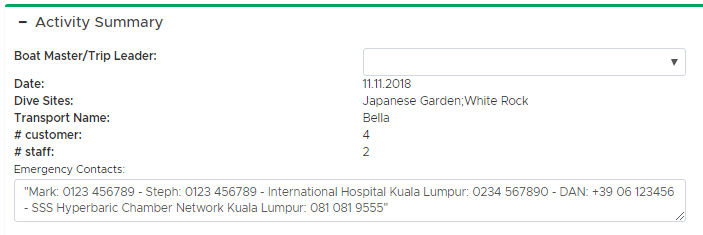
The Emergency Contacts are copied from your settings. If you haven’t set them up yet, please go to chapter Company Information.
In the Dive Roster you will see the list of diving staff members and customers as you have set them up in the trip groups.
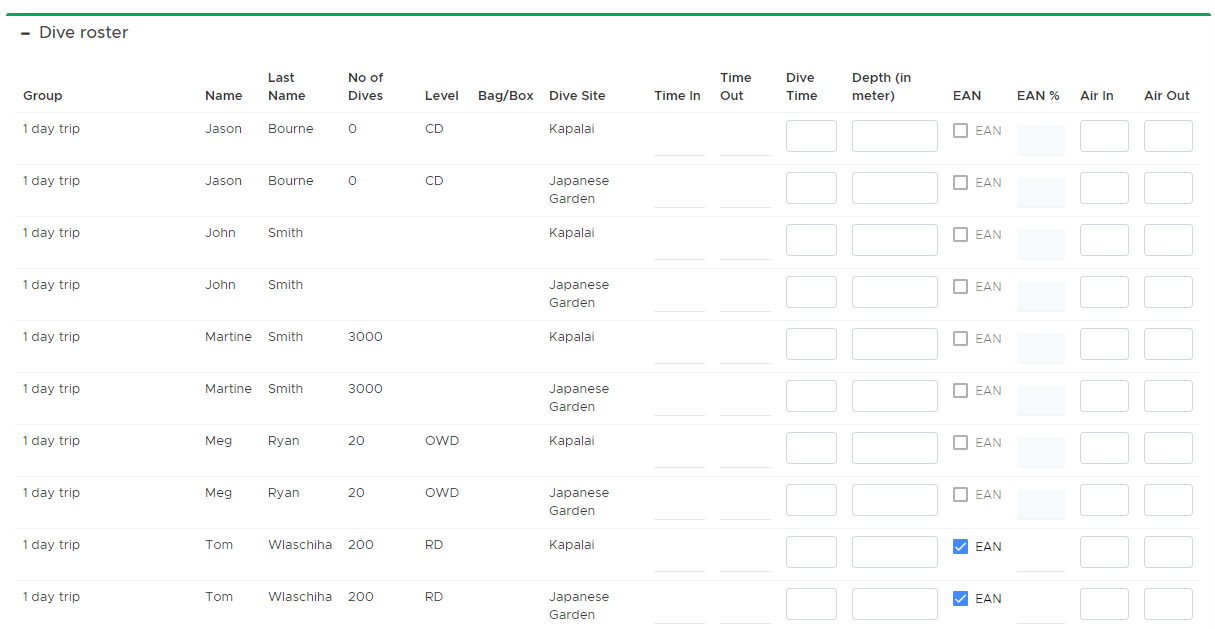
The first name of the group is always the staff member leading the group.
Please remember that you can customize the columns of the dive roster. Read chapter UI Settings.
If you click on button Print, Geek Divers will generate a pdf file with Trip Summary, Dive Roster and Post-Trip Checklist.
Before you print the Dive Roster, you can choose if you want to print it in landscape and if you need a column Signature.
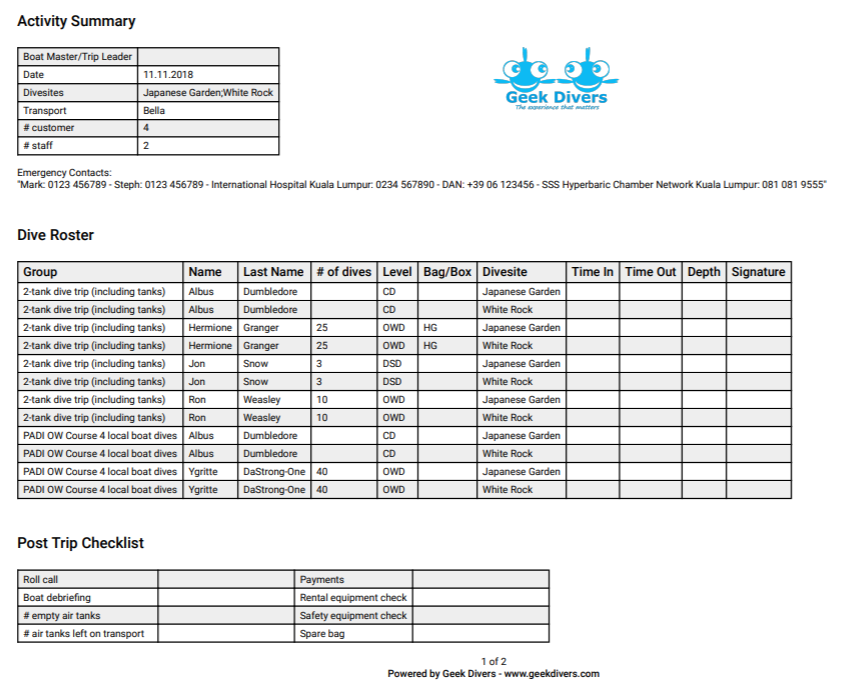
After the dives you can enter Time In, Time Out (or alternatively Time In and Dive Time), Depth and EAN% in Geek Divers for your records. Starting from version 2.0 you can also enter Air In and Air Out.
The Custom Trip list will show the list of columns that you’ve set up in your General Settings - UI Settings. If you haven’t done it yet, please read chapter UI Settings.
If you choose to assign rental equipment to the customers in every trip and you wish to use your Custom Trip list for that, you need to add the button Assign Equipment to your Custom Trip list. In Reports/Summary you will see this button in orange in every customer row. Click on this button to open a pop-up and assign the correct equipment to your customers. Please consider that this button is also available in the Equipment list.
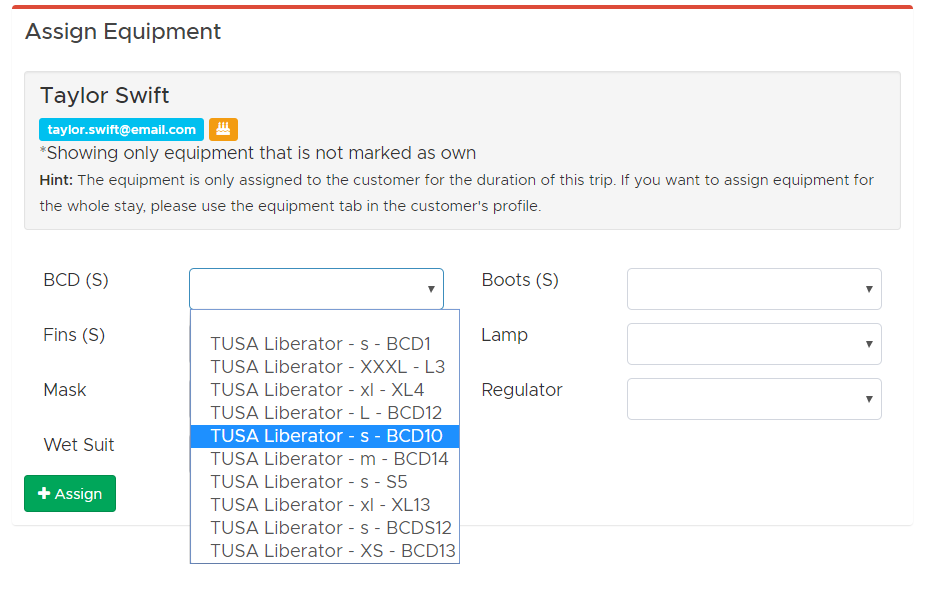
If you’ve filled out the sizes of the equipment that the customer wishes to rent in customer’s tab Equipment, you will see the sizes both in the Custom Trip list table and in the pop-up, in brackets.
Use the drop-down menus to view and assign the correct piece of equipment among the available ones. When you’re done click on button Assign. Your selections will assign specific pieces of equipment to the customer for the duration of the trip.
Repeat the assignment for every customer in the list.
The printed version (pdf) of your Custom Trip list will show the staff members rows with a light green background color. Additionally, if you’ve added a custom column with a default value and you changed this value within the Custom Trip list, the cell with a different value will show with a light blue background color. The button Assign Equipment will not be printed.
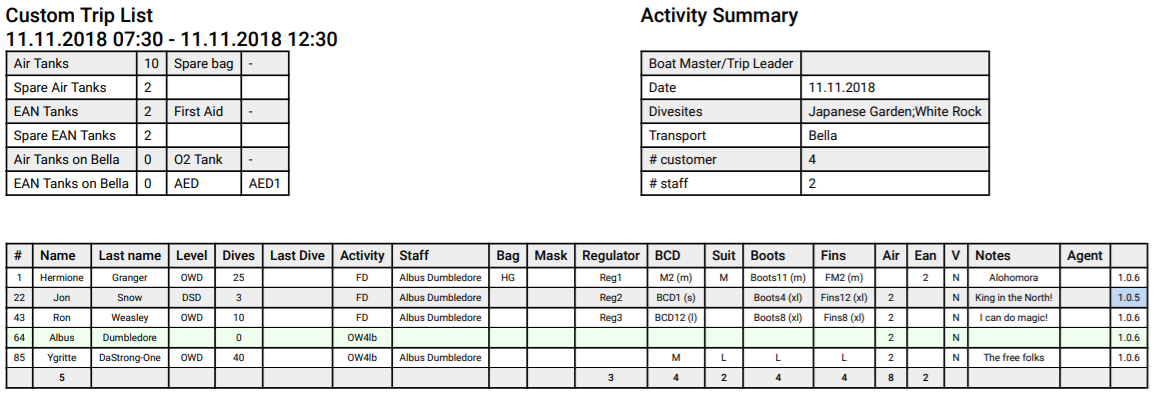
The Trip List shows additional information about the customers joining this trip. You can customise the columns of this list in General Settings. Please read chapterUI Settings to find out how.
You can click on button Print to generate a pdf of the Trip List. The printed version of the Trip List will include the Activity Summary.
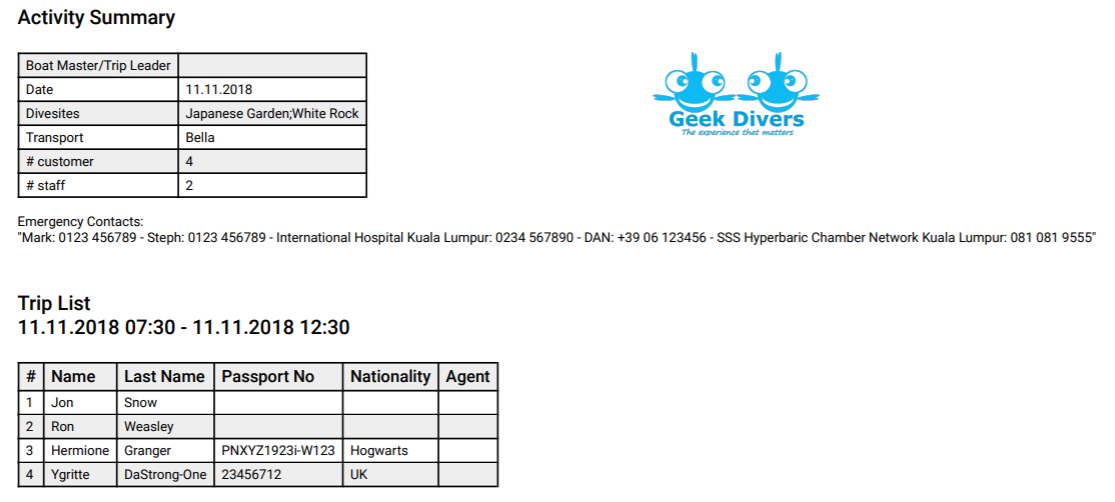
The Equipment List Summary and Equipment List show you the complete list of equipment that you need for the trip. If you wish to use these lists, you can customize the columns in your General Settings. Please read chapterUI Settings to find out how.
In the Equipment List Summary you will see the number of tanks that you need for this trip, including 2 spare tanks. You can modify the number of spare tanks. You can also add safety equipment such as O2 tank, First Aid kits and AED devices, providing that you’ve set them up in your equipment list. Please read chapter New Equipment to find out how.
If you usually assign your rental equipment to your customers for their entire stay (from check-in to check-out date), then you need to do so in the customer’s profile, tab Equipment. The equipment assigned to your customers in their profiles will be automatically available in the Equipment List.
If, on the other hand, you assign your rental equipment to your customers day by day, in the Equipment list you will find the button Assign Equipment in orange in every customer row. Click on this button to open a pop-up and assign the correct equipment to your customers. In this case the assigned equipment will be automatically released at the end of the trip.
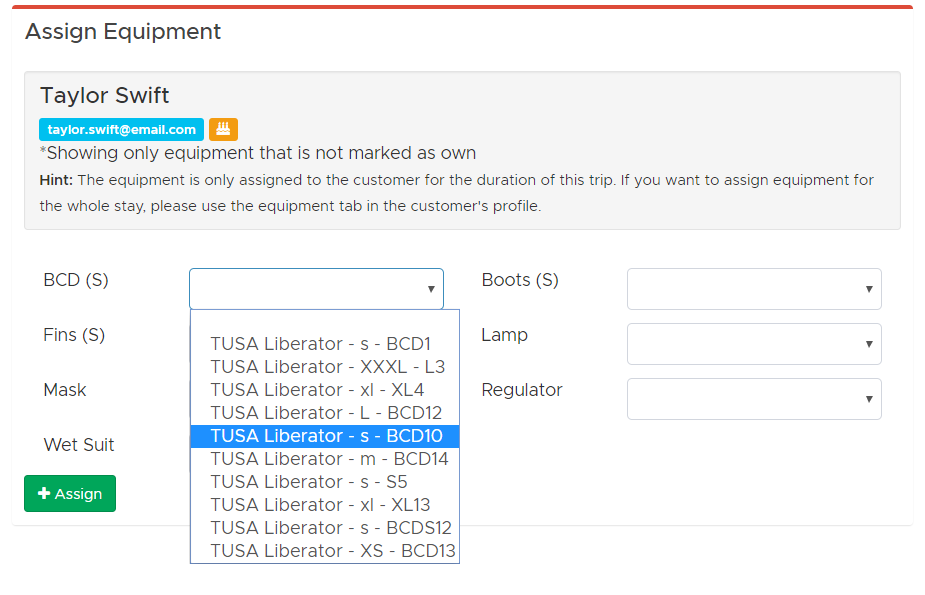
If you’ve filled out the sizes of the equipment that the customer wishes to rent in customer’s tab Equipment, you will see the sizes both in the Equipment list table and in the sidebar in brackets.
Use the drop-down menus to view and assign the correct piece of equipment among the available ones. When you’re done click on button Assign. Your selections will assign specific pieces of equipment to the customer for the duration of the trip.
Repeat the assignment for every customer in the list.
The printed version of the Equipment list will show both Equipment Summary and Equipment List. The staff members will be shown in a light green background color.
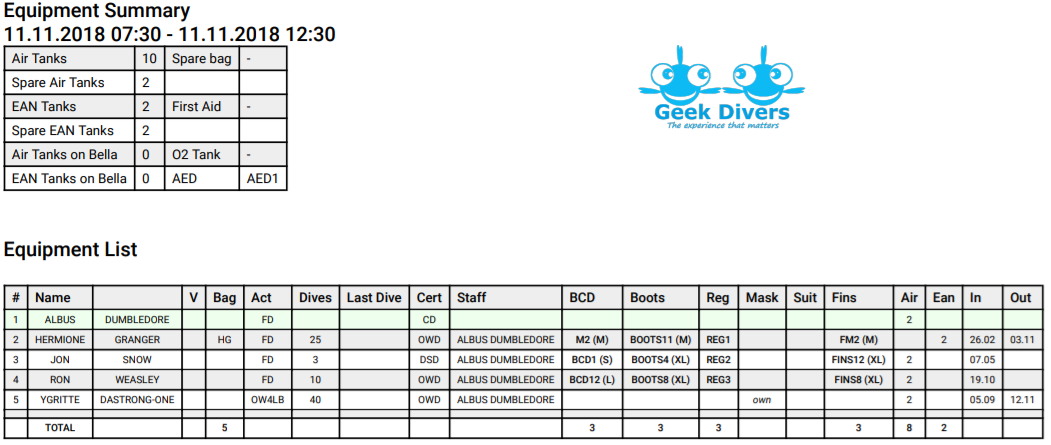
Before you leave the trip don’t forget to click on the Save button.
8.2.2 New Course
In the Activity Calendar click on a day at the time your course should start. In the pop-up select New Course and confirm. Alternatively you can click on the menu Activity and New Course.
Geek Divers will take you to the list of all your price list item types Course (with a book icon).
Select a course by clicking on it. You will be directed to the activity planning page.
Click on the calendar icons to modify the start and end dates and times.
The description that you see underneath the dates, is the same that you wrote in your price list.
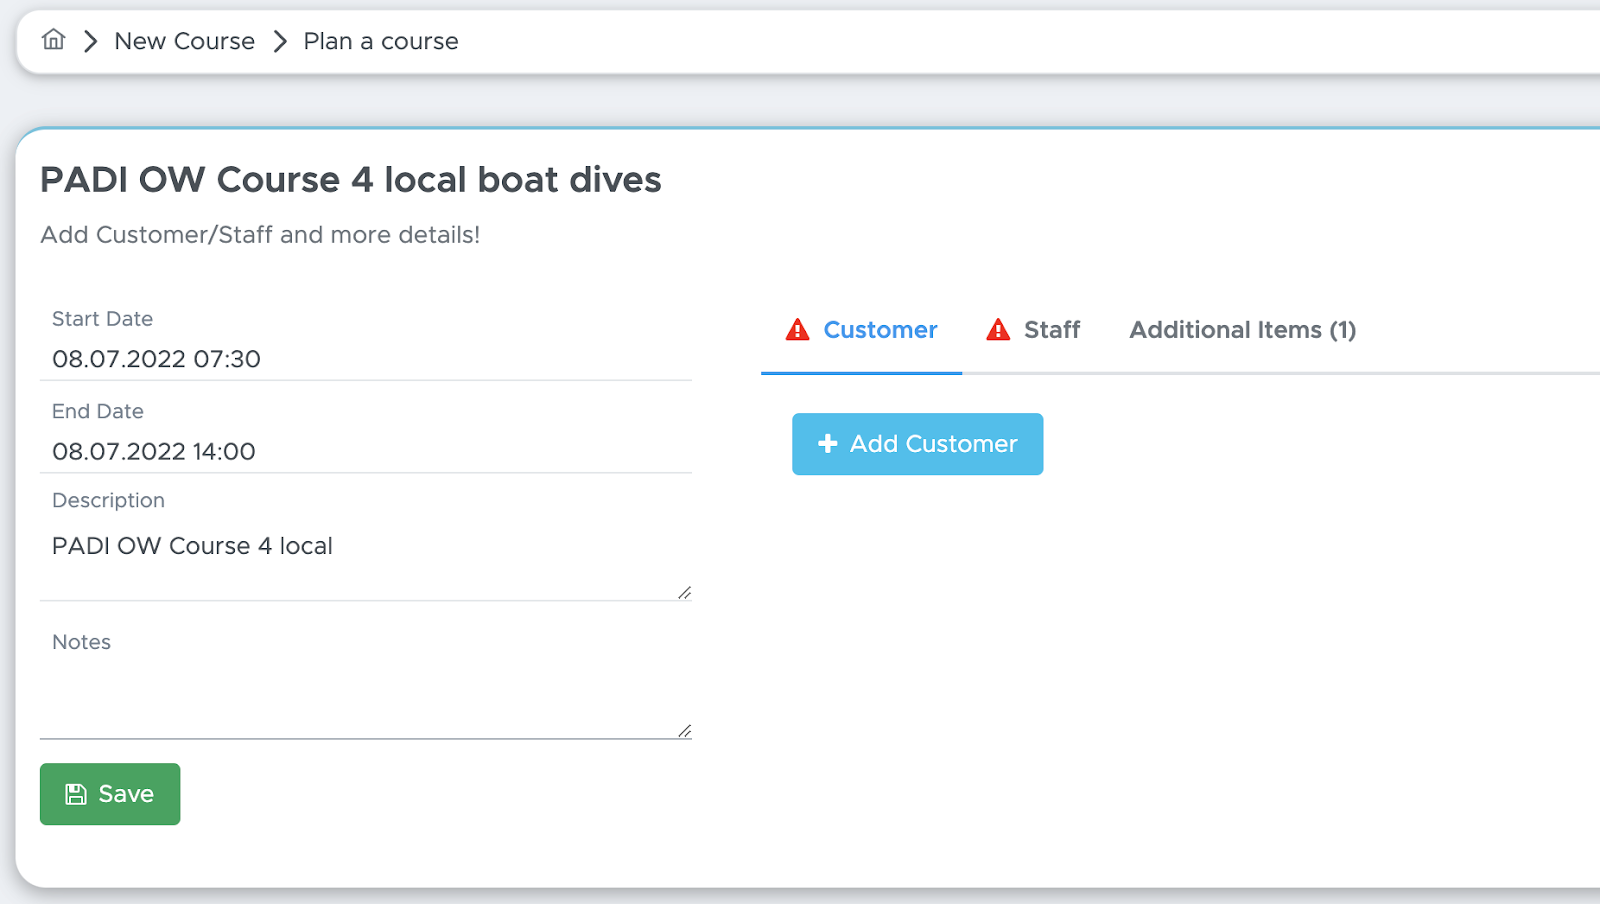
Click on the “Add Customer” button to select the customers who are joining this course. You will see all “current customers” automatically. If you want to add a customer that is not current right now, you can just start typing the name in the “search customer” field and select it from the list. Confirm your selection by clicking on the button “Select”.
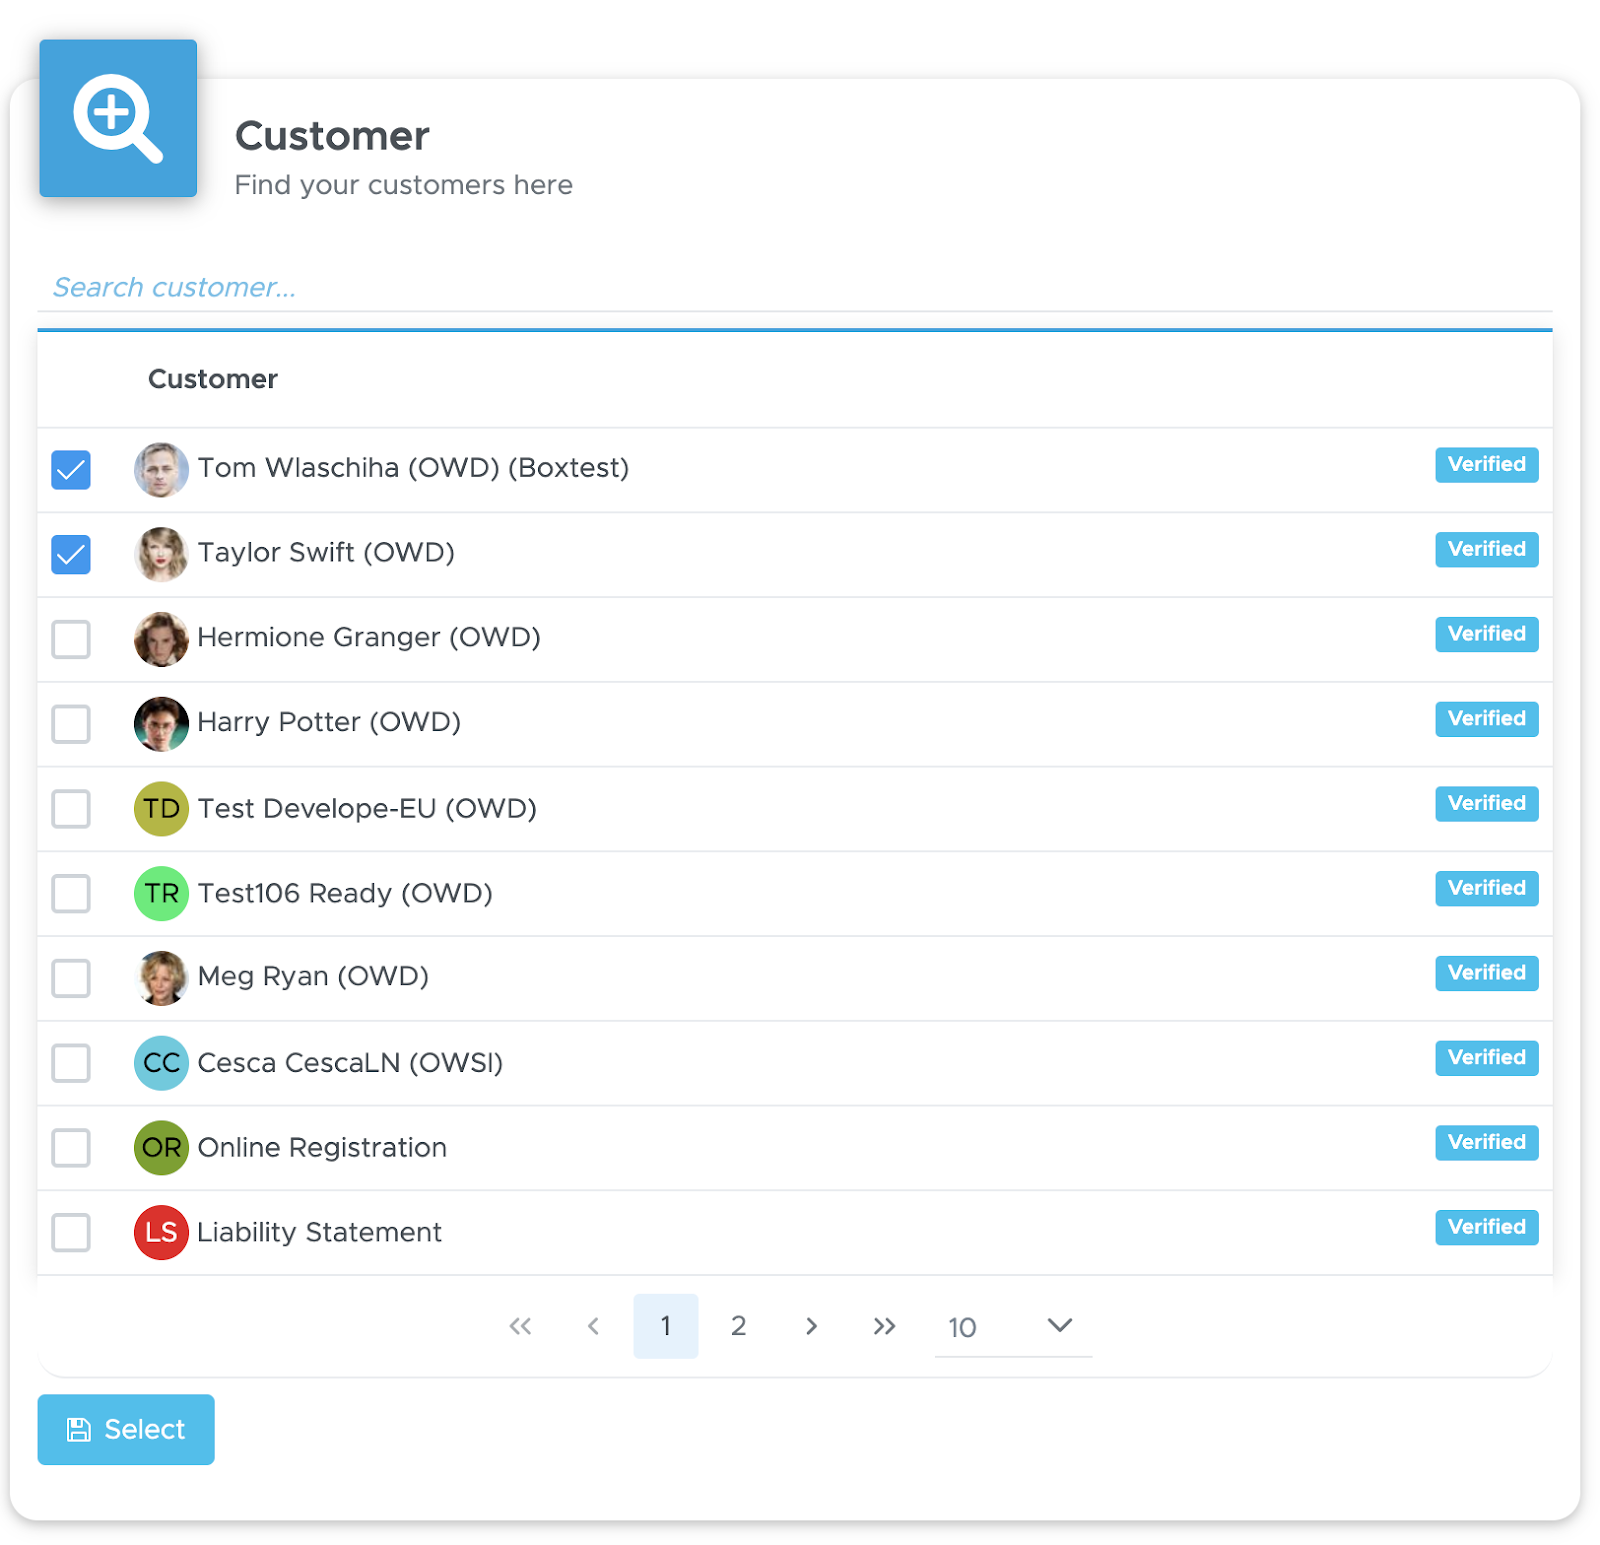
The customers who join a course will be charged according to your price list for the course and in their bills you will see separate lines for the course and the extra charges.
Now click on the Staff tab and click the button “Add Staff”
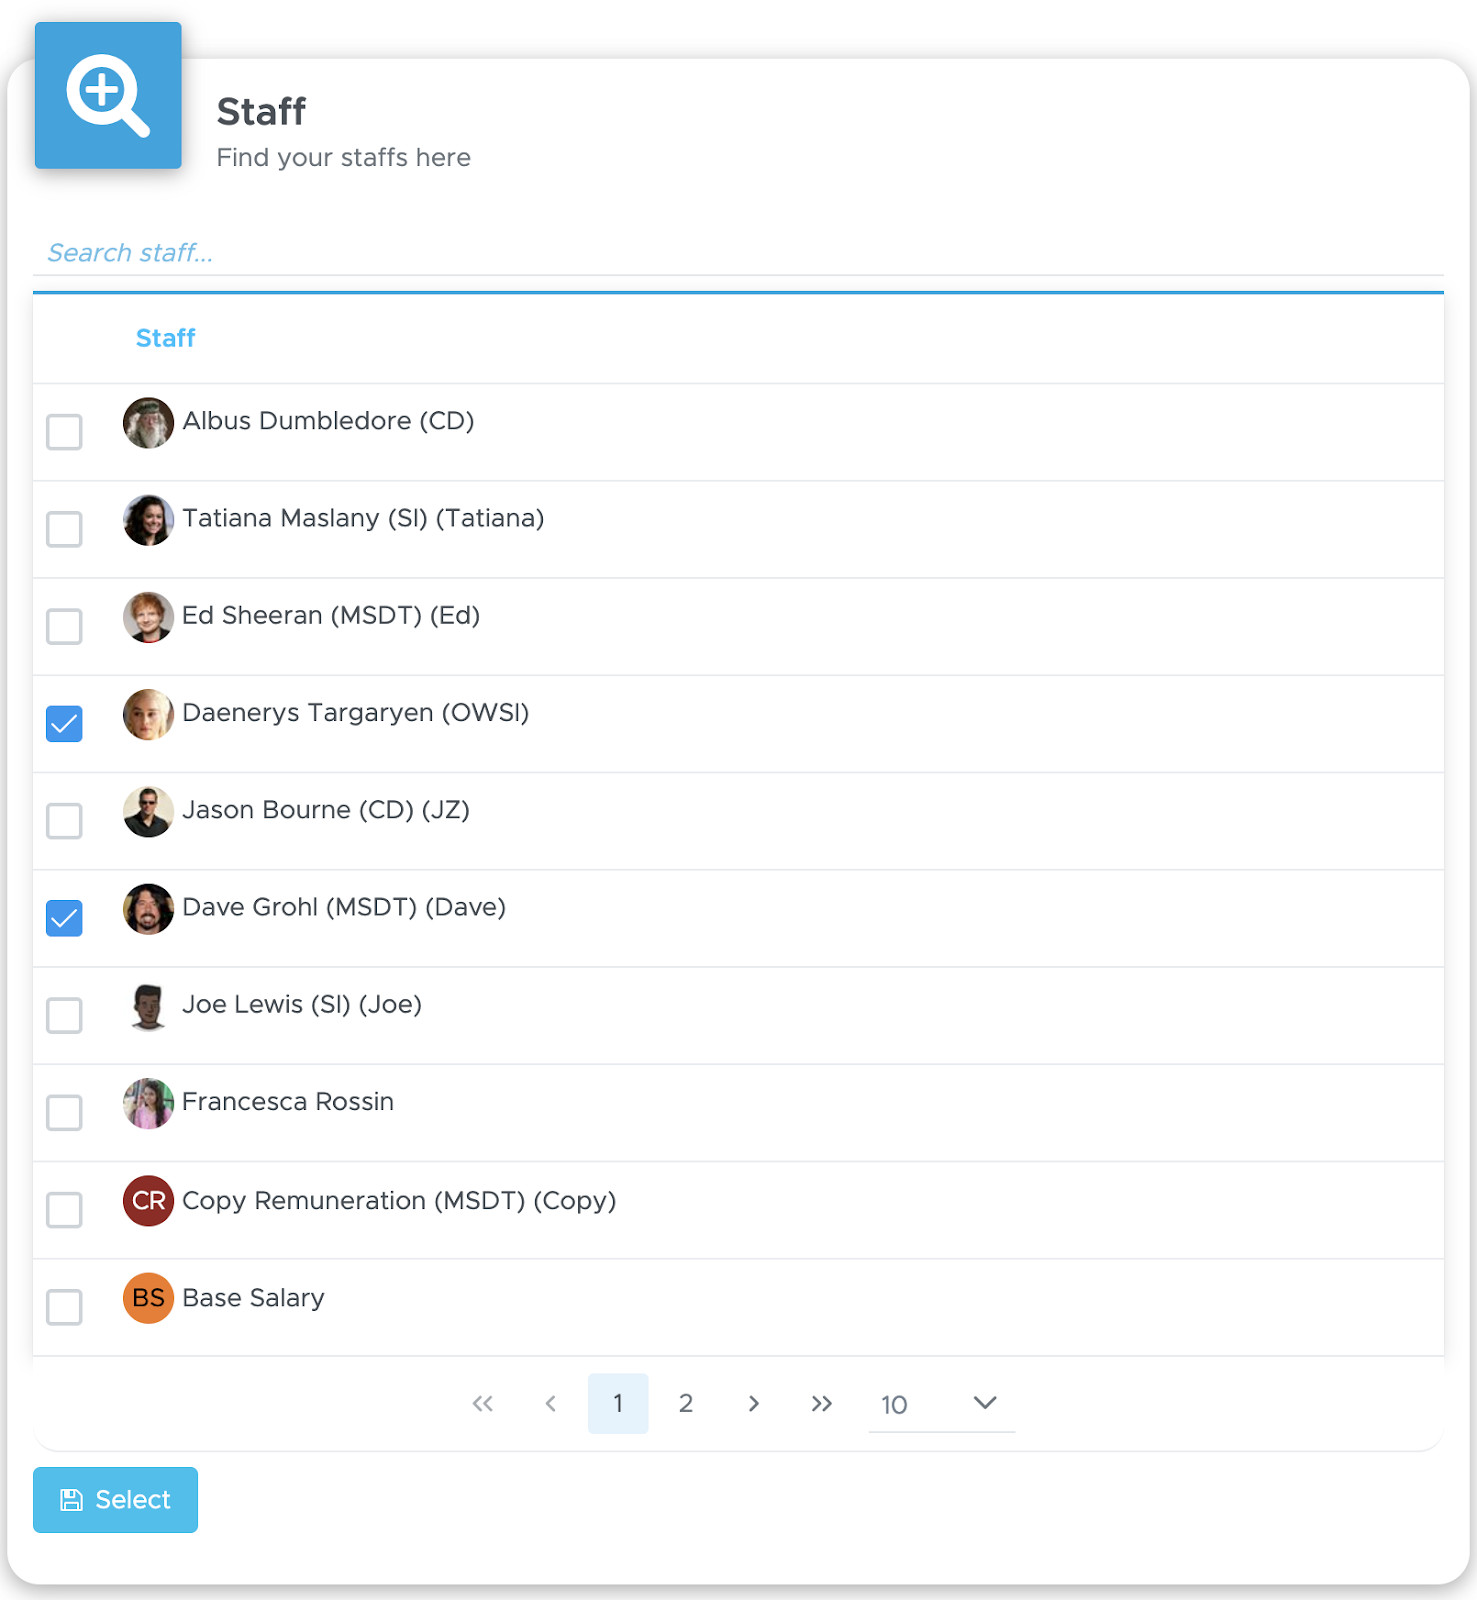
In the example above I selected two instructors who will teach this Advanced Open Water course.
Because I chose to divide the Advanced Open Water into 14 sections in my price list, the system will show me “Sections ( 14 max)”. In my example the first instructor will teach 8 sections and the second 6.
It’s important that you write the number of sections if you choose more than one staff member or each of them will receive the full commission for the course even if they taught only a part of it.
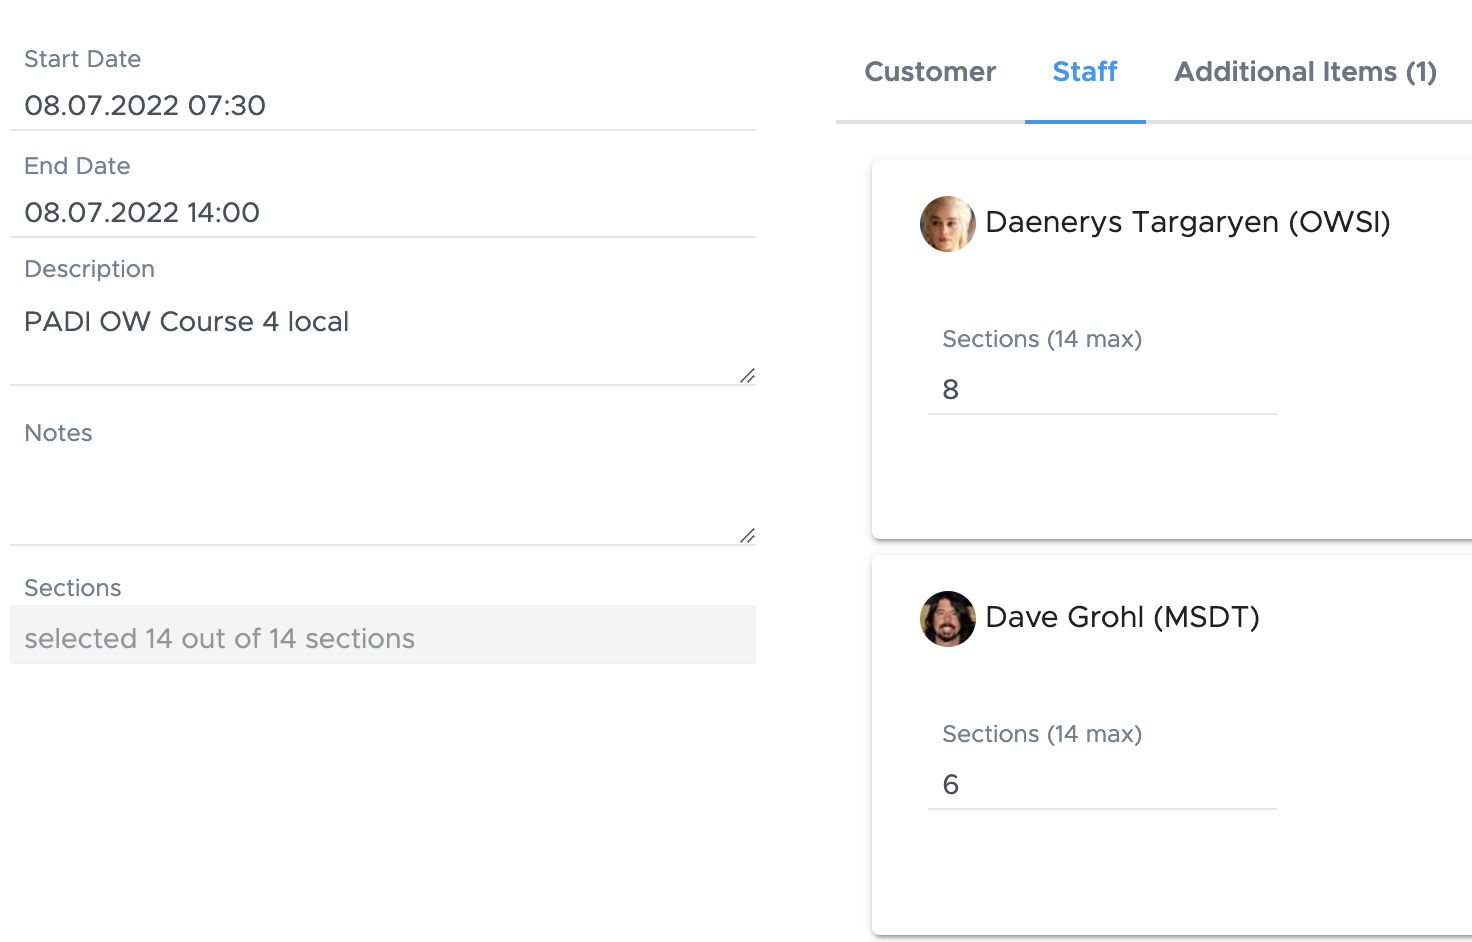
If you choose only one instructor you can skip the sections part. If you haven’t defined the number of sections in your price list, please go back to chapter Price list item type Course of this user guide and read the explanation in Sections.
You can edit this part later, as long as the course is open.
If you need to select any extra charges for all the customers joining this course, click on tab “Additional Items”.
Here you see all the extra charges that you have already added to your price list.
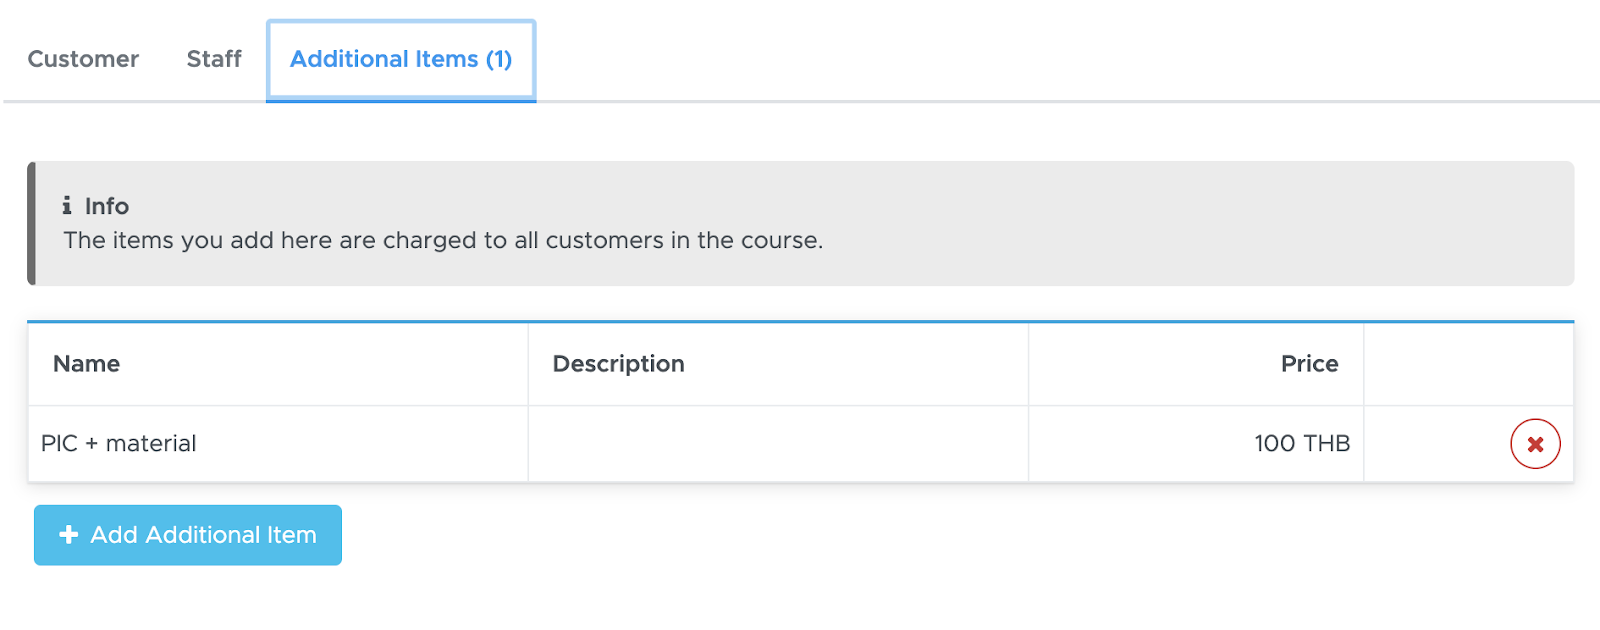
Select any additional costs (if appropriate). If extra charges are already included in your price list item, you will see them already selected. E.g. PIC + material is already selected in the picture above.
Don’t forget to click on the button Save!
8.2.3 New Task
A task can be used for internal reminders, staff meetings and anything else that you need to pin to your Activity Calendar.
Go to your Activity Calendar and click on a day and time. From the pop-up choose Task and click on Ok.
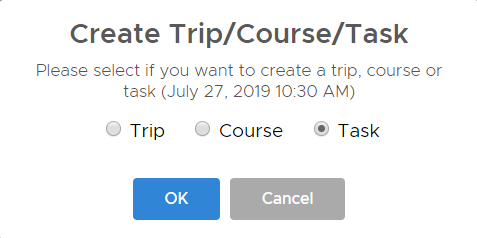
A sidebar will be opened on the right-hand side of your screen.
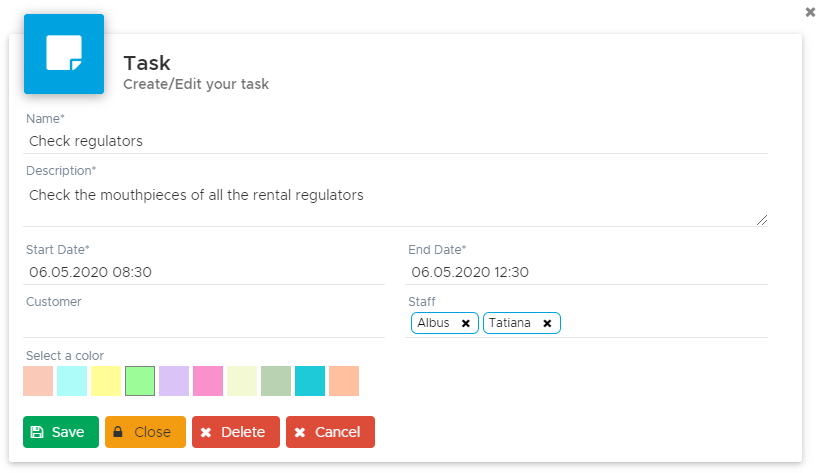
Enter a name and description for this task. The Start Date is the date and time taken from where you clicked in the calendar. The End Date is one hour later. You can change one or both of them by clicking on them and selecting a different date/time.
If you wish, you can add staff members and/or customers to this task. In Add Staff start typing the name or last name of your staff members and Geek Divers will find them. If needed, repeat these steps to add customers.
Select a color that will be used to display this task in the activity calendar and click on button Create. The task will be created and added to your activity calendar.
If the task is set for one hour, you might not see the full content of it. Click on the pin icon to open a pop-up that will show you the content of this task.
If you wish to edit the task click on the pencil icon. Make your changes and click on button Update.
Please consider that a task will not automatically update bills or payslips. Think of it as a note pinned to your calendar.
8.2.4 Activity pop-up and activity notes
A new activity pop-up has been introduced with version 2.0.
From the Activity Calendar click on a trip picture or on a course to view the pop-up.
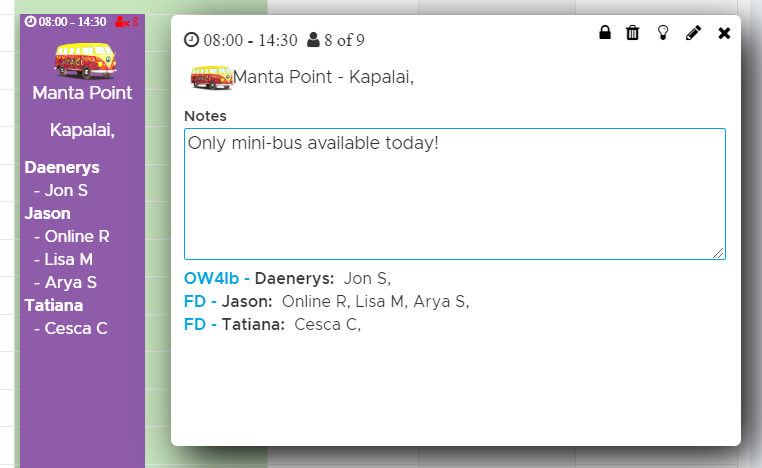
At the top of the pop-up you will find:
The activity start and end time.
A people icon, the total number of people currently in the activity and the maximum capacity (only in trips) that depends on the chosen transport or on the limitations due to the chosen dive sites (whichever is smaller).
A padlock icon to close the activity (a pop-up message will ask you if you’re sure).
A trash bin icon to delete the activity (a pop-up message will ask you if you’re sure).
A lightbulb icon (only in trips) to access the Trip Quick Edit feature.
A pencil icon to edit the activity.
An X icon to close the pop-up.
Right below you will find the default icon or picture of the transport selected for this activity and the dive sites.
In the middle of the pop-up you will find the activity notes. You can edit the notes directly in the pop-up or you can click on the pencil icon to edit the activity and you will find the notes there as well.
Below the notes you will see the group(s) in the activity.
Every group is introduced by the abbreviation that you’ve chosen in your price list in blue font. If you haven’t set up an activity abbreviation or if you wish to change it, check chapters Price list item type Trip and Price list item type Course.
The names in bold are your staff members and the remaining names are your customers.
8.2.5 Copy / Move an activity
Starting with Version 2.1, you will be able to simply drag and drop an activity to copy or move it.
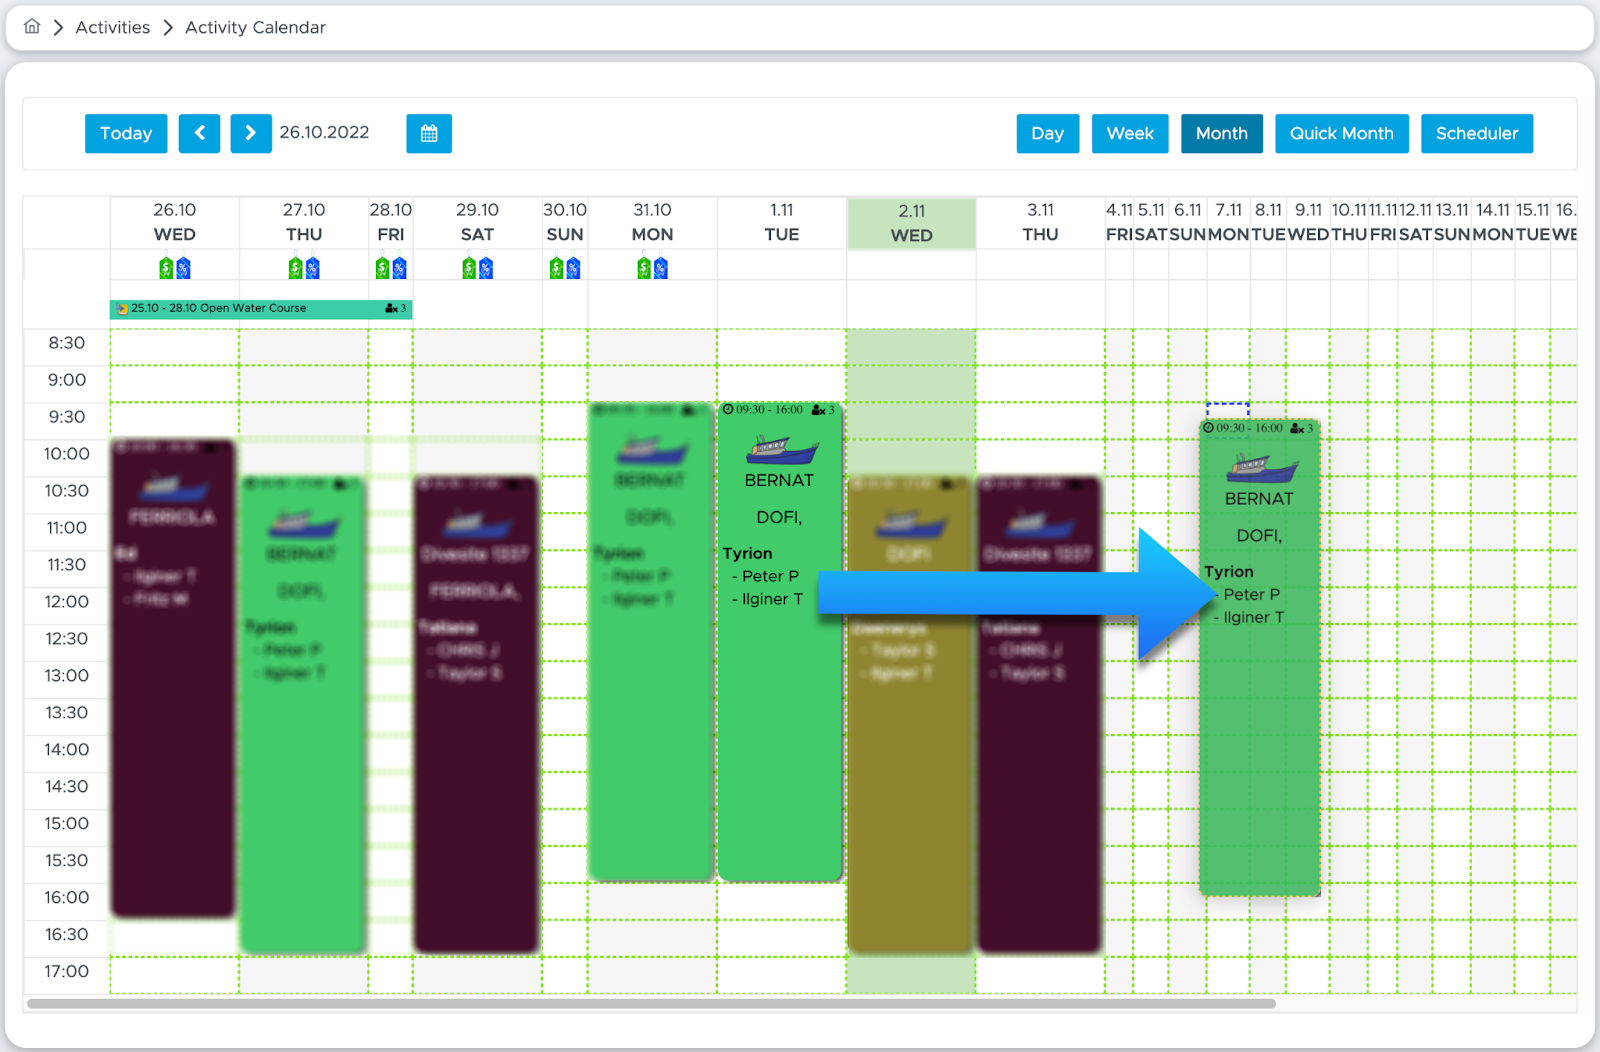
Geek Divers now will ask you if you want to move or copy that activity.
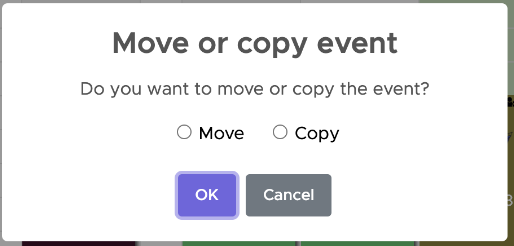
If you choose “Copy”, Geek Divers will ask you if you want to copy everything, or just the activity.
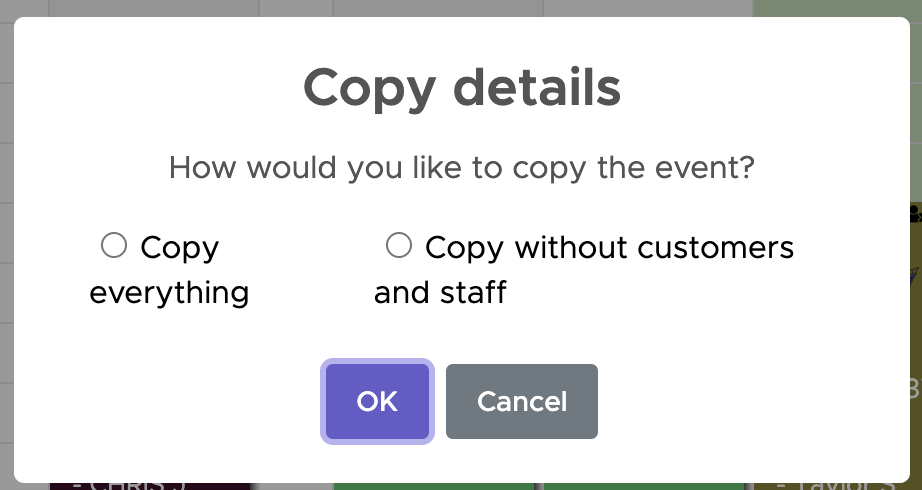
As soon as you make a selection, Geek Divers will copy or move the activity.
8.3 Modify a Trip or a Course
As long as you don’t close an activity, you can still modify most of its components. To do so, in the menu on the left, click on Activity and Activity Calendar.
Feel free to choose the Day, Week or Month view to locate the Activity that you wish to modify. For trips, click on the picture at the top of the activity block.
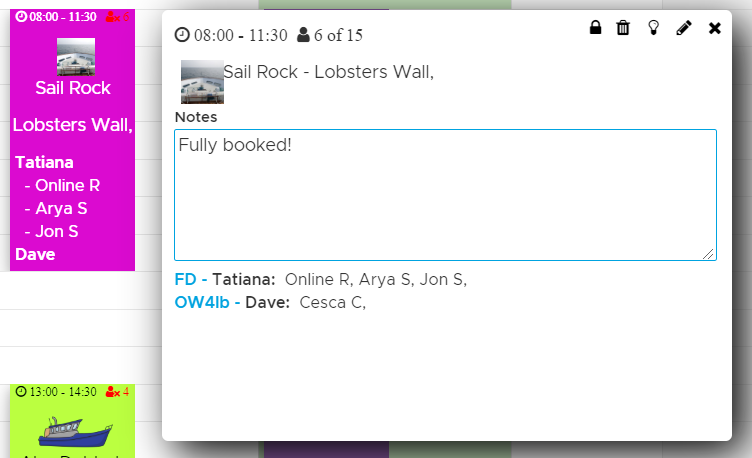
This will open a pop-up that shows the details of the existing activity. Click on the pencil icon to view or modify the current activity.
Geek Divers will take you to the trip or course that you wish to view or modify, the same that you’ve used to create them.
What you can modify:
Dive sites ( for trips only): add, remove dive sites and change the number of times your customers went to a specific dive site.
Additional charges: add or remove additional charges for the Activity.
Customers: add or remove customers who joined the Activity and reorganize the groups.
Staff: add or remove staff members who joined the Activity and reorganize the groups.
Modify the number of sections that a staff member has taught during a course.
Add one or more agents to the customers.-EAN: add or remove the EAN checkbox (for trips only).
Add or remove additional charges for one customer.
Modify the number of dives that a customer has done (for trips only).
Modify the number of dives that a staff member has done (for trips only).
You cannot modify the Activity type. If you’ve created a trip, the trip cannot be turned into a course and vice versa: if you’ve created a course, the course cannot be turned into a trip. If the course or trip didn’t happen, you can click on the trash bin icon of an activity pop-up. No customer will be charged and no staff member will be remunerated for a deleted activity (according to the set up commission model).
You cannot add customers or staff members to a saved course within a trip. However, you can remove a customer or a staff member from a course added to a trip. This change will not affect the course that you’ve set up. To permanently remove a customer or a staff member from a saved course you need to edit the course.
8.3.1 Add/Remove Dive Sites
In the menu on the left, click on Activity and Activity Calendar and locate the activity that you wish to modify. For trips: click on the picture to open the pop-up and choose the pencil icon. Please note that there are no dive sites in a course. This is because you could set up a dry course or a regular one that includes dives. At a certain point of the course you will add the whole course to a trip for the training dives.
For Trips
If you wish to remove a dive site, scroll to the bottom of the page and click on the “X” next to the dive site of your choice.
If you wish to add a dive site, select the dive site of your choice from the drop-down menu. Please remember that any change to the dive sites will affect the Dive Roster and the data that you’ve already entered.
Before leaving the Trip, don’t forget to click on the button Save!
8.3.2 Add/Remove Customers and Staff members
In the menu on the left, click on Activity and Activity Calendar and locate the activity that you wish to modify. Click on the Activity picture to open the pop-up and choose the pencil icon.
For courses
Click on the tab to see the customers. Open the dropdown menu and click on the “Remove Customer” button.
If you wish to change the selected staff members, click on the Staff tab.
Open the dropdown menu and click on the “Remove” button.
Before leaving the Course page, don’t forget to click on the Update button!
For Trips
Click on tab Groups.
Select a group by clicking on the Trip/Course name.
Click on a customer on the left to add them to the group or use the search field to locate the customer from All Customer.
Click on the down-arrow of a selected customer to show the button Remove. Click on the button Remove if you wish to remove this customer from the group.
Click on Staff to view your current diving staff members and the staff members assigned to the group.
Click on a staff member on the left to add him/her to the group.
Click on the down-arrow of a selected staff member to show the button Remove. Click on the button Remove if you wish to remove this staff member from the group.
Please note that if you add a course to a trip you can only remove customers or staff members from this group and the changes made in the trip will not affect the course. In this case you cannot add customers or staff members.
If you wish to create a course from within the trip, you are free to select customers and staff members. Once you add the group to the trip, Geek Divers will create a separate course that you can view and modify in the Activity Calendar.
Don’t forget to click on button Add/Update to save the changes to the group in the Trip.
Before leaving the Trip, don’t forget to click on the button Save!
Trip Quick Edit
The Trip Quick Edit feature is very useful if you only need to reorganize the groups in your trip: moving people from one group to another, add/remove people and create new groups. In the Trip Quick Edit you cannot add extra charges or EAN tanks. To do so you need to use the regular Trip Edit feature.
In the menu on the left, click on Activity and Activity Calendar and locate the trip that you wish to modify. Click on the picture to open the pop-up and choose the lightbulb icon (Quick Edit).
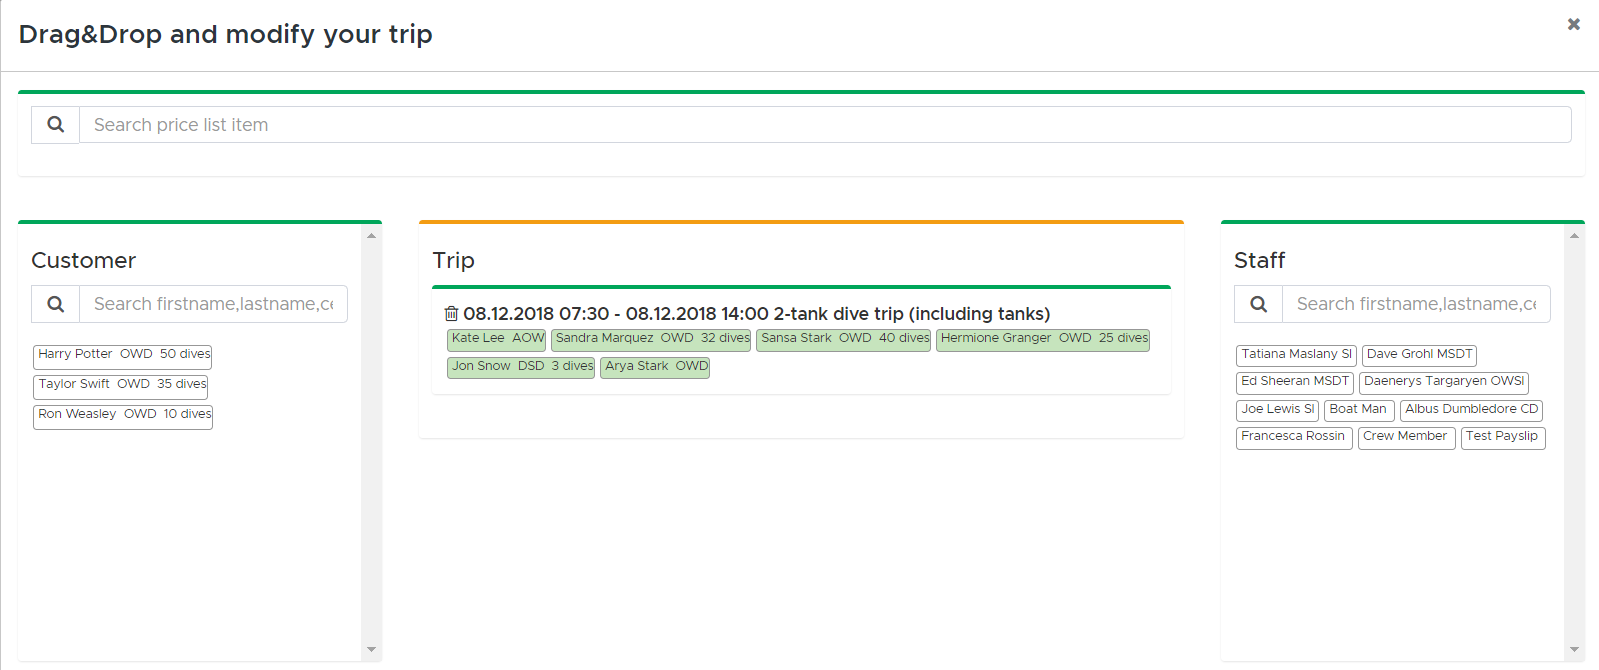
Geek Divers will open a pop-up window that looks like a white board. In the middle you will see the groups that you’ve already added to your trip.
The names in light-blue represent the staff members and the names in green the customers.
On the left you will find your current customers that are not yet part of the trip and on the right the staff members.
At the top, in the search string, you can search for the price list item type trip that you wish to use to create another group.
Search for your trip in the search string and drag it in the middle of this pop-up to create another group.
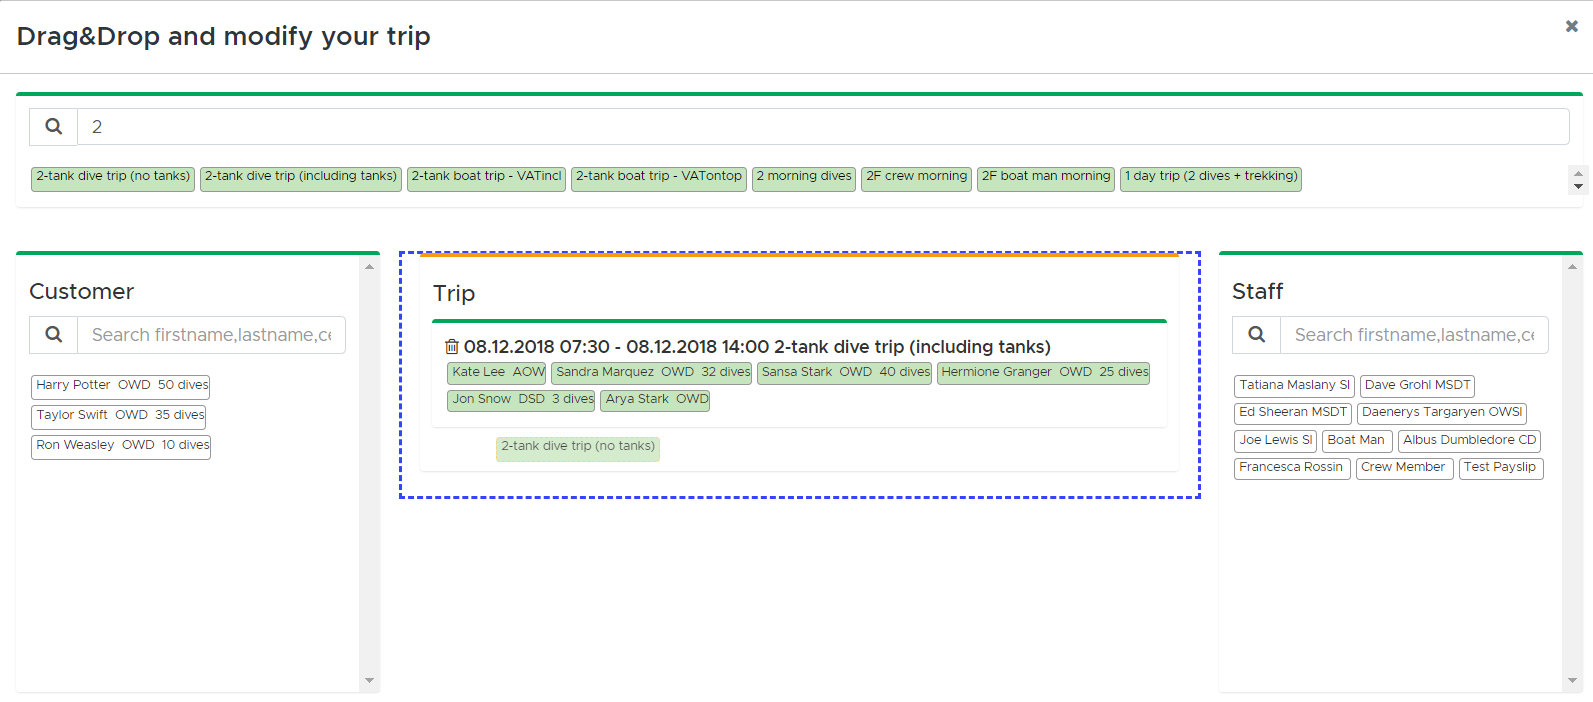
The blue segmented area will show you where you can drop the trip that you’ve chosen to use. Drop it anywhere in this area and you will see a new empty group.
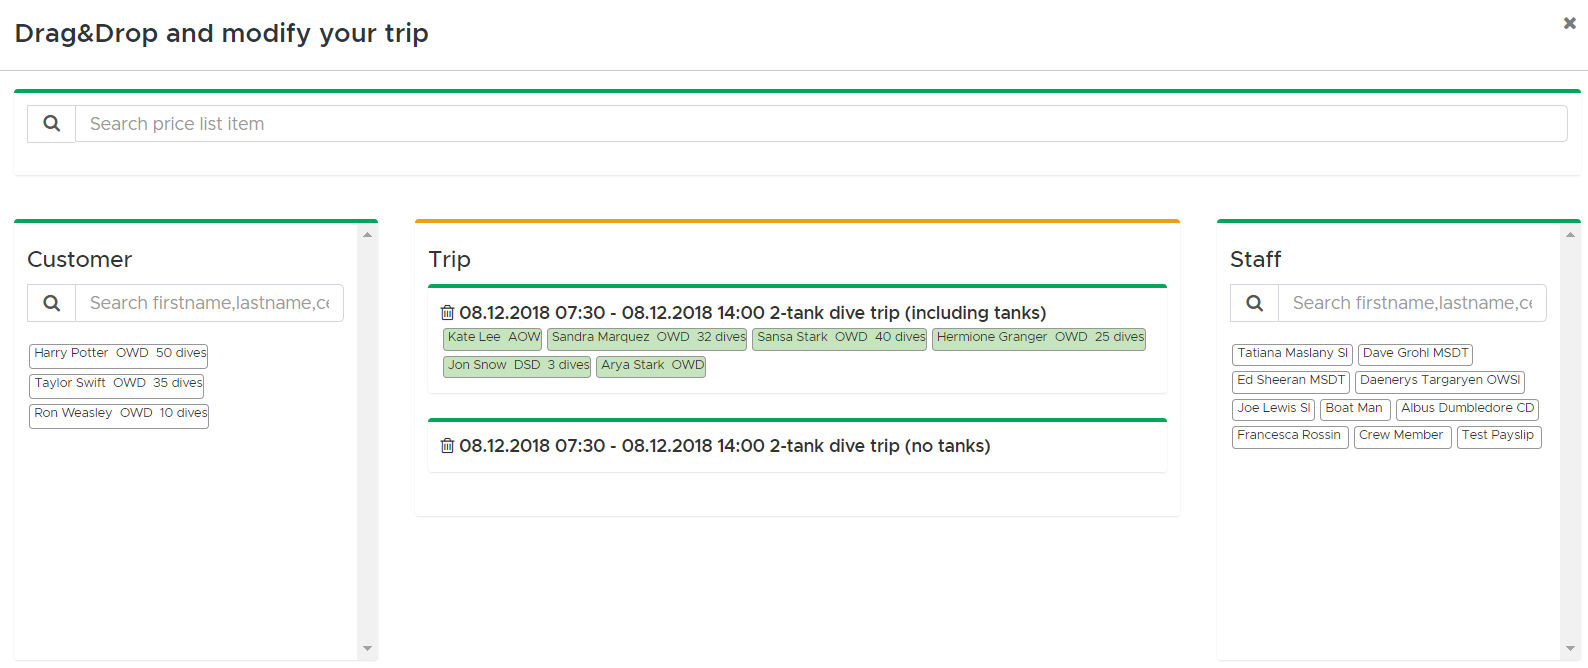
Now drag customers from the left column or from the first group to the empty group that you’ve just created:
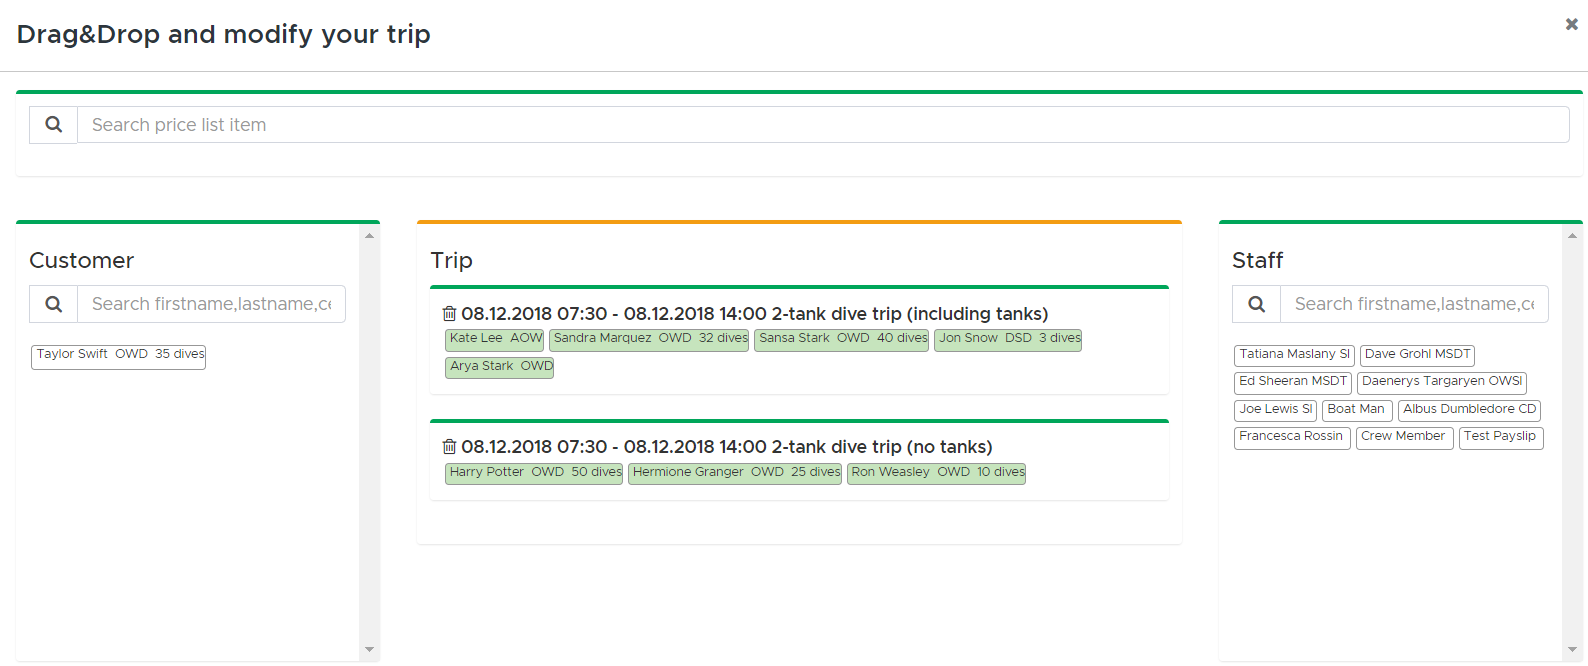
You can create as many groups as you need, rearrange the existing ones and add staff members.
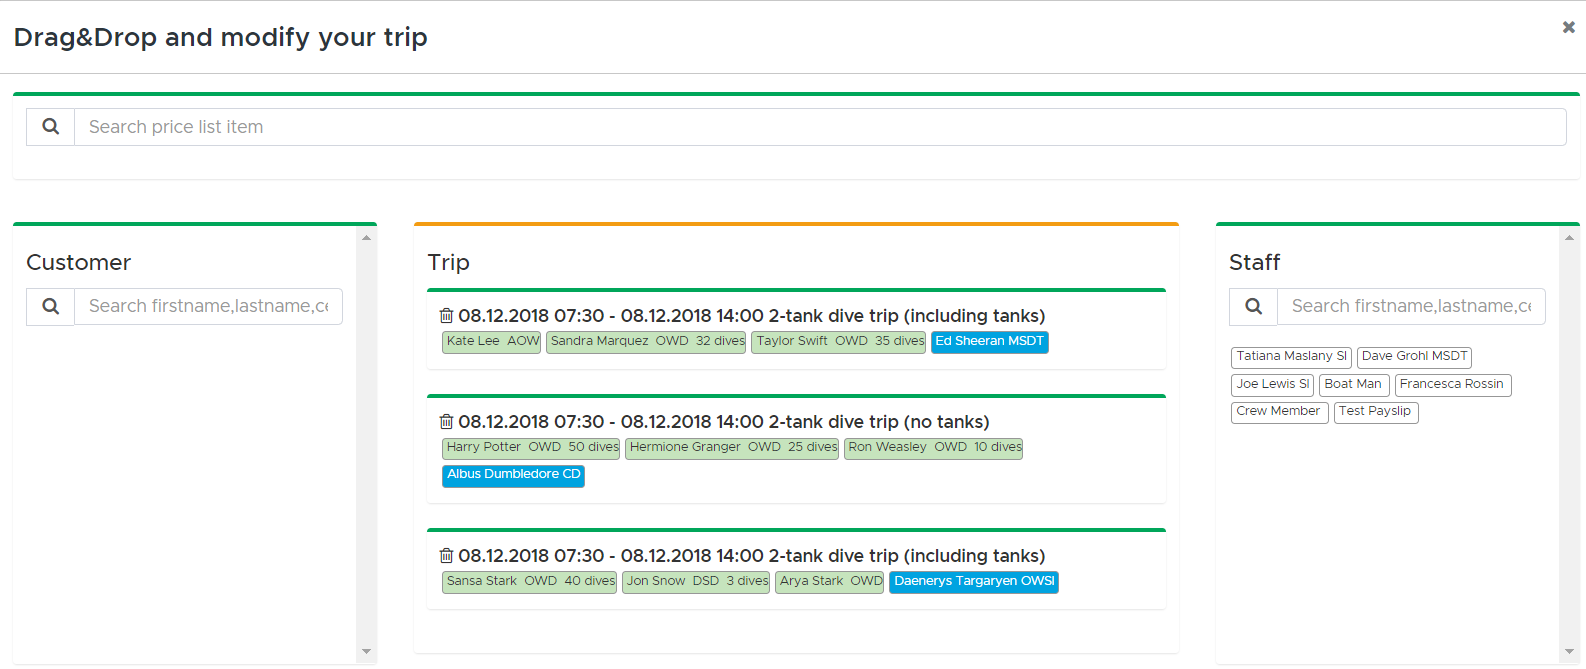
Customers will be shown in green and staff members in blue.
In case of wrong selections or a last-minute change, you can drag customers back to the left column and staff members to the right column.
When you’re done with your quick edit, click on button Save at the bottom. The trip in your calendar will show the updated groups.
Please consider that the Quick Edit view is meant to be used only to rearrange groups, customers and staff members in a trip. To change dive sites, transport, times/dates, add courses as a group in the trip, add non-current customers, add extra charges, assign agents or equipment you need to use the regular Edit feature.
Please consider that course groups follow special rules: you cannot add people to course groups in a trip if they are not already part of the course in the calendar.
8.3.3 Modify the number of sections
You can add/modify the number of sections only if your price list items are set up with sections. Please check paragraph Sections to read more about Sections. In this chapter you will find a complete explanation about sections for courses. However you can set up sections in price list item types Trip as well.
In the menu on the left, click on Activity and Activity Calendar and locate the activity that you wish to modify. Click on the Activity picture to open the pop-up and choose the pencil icon.
For courses
Click on Select Staff to view the staff members assigned to this course. Delete and type again the number of sections that each staff member worked on. Please consider that you don’t need to write the number of sections in a staff member’s card if you’ve assigned only one staff member to the course as the total number of sections considered is the maximum by default. Sections are meant to be used to share the workload (and the commissions) among two or more staff members. This also means that if two or more staff members are assigned to the same course and you don’t specify the number of sections they’ve actually taught, each staff member will get the full commission for the course once you close it.
Before leaving the course page, don’t forget to click on button Update!
For Trips
Click on Groups tab.
Select a group by clicking on the trip name. Please consider that if you need to modify the sections of a course you need to open the course from the Activity Calendar.
Click on Diving Staff.
Click on the down-arrow of the selected staff members to view the sections and modify them. Please consider that you don’t need to write the number of sections in a staff member’s card if you’ve assigned only one staff member to the group as the total number of sections considered is the maximum by default. Sections are meant to be used to share the workload (and the commissions) among two or more staff members assigned to the same group of customers. This also means that if two or more staff members are assigned to the same group of customers and you don’t specify the number of sections they’ve actually done, each staff member will get the full commission for the activity once you close it.
Don’t forget to click on button Add/Update to save the changes to the group in the Trip.
Before leaving the Trip, don’t forget to click on button Save!
8.3.4 Add an agent to a customer in an activity
In the menu on the left, click on Activity and Activity Calendar and locate the activity that you wish to modify. Click on the Activity picture to open the pop-up and choose the pencil icon.
For courses
In every customer card you will see a table with a button “Edit/Assign Agent”. To add an agent, click on this button. A dialog box will pop up with the list of possible agents. If you don’t see any agent it’s because you didn’t create any agent commission for your internal staff members or external partners/agents. Please go to paragraph Agent Commissions to read how to set them up.
In the dialog box locate the agent and commission that you wish to assign to this customer and move it from the left to the right or click on the arrow button.
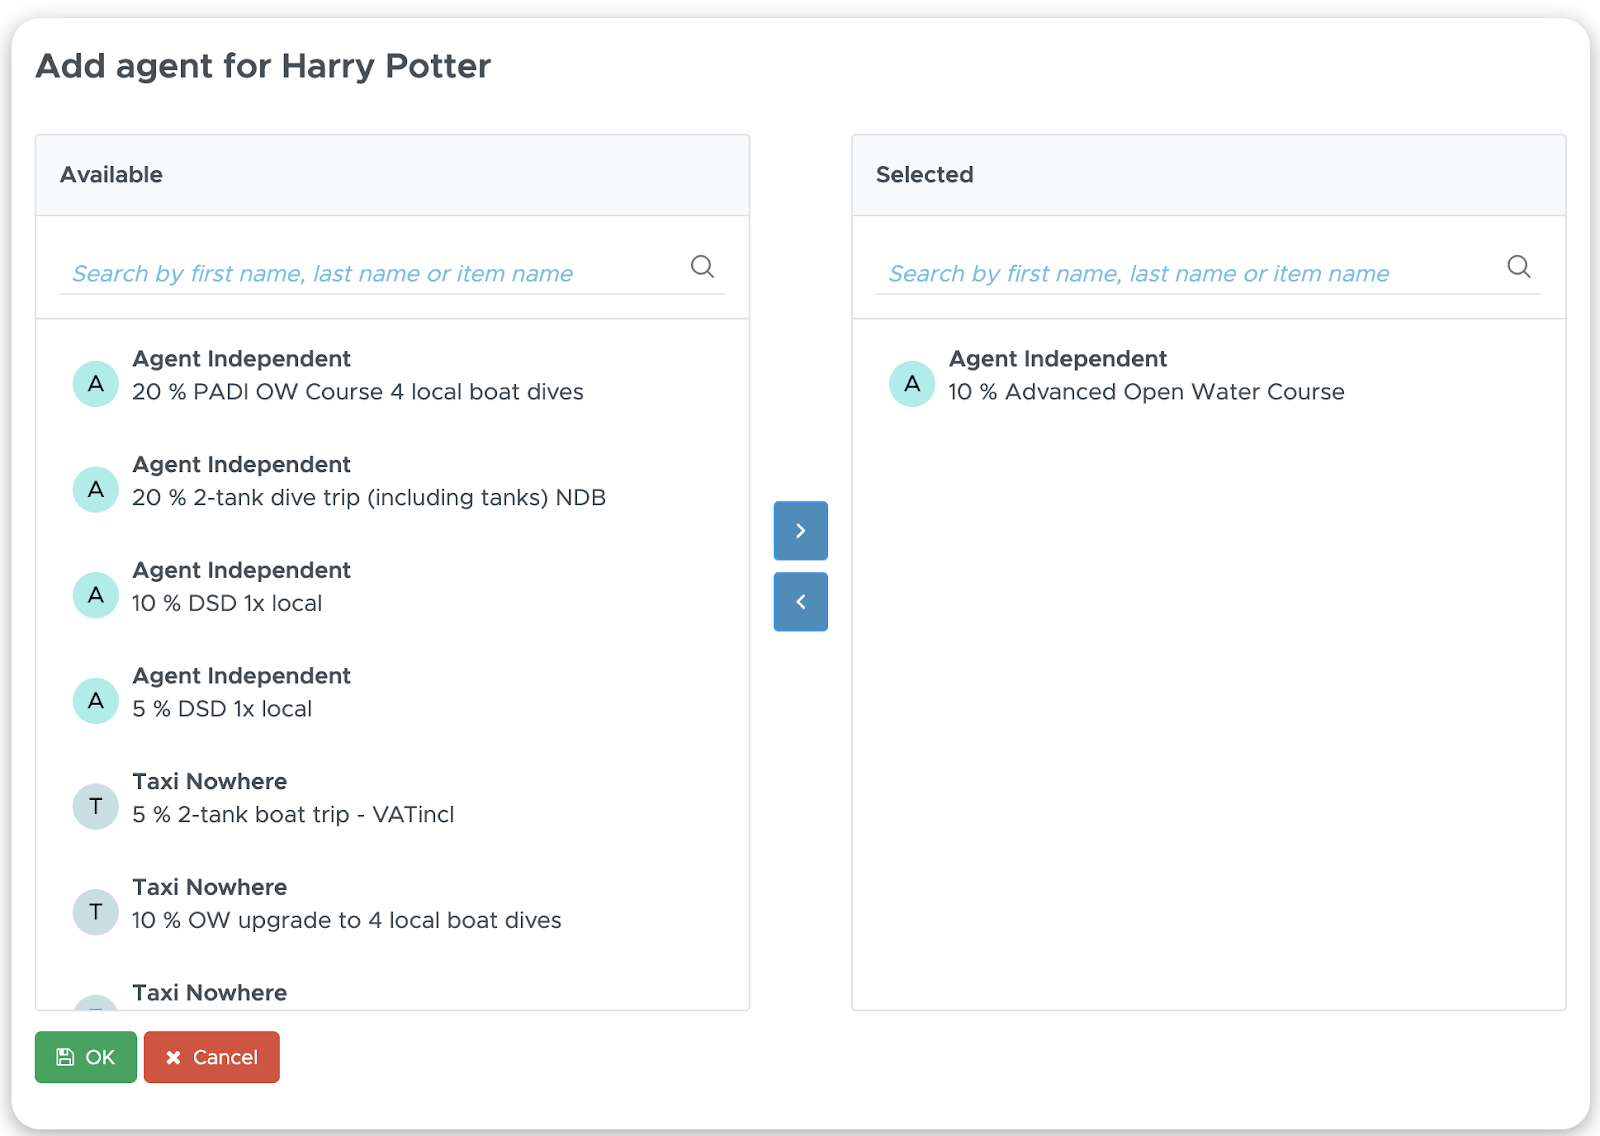
In the example above here an independent agent with 10% commission on the Advanced Open Water course is selected. When you close the course, you will see a new line in this agent’s Credit Note with a 10% commission on this course ( excluding fees and course material).
Click on the OK button to save your selection.
In the table you will now see the assigned commission + the agent.
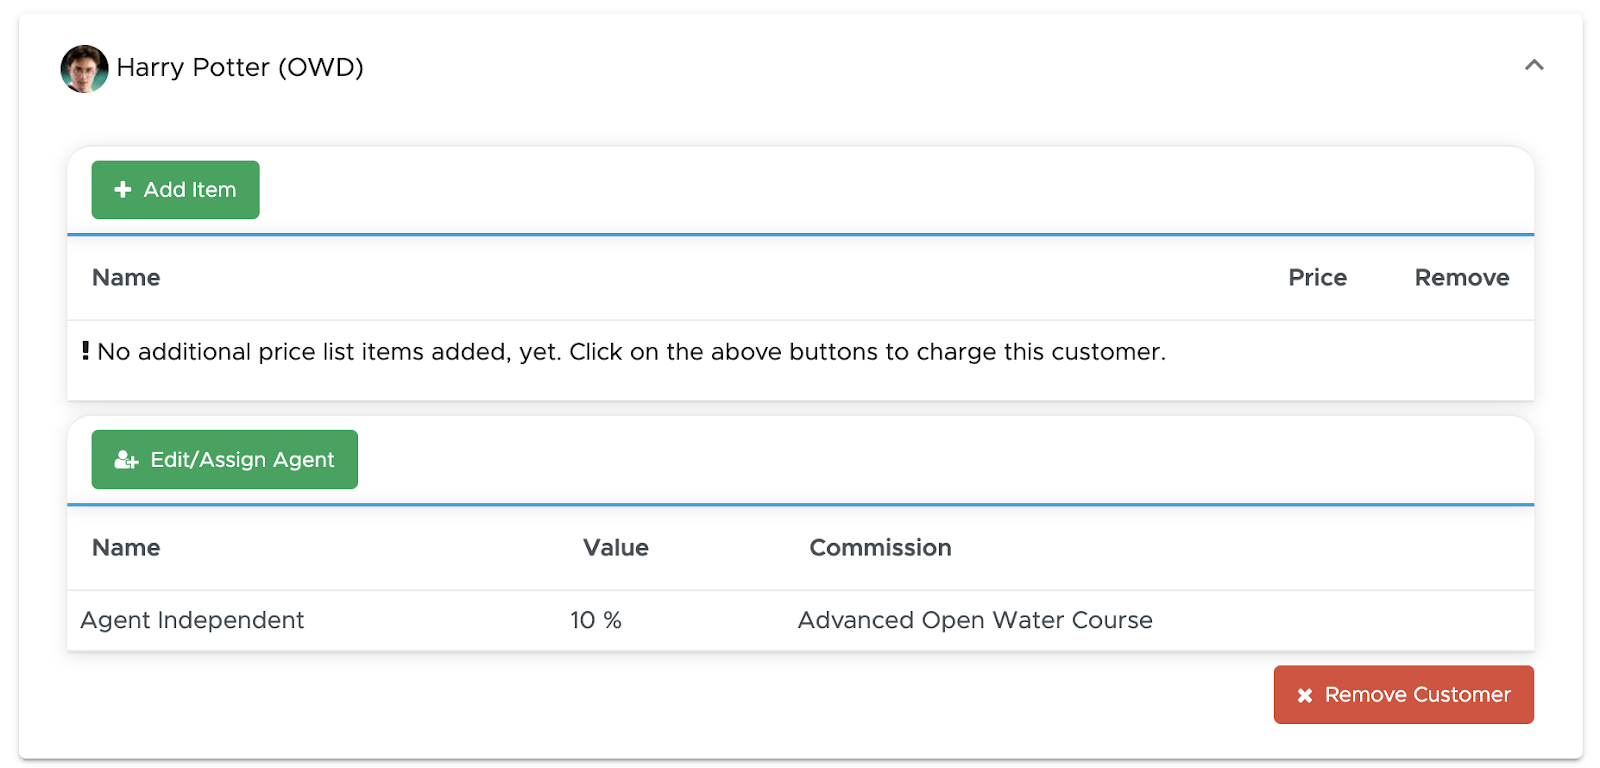
You can always open a Course (still open or already closed), go to the customer card to see which agent was assigned to this customer. If the Course is already closed however you won’t be able to modify it.
If the Course is not yet closed, you can assign more than one agent to a customer by repeating the steps described above here.
Before leaving the Course page, don’t forget to click on the Update button!
For Trips
Click on Reports/Summary tab and expand the Trip List by clicking on the ’+’ button next to it.
Locate the customer that you wish to assign an agent to and click on the light blue button in the Agent column. If you can’t find the column Agent you might need to go back to your General Settings - UI Settings and remove the tick from this column. Alternatively, if you prefer using your Custom Trip list, you can add the column Agent to this list. Either way, the button will open a pop-up for the selection of the agent and the specific commission that you wish to apply.
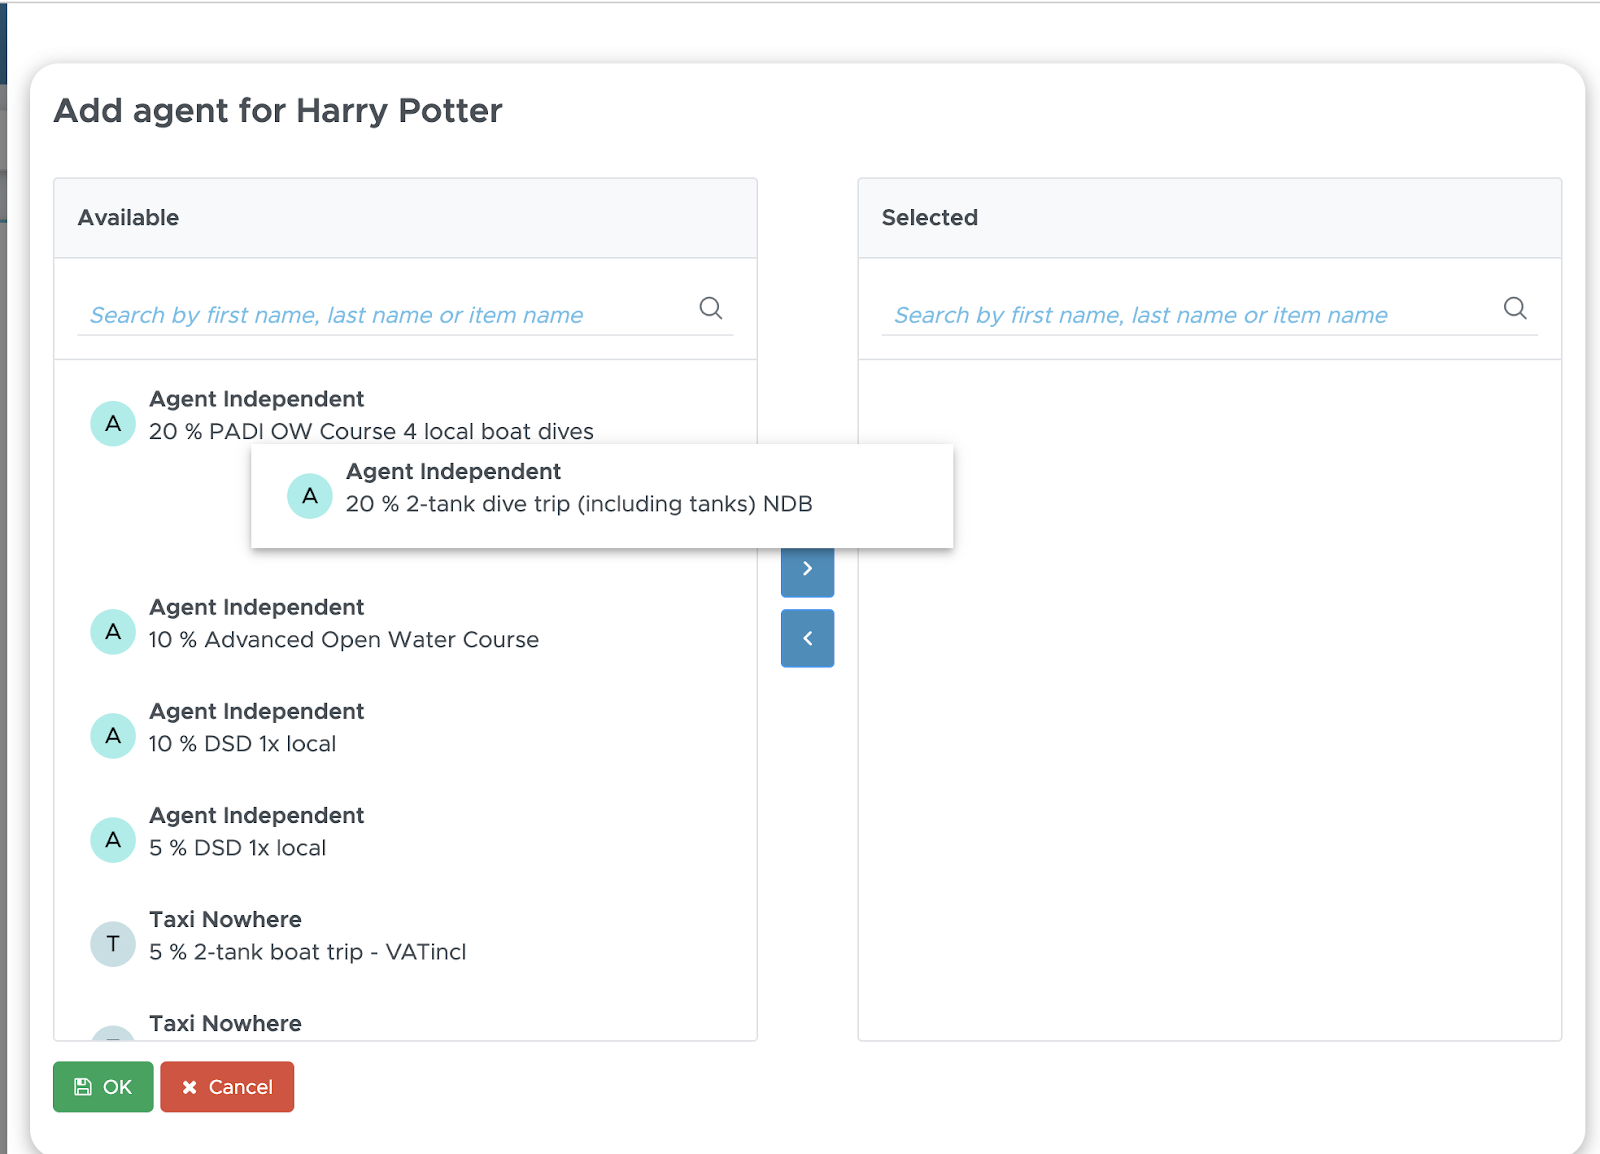
Locate the agent name, select a commission, move it to the right side and click on button Ok.
The light blue button in the Agent column will show “1 agent assigned”.
Repeat the steps described above here to add another agent to the same or another customer.
Before leaving the Trip, don’t forget to click on the button Save!
8.3.5 EAN
If you don’t offer Nitrox in your dive center, you can skip this chapter.
An EAN checkbox will always be visible in the customer’s card in a trip. Whether you charge an extra fee for EAN or not, it is a good idea to tick the EAN checkbox if the customer chooses to dive with Nitrox because this will be visible in the Dive Roster and in the Equipment List. A check on EAN will also update the number of tanks that you need in every trip (visible in Equipment List Summary). Please consider that you can only select EAN tanks in a trip, not in a course.
In the menu on the left, click on Activity and Activity Calendar and locate the trip that you wish to modify. Click on the trip picture to open the pop-up and choose the pencil icon.
For Trips only
Click on Groups tab.
Select a group by clicking on the Trip name.
Click on the down-arrow of the selected customer to view and tick the EAN checkbox.

If you charge extra for Nitrox tanks, the customer’s bill will show the extra fee in his/her bill.
Before leaving the Trip, don’t forget to click on button Save!
8.3.6 Additional charges for a single customer
If there are additional charges for one customer only, then you can add them on customer level.
In the menu on the left, click on Activity and Activity Calendar and locate the activity that you wish to modify. Click on the Activity picture to open the pop-up and choose the pencil icon.
For courses
Click on the ‘Add Item’ button in the customer card, select one of the available extra charges and click it to confirm your selection.
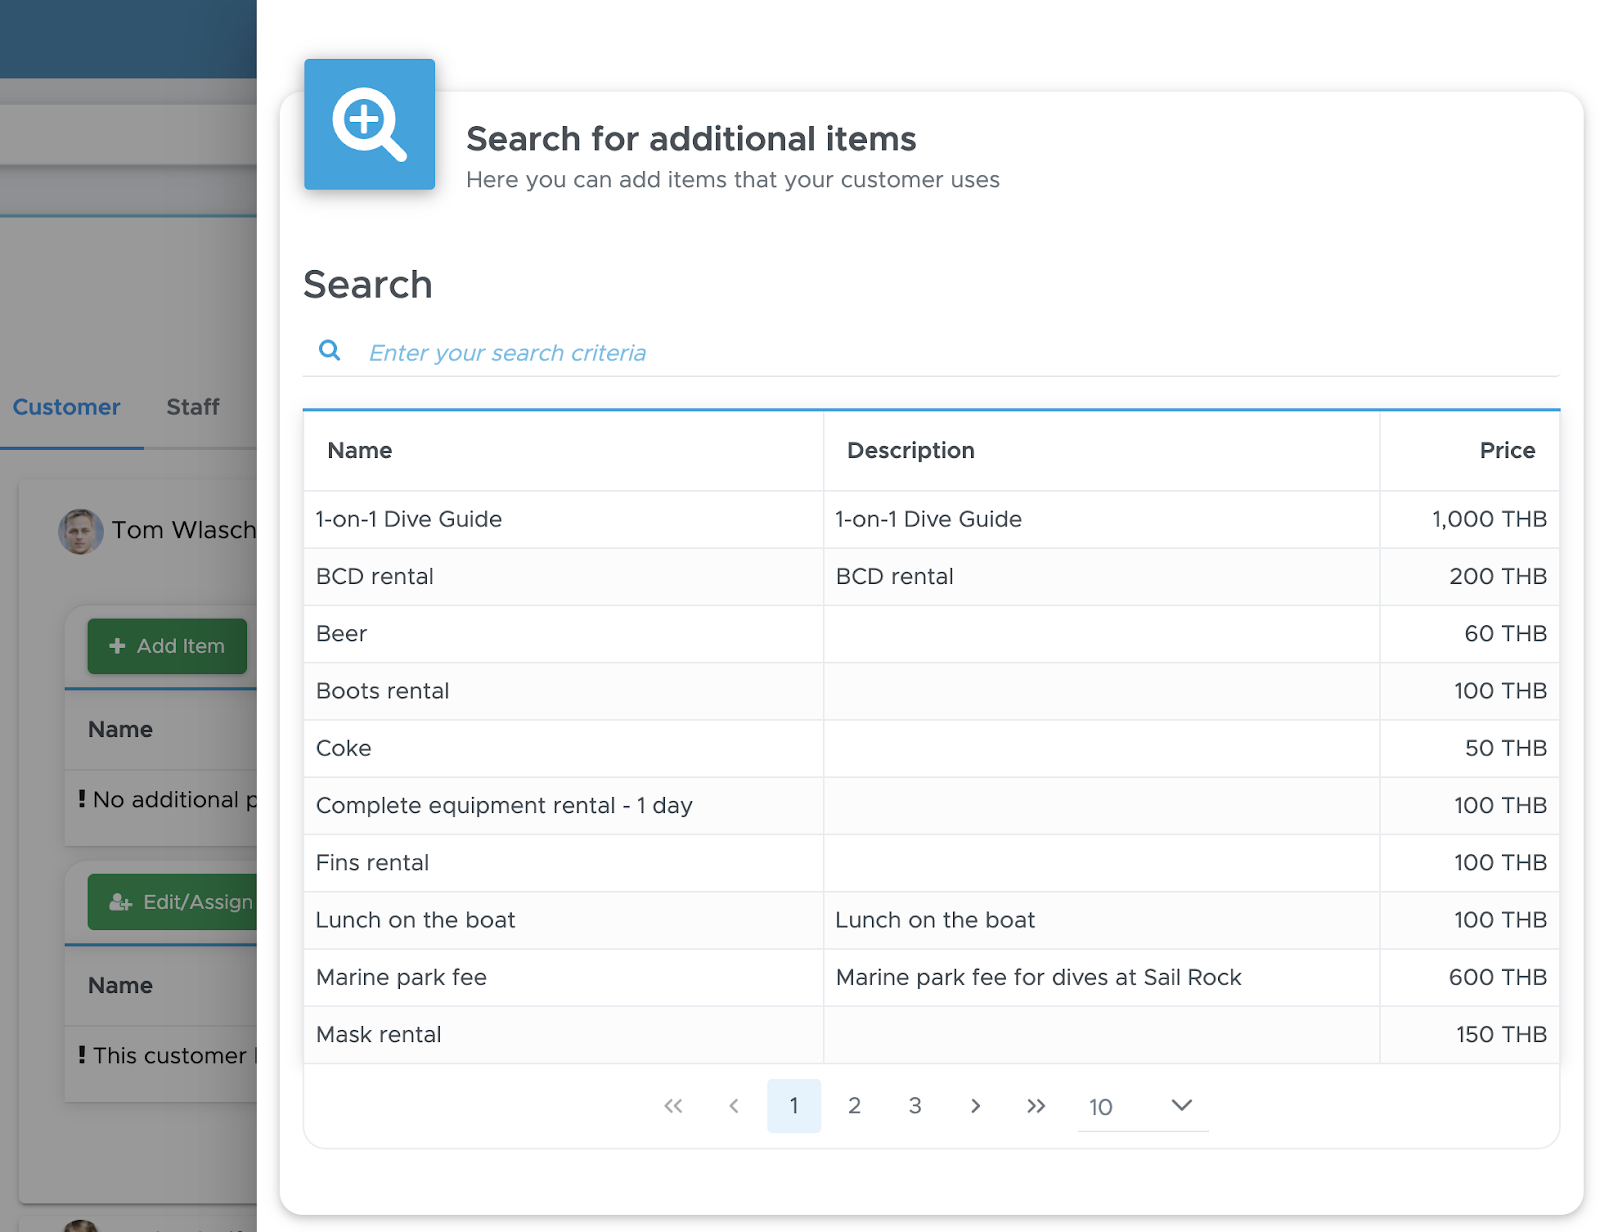
The customer’s card will show the extra costs in the table:

You can add more extra charges by clicking on the “+” button and remove them by clicking on the “X” button.
You will see the extra charges in the customer’s bill in separate bill positions.
Before leaving the Course page, don’t forget to click on button Update!
For Trips
Click on Groups tab.
Select a group by clicking on the Trip name.
Click on the down-arrow of the selected customer to view and click on the quick buttons and/or on button Add Item.
With a click on a quick button:
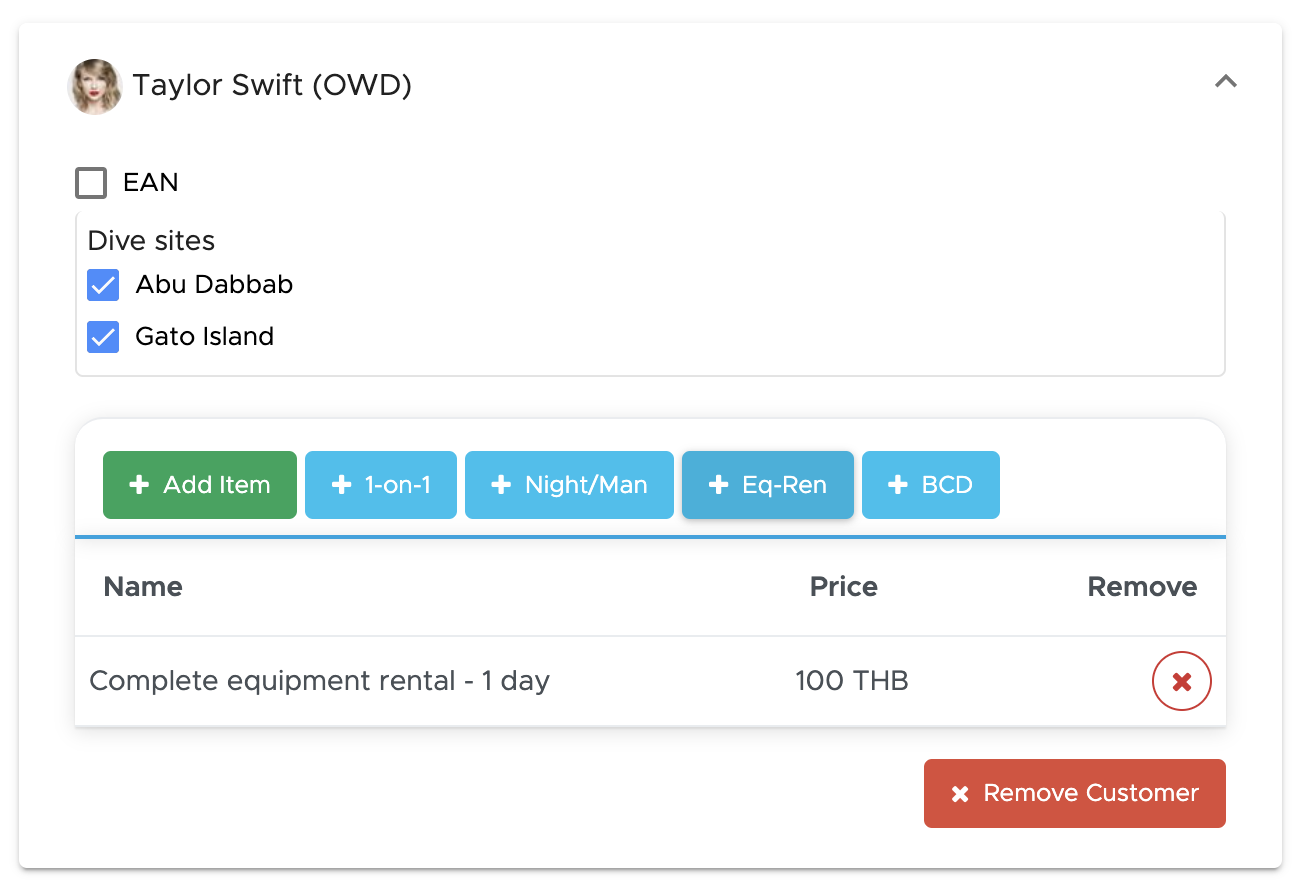
Click on button Add Item to view all the possible additional items:
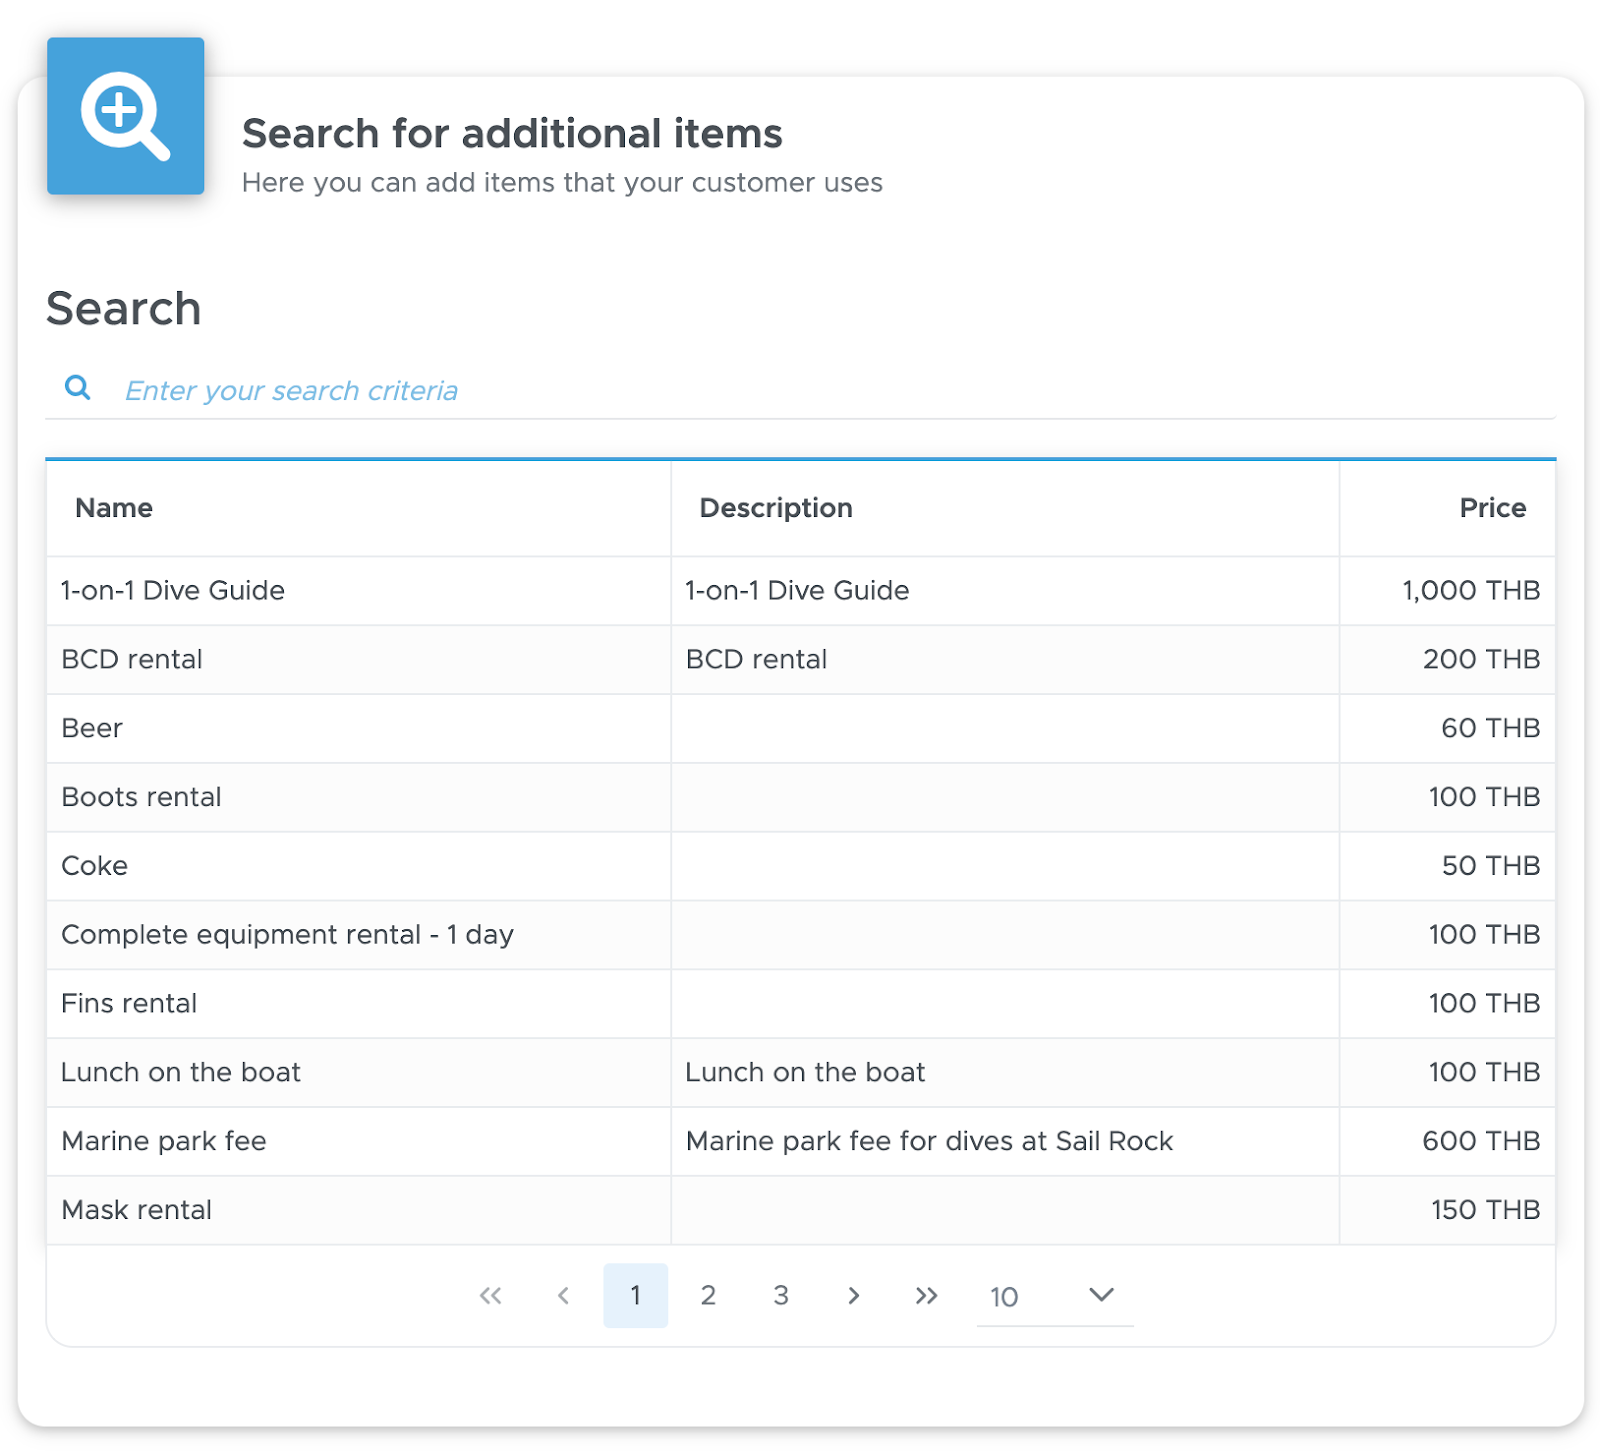
If you click on the button Add Item a sidebar will show you all the extra items that you can select. If not immediately visible, start typing the name of the item in the search field on top. Once you’ve found what you’re looking for, click on button Select. You will see the selected item at the bottom of the customer’s card.

You can remove the extra charges by clicking on the X button next to each extra charge. Don’t forget to click on button Add/Update to save the changes to the group in the Trip.
Before leaving the Trip, don’t forget to click on the button Save!
8.3.7 Modify the number of dives per customer
For Trips only
If you charge your customers per dive or if your staff members receive their commissions based on the number of dives or the number of tanks, then you need to update the number of dives that they actually did during a specific activity.
If you charge your customers for an Activity (Course or Trip) that includes dives or if your staff members receive their commissions per Activity or per customer or if you charge your customers for every dive listed in the trip, you can skip this paragraph.
Reminder: this paragraph explains how to remove a dive from a customer who decided not to do one (or more) dive(s) in the Trip. If you wish to remove a dive site from the whole Trip, please follow the instructions in paragraph Add/Remove Dive Sites Please consider that this is only valid for Trips.
In the menu on the left, click on Activity and Activity Calendar and locate the activity that you wish to modify. Click on the Activity picture to open the pop-up and choose the pencil icon.
Click on Groups to view the groups of customers and staff members on the boat.
Locate the group that you wish to modify. You will be taken to the list of customers in this group and you can view them on the bottom-right of your screen. Click on the down-arrow next to the customer to expand the customer’s card.
You will see the dive sites selected in your trip and you can deselect one or more, like in the picture below here.
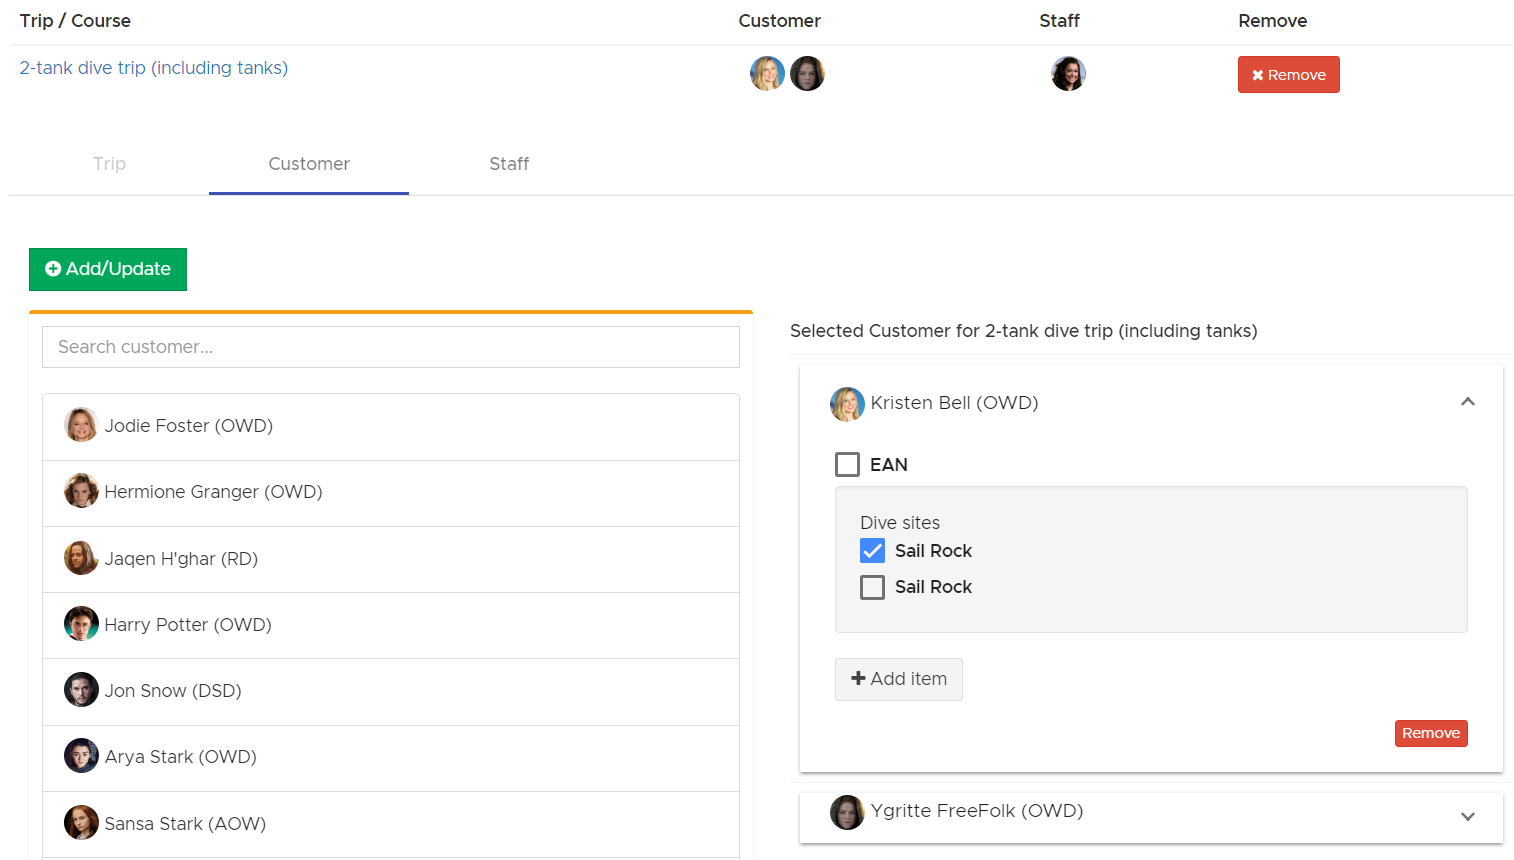
Please consider that if you charge your customers for a Trip that includes the dives, the customer’s bill won’t change automatically just because you deselected one or more dives. On the contrary, if you charge separately for the Trip and for the dives (using the Single Dive price list with or without packages), Geek Divers will automatically remove the charges of one or more dives from the customer’s bill.
If your staff members are paid per dive or per tank, click on Staff and repeat the same steps described for the customer.
Click on button Add/Update to confirm the changes.
Before leaving the Trip, don’t forget to click on the button Save at the bottom of the page.
8.3.8 Additional charges for the whole group of customers
If you need to add/remove extra charges that affect all the customers in a group, you don’t need to apply the extra charges to every single customer.
For Trips
Click on the pencil icon in the trip pop-up and on tab Groups.
Click on the group (activity name in blue) that you wish to modify and on tab Extra.
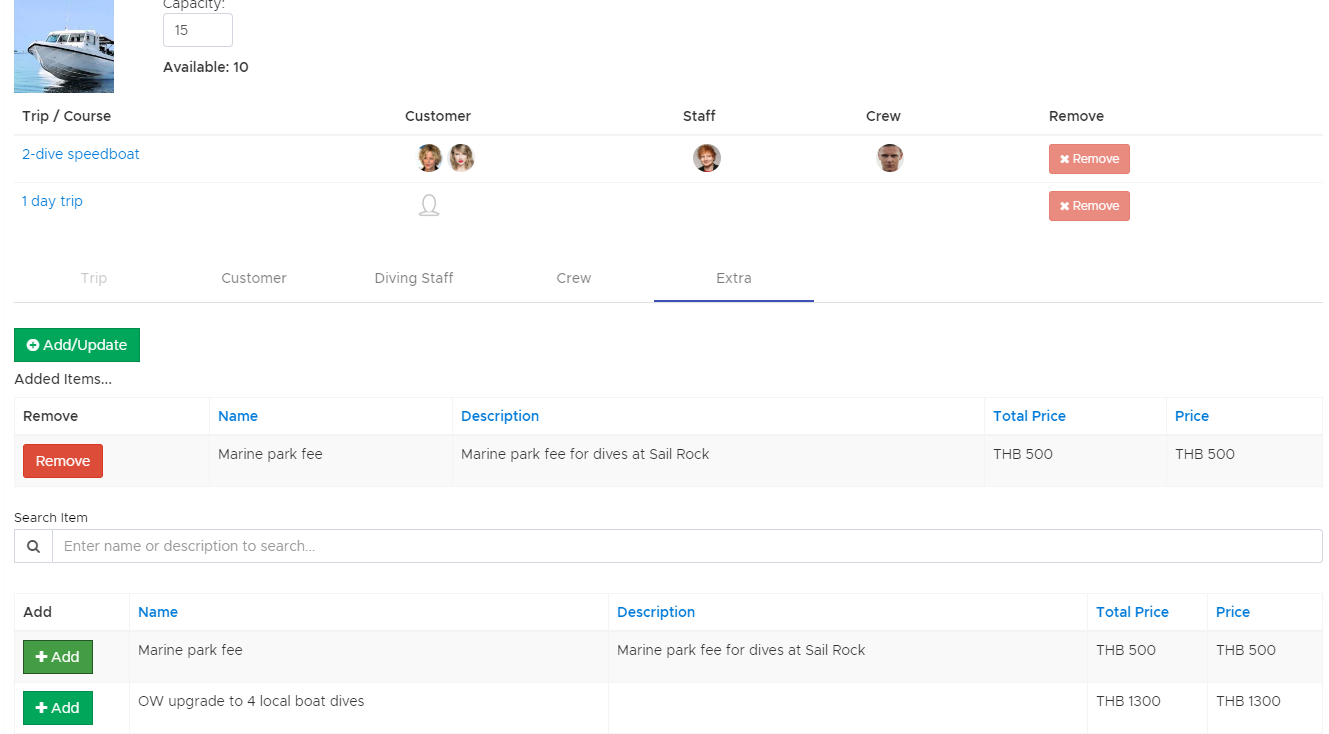
Here you will find all the extra charges that you’ve added to your price list: item types Extra, Fee and Food and Drink.
Click on button Add to apply an extra charge to all the customers in the group. Click on the button Remove to remove the extra charge for the whole group.
Click on button Add/Update to confirm your changes and on button Save at the bottom of the page.
For Courses
Click on the pencil icon in the course pop-up.
Click on the tab “Additional Items”.
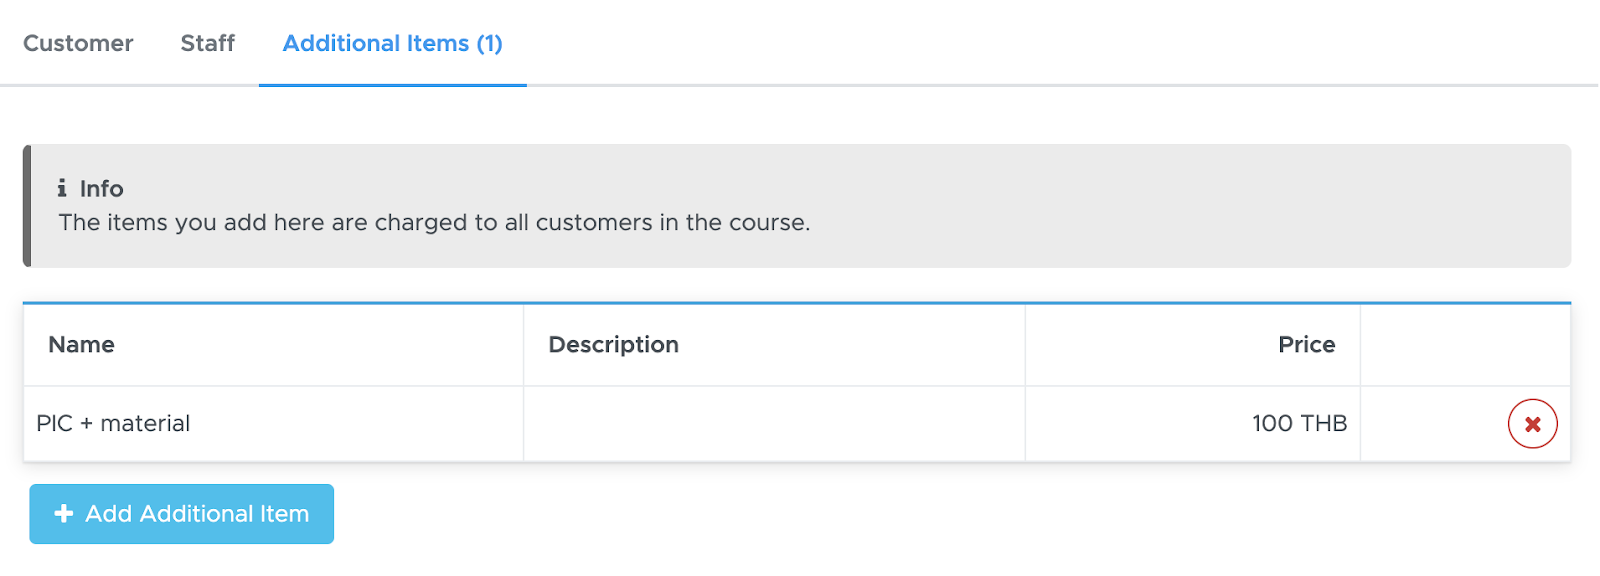
You can add more items by clicking on the “Add Additional Item” button or remove some by clicking on the “X” button.
The selected charges will be applied to all the customers in the course and you will find them in their bills after you click on button Update in the course.
8.4 Close an Activity
Once an Activity has happened and you’ve double-checked that everything in it is correct, you can close it. It is actually recommended to close an activity as soon as it’s completed or even before completion if nothing else can change anymore. If a customer wishes to check out and there are still open activities with their name in them, their bill can’t be closed.
To verify the content of an activity before closing it, in the menu on the left, click on Activity and Activity Calendar and locate the activity that you wish to check. Click on the Activity picture to open the pop-up and choose the pencil icon.
Once you’ve verified that the content of the activity is correct or you’ve made the appropriate changes, you will find button Close within a course and button Close Trip within a trip. From the Activity Calendar you can also close a trip or a course by clicking on the padlock icon in the activity pop-up. However you wish to close an activity, you will always see a pop-up asking you if you are sure. Please remember that a closed activity cannot be re-opened or deleted, not even by the Geek Divers support. The Geek Divers support can however suggest the steps to take to manually fix customers bills, staff members payslips and agents credit notes in case an activity was closed by mistake.
In the Activity Calendar, a closed activity will be shown with a faded color. A trip pop-up will only have a Show icon and Close Popup icon.
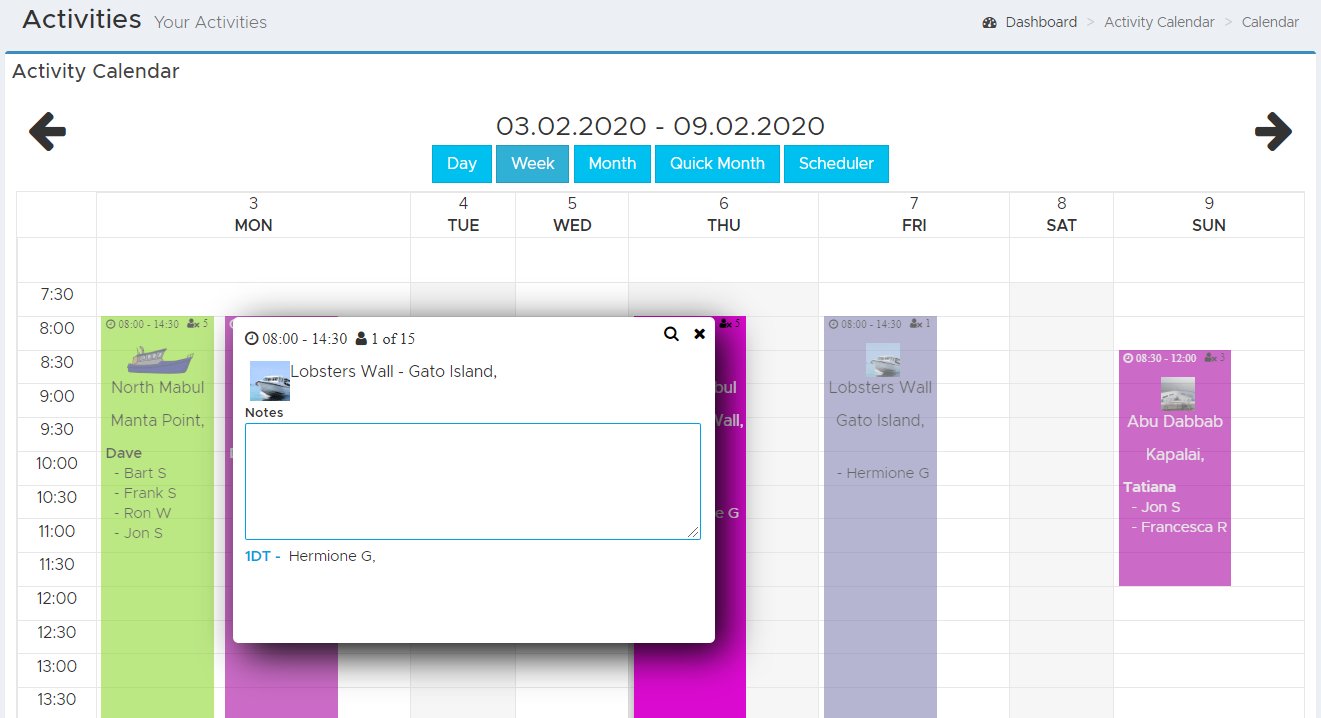
In All Activities a closed course or a closed trip won’t show the buttons Close Course or Close Trip.
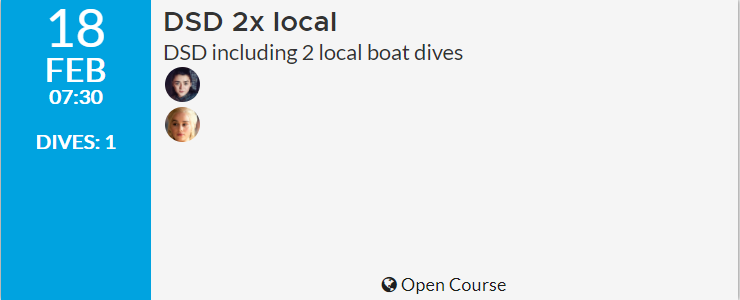
Once you close an Activity you won’t be able to modify it anymore, but you can always view its content.
When you close an Activity the staff and agents commissions are calculated and added to the staff payslips and agent’s invoices or credit notes. The only exception is represented by the agent commission based on the whole customer’s bill that will be calculated and added to the agent’s invoice or credit note when the bill is closed and the customer is checked-out.
8.5 View your Activities
Once you’ve created one or more Activities, you can view them (and modify them if they are still open) in two separate views in Geek Divers.
All Activities (Deprecated, will not be maintained anymore starting with Version 2.1)
In the menu on the left, click on Activity and All Activities.
In this page you see rectangular cards representing the Activities that you’ve created. The Activities are ordered by start date and time with the most recent on top. You will find future activities in the Upcoming section and past activities in the Past Activities section.
Once you close an activity, the card will disappear from this view. You can use the toggle at the top-right of this page to show closed activities.

Please consider that All Activities page is no longer supported. No new features will be added to this page.
Activity Calendar
In the menu on the left click on Activity and Activity Calendar.
In this page you see a calendar view of all your Activities.
You can choose a Day, Week or Month view for your calendar. A scheduler will show you your transports and when they are busy on a selected day. In version 2.0 a Quick Month view has been introduced as a read-only page (you can’t create, edit or close activities).
In each of the above mentioned views you can use the back and forward arrows at the top to go back and forward one day/week/month. Starting with version 2.1 you can also select a date by clicking on the calendar icon.
If you wish to jump to today, you can click on the “Today” button.
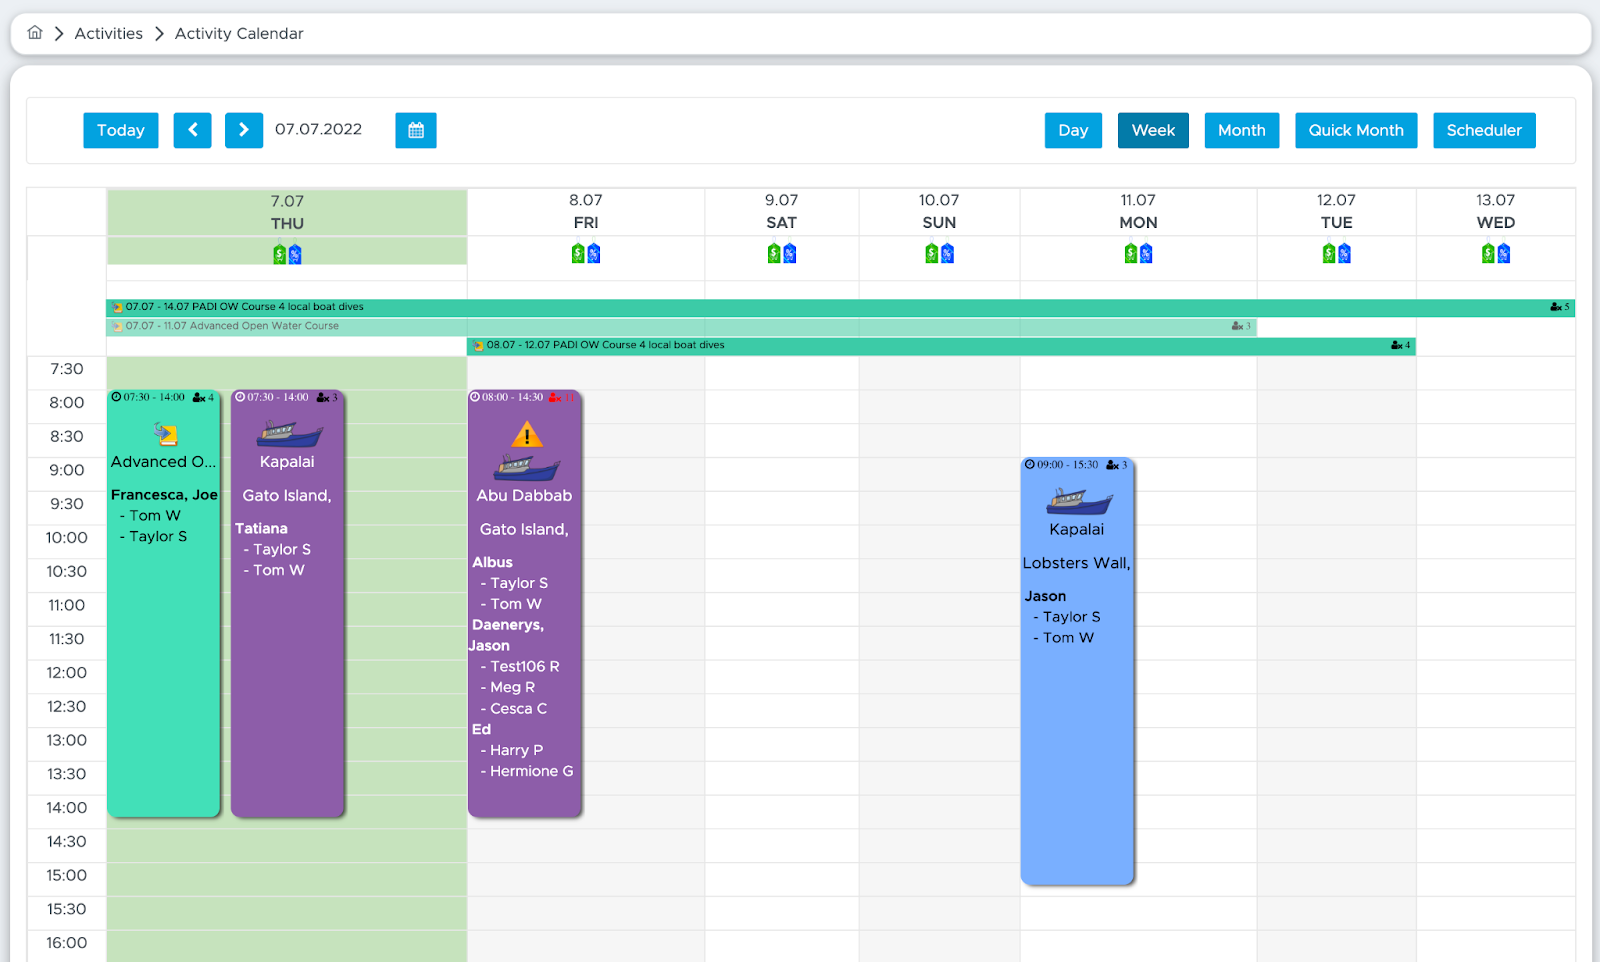
Use your calendar to plan all your activities in the future: set up all your trips and courses, even if you don’t know all the details yet. Remember that as long as a trip or a course is open, you can make any change.
9. Customers bills
There are two ways to view a customer’s bill:
Click on Customers, All Customers (or Current Customers if the customer you’re looking for has not checked out yet) and locate the customer. Click on the customer’s name and on tab Bill/Agent. You’ll find all the customer’s open and closed bills at the top of the page.
or
Click on Financial and choose either Current Open Bills (these bills belong to your Current Customers) or Open Bills ( all the open bills) or Closed bills. Search by bill number, customer’s first name or last name.
In either case, click on “open” (if the bill is still open) or on the bill number (if the bill is closed) to open the bill and view its contents.
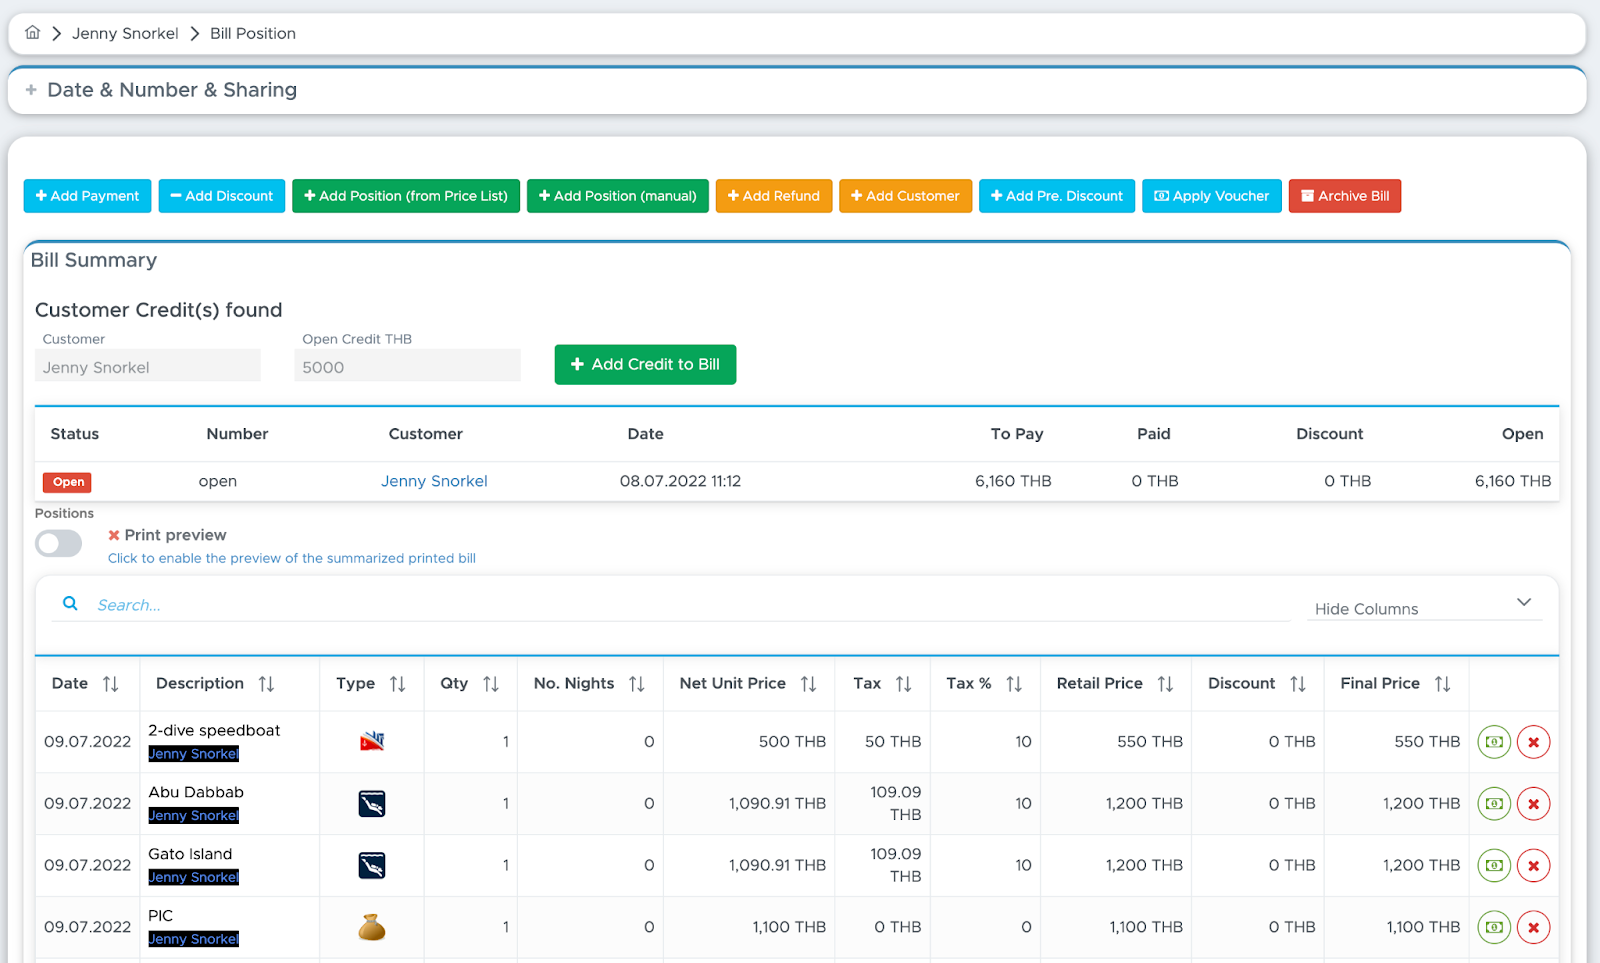
👀 Important!
Starting from version 2.0, bills won’t be assigned an automatic bill number until you close them. The bill date will be the closing date. For accounting reasons, bills that are not closed won’t be considered to calculate tax and revenue and therefore should not have a number.
In the bill you can see every Activity that the customer has joined, including additional charges or fees. As soon as you add a customer to an Activity (course or trip) and you save the activity, the bill is updated. If you remove a customer from an Activity, the charges related to that Activity will disappear from the customer’s bill.
In the Bill Summary section, at the top of the screen, you can find the most important numbers in the bill:
To Pay - the total sum of all the retail prices in the bill,- Paid - the amount already paid,- Discount - the total discount offered in the bill,
Open - the remaining balance to pay (Open = To Pay - Discount - Paid).
These numbers are automatically recalculated according to the content of the bill and the recorded payments.
If you wish to view more details you can scroll down at the bottom of the bill to view the Total Net Price, Fees, Tax and the Total amount, calculated as the sum of Total Net Price + Fees + Tax.

👀 Important!
Starting from version 2.0, bill positions will be shown with quantity 1. Columns Net Unit Price, Tax and Retail Price will show the prices per 1 unit, both in the regular view and in the Print Preview. The values at the bottom of the bill will show you the total of each category.
9.1 Add positions
You can add positions to the customer’s bill in four different ways:
add an item from the price list,
add something completely manually (if the item is not in your price list),- add the customer to a trip or a course in the Activity Calendar,
apply a voucher to the customer’s bill.
To add an item from your price list click on the green button at the top “Add Position (from Price List)”. This feature is useful if you’ve set up your items on sale in the price list and your customer wants to buy a mask, a T-shirt or anything else that you sell in your shop. You can also use this button to add accommodation charges if you’ve set up a price list item type = Accommodation in your price list.
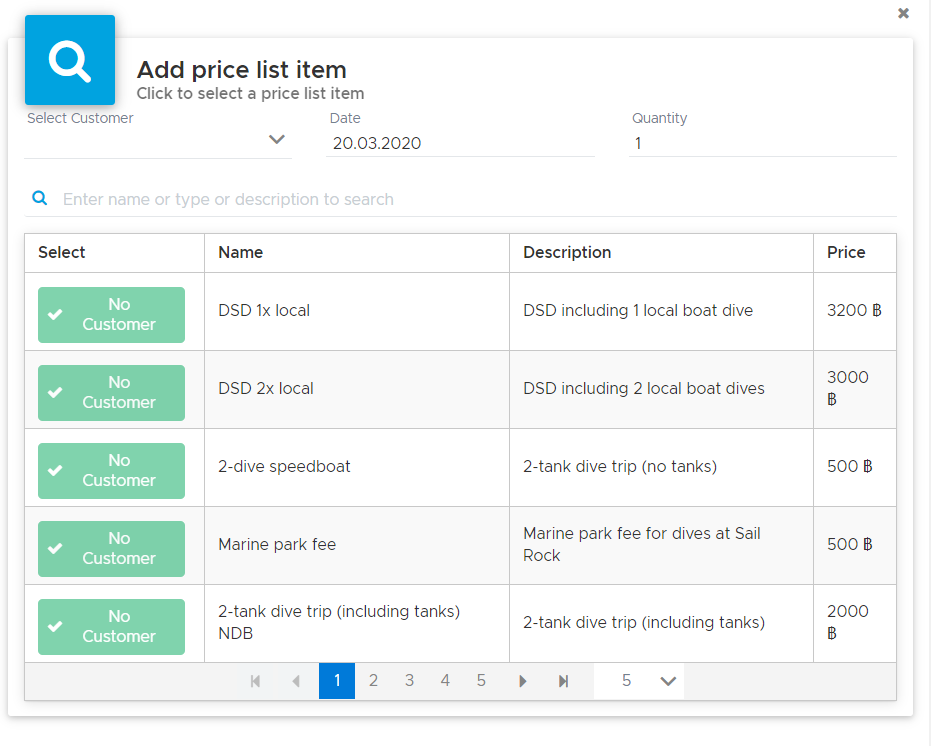
In the sidebar you can change the date, update the quantity, locate the item that you wish to add to the customer’s bill and click on button Select. If more than one customer is added to the bill, you will also need to select the name of the customer to assign this new position to. As soon as one customer is selected, button No Customer will turn into Select. Click on the correct Select button and you will see the item in the bill positions, ordered by date.
To add a generic new position to the bill, click on the green button at the top “Add Position (manual)”. In this case you’re adding something that is not in your price list.

Modify the date, if necessary, type a description, choose a type, update the quantity and unit price. Add the sales tax, if appropriate, and click on button Save Position. If more than one customer is added to the bill, you will also need to select a customer’s name before saving.
This is useful in case you don’t have a specific price list item in your price list. E.g. the customer lost some blocks of lead. Please consider that anything that you add to the bill using this button will be shown in your financial report as type only.
Whenever you add an item or a manual charge to a customer’s bill, the value in Open is automatically recalculated.
To add positions to a customer’s bill you can also add the customer to a trip or a course in your Activity Calendar. Read chapter Add/Remove Customers and Staff members to find out how.
Applying a voucher to a customer’s bill means taking a confirmed quote (by the customer or by one of your travel agents) and copying its content into a customer’s bill. The confirmed quote contains the list of items and/or accommodation that you’ve offered to your customer or partner with the agreed prices and discounts. When you apply a voucher to a bill, some of the items in the confirmed quote/voucher will be automatically added to the bill positions: accommodation (room reservation from the Accommodation Calendar) and meal plan, multi-packages and type Package items.
9.2 Discount
9.2.1 Manual Discount
You can add a discount (in fixed amount or percentage) to every bill position by clicking on the green button located on the right hand side. The discount will be shown in the Discount column and the Final Price will be updated accordingly. The discount for customers' bills is always applied on the Final Price.
The green discount button is not available in bill positions that were added manually (Add Position (manual)) and in case a bill position matches a voucher position.
You can also add a discount on the whole bill by clicking on the light-blue Add Discount button at the top of the bill page. Please consider that if you add a discount to the whole bill in percentage, the final price of every bill position in the bill (including fees) will be considered in the calculation of the percentage. The percentage will be calculated on the total sum of all the final prices at that moment in time. Additionally, there won’t be any recalculation of the tax in every bill position. For the above reasons, the Add Discount button at the top of the bill page is not recommended if your services are subjected to a sales tax or if you’ve added one or more fees. In that case, you can add discounts to specific bill positions of your choice.
You can remove a discount that you’ve added to a bill position by clicking on the green button at the end of the position and set the discount back to 0. If you wish to remove a discount applied to the whole bill, locate the bill row with description ‘Discount’ and click on button Delete at the end of the row.
Please consider that the automatic package discounts applied to the items in the bill cannot be removed. An automatic package discount is calculated and applied to the items in the bill according to your price list setup.
9.2.2 Automatic Item Package Discount
In case you set up package prices in your price list (e.g. boat trip with packages for 2-3 or more trips, the bill is recalculated automatically, showing the discount in every row.

In the example above the first trip is shown with a regular price and the second shows a discount. This is because in the price list this trip is set up with a package as ‘ No Discount Before’.
If this customer then joins an Advanced Open Water course, the course and the additional price list items that you’ve added to the course price, will be shown in the bill. In general, the way you set up your price list will determine what exactly you will see in a customer’s bill.
Starting from version 2.0 and the possibility to add more than one customer to one bill, the automatic item package discounts will be calculated per customer, unless you choose to share the packages.
If you apply a voucher containing some units of an item that is set up with an item package discount, the prices written in the voucher positions will be copied to the bill positions. Please consider that the quoted prices might refer to your “old” price list, before you updated your prices for the season. These were the prices agreed with your customers and they will be automatically written in the bill positions. In the bill, if the quantity of the item with item package discount is greater than the one written in the voucher, the extra quantity will consider your current price list and start from unit 1.
Example: your customer has booked and confirmed 3x 1 day trip.
1 day trip | “Old” price list (at the time of the quote) | Current price list |
Qty 1 | 50 USD | 55 USD |
Qty 2 | 48 USD | 52 USD |
Qty 3 | 45 USD | 50 USD |
At customer’s check-in you apply the voucher to the customer’s bill and plan them in the activity calendar. As soon as the customer is planned in the day trips, their bill will be automatically updated and the bill positions will be matched with the voucher positions. Let’s assume that the customer is really enjoying the day trips and chooses to add one more, which you plan in the calendar accordingly.
The customer’s bill will show the following prices:
Description | Voucher (Y/N) | Price (if the item is set as NDB*) | Price (regular package discount) |
1 day trip | Y | 50 USD | 45 USD |
1 day trip | Y | 48 USD | 45 USD |
1 day trip | Y | 45 USD | 45 USD |
1 day trip | N | 55 USD | 55 USD |
Total | 198 USD | 190 USD |
*NDB=No Discount Before
In the example above, if you wish to offer a discount for trip no. 4, you will need to enter it manually.
9.2.3 Multi-Package Discount
If in your price list you have a Multi-Package, a message will be prompted whenever the content of the Multi-Package is available in the bill and you can choose to apply it.

The following is the Multi-Package that we will consider for this example:
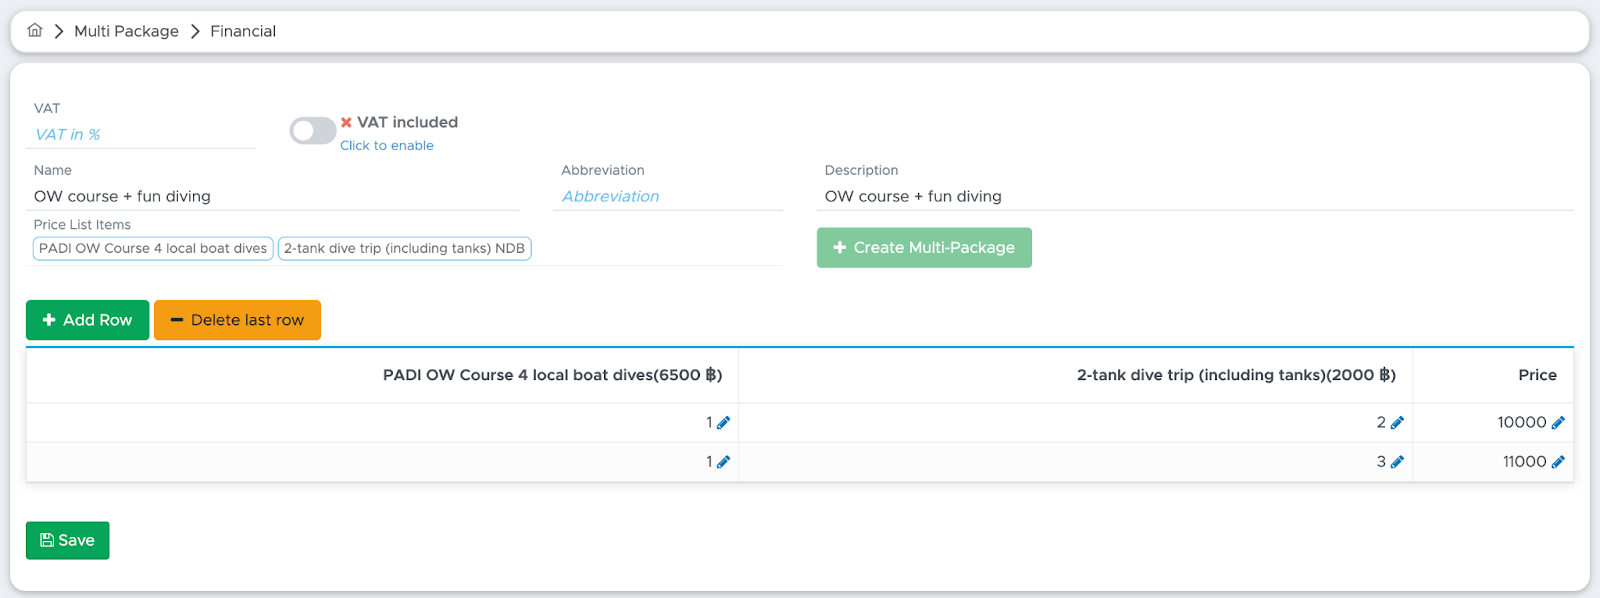
The above Multi-Package offers two combinations of an Open Water course with a 2-tank dive trip:
1x OW course + 2x 2-tank dive trips
1x OW course + 3x 2-tank dive trips
You can plan both the Open Water course and the dive trips in the Activity Calendar or you can add these items to the customer’s bill using button Add Position (from Price List).
As soon as the items in the bill match the content of one of your multi-packages, you will be prompted with a message “Possible multi-package found!” at the top of the screen.

Click on the button Select Multi-Package and a sidebar will show you the multi-packages that could be applied to this bill.
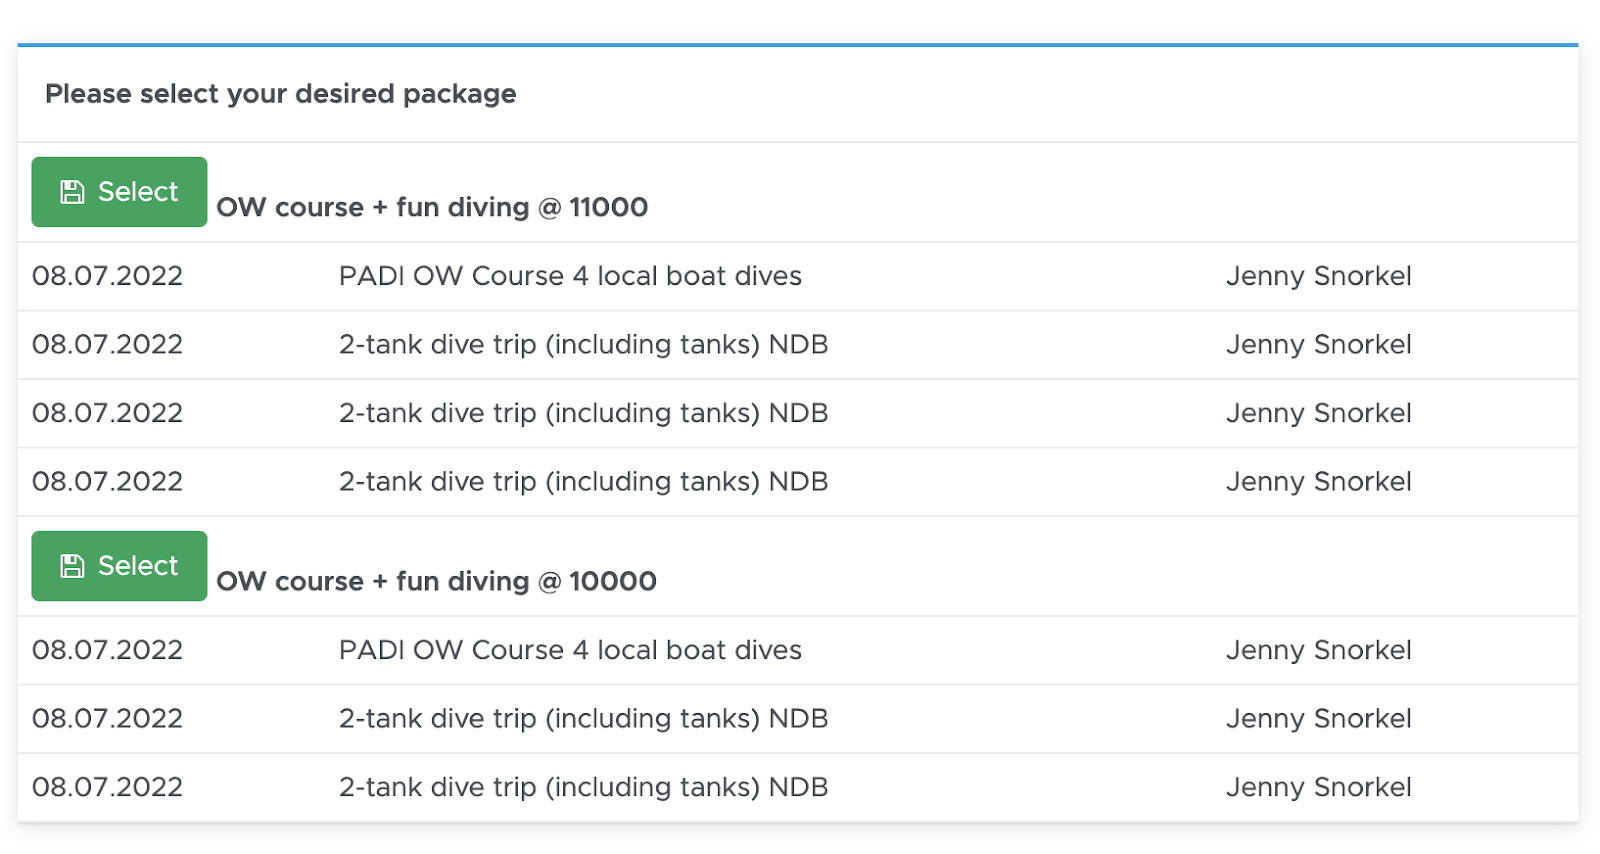
In this example, the customer’s bill contains the Open Water course and 3 fun diving trips, so the sidebar will show both the option with 2 and with 3 trips.
Click on button Select to apply the multi-package of your choice.
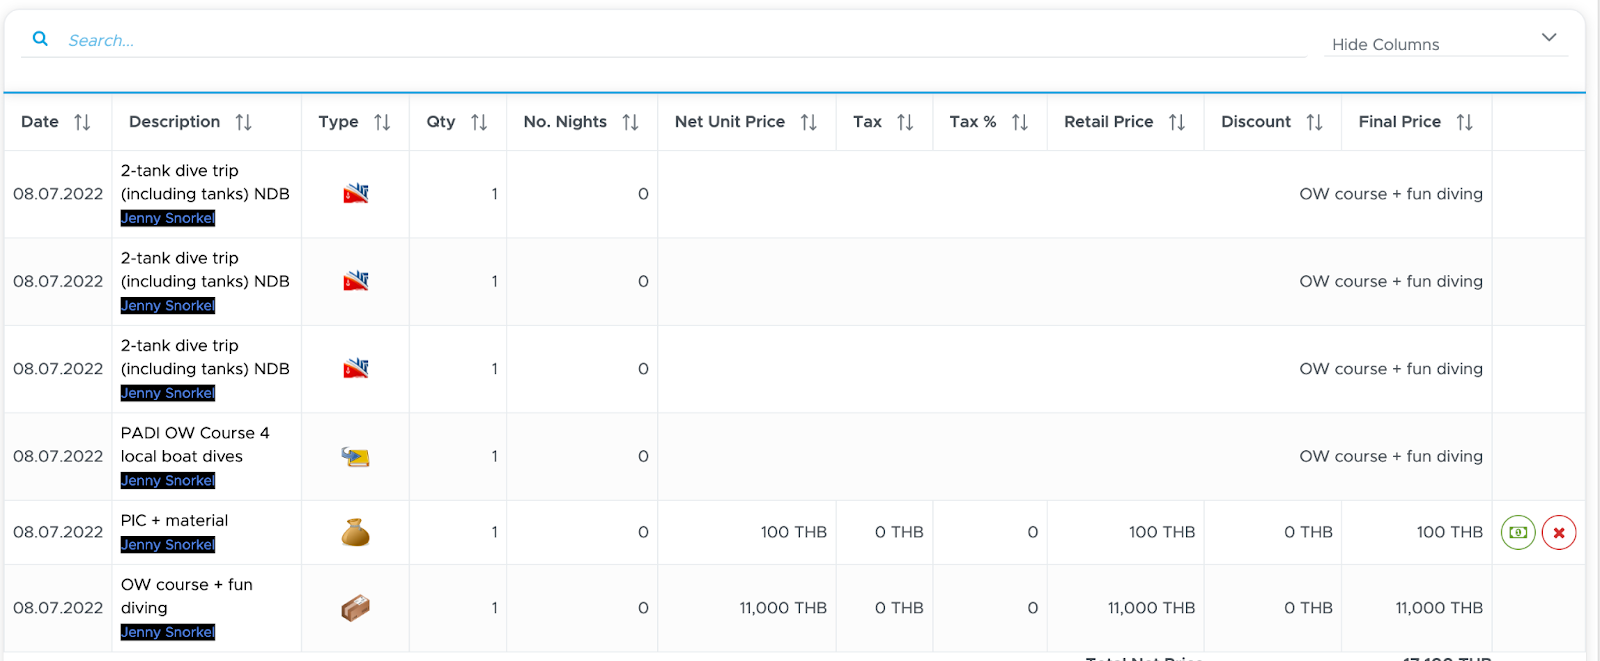
In the bill you will see one additional position with the multi-package price. The bill positions that belong to the package won’t disappear and their prices will be replaced by the package name. Everything that is not included in the package won’t be changed. In the bill summary section at the top, the amounts will be recalculated accordingly.
In case you’ve made a mistake and applied the wrong multi-package, you will now see a button Reset all multi-packages. When you click on this button all the multi-packages will be deleted and the bill positions will return to their original state and prices. You can then click button Select Multi-Package once again to apply the correct one.

In case of a multi-package in the voucher positions, the multi-package will be automatically written in the bill positions as well and assigned to the first customer in the bill. In case the multi-package belongs to another customer in the bill, click the light-blue people icon at the end of the position to change the assignment.
The items that belong to the multi-package, as soon as they are added to the bill (either manually or automatically through the Activity Calendar), will be automatically detected and marked as multi-package items. It is important therefore that the correct customer is assigned to the multi-package item, as well as to each item that belongs to the multi-package.
9.2.4 Discount with price list item type Package
If you haven’t done it yet, please read chapter Price list item type Package.
If your customer chooses one of your package prices, you can manually add this package to your customer’s bill. If your customer doesn’t have an open bill yet, you can go to the customer’s profile (either from All Customers or Current Customers) and click on tab Bill/Agents. You will find a button Create Bill. As soon as you click on this button a new bill will be generated for this customer.
Click on the bill and on button Add Position (from Price List). Search for your package item and select it.
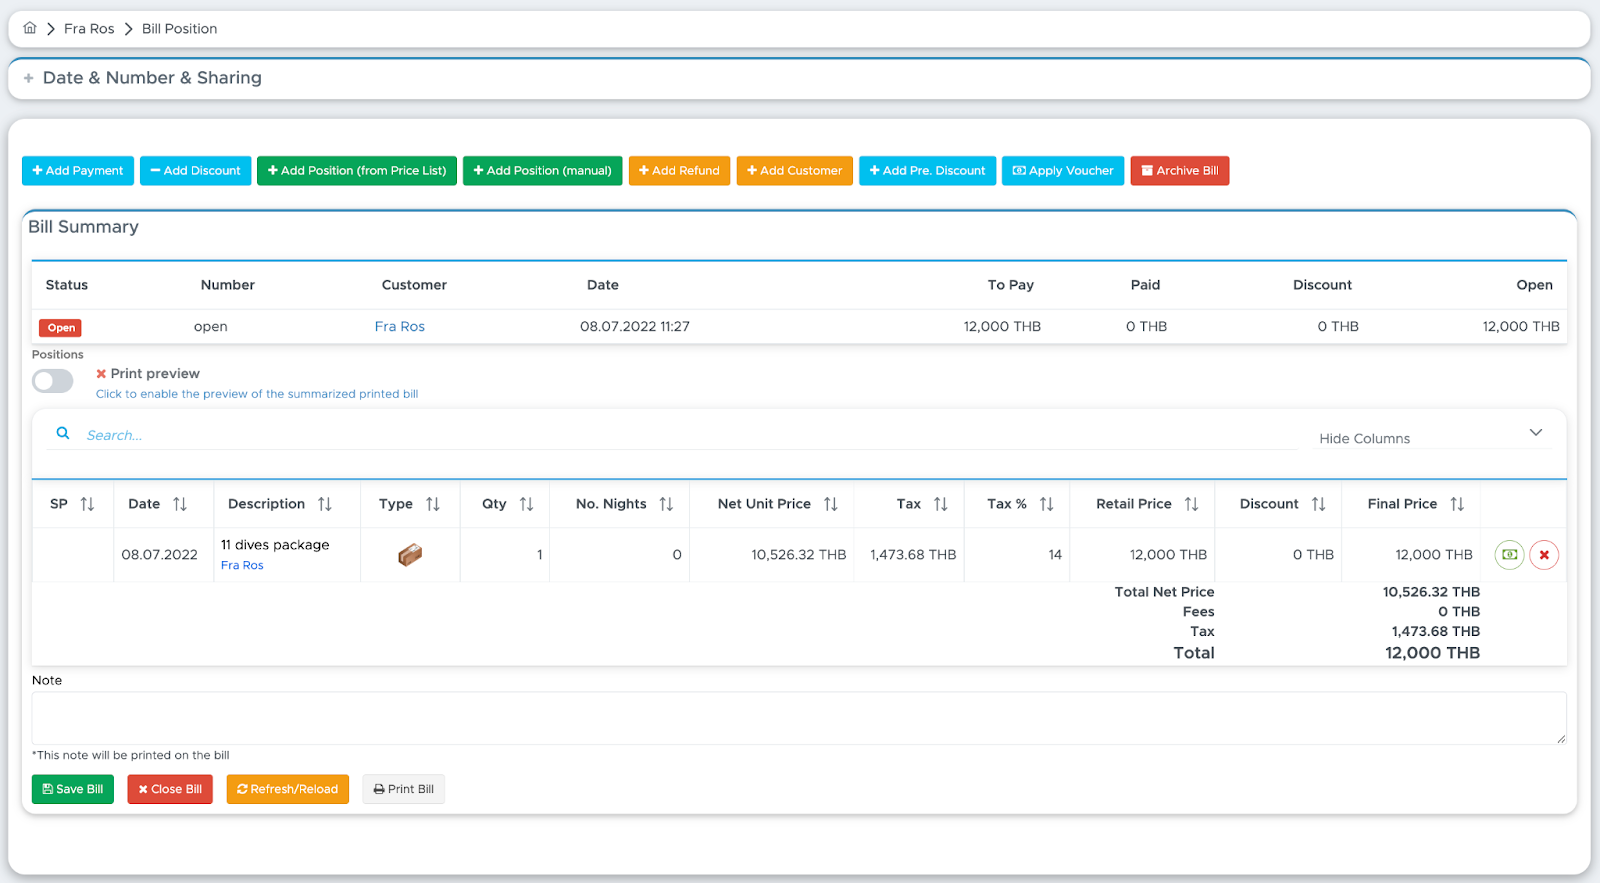
At this point you will plan activities including this customer and they will be added to his bill according to the prices that you’ve defined in your price list.
Before check-out your customer’s bill might look like this:
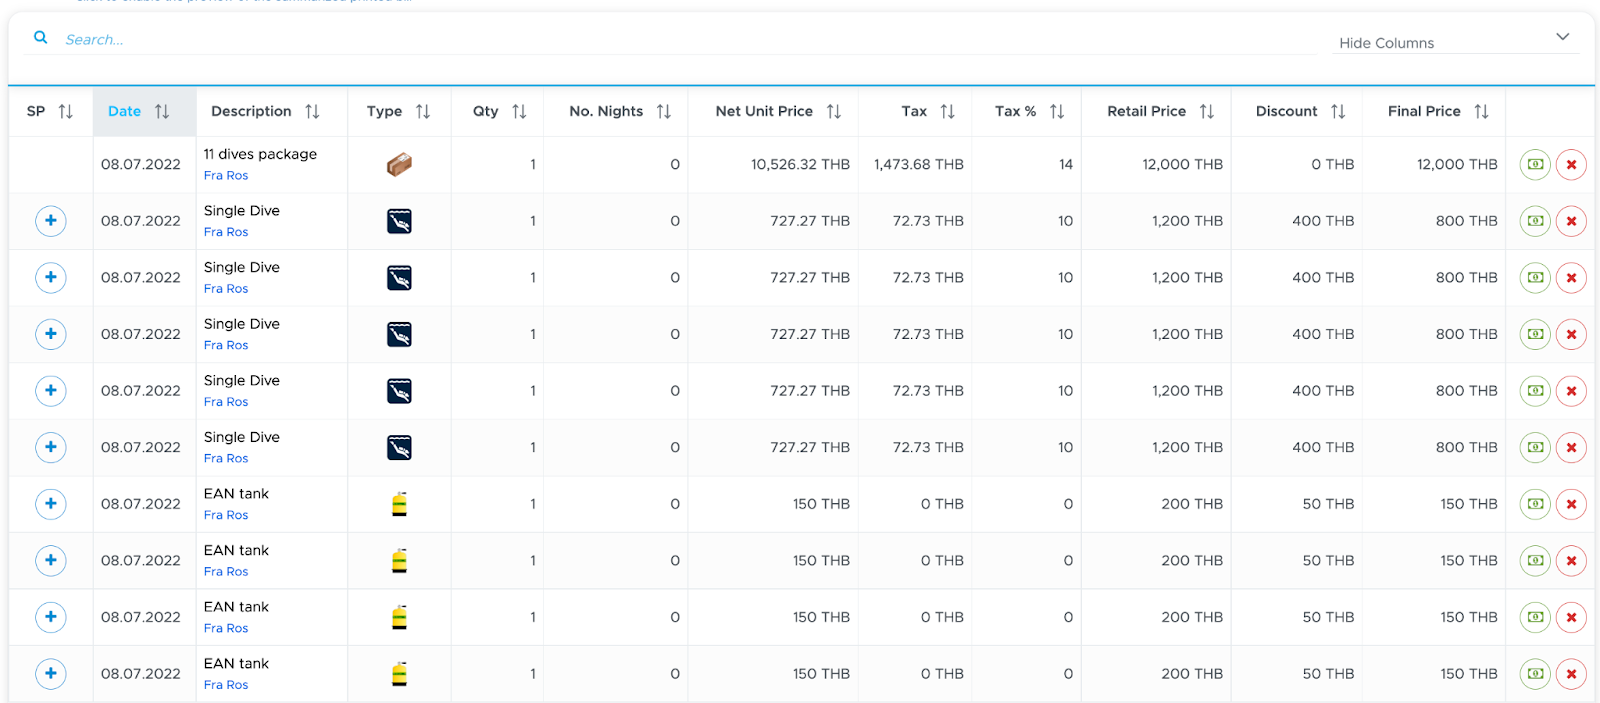
Now this bill includes the package that you’ve manually selected from your price list and every activity that your customer has joined. Most of these bill positions are actually part of your package and they should not be charged separately.
By clicking on the blue + button you can now manually select which bill position you want to include in your package. E.g. 3 single dives and 1 EAN.
After your selection, the bill will then look similar to the following:
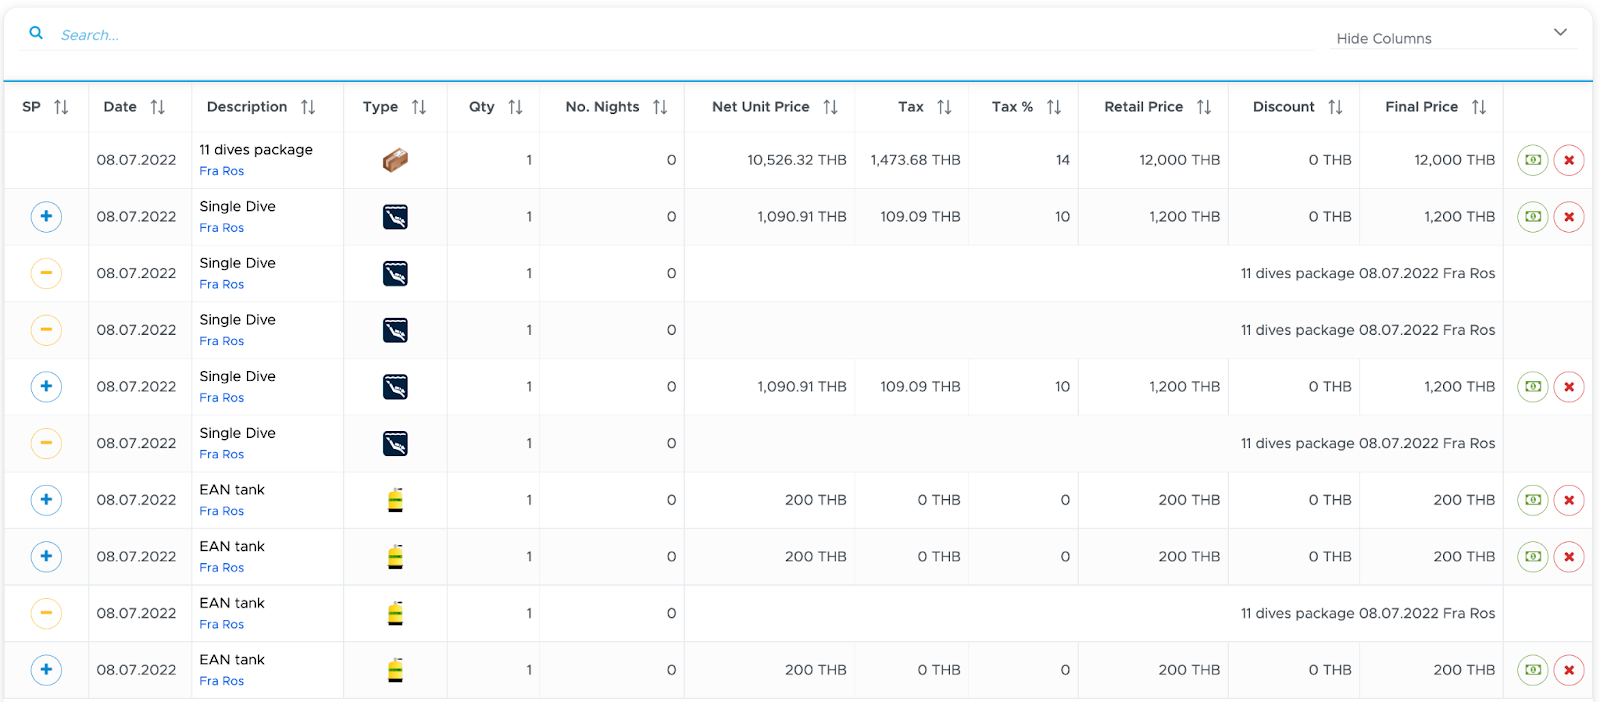
Every line left with the blue + button will be charged on top of the package, while the lines with the orange - button are now part of your package and marked as such. In case of wrong selection you can click on the orange - button to remove the selection and extract the bill position from the package.
The amounts in the bill summary are updated according to your selection.
Please click on the button Save Bill to make sure that the automatic discounts are calculated and saved correctly.
The package item can be added to the bill any time. Whenever you add it to the bill, you will see the blue + button next to the other bill positions that could potentially be added to the package.
In case of a Package item in the voucher positions, the Package will be automatically written in the bill positions and assigned to the first customer in the bill. In case the Package belongs to another customer in the bill, click the light-blue people icon at the end of the position to change the assignment.

The assignment to the correct customer is only useful to show the correct name in the printed bill. All the bill positions that could potentially be added to the package will show a blue + button, regardless of the customer they are assigned to.
Bill positions that match voucher positions will not show the + button as they were quoted separately and outside of the Package.
9.2.5 Apply a predefined discount
If you’ve set up your predefined discounts in General Settings (Predefined discounts) you can apply them to your customers bills.
Click on the button Add Pre. Discount at the top of the bill and tick the checkbox related to the discount that you wish to apply.
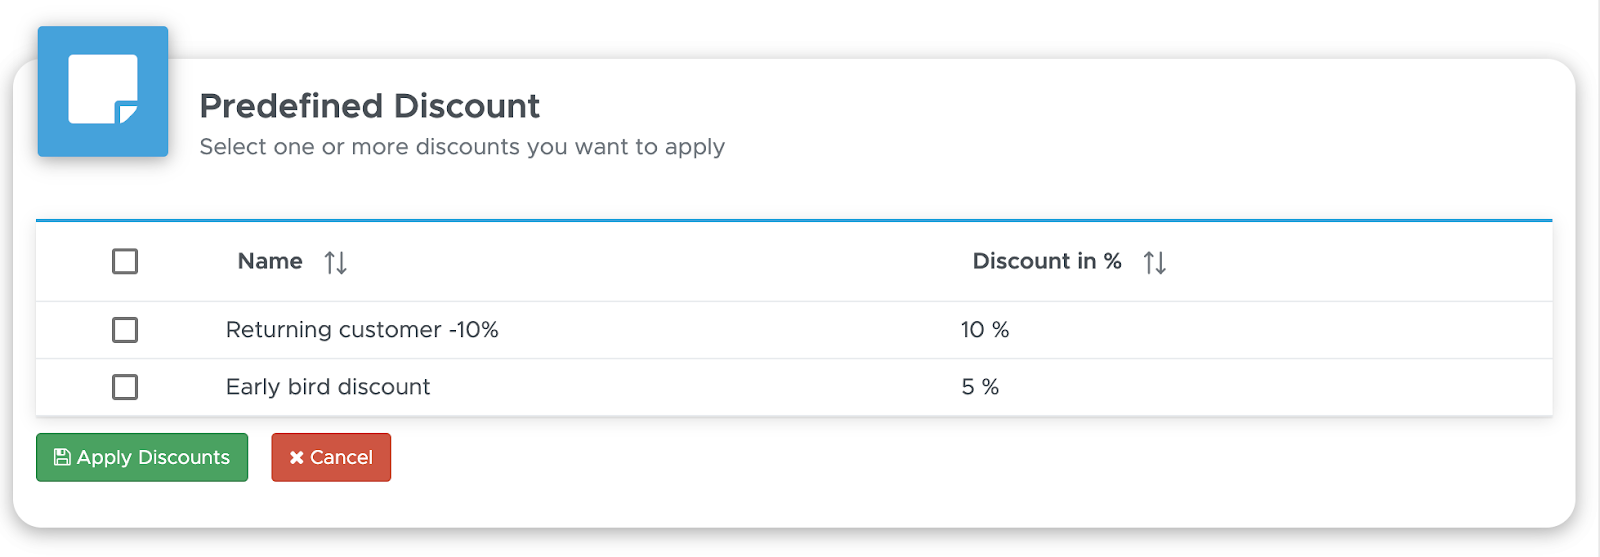
Click on the button Apply Discount.
You will find the applied discount right below the bill summary.

All the current and future bill positions that match the definition of your predefined discount will be discounted according to the percentage that you’ve chosen. Please consider that the predefined discounts are always calculated on the final price.
You can apply more than one predefined discount and the system will apply them in the order that you’ve selected them.
If a bill position already has an automatic or manual discount, the predefined discount will be calculated and applied to the discounted final price.
If there’s more than one customer in the bill, the predefined discount will be calculated on all the matching bill positions, regardless of who they’re assigned to.
Bill positions that match voucher positions will be excluded from the calculation of a selected predefined discount to preserve the prices and discounts agreed at the moment of the quote.
If you’ve made a mistake you can remove a predefined discount from a bill by clicking on the X icon. All the bill positions will go back to their original prices before the application of the predefined discount.
9.3 Payment
To add a partial or full payment to the bill click on the light-blue button at the top “Add Payment”.

Select the payment method, the currency (the default currency is the one that you’ve chosen in your Settings), the conversion rate (if appropriate) and the amount. If you select a currency that has a conversion rate (as set up in General Settings - Conversion Rates), you will see the conversion rate automatically written. If necessary, you can delete it and type a new one.
If you start recording the payment while the customer is right in front of you, you can use the automatic calculations done by Geek Divers to inform the customer of the correct amount. E.g. in case of payment in another currency, under Amount you will see the value written in Open converted to the chosen currency, according to the conversion rate that you’ve typed.

If you now type a value in Amount, the field at the bottom-right will show you the total amount to input in the credit card machine, including the credit card fee percentage that you’ve set up in your settings.
You can now click on the button Save. If you’ve added a payment fee to your settings, Geek Divers will calculate it automatically and show two lines in the payments table as soon as you click on Save Payment.

The amounts in the bill summary are automatically recalculated, showing any outstanding balance.
9.3.1 Apply Credit
If you’ve already received a partial or full payment from your customer and you’ve recorded it as Customer Credit, you will see the total amount of Current Credit at the top of the bill.

You can choose to apply all or part of the credit to the current bill. To do so click on the button Apply Credit. A new field will ask you the amount of credit that you wish to apply to the bill. Type the amount and click on the button Confirm Credit.

The extra field will disappear and you will see the applied credit in the Payments section of the bill. The Current Credit will be recalculated to show the current value. If you’ve applied the whole credit to the customer’s bill, you won’t see the Customer Credit in the bill anymore.

In case of mistakes, you can delete the applied credit that you see in the Payments section. The Customer Credit will then be shown at the top of the bill and you can repeat the steps to apply the credit. The applied credit that you’ve deleted will stay in the bill Payments section and be marked as deleted.
9.4 Add Refund
You can only add a refund if the bill contains at least one payment. The maximum refund value is equal to the total amount paid.
Click on the button Add Refund.

The date is automatically set to today and you can change it by clicking on the calendar icon.
Enter the amount that you wish to refund to your customer and click on the green button Add Refund.

The refund is added to the list of payments and the Open amount is automatically recalculated.
9.5 Apply Voucher
Starting from version 2.0 and with the introduction of the Booking Module, you can manage all the quotes that you offer to your customers and partners. A confirmed quote will be automatically considered a voucher for the customer. It’s your choice to ask for a deposit or full payment of a confirmed quote before the customer arrives or at check-in.
If the customer claims to have a voucher, you don’t necessarily need to see proof of it. If the voucher was generated from a customer quote, you only need to know the name of the first customer that was attached to the quote. If the voucher was generated from a partner quote, you need to know the name of the partner who requested the quote (e.g. Travel ABC) and the list of services purchased by the customer. Click on button Apply Voucher at the top of the bill to view the content of the voucher.
👀 Important!
Please make sure that your customer has a correct check-in date or Geek Divers won’t find any matching confirmed quote. Currently Geek Divers has a tolerance of ±5 days on the check-in date.
9.5.1 Voucher from a customer quote
Click on the button Apply Voucher. If the customer checks-in with a voucher because they have requested and confirmed a quote, in the sidebar you will see the content of the confirmed quote.
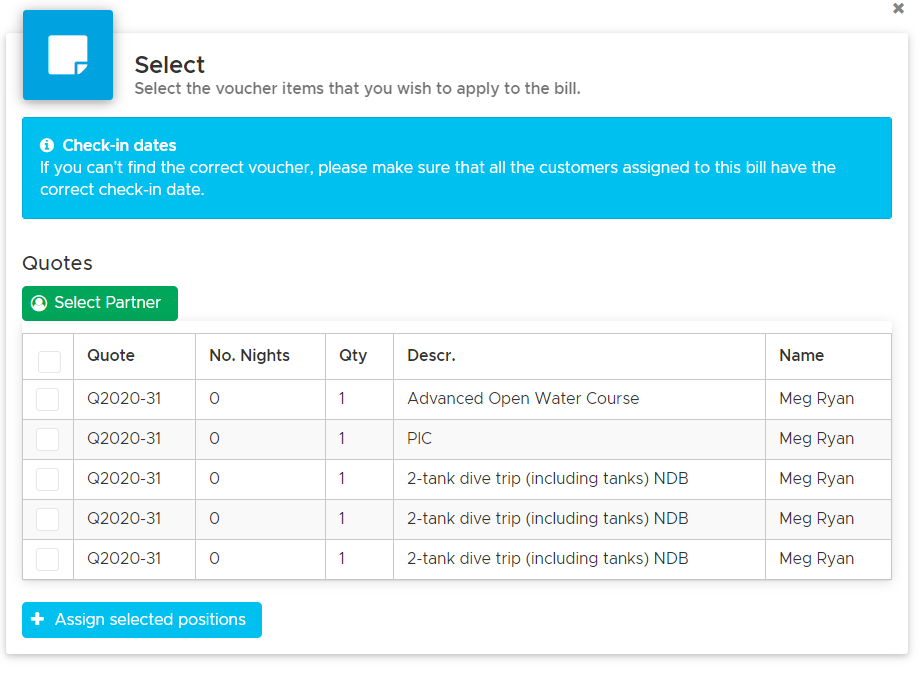
Select all or some of the items by clicking on the checkboxes next to each position or the checkbox at the top and click on button Assign selected positions.
The sidebar will automatically close and all the selected positions will be added to the bill in the Voucher section.
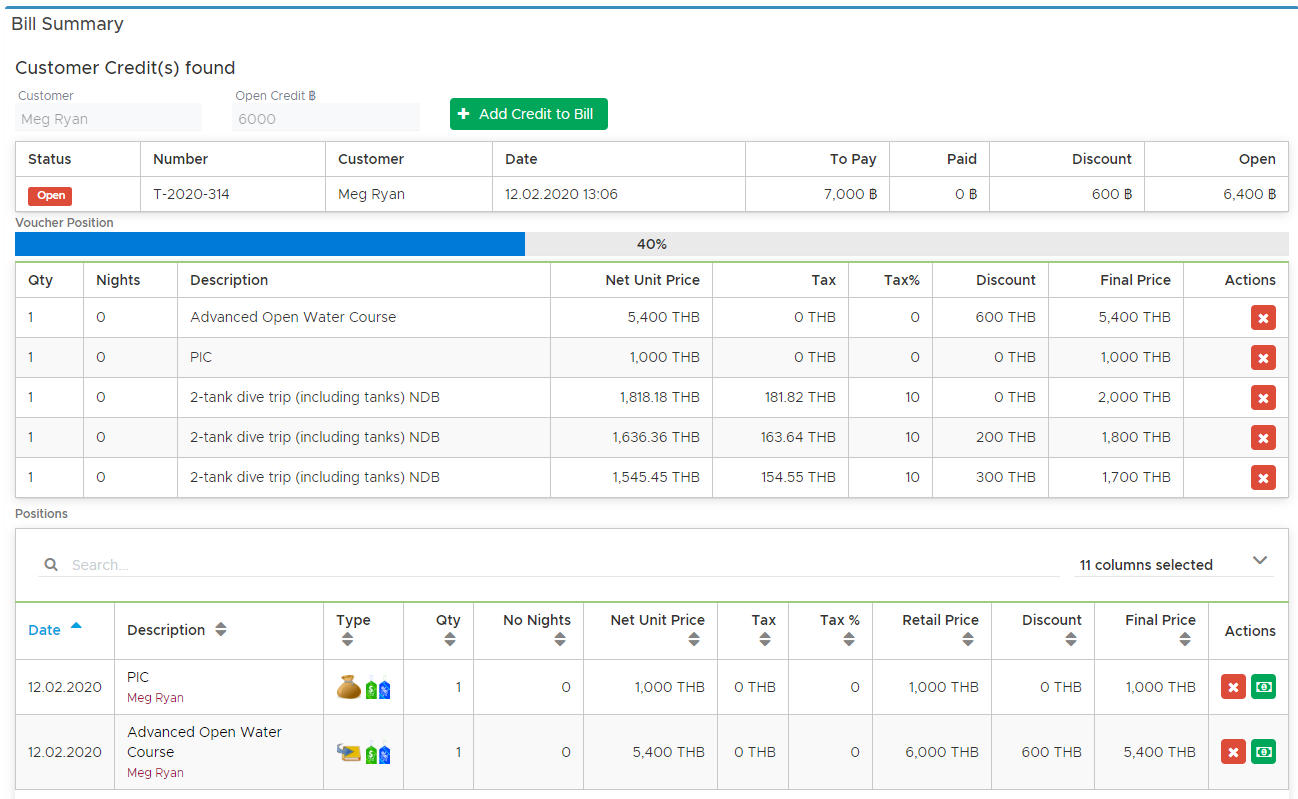
The voucher positions will be copied 1-to-1 from the quote, with the same descriptions, prices and discounts. The prices might be slightly different from your current prices. This is because your current price list might have changed between the time the quote was created and confirmed and now or because a discount was recorded in the quote.
Some voucher positions will be automatically copied in the bill positions: accommodation (room reservation from the Accommodation Calendar), meal plan, multi-package and type Package. Everything else will be either added automatically to the bill positions every time you plan the customer in the activity calendar or you can add items manually using button Add Position (from Price List).
As soon as you plan the customer in the activity calendar or you add positions to the bill, the voucher positions will be marked in the bill positions with the voucher icon (green and blue in column Type). As soon as a voucher position matches a bill position, you will see the voucher progress bar updating with a higher percentage.
In the example above, the customer is planned in the Activity Calendar in an Advanced Open Water course, which is also part of her voucher. The current retail price of the course is 6000THB, but in the quote she was offered a 10% discount, therefore the same price will be reflected in the bill positions.
In case of mistakes, voucher positions can be removed from a customer’s bill by clicking on the X button at the end of each voucher position. If a voucher position is removed from a bill, it disappears from the current bill, but it remains available to be used in another customer’s bill, if the original quote was assigned to more than one customer. Removing a voucher position, if this is already matching a bill position, will not remove a bill position, but it might update it with the current prices. More on this in chapter Customer Quote.
Please consider that you can click on Apply Voucher at any time, as long as the bill is still open and the customer has the correct check-in date. You can choose to apply a voucher at check-in, during the customer’s stay or before check-out.
9.5.1 Voucher from a partner quote
If the customer checks-in with a voucher because they have purchased your services through one of your partners or travel agents, in the sidebar you will not find the content of the partner quote because your first need to select a partner (the only exception is if the partner quote was also assigned to the customer).
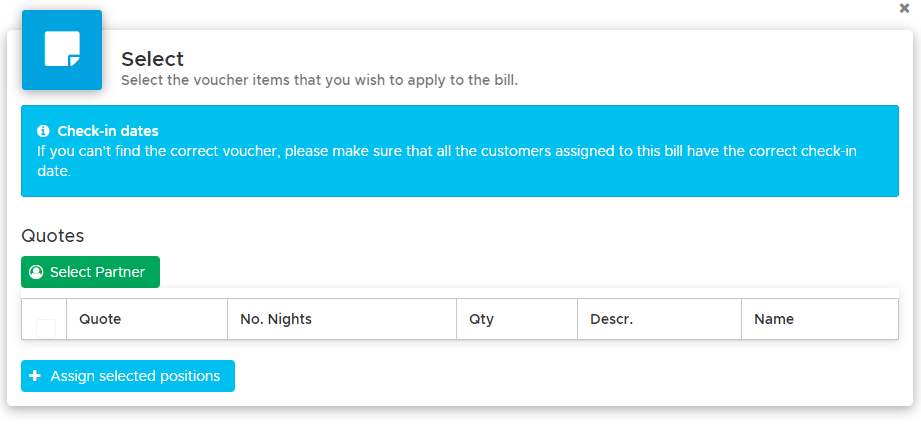
Click on the button Select Partner and choose the correct partner from the list. In the sidebar you will now see the partner quote positions that match the customer’s check-in date. You might find a lot more positions than the ones written in the customer’s voucher. Select only the positions that the customer has actually purchased and click on the Confirm button.
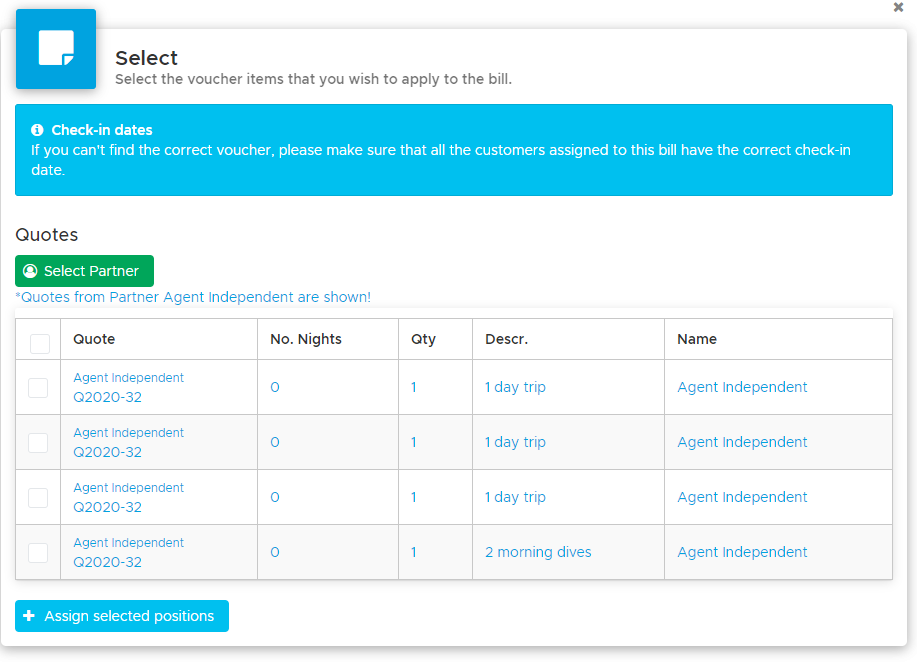
The selected positions will be written in the voucher section of the bill with the wording “Partner voucher” and no prices. As soon as you plan the customer in the activity calendar, new bill positions will be written in the bill and if they match any of the voucher positions, they will be marked as “Voucher” (no prices).
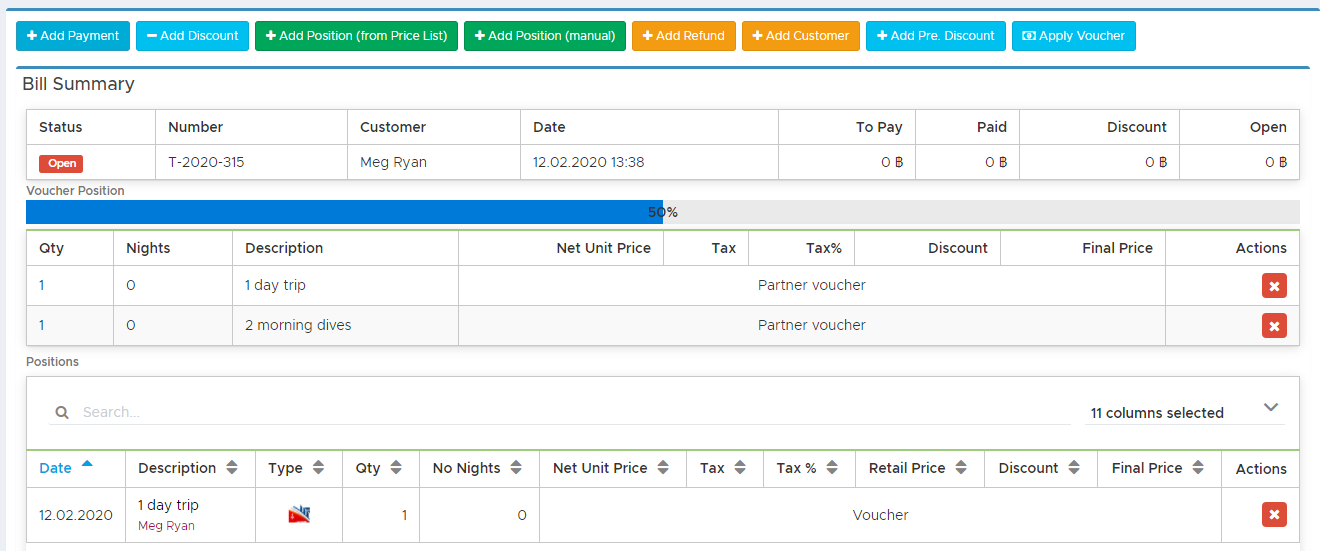
The voucher positions are preceded by a progress bar that is automatically updated whenever a voucher position is applied to the bill.
In case of mistakes, voucher positions can be removed from a customer’s bill by clicking on the X button at the end of each voucher position. If a voucher position is removed from a bill, it disappears from the current bill, but it remains available to be used in another customer’s bill. Removing a voucher position, if this is already matching a bill position, will not remove a bill position, but it will update it with the current prices. More on this in chapter Partner Quote.
Please consider that you can click on Apply Voucher at any time, as long as the bill is still open and the customer has the correct check-in date. You can choose to apply a voucher at check-in, during the customer’s stay or before check-out. Clearly, depending on the content of the voucher and the content of the bill, the Open amount will change.
9.6 Fees and Notes
The fees that you charge to your customers are not part of your revenue and therefore they need to be shown separately in your customer’s bill.
You will see the fees written at the bottom of the bill in a separate sub-total.
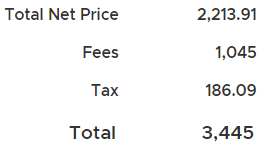
Below the bill total you will see a text field Note. If you wish to write a comment to the customer’s bill, you can do so in this field. If this text field contains at least one character, it will be printed in the pdf version of the bill before the bill footer.

9.7 Change date and bill number and share packages
At the top of every open bill you will find a section ‘Date & Number & Sharing’.

Click on the ‘+’ to expand it.
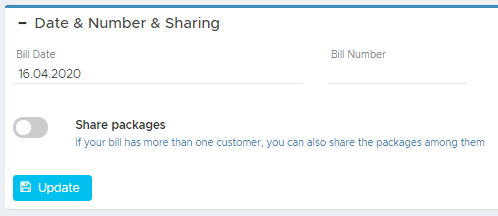
If the bill is open you will see the creation date. The Bill Number will be empty. You can change the date and write your own bill number and click on Update. Please consider that by typing your own bill number you might end up having more than one bill with the same number in the system.
Once you close the bill, no more changes will be allowed.
The bill date that you see in this section is the bill creation date. The official bill date is the bill closing date that will be set together with the bill number once you close the bill. If you set a different date here, this date will be taken as bill date once you close the bill.
In version 2.0 you will find a new toggle: Share packages.
With the possibility to add customers to a bill (see following chapter), you can choose if you wish to share your item packages and multi-packages or if you prefer leaving the automatic discounts strictly to one customer at a time. By default this toggle is turned off, so your item package prices and your multi-packages will be applied separately per customer. If you wish to allow your customers to share a package price, you will need to manually turn on this toggle and click on button Update.
9.8 Add Customer
With version 2.0 you can have more than one customer in one bill. To add a customer to an open bill, click on the button Add Customer. In the pop-up, start typing the customer’s name or last name. As soon as you see the correct customer, click on it to add it to the current bill.
If the added customer doesn’t have an open bill, the name will just be added to the bill, below the first customer.

If the added customer already has an open bill, Geek Divers will ask you if you wish to merge that bill into the one that you’re viewing.
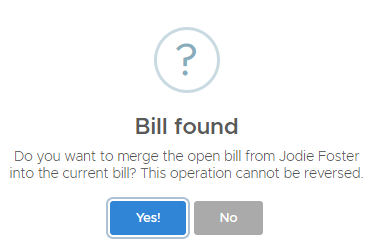
If you click on yes, the system will take the content of the customer’s bill (bill positions, payments, vouchers) and transfer them to the bill that you’re viewing. The bill that was merged into the one that you’re viewing will be completely empty and it will disappear.
👀 Important!
Once two or more bills are merged, they cannot be split again. The Geek Divers support service cannot split them for you.
In the bill with more than one customer, every bill position will be assigned to a customer.
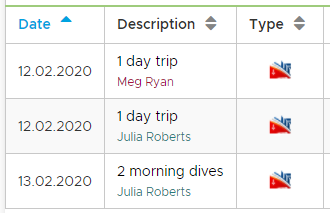
At this point, if you wish to use button Add Position (from Price List) or Add Position (manual), you will need to select which customer the new position belongs to. The bill positions that are automatically generated from the Activity Calendar will show the correct customer’s name.
If the bill contains a voucher, the voucher positions will be applied to any matching bill position, regardless of the customer’s name written under the description.
Applying a customer credit or adding a payment or recording a refund will not distinguish between the open amount of a customer or the other. Once two or more customers are in one bill, the calculations will take into account every position and consider the total sums.
Any predefined discounts applied to the bill will calculate the discount on bill positions matching your setup, regardless of the customer they are assigned to.
It is therefore very important that you add a customer to an existing open bill only if you’re sure that these customers wish to settle the bill together and if you wish to apply the same conditions to all of them.
The customers can however check the bill positions and their names in the bill printed version and if they wish to split the costs, they can do so after check-out.
9.9 Print bill
You can print the customer’s bill at any time as long as there’s at least one bill position.
Print Preview - You will find this toggle before the Bill Positions section. If you click this toggle you will see a summarized version of the bill. E.g. instead of seeing each position with Qty 1, some positions might be merged and show you a quantity higher than 1. Positions will be merged only if they have the same date, description and net price. If the Print Preview toggle is set to ON while you add a payment or a new bill position, you might not see them immediately in the bill. Turn the Print Preview toggle to OFF to verify that they’ve been correctly added to the bill.
While in a customer’s bill, scroll down and click on button Print Bill.
You will see a sidebar containing the available printing options.
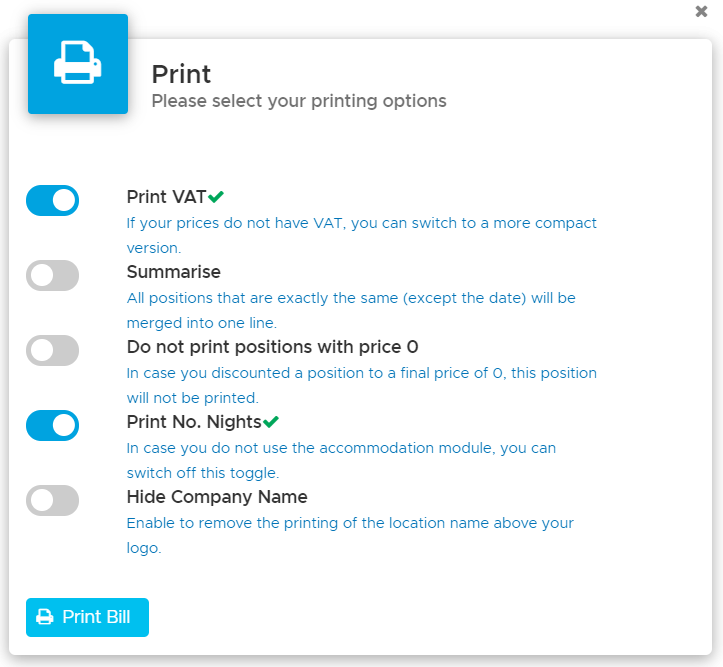
Click on the toggles to turn them on or off according to your preferences. A toggle that is turned on is blue and a toggle that is turned off is gray.
The first time you print a bill you will need to click on the toggles. Your preferences will be saved on the same device for the bills that you wish to print in the future, but you can always change your preferences.
Once you’ve made your choice click on button Print Bill.
A pdf file is generated and you can save it anywhere on your computer for your records. You can then send it to the customer via email or print it.
The bill status will show as Open if the value in Open is not zero. You will see status Paid if the amount in Open is exactly zero and status Closed if you’ve closed the bill, regardless of the amount written in Open.
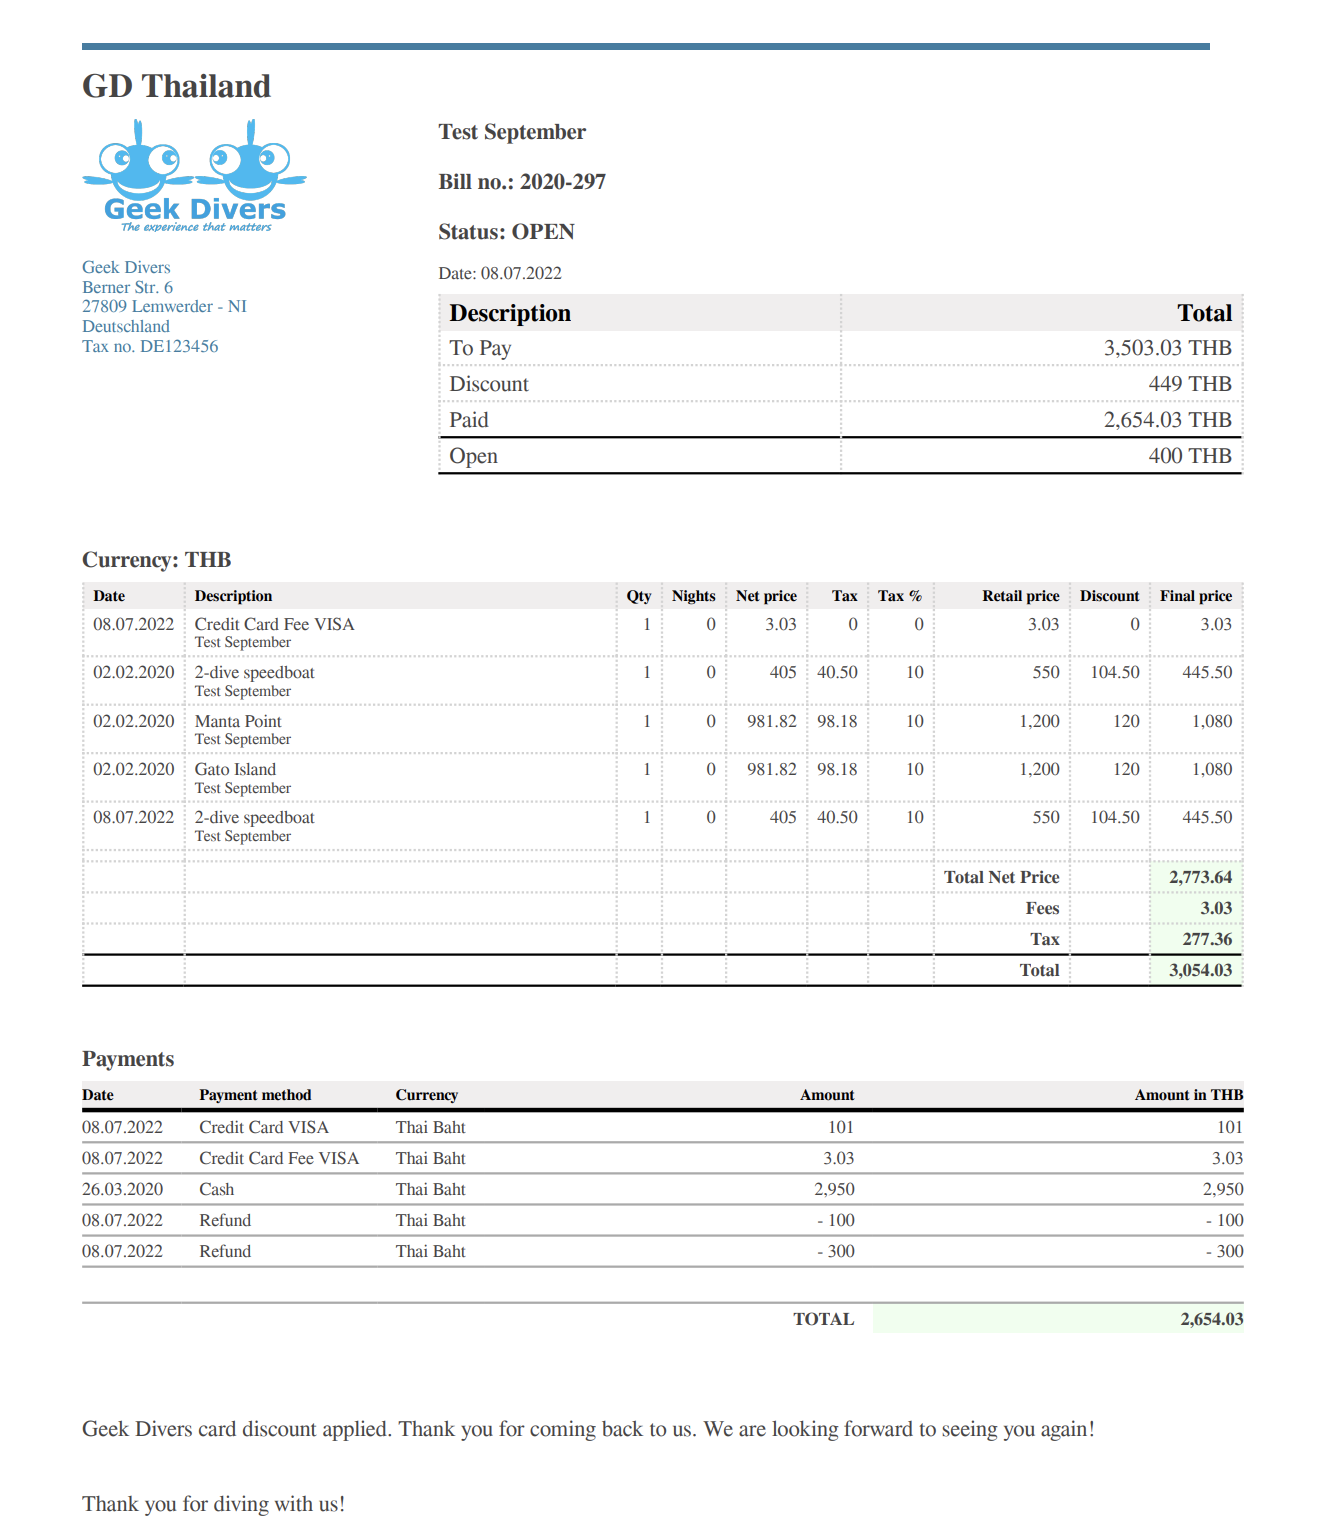
9.10 Archive a bill
Starting from version 2.0, you can archive a bill if the following conditions are met:
The bill is still open.
There’s no bill number and no change was recorded to the original Bill Date in Date & Number & Sharing.
The bill has no bill positions or the bill positions are deleted.
The bill has no payment positions or the payment positions are deleted.
The bill has no applied vouchers.
The Bill Summary shows an amount of 0 in To Pay, Paid, Discount and Open.
You will find button Archive at the bottom of the bill and it will be available only if all the conditions listed above are met. An archived bill represents either a mistake or a peculiar situation. E.g. The customer was planned in the activity calendar, but for some reason they can’t join the activities and you don’t want to charge them. If their bill is completely empty, it doesn’t really make sense that you close it. Please remember that when you close a bill, Geek Divers will assign a progressive number to it and therefore it becomes an official accounting document.
You will find your archived bills in menu Financial - Archived Bills.
9.11 Close bill and check-out
Once the bill is paid and the customer has said bye-bye, you can close the bill. By closing the bill, you also check-out the customer. If you know that the customer is still around and might come back for a couple of dives, you might want to keep the bill open, so that the customer is still visible in your Current Customers. If you have accidentally closed a bill and the customer comes back to your dive center for a few dives, follow the steps in chapter Verify and Check-in to check-in the customer once again. As soon as you add this customer to an Activity, a new bill will be automatically created.
To check-out a customer, click on button Close Bill.
If you have added the customer to any past or future activities that are not yet closed, you won’t be able to close the bill and you will see a message similar to the one below:
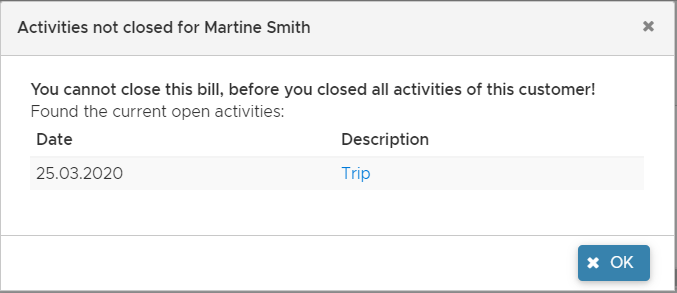
If you click on the name of the activities in this message you’re automatically redirected to the activity where you can decide to either remove this customer from the activity or close the activity. Once all the activities that this customer has joined have been closed, you can check-out the customer by clicking on Close Bill button.
If the customer is not part of any open activity, this is the message that you will see:

If you click on Yes, the bill will be closed (you won’t be allowed to make any more changes to the bill), the customer will be checked out and the rental equipment assigned to this customer in customer’s tab Equipment will be released.
If you haven’t typed a bill number and date in Date & Number & Sharing, when you click on button Close Bill, a bill number will automatically be generated and assigned to this bill. The bill closing date will be assigned to the bill as bill date.
10. Payslips (previously Staff Payments)
Geek Divers generates the staff payslips according to the remuneration model that you’ve set up in Staff. Please read chapter Staff commissions/salary if you haven’t done it already.
You can view all your staff members’ payslips by clicking on Financial and Payslips (previously named Staff Payments).
You can also go to Staff, Current Staff, click on the staff member’s card and go to tab Payslip to view all the Open and Closed payslip for a specific staff member.
Either way locate the payslip that you wish to view and click on the staff member’s name to open it.
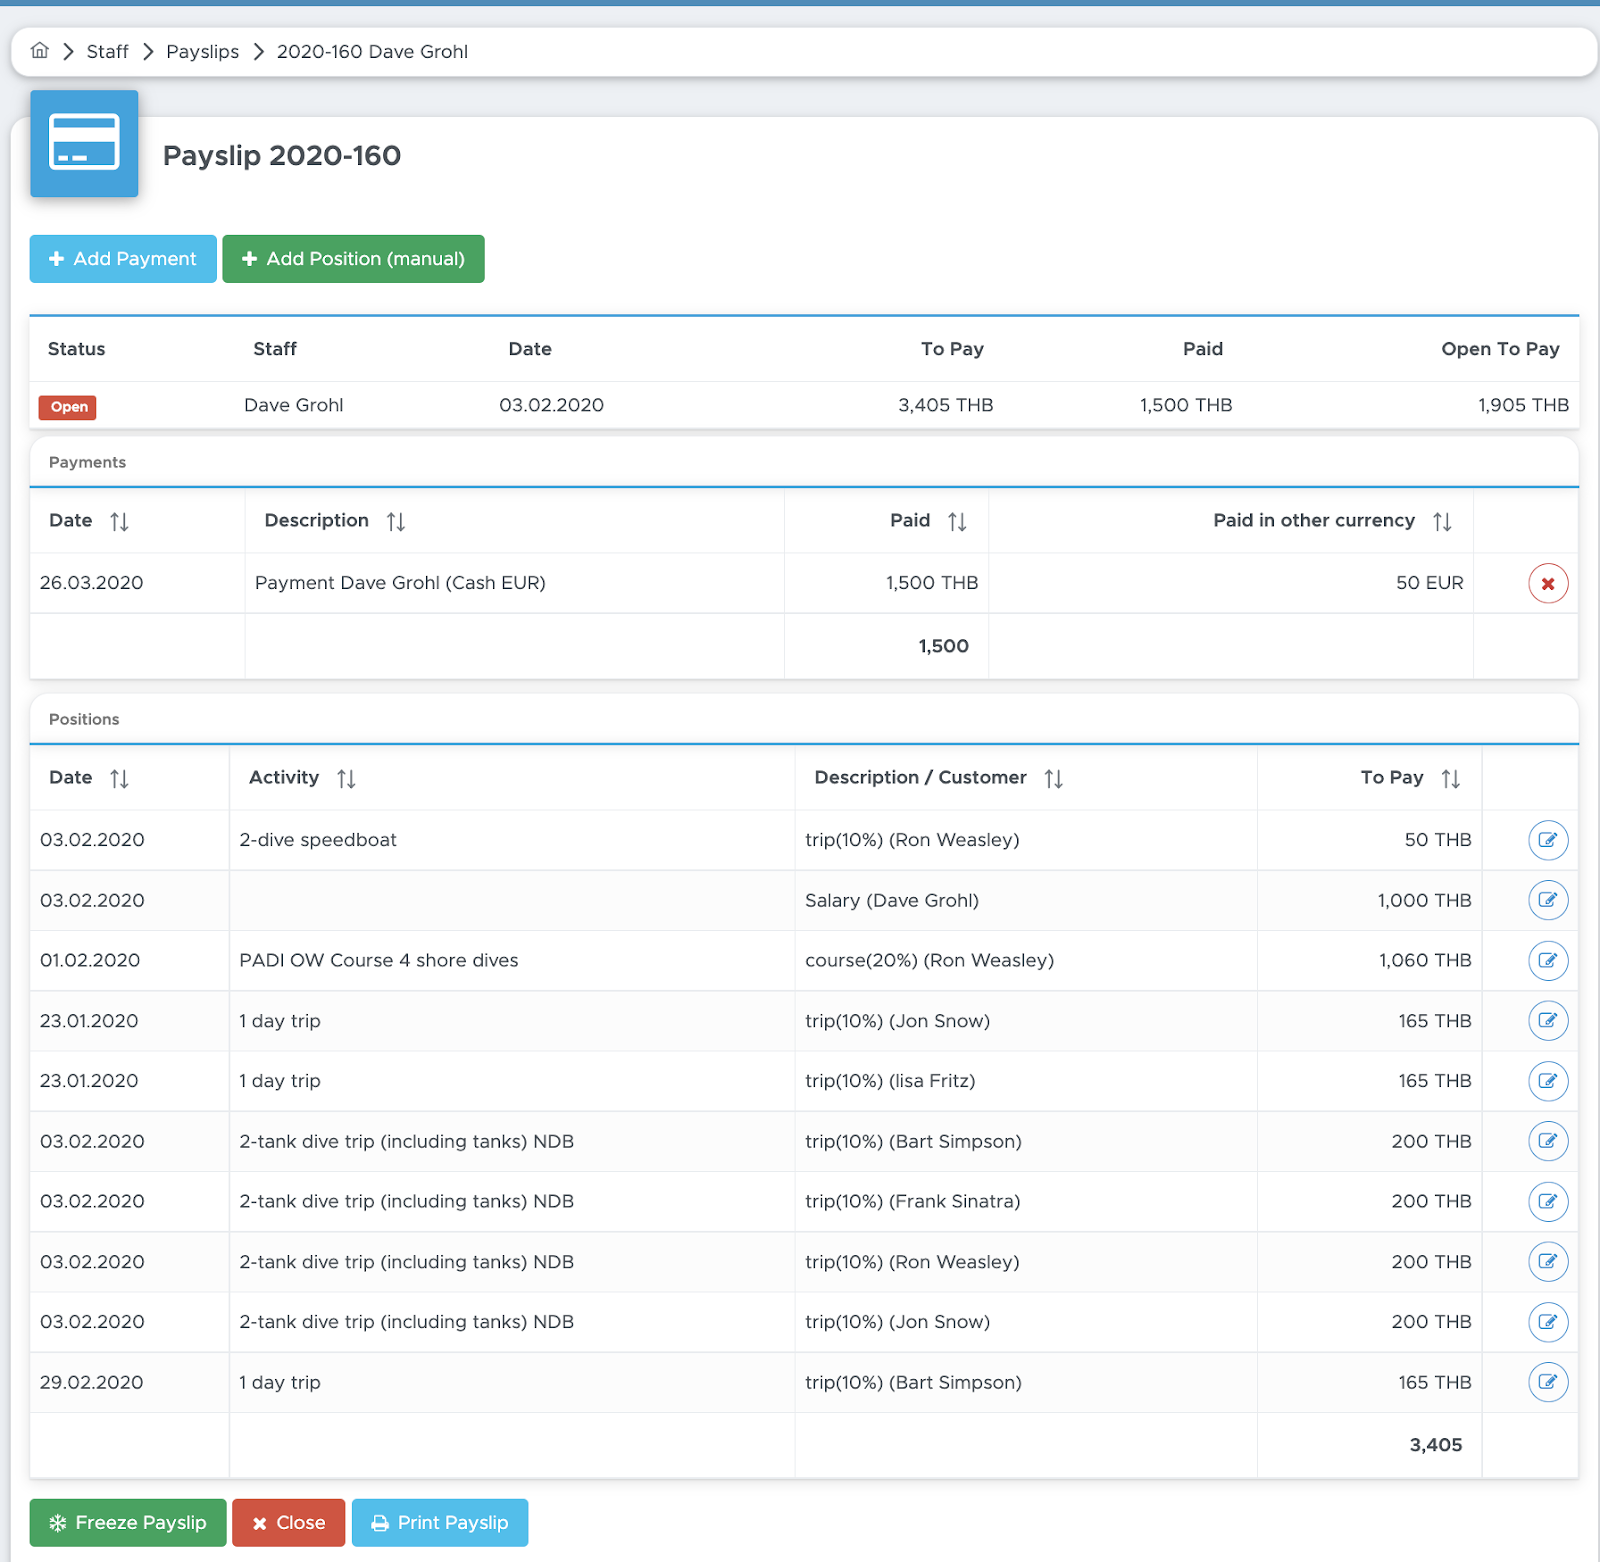
In the first row you can find a summary, followed by the Payments section.
In the Positions section you will find a list of automatically recorded positions containing the commissions based on the activities that this staff member joined and/or their base salary.
Every position shows the amount in column To Pay. If you wish to make any change to the content of the position, click on the light-blue button Edit at the end of the row. A sidebar will open on the right-hand side of your screen.
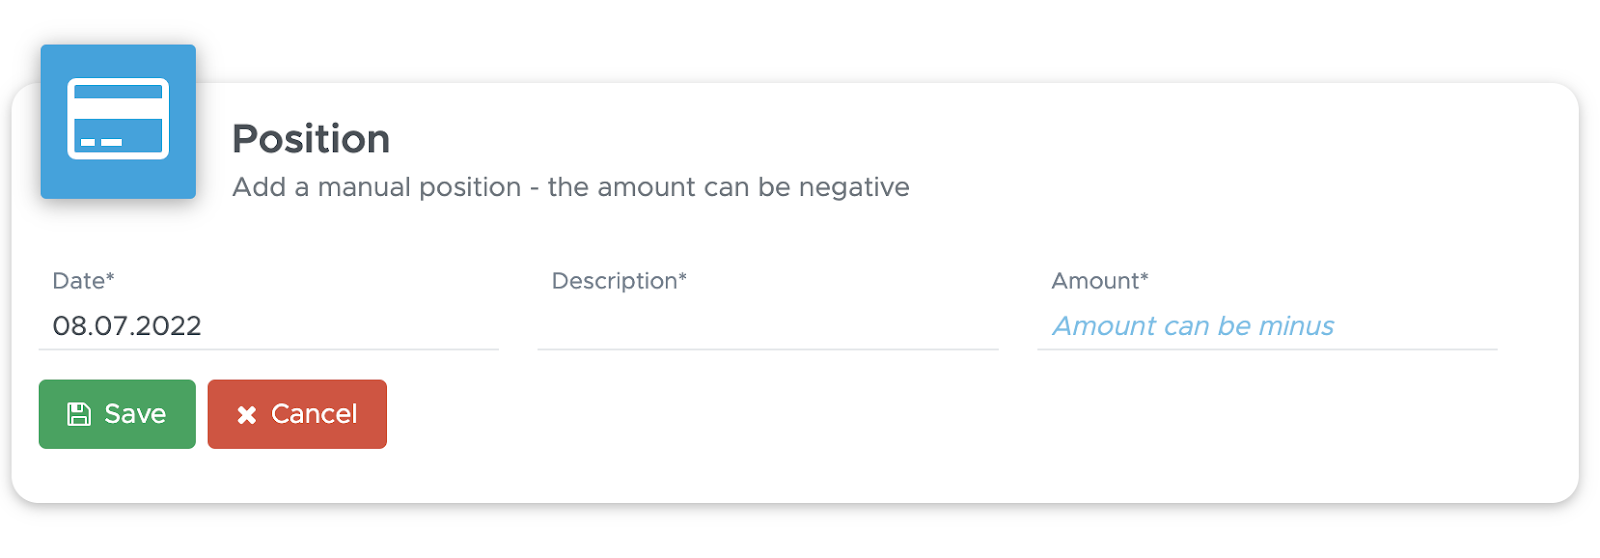
Make your changes and click on button Save to update the position in the payslip. Whenever you make changes to a payslip position, the values written in the summary section will be automatically recalculated.
10.1 Add positions
You might need to add extra charges to the payslip or an additional form of income that is not part of Geek Divers automatic calculations.
To do so click on the green button at the top “Add Position (manual)”.


Select a date and type a description. If you are adding an extra charge, remember to use the “-” sign before the amount.
Click on Save Position button to add the row to the payslip.
The Open To Pay amount is automatically recalculated accordingly.
10.2 Freeze a payslip
In case you have no time to check every single position of a payslip, but you want to close the payslip because today ( or tomorrow) is payday, you can temporarily “freeze” a payslip and work on it later.
Geek Divers won’t add or remove positions from this payslip, but you can still modify it as described in chapter Payslips and Add positions. This feature gives you the flexibility to choose your paydays and freeze all the payslips a few days before or on the same day.
To freeze a payslip go to Financial and Staff Payments, locate the payslip that you wish to freeze and click on the number or the staff member’s name.
Scroll down and click on the button Freeze Payslip. You will find a frozen payslip in the Frozen Staff Payslips section of the Payslips page (menu Financial - Payslips).
Freeze All
In Financial - Payslips you can find a button Freeze All at the top of the page. This button will take all the open payslips and freeze them. Please consider that if a staff member already has a frozen payslip, Geek Divers won’t be able to freeze a second one. You need to (pay and) close the frozen payslips before you can freeze a payslip for the same staff member.
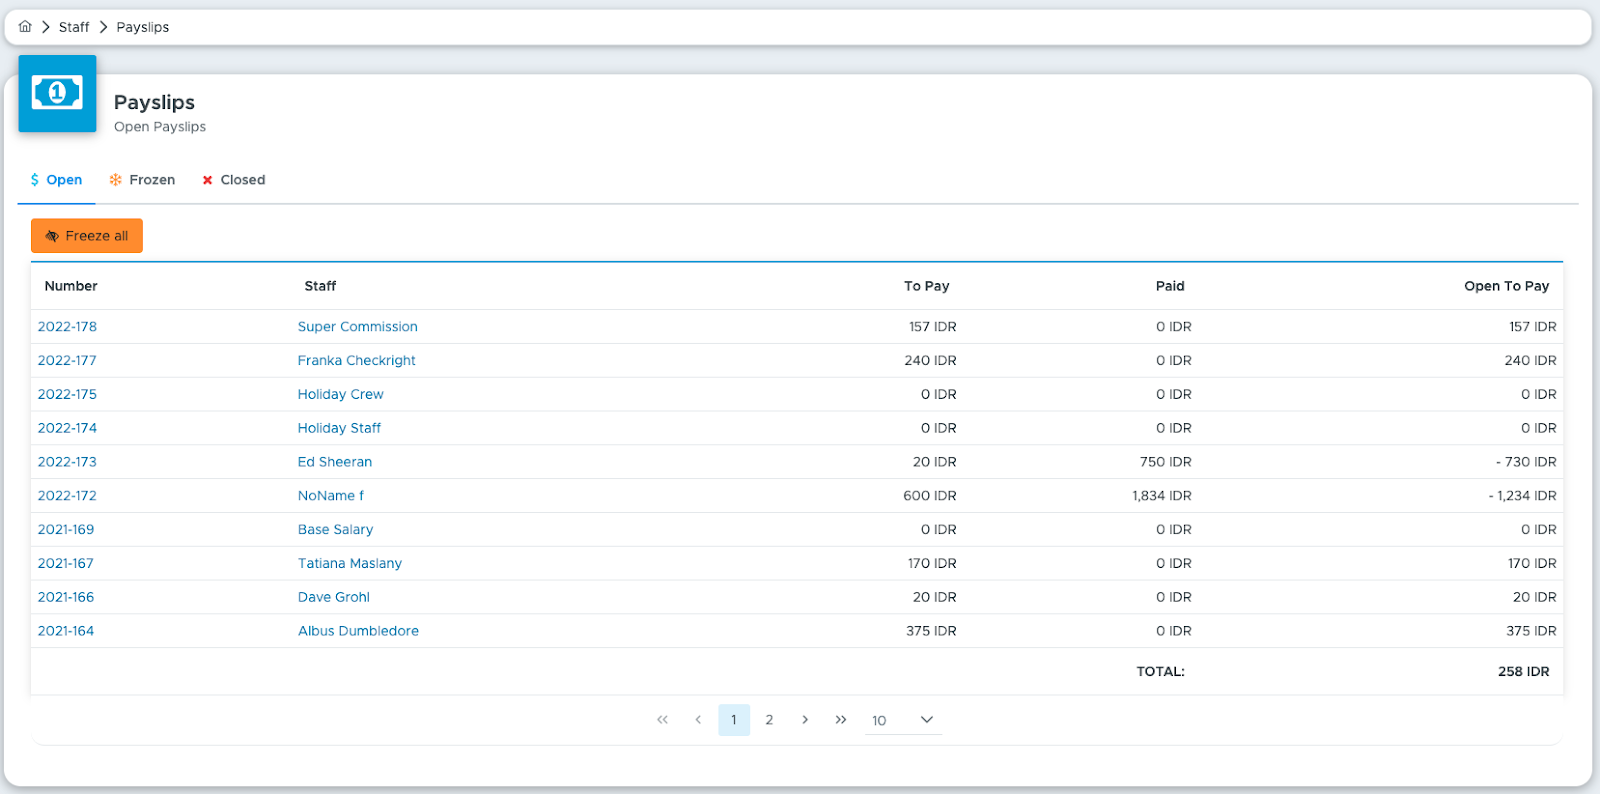
If the staff members with frozen payslips receive a base salary, Geek Divers will automatically create new payslips for them under Open Payslips, including the base salary that you’ve defined in Staff Commissions/Salary.
If the staff members with frozen payslips do not receive a base salary, their new payslips will be automatically generated by Geek Divers as soon as you close an Activity that they have joined and for which you’ve set up a commission.
10.3 Record a payment
Click on the Add Payment button to record a payment.
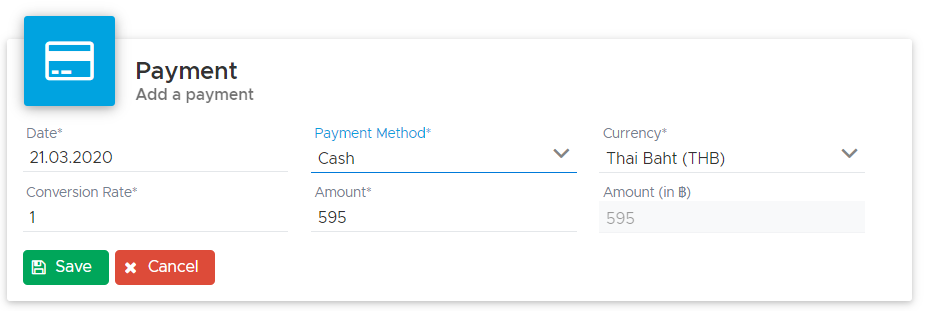
Select a payment method and type an amount to save the payment. If you wish to change the currency you can do so, but don’t forget to add a conversion rate.
You can use the Add Payment button not only to settle a payslip, but also in case one of your staff members asks for an advance payment. By using this feature you can record the date and the amount and leave the payslip open.
In case of mistakes, you can delete the recorded payment by clicking on the X button at the end of the payment position. If you delete a payment from a payslip, the payment will be completely deleted from the payslip and from the cash flow.
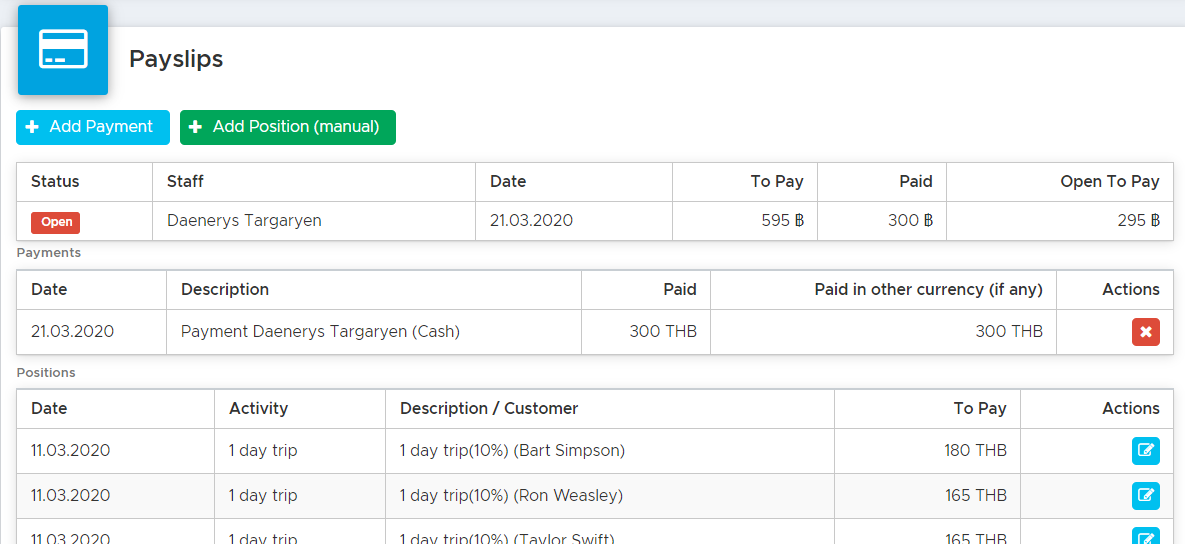
10.4 Close a payslip
You can close a payslip whether this is in status Open or Frozen.
In Financial - Payslips, click on the payslip that you wish to settle and close.
To close a payslip click on button Close at the bottom of the payslip.
You will find this payslip in the section Closed Payslips of Financial - Payslips.
If you wish to keep a record of the settled payslips on your hard drive or print/email the payslip for your staff member, click on Print Payslip button at the bottom of the payslip. Geek Divers will generate a .pdf file that you can save locally.
Please consider that closing a payslip is an operation that cannot be reversed.
11. Agents Invoices/Credit Notes
Similarly to the way you handle staff payslips, you can work on invoices and credit notes for your local agents who work on commissions.
The agent commissions that you’ve set up in your partners’ profiles ( tab Commissions/Price List) will be calculated and written in your agent invoices/credit notes when an activity is closed (if the agent is assigned to a customer in an activity) or when the customer’s bill is closed (when the agent is assigned to the customer in the customer’s profile (tab Bill/Agent) with an “All” commission.
From the menu click on Financial and choose Agent Invoices (previously named Partners). Geek Divers will take you to the list of Open, Frozen and Closed invoices/credit notes.

At a first glance you won’t see the difference between invoices and credit notes, but in case you want to print them, the pdf file will show you ‘Invoice’ or ‘Credit Note’ depending on the open balance:
Invoices → the open balance is greater than zero (your agent owes you)
Credit Notes → the open balance is lower than zero (you owe your agent)
Example 1 (invoice):
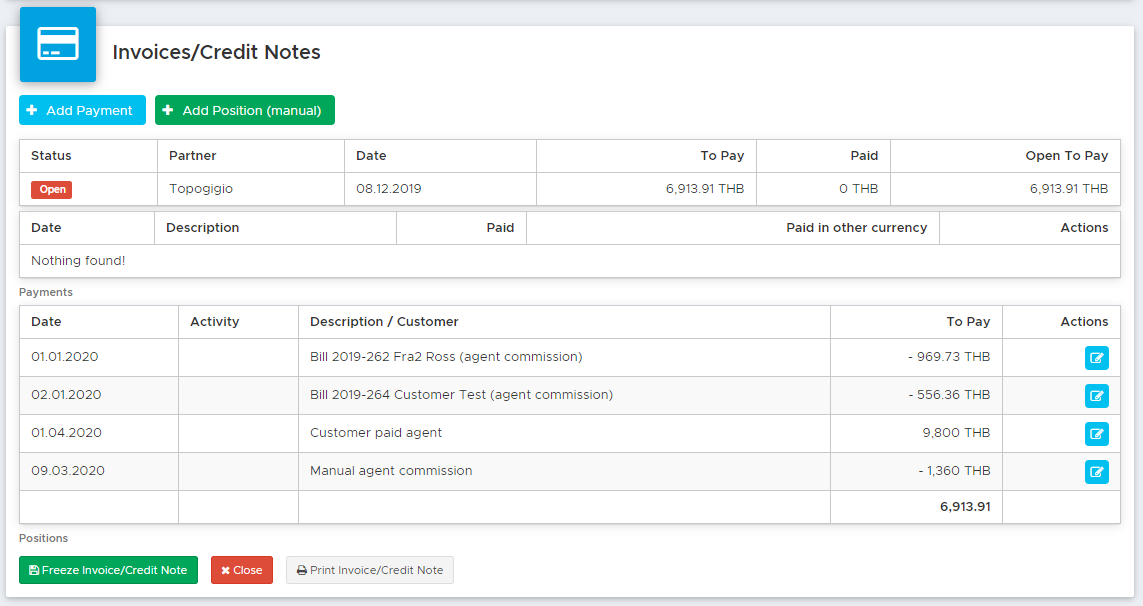
This is the printed version:
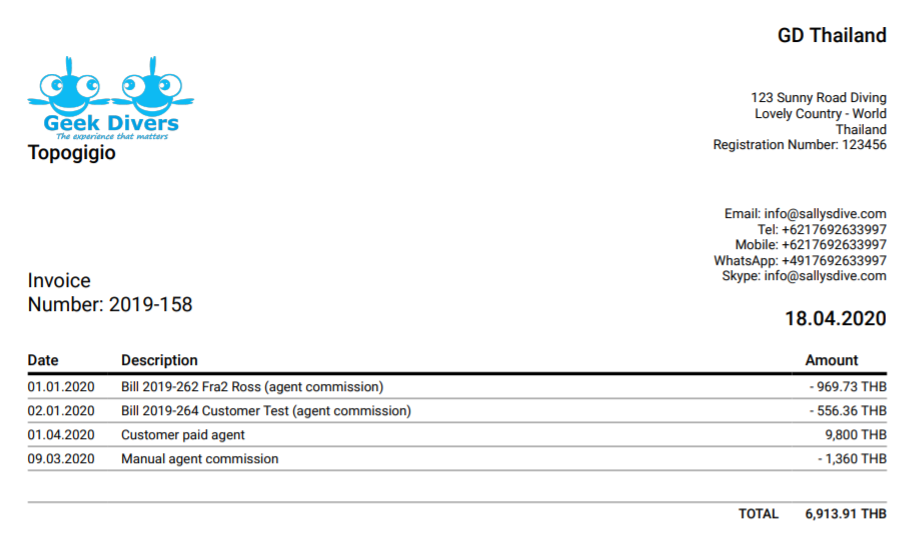
Example 2 (credit note):
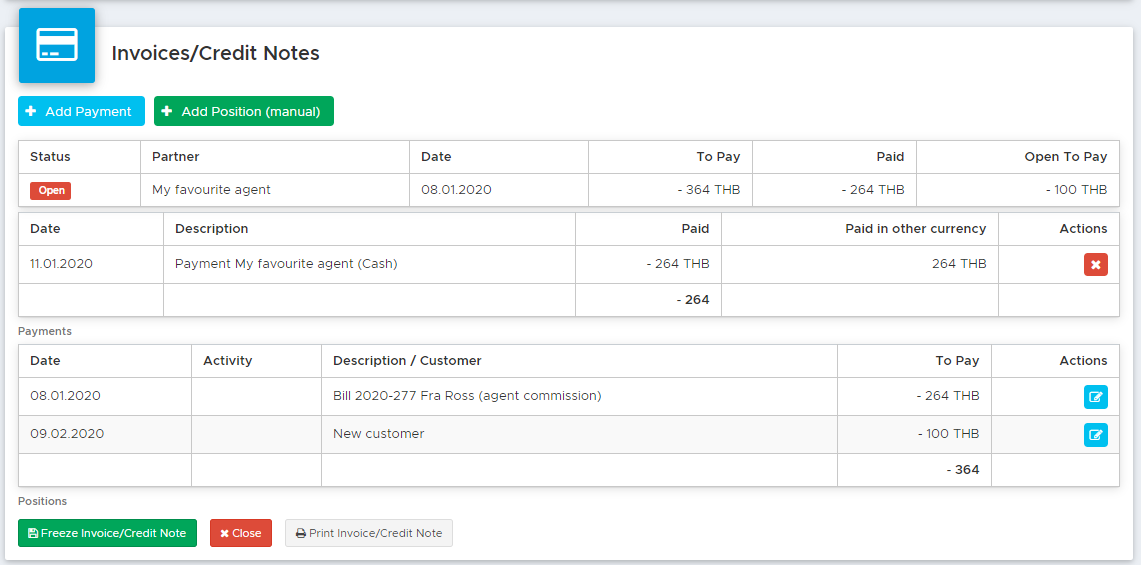
This is the printed version:
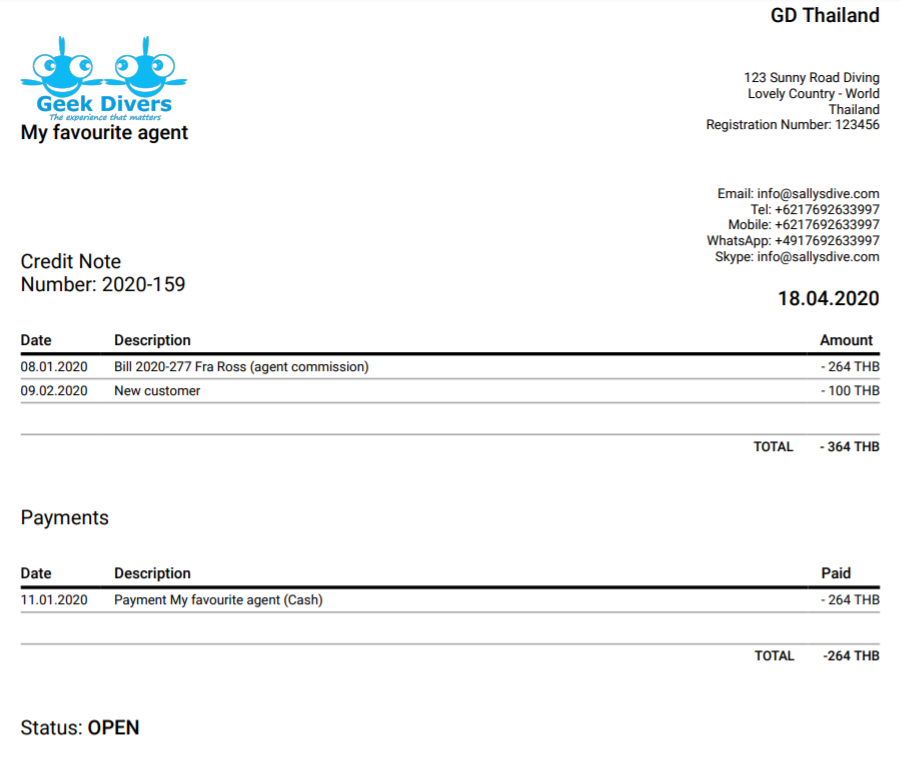
11.1 Add a payment
To record a payment in an agent’s invoice or credit note, click on button Add Payment.
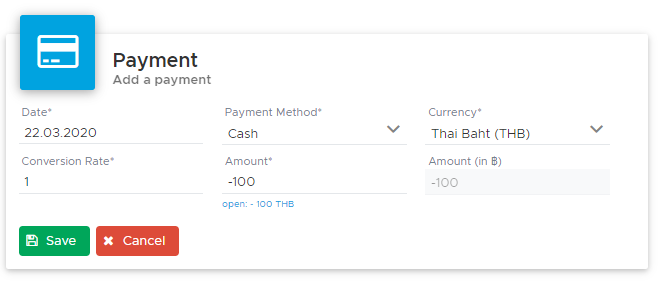
In field Amount write the amount paid or received according to the following rules:
An amount lower than 0 (as written in Open) when you pay your local agent.
An amount higher than 0 (as written in Open) when your local agent pays you.
In both cases the correct amount will be recorded both in the agent’s invoice or credit note and in your cash flow.
You can choose to leave an agent invoice/credit note open and add regular payments or close it whenever it’s fully paid. If you need to take some time and check all the commissions, you can freeze an agent invoice/credit note and rework it manually, if needed.
12. Cash flow
In the menu on the left, click on Financial and Cash Flow.
On this page you can view all the financial transactions that happen in your dive center (location). The top part of the page shows a Start Date and End Date that by default are equivalent to the current month. If you wish to view your cash flow in a specific period of time, you can select a different start and end date. Click on button Update and the cash flow table in the bottom part of the page will be refreshed.
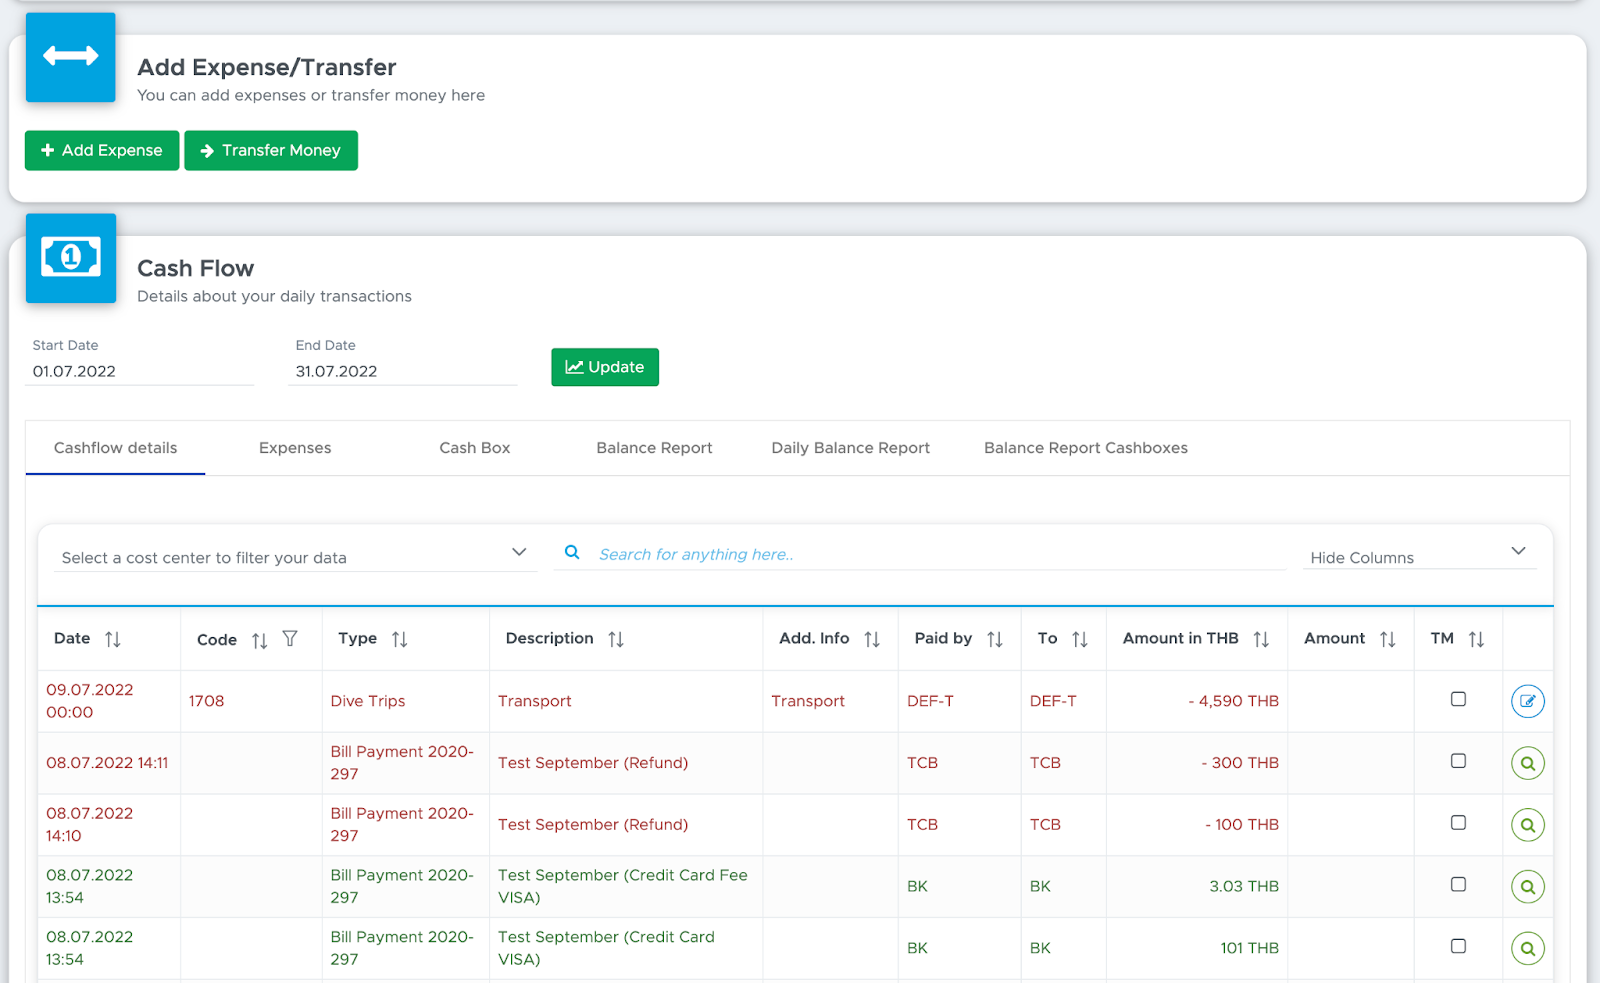
Every manually created row in the table has a button Edit on the right-hand side.
If the row was written automatically in the cash flow (payments recorded in bills, payslips, agent invoices/credit notes, partner invoices or customer credits) or if you used button Transfer Money, button Edit is not available. In every other case you can click on the Edit button to correct a mistake: change the date, expense code, cost center, amount...etc.
Starting with version 2.1 you will now have another button to get more information about the transaction you currently see. You can also navigate to the cause of that transaction.
Right below the Start Date and End date, you will see some tabs. The following paragraphs describe each one of them.
Please consider that when you set up your users, you can choose which tabs each user should be able to access.
The Admin login can access all of them.
As a generic suggestion and due to the kind of data displayed in these tabs, you might want to keep tabs Cashflow details and Balance Report only for the business owners or allow the access only to very trustworthy employees. Please check chapter Users to find out how to restrict access to the cash flow. If you need help in setting up your users, please feel free to contact the Geek Divers team.
12.0 Initial setup
In the cash flow page in Geek Divers you can find an overview of all your costs and revenue divided by cost center and payment method.
It’s therefore important that you complete your setup of cost centers, accounting codes and payment methods before you start using the cash flow.
Once the above settings are completed, you will need to balance all your cost centers in order to have the correct values in each one of them.
Let’s assume that you’ve set up the following cost centers:
CB - Cash box SA - Safe B - Bank PP - PayPal account TW - TransferWise account
These cost centers represent the real “pots of money” that you regularly use in your business and they usually are not empty.
In order to see the correct balance, you will need to set the initial balance, which represents the current available amount.
In your accounting code you have created a code for this purpose - e.g. 1111 - Balance adjustment.
As an example, let’s take your Cash Box, which is usually a real box with cash or the till drawer at the counter. Let’s assume that the content of your cash box is 450 THB.
In menu Financial - Cash Flow, click on button Add Expense.
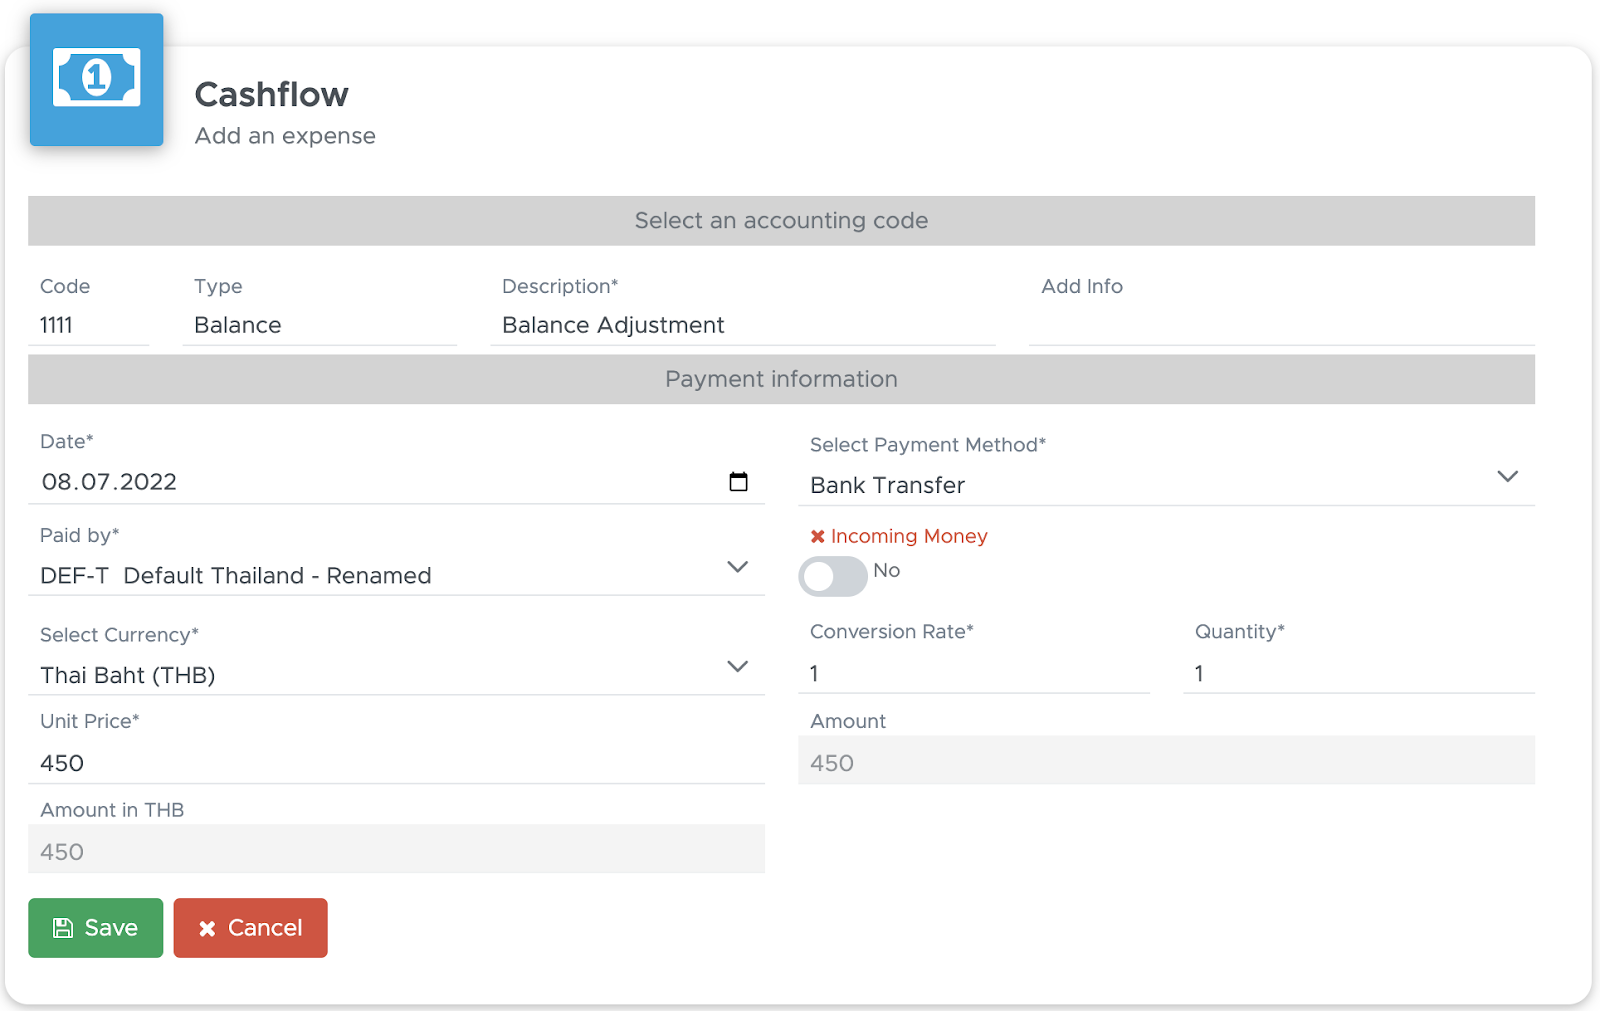
Select your balance adjustment code and feel free to add a description and some additional information. The date will be automatically set to today and you can change it, if appropriate. Select the payment method, which in this case could be Cash. In “Paid by” select your cash box (if it’s not already selected). Click on the toggle Incoming Money as you’re setting a positive balance for this cash box. In unit price, write the amount that is physically in your cash box and then click on the button Save.
In the bottom part of the screen, you will see the transaction that you’ve just entered:

You can also check the content of this cost center in tab Balance Report:

Repeat the steps for each cost center to view the correct initial balance. Please remember that you can set the correct balance even if you don’t want everybody to see how much money you have in your bank account: you can restrict the access to the cash flow only to selected users. Please check chapter Users to see how and feel free to send us a message in case you need help.
👀 Important!
Every time you receive or spend money you need to record the transaction in Geek Divers. This will guarantee the display of the correct balance in every cost center.
If you receive a payment you will need to record it in the customer’s profile (tab Bill/Agents - Add Credit), in a customer’s bill or in a partner’s invoice. If you spend money you will need to record it in an agent’s credit note or in the cash flow as an expense ( with the correct expense code). If you move money from one cost center to another - e.g. cash from the cash box to the safe - you will need to record the transaction in the cash flow, using button Transfer Money.
Once a month (or whenever you think it’s appropriate), when you receive your bank statement or when you download your PayPal/Transferwise statement, you can record the extra payment fees that you had to pay for every transaction. You can enter them as expenses with a specific code for bank fees or using the balance adjustment code.
12.1 Cash flow - Cash flow details
The default view for cash flow is Cashflow details. This table shows everything entered in the cash flow both manually and automatically.
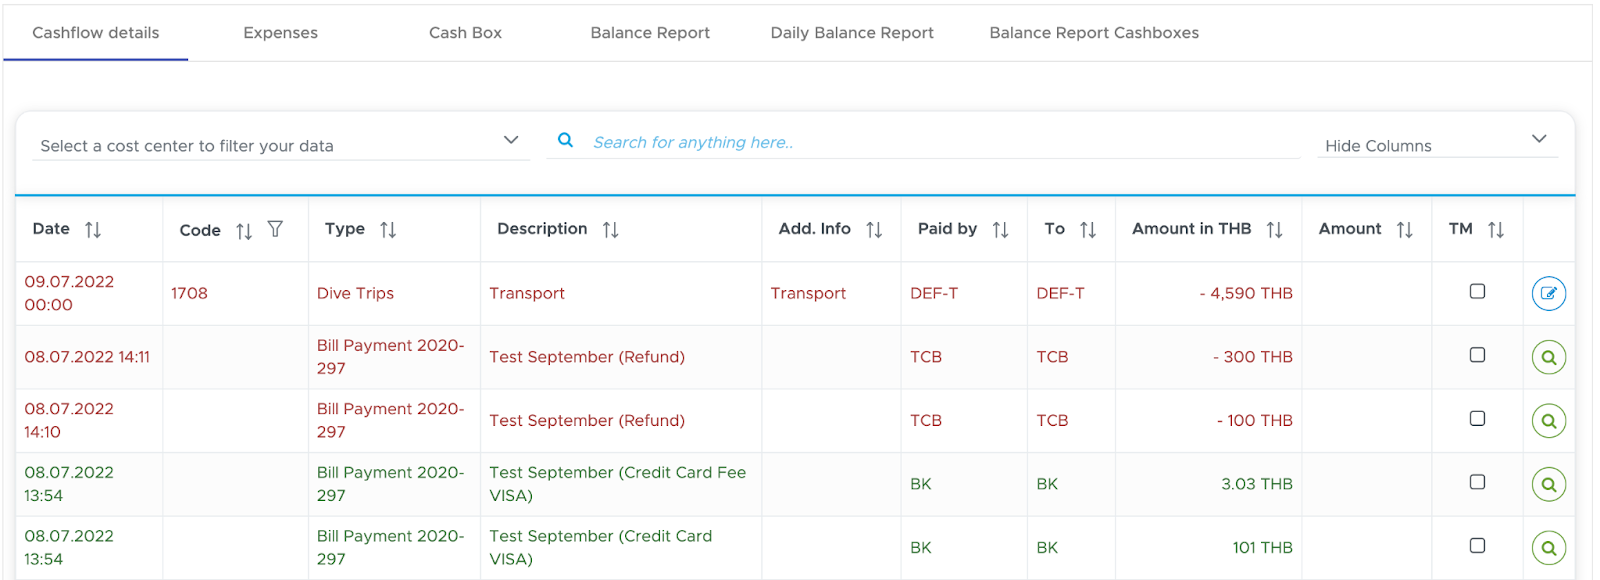
Green rows represent your income and red rows represent your costs.
Every time you record a payment from your customers and you enter the payment in the customer’s bill, Geek Divers will add a row in the Cash Flow table with Type “Bill Payment” and you will find the customer’s name and the payment method in column Description.
Every time you record a payment in one of your staff members’ payslip, Geek Divers will add a red row in the Cash Flow table with Type “Staff Payment”.
Every time you record a payment in an agent’s credit note, it will be recorded in red in the cash flow. Every time you record a payment in an agent’s invoice, it will be recorded in green in the cash flow.
Every time you record a payment in a partner’s invoice, it will show in green in the cash flow.
Underneath tab Cashflow details you will find a drop-down menu that you can use to filter your cash flow and view only the transactions that belong to one of your cost centers.
Select one of your cost centers to view only the transactions that belong to it between the dates defined at the top of the page.
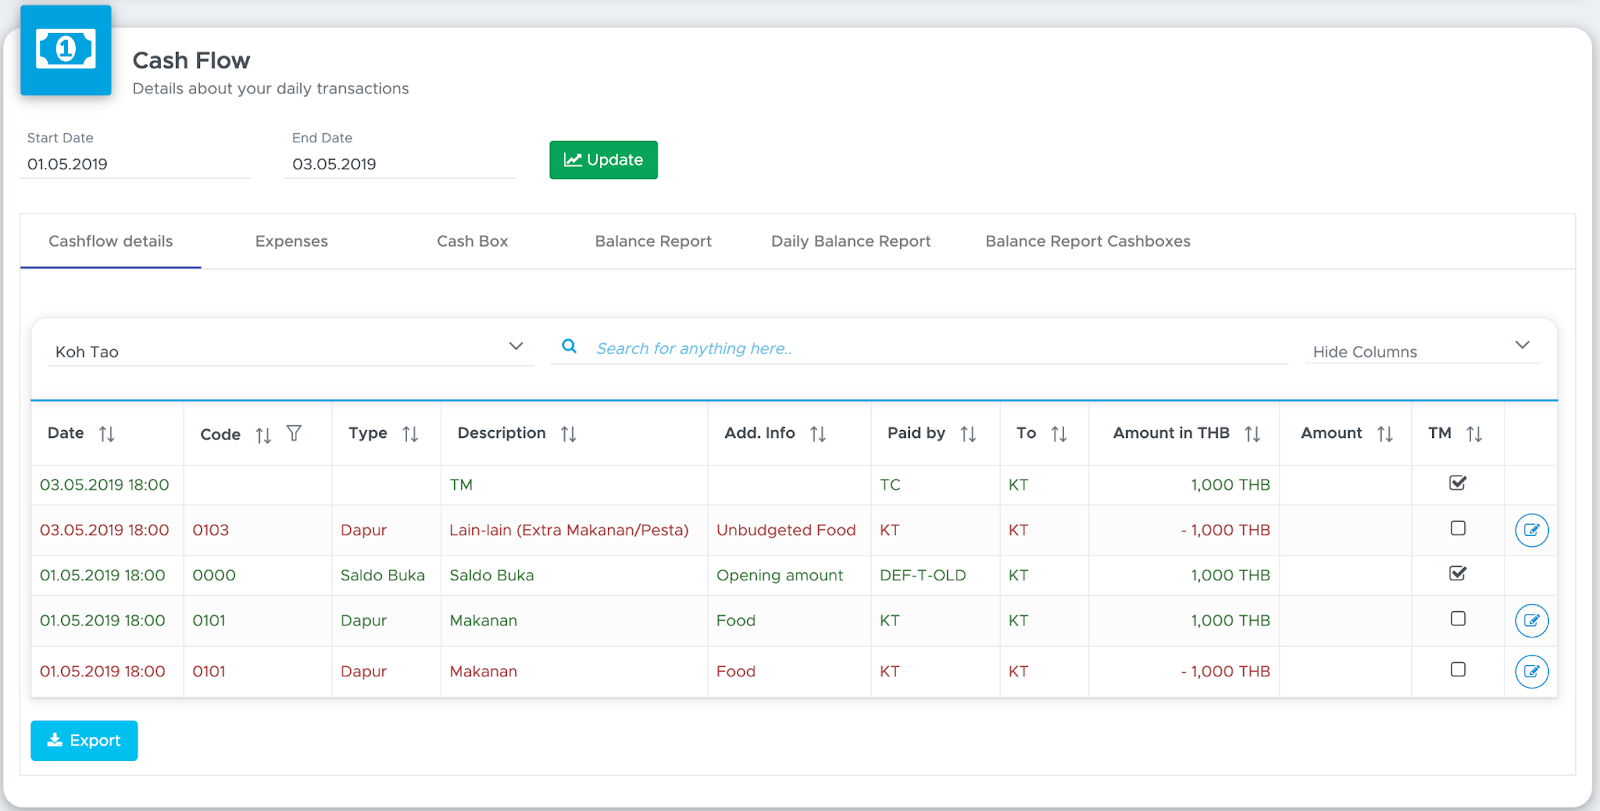
Starting with version 2.1 you can now also filter your cash flow by just entering anything you want to.

If you want to filter by “Code” and you find too many results, you can use the filter in the table.
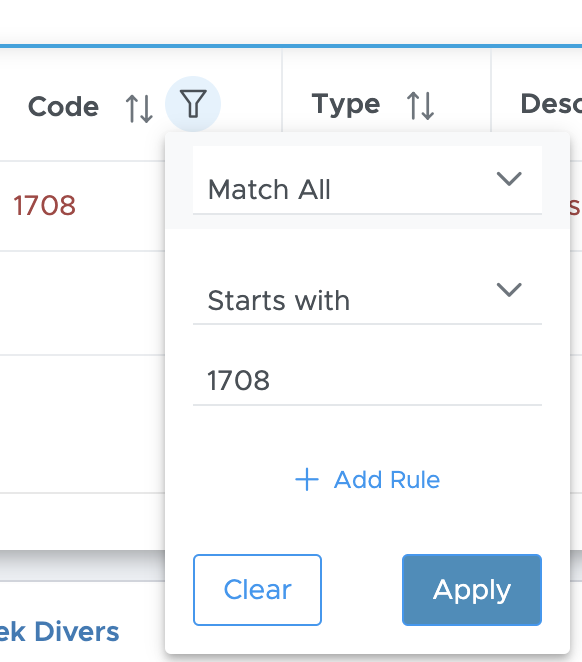
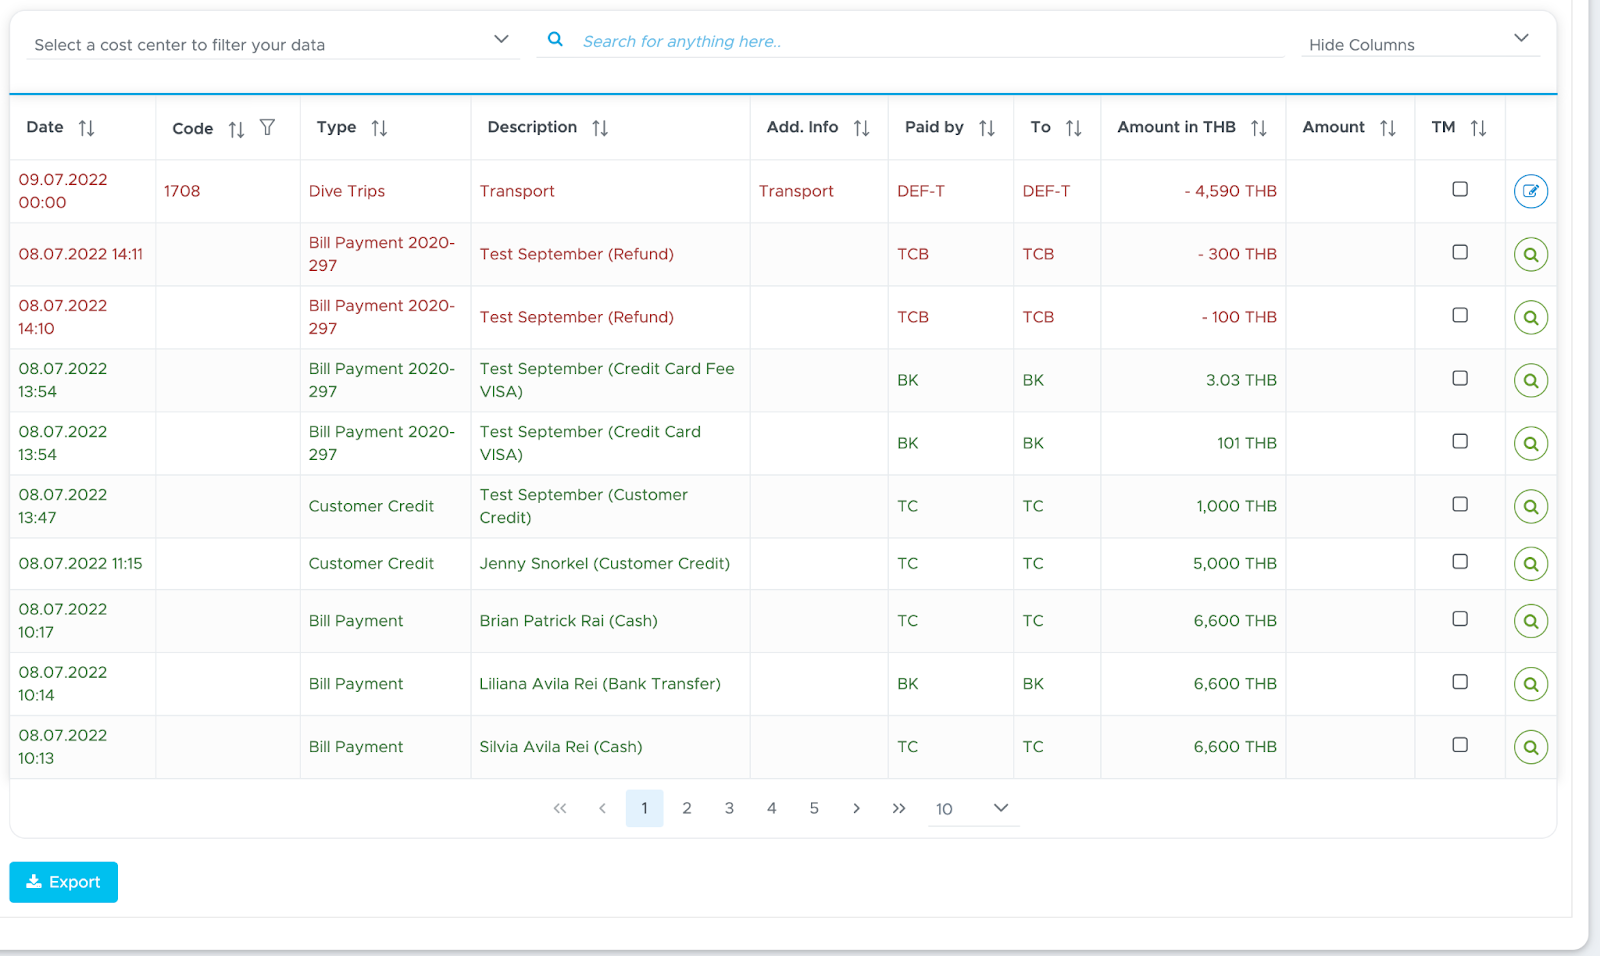
At the bottom of this page you can click on button Export to export the table that you’re viewing in a csv file. Once you save this file you can open it as a spreadsheet.
12.2 Cash flow - Expenses
As you can probably understand, Geek Divers has no knowledge of any other costs that you might have. E.g. Geek Divers doesn’t know how much you pay for renting the premises, for gas and power, pool maintenance, grocery shopping or stationery.
Additionally, Geek Divers cannot possibly know about any other source of income.
However, you can enter costs and income manually using the button Add Expense at the top of this page.
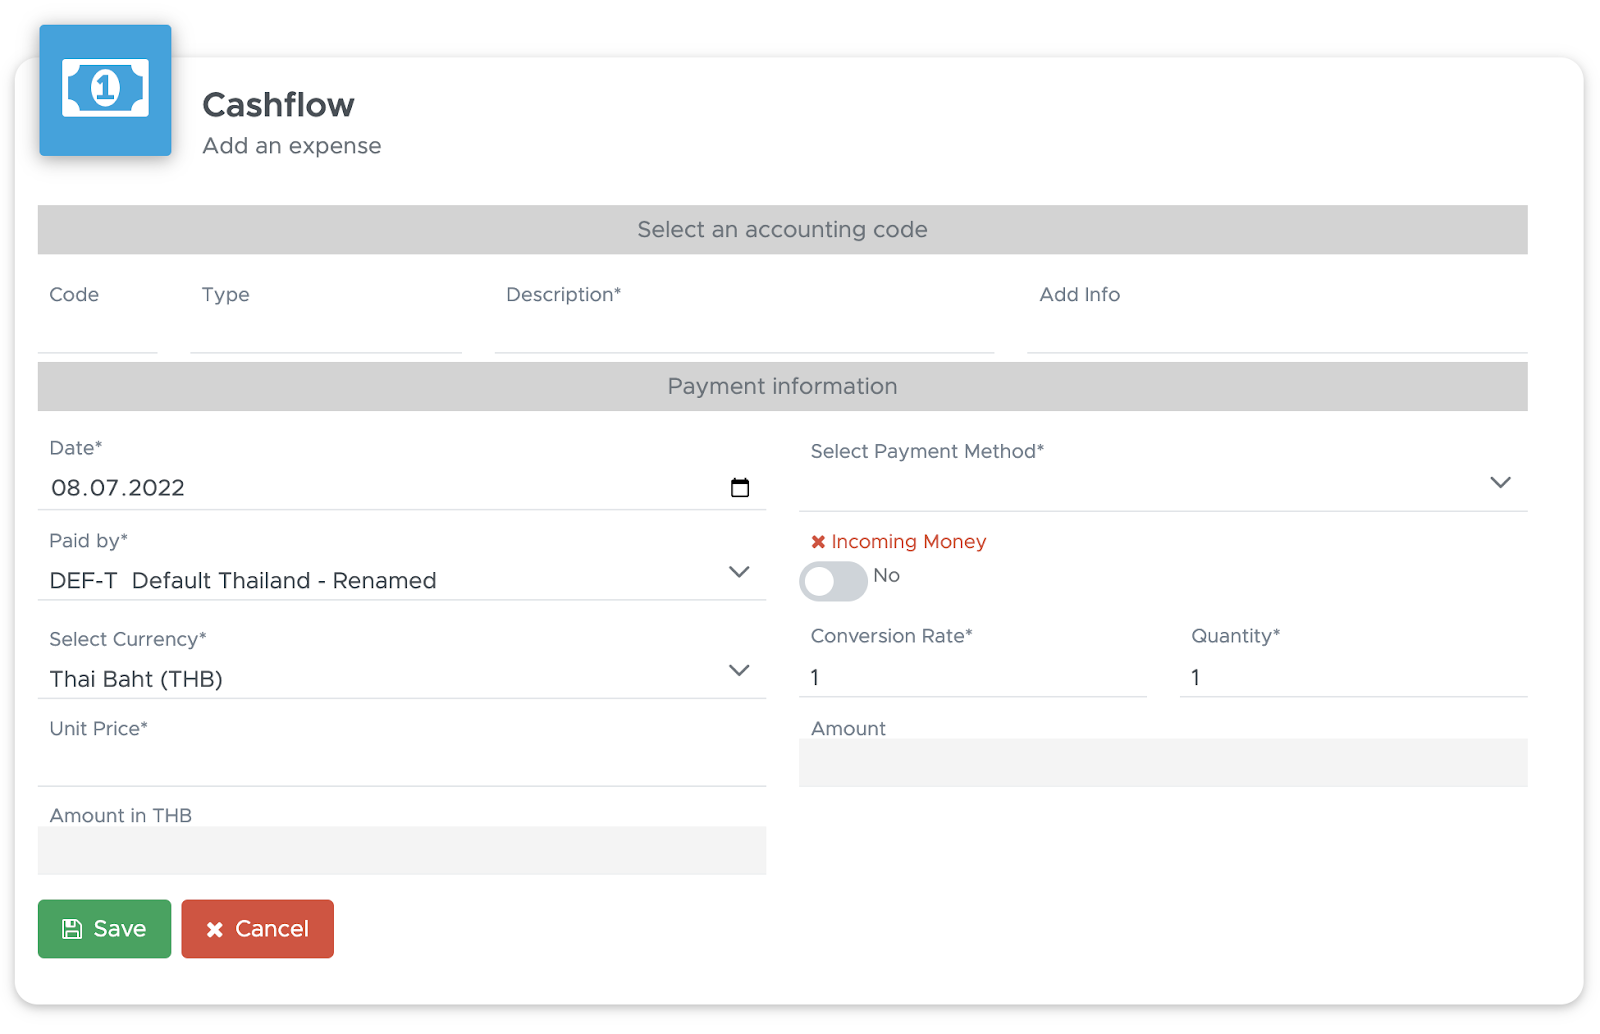
The expense date is automatically set to today, but you can change it by clicking on the calendar icon. In code you can start typing one of the expense codes that you’ve set up in Settings (if you haven’t done it yet, please read chapter Accounting Codes) and select the correct one from the suggested list. Alternatively, if you don’t remember the exact code, you can start typing the type in field Type and select the correct code from the suggested list.
Once you select the code, Type, Description are automatically pre-filled with the information that you used in your Settings. You can write more details in field Add. info. Choose a payment method and the field “Paid by” will be automatically pre-filled with the cost center assigned to it (if you haven’t done it yet, please read chapter Cost Center and Payment Methods). Field Currency is showing your default currency. You could select a different currency and type the correct currency conversion. Add the quantity and unit price. The Amount and Amount in your default currency will be automatically calculated.
When you save the expense the quantity and unit price won’t be visible in the table below. However if you export the table, these values will be part of the exported csv file.
To enter a source of income, repeat the above and tick the “Incoming Money” checkbox. In this case, the amount will be written in green.
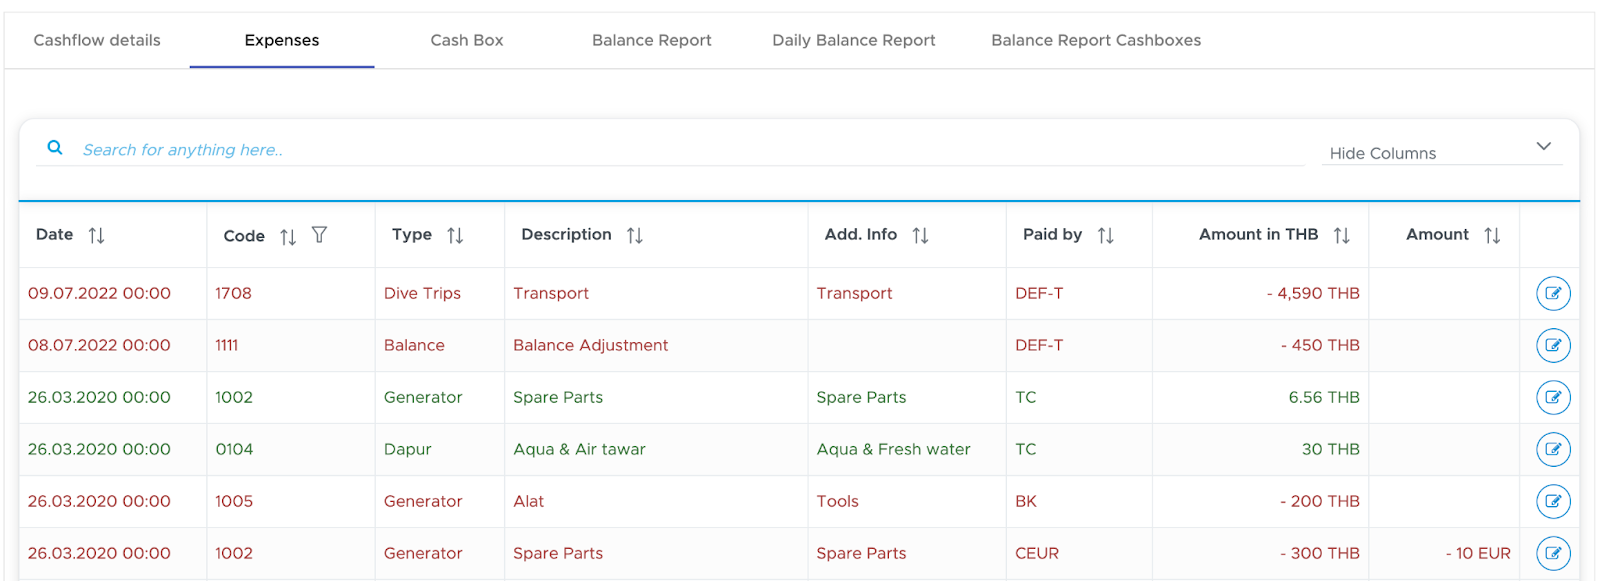
You can also search for a specific expense in your selected time range to filter the results.
At the bottom of the list you will see a total amount that represents the sum of all the rows above.
If you wish to export your list of expenses, click on the button Export at the bottom of the screen. You can save the csv file on your local device and open it with your spreadsheet software.
12.3 Cash flow - Cash box
In this tab you can select any of your cash boxes from the drop-down menu and view the list of transactions in an interval of time. This view is very similar to Cash flow Details, but it’s restricted to cash boxes.
Set a Start Date and End Date at the top of the page and click on button Update. In the cash box drop-down menu select the cash box that you wish to display and Geek Divers will show you a table with the list of transactions in this interval of time.
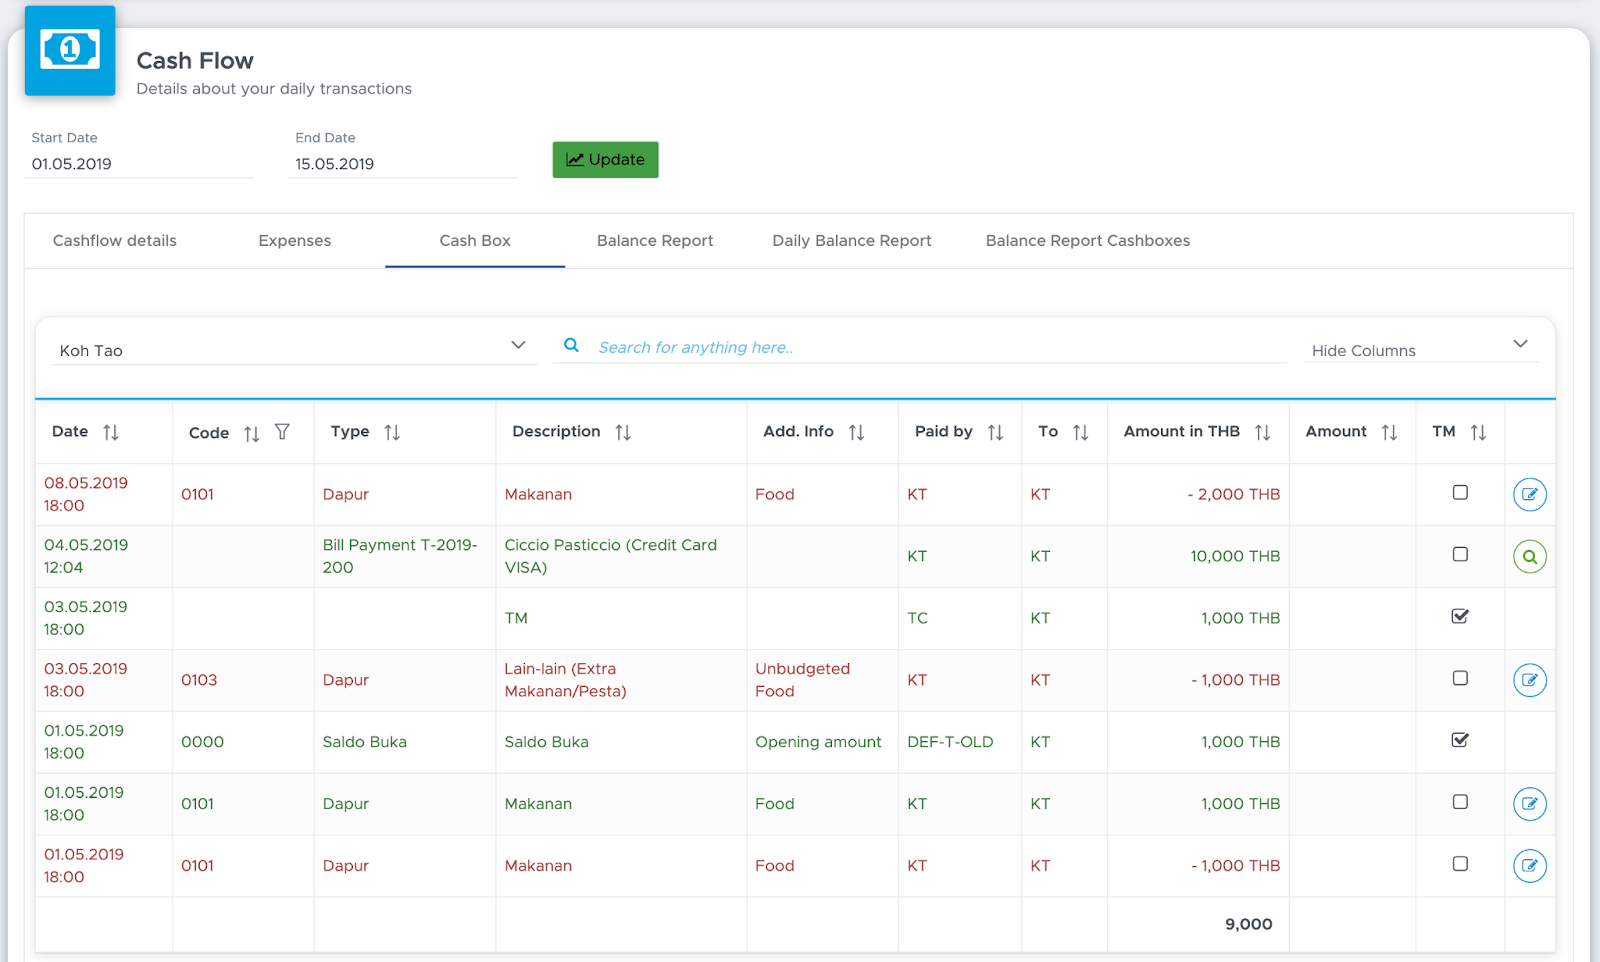
You can also search for a specific expense in your selected time range to filter the results.
At the bottom of the page you will find the total amount in the cash box in this interval of time and button Export to export the table to a spreadsheet.
12.4 Cash flow - Balance Report
In this tab you will see a set of 3 tables for each of your cost centers.
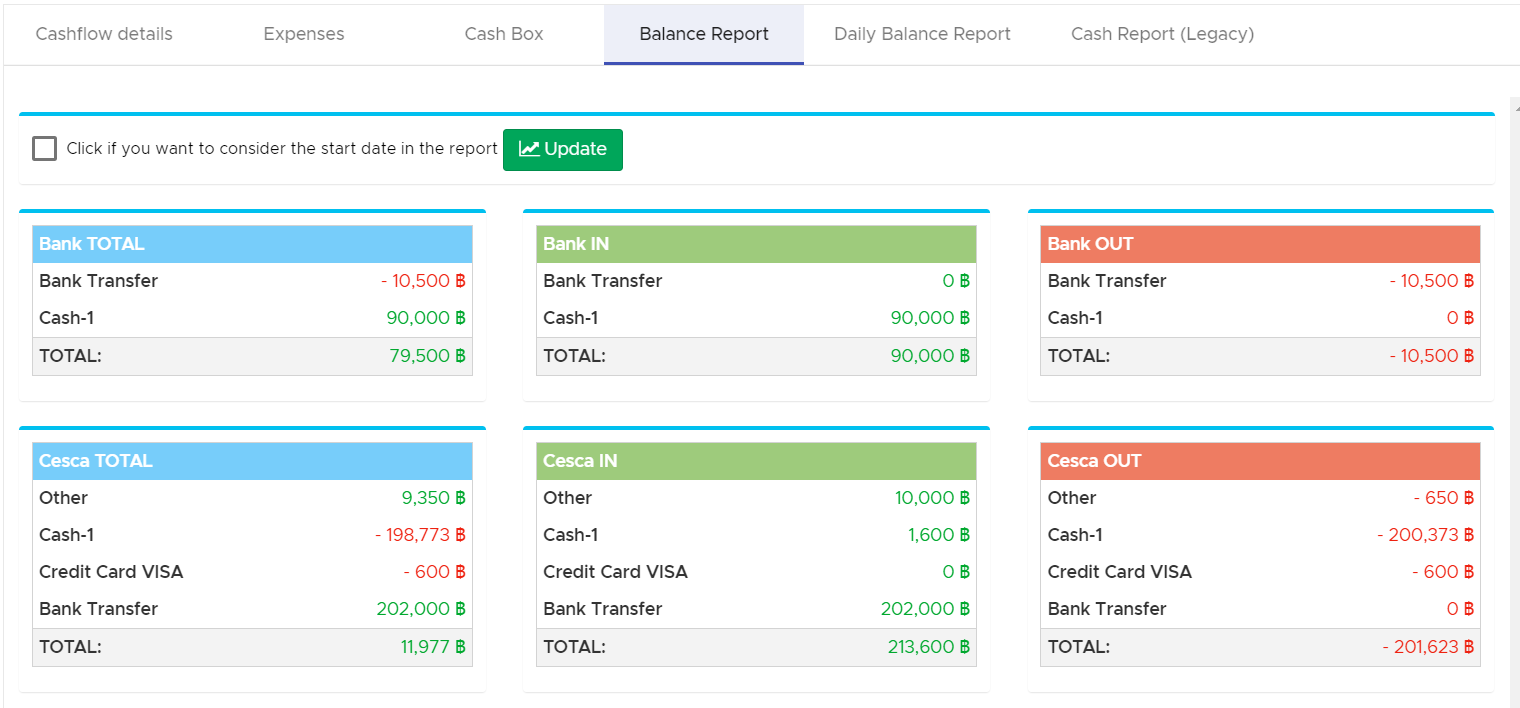
The light-blue table shows the sum of all the transactions (both in and out) divided by payment method. The green table shows only the incoming transactions, while the red table shows the outgoing transactions.
If you’ve deactivated cost centers that you no longer need or in case of old data (before December 2018), you will see a set of tables called ‘Other’.
If a payment method was never used in combination with a cost center, it won’t be shown in the tables.
By default these tables show your numbers from the first day you started using Geek Divers and until the End Date that you’ve set at the top of this page.
If you wish the system to consider a specific start and end date, you need to set a specific Start Date and End Date at the top of the page and then click the checkbox ‘Click if you want to consider the start date in the report’. Then click on button Update to refresh the tables.
12.5 Cash flow - Daily Balance Report
In this tab you will see the same sets of 3 tables for each of your cost centers that you see in the Balance Report.
The only difference here is that you can only view the numbers that belong to one day in the calendar.
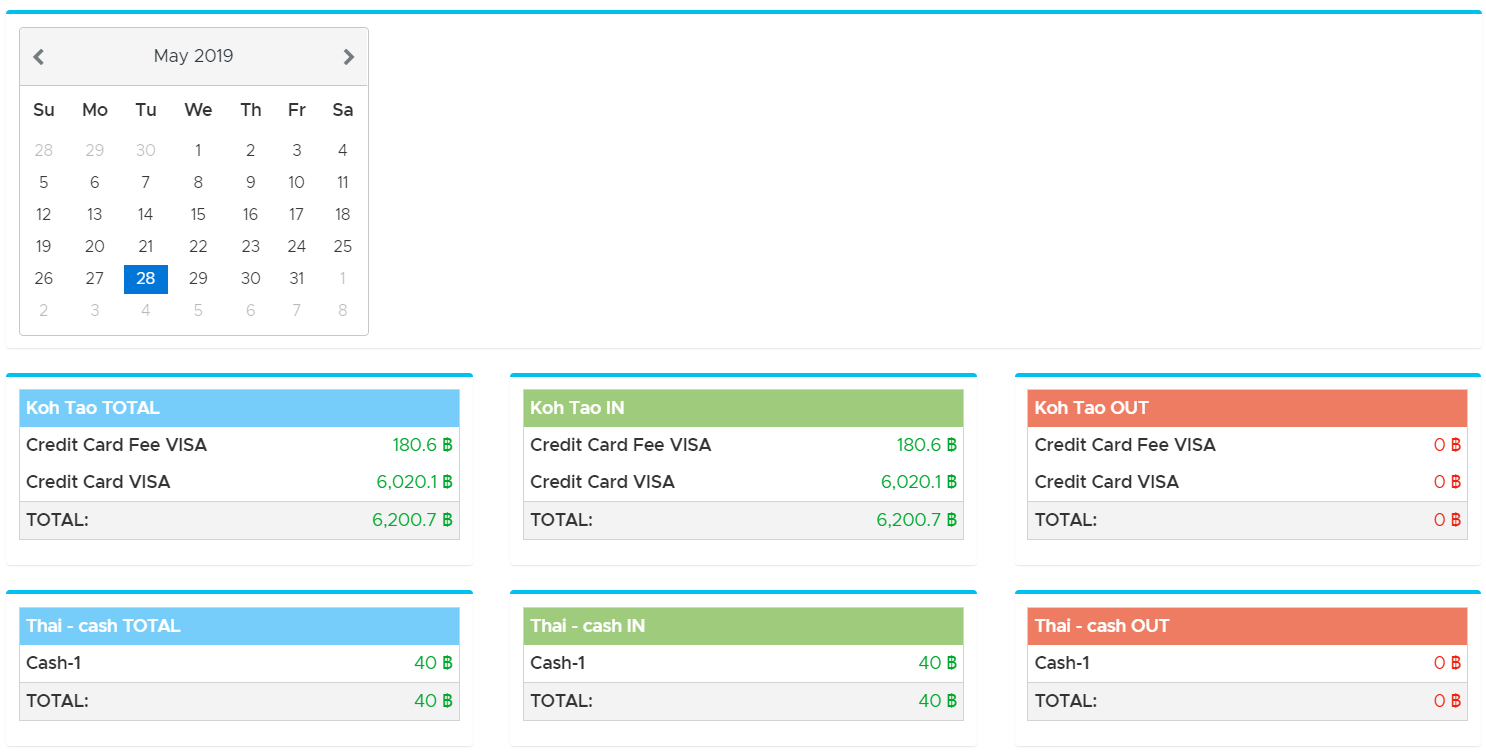
By default Geek Divers will show today and you can use the calendar above to select a different day.
Only the cost centers that actually had any recorded transactions on that specific date will be displayed.
12.6 Cash flow - Balance Report Cashboxes
This tab behaves exactly like tab Balance Report, but it only shows you a set of tables for each of your cash boxes. Your cost centers that are not marked as cash boxes won’t be available here.
12.7 Cash flow - Cash Report (Legacy*)
This tab has been removed in version 2.1 and is no longer available.
* This tab is no longer supported or maintained.
In tab Cash Report you can see the current cash in each cost center.
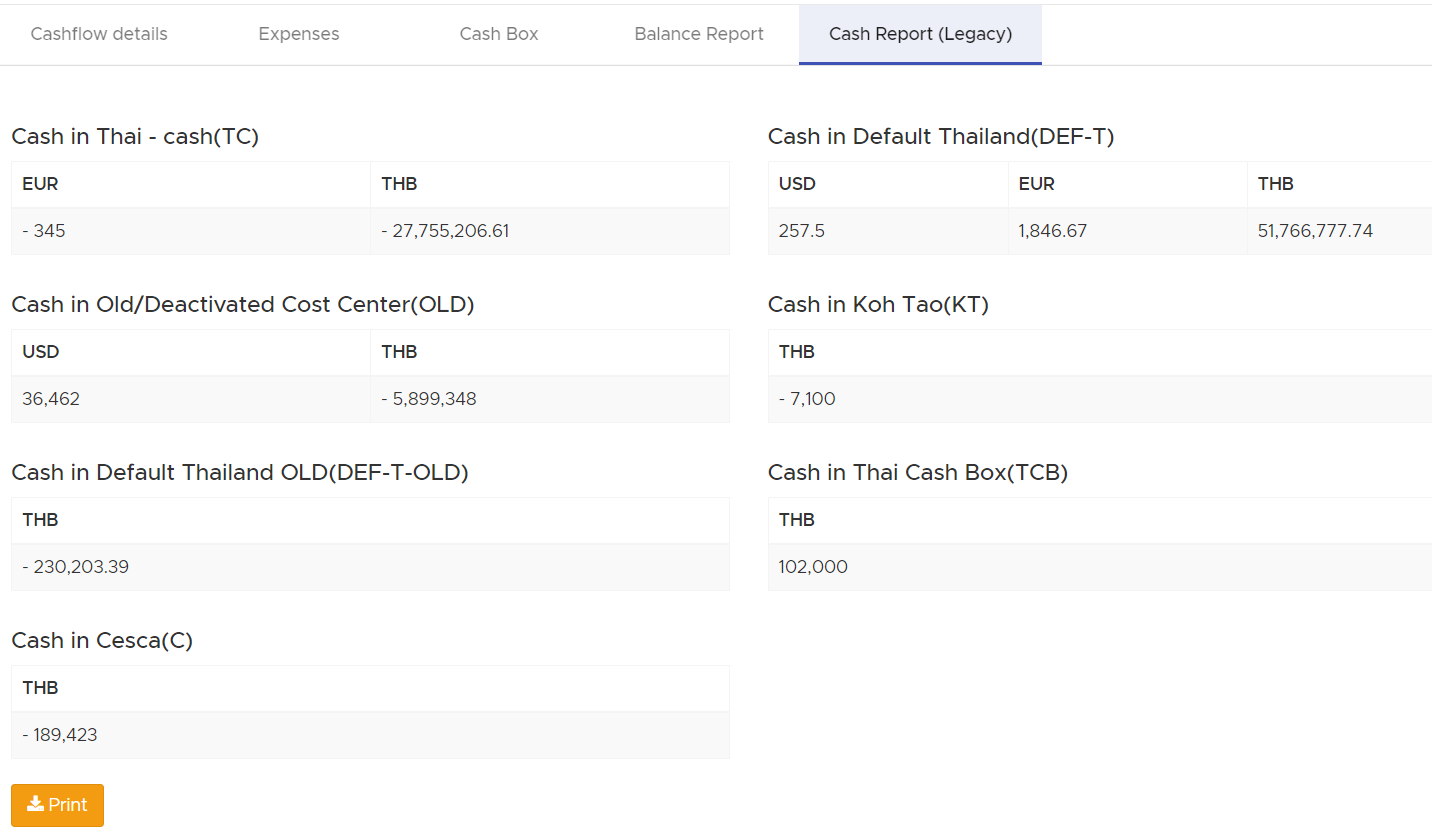
The Cash Report view will show you the cash entries until the End Date selected above and you can export them by clicking on button Export at the bottom of the table.
Additionally, for every cost center and cash box within the location that you’re viewing, you can find a summary balance of the cash. You can print (pdf) the Cash Report by clicking on button Print at the bottom of the page.
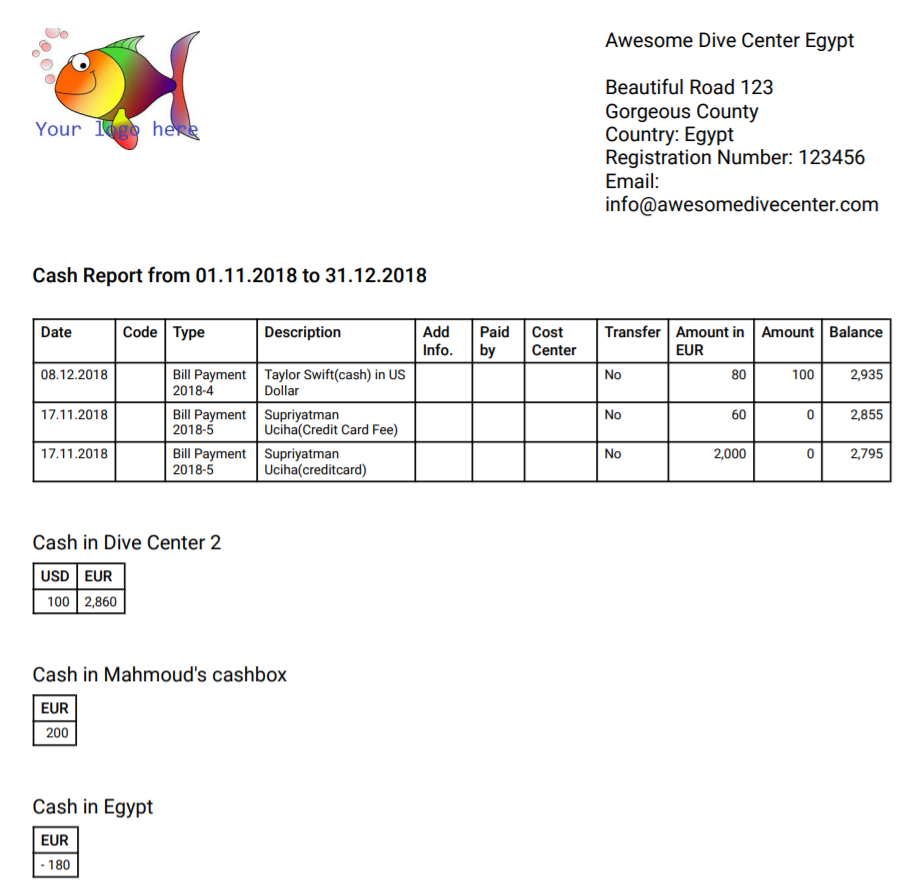
12.8 Transfer Money
This button, at the top of the cash flow page, can be used to move money from one cost center to another. Please consider that you need to be in the location of the sending cost center to be able to select it, but you can select any cost center in your organization as the receiving one, providing that the sending location and the target location are set up with the same default currency.
E.g. you wish to move some cash out of your cashbox behind the counter and into your safe.
Click on the button Transfer Money.
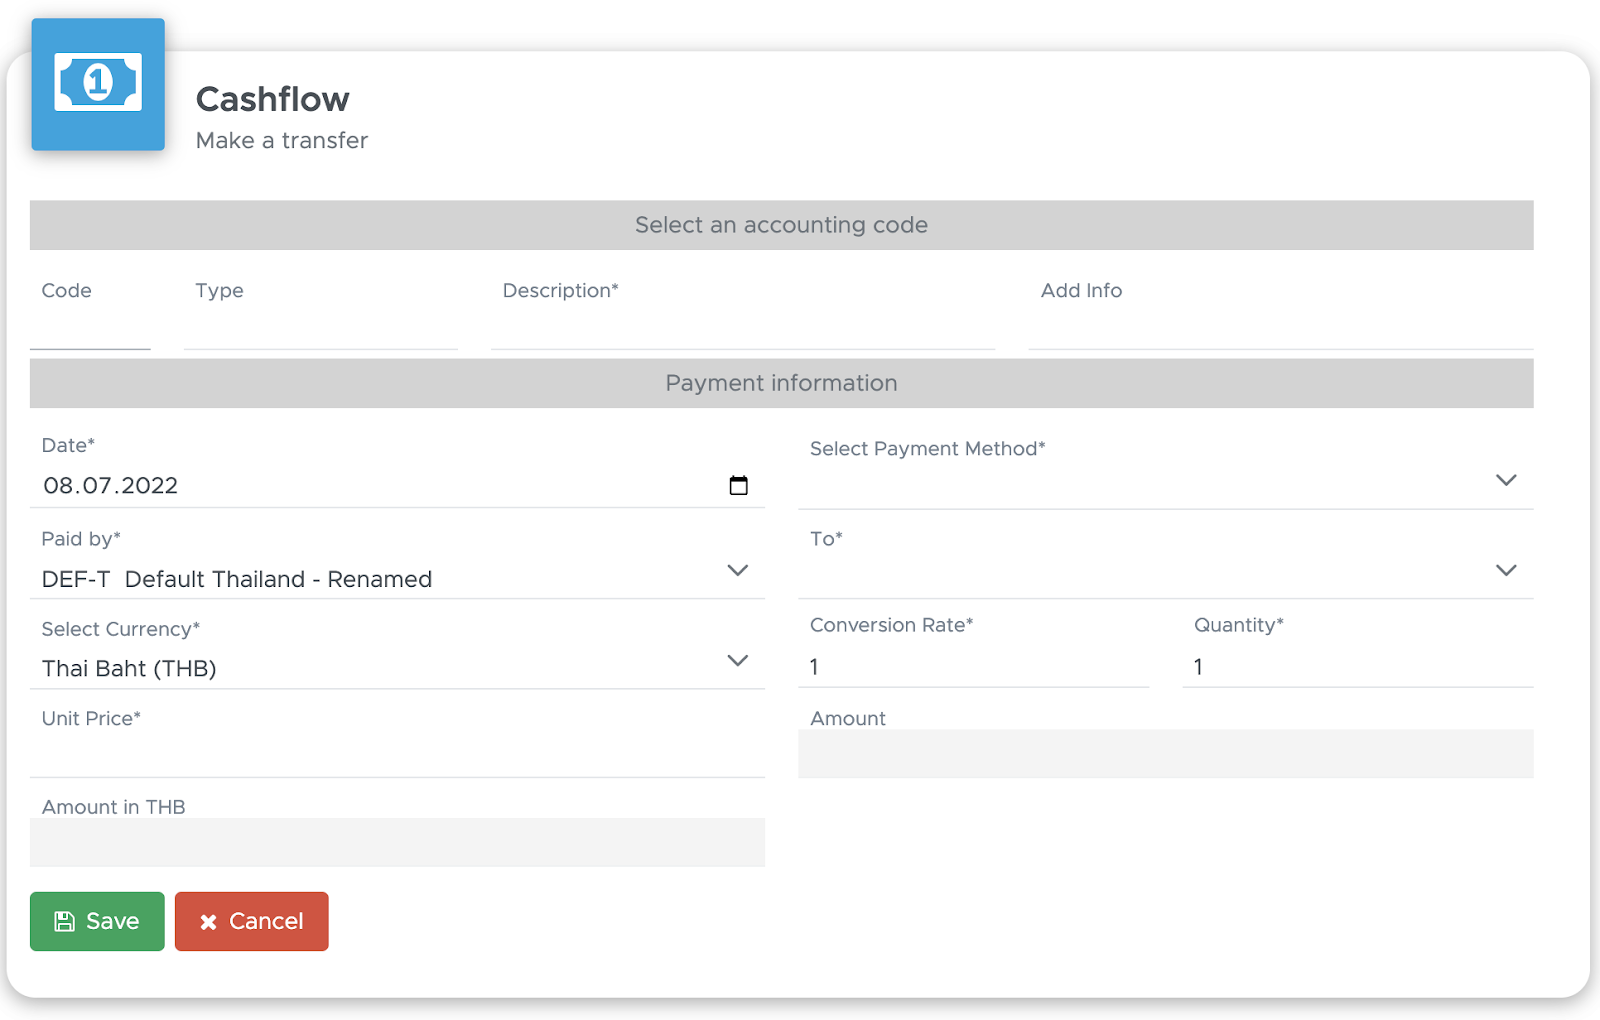
The date is automatically set to today, but you can change it by clicking on the calendar icon. Select the accounting code that you’ve set up for money transfers and the Type and Description will be automatically pre-filled. If needed, you can type more information in field Add. Info. Select a payment method and verify that the cost centers written in Paid By (=transfer from - e.g. your cashbox) is correct or modify it. Choose a cost center in To (=target cost center - e.g. your safe). If needed, select a currency (your default currency is pre-selected) and write a conversion rate. Type the amount that you wish to transfer and click on then button Save.
In the tab Cashflow Details or Cost Centers select the sending cost center.

You will see your transfer in red because this is an outgoing transaction.
Now select the receiving cost center.

You will see the same transaction in green because this is an incoming transaction.
Now click on tab Cashflow Details.

If the sending and the receiving cost center belong to the same location you will see both the incoming and the outgoing transactions. These transactions balance each other because you’ve just moved money: you didn’t spend it or earn it.
13. Online registration form
Every Geek Divers account comes with one or more online registration forms connected to it. You can find the URL for your online registration form in Settings - General Settings - Registration Form. On this page you’ve chosen to use only one registration form for all your locations (Global settings) or a separate registration form for each of your locations. To view the location-specific URL of your online registration form, please change the location using the selection menu in the top bar.
The online registration form connected to your Geek Divers account will save customers only to your account and nowhere else. Your customers’ data is protected at all times.
The URL(s) can be added to your website, you can send it to your customers via email or you can use it in your dive center on a phone, tablet or laptop for walk-in customers. We recommend the usage of a free service to shorten the URL and generate a QR code. Print one or more copies of the short URL and QR code to keep available in your dive center for your customers. You could ask them to use their phone to fill out the registration form if they have an internet connection.
The form includes customer’s personal data, diver’s certifications, rental equipment, consent checkboxes and more. You can customize your online registration form following the instructions in chapter Registration Form. Once the customer confirms the data, you will see the customer in Customer → Upcoming Customers if the check-out date is in the future. If the customer doesn’t fill out check-in and check-out dates or if they are in the past, you can still find the incoming customer information by choosing the “RegForm” tag in All Customers. Every customer that fills out the registration form will be automatically tagged “RegForm”.
The online registration form can have up to 11 steps represented by sample pictures below here. In your settings you can choose to turn off some of the steps if you don’t need them. Below here you can find all the available steps. Please consider that if you turn off one or more steps, the step numbers described below here might be different.
Step 1 - Check-in/out dates
In this first step your customer will select which of your locations they wish to visit (or the locations they’ve already booked) and the dates. This is how Step 1 looks like if you’ve chosen to use one online registration form for all your locations (Global Settings):
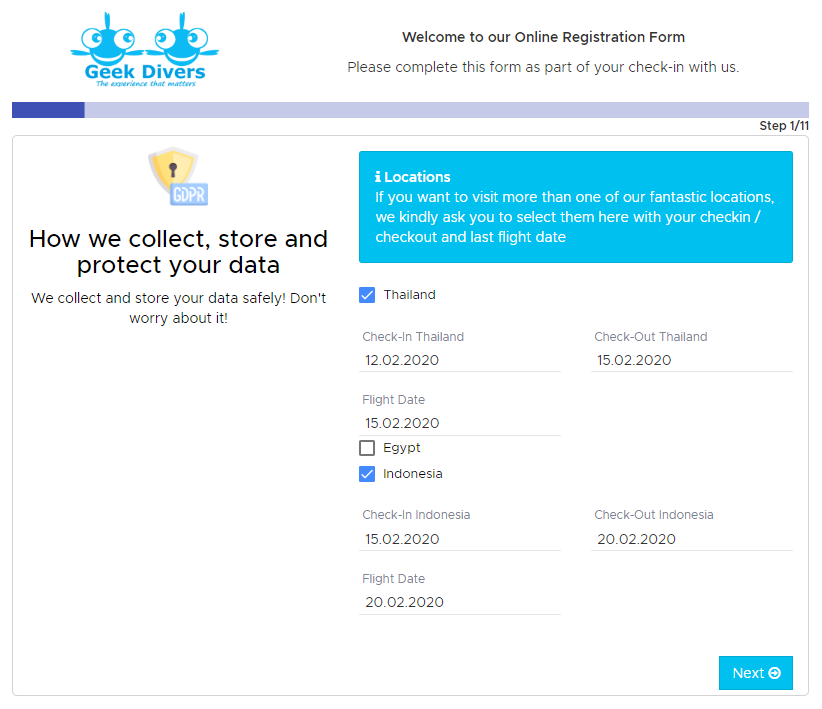
If you’ve chosen to use a separate URL for each of your locations, this is how the first step will look like:
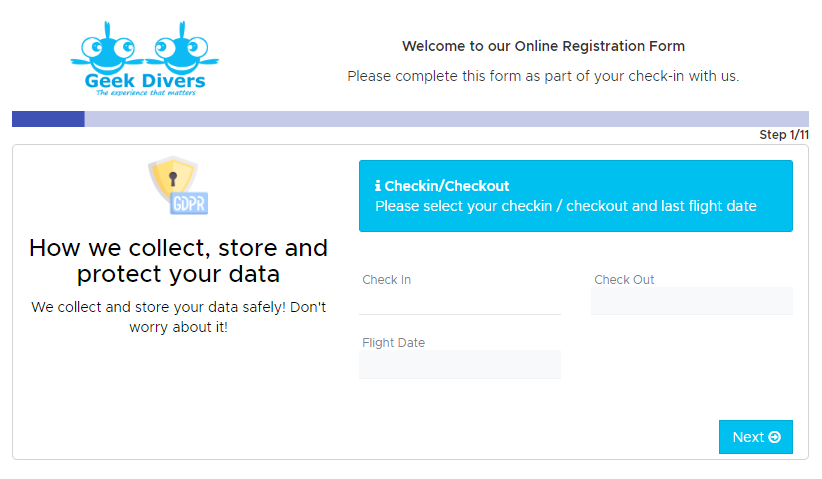
Step 2 - Personal Data
The second step is related to the customer’s personal data. Here the mandatory information is represented by: Name, Last Name, Date of Birth and Email. If this customer is already in your Geek Divers customer base and there’s a match for all the mandatory fields, the existing customer’s profile will be updated with the information coming from the online registration form.
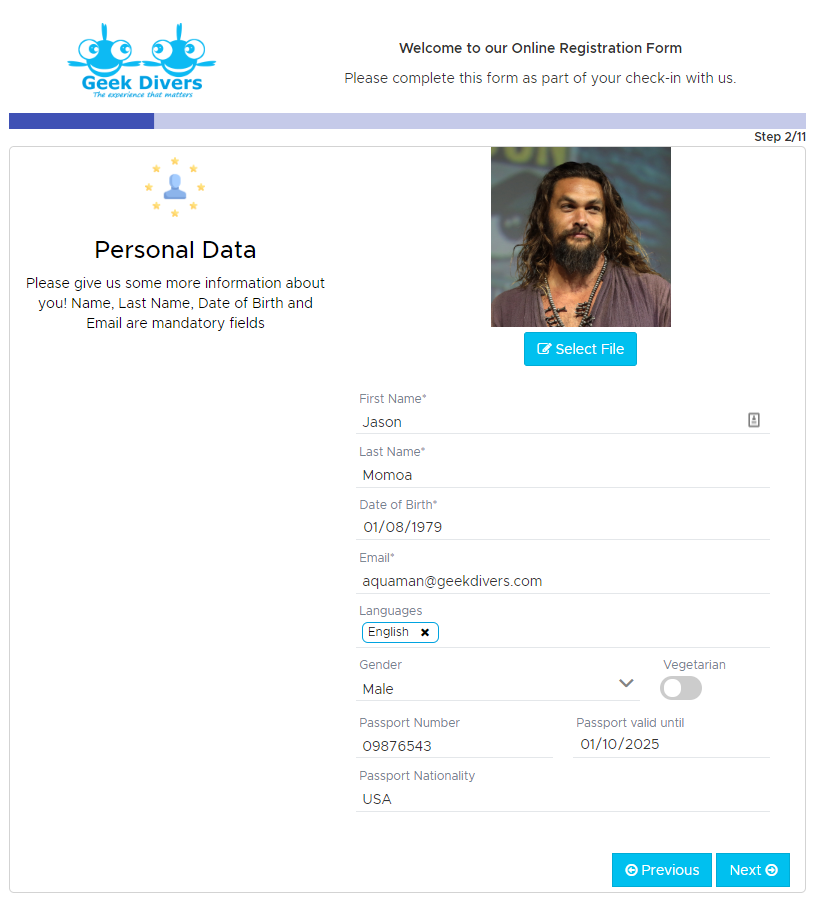
Step 3 - Address
The third step is related to the customer’s home address. They can start typing their address in the first field at the top and Google Maps will propose suggestions.
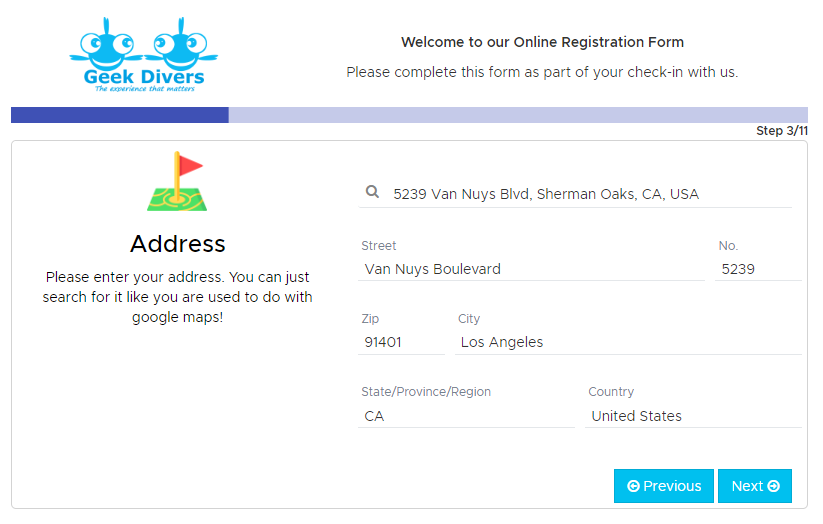
Step 4 - Insurance
This step is related to the customer’s insurance information. If they have insurance that covers for diving activities they can write the related information here.
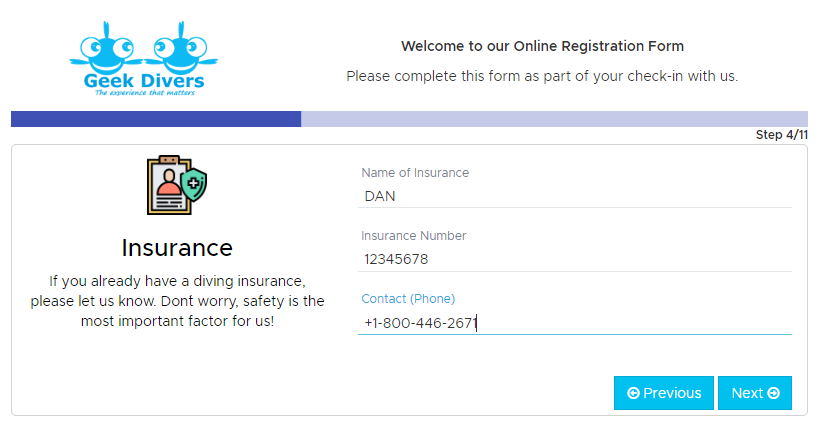
Step 5 - ICE
This step is about In Case of Emergency contact information.
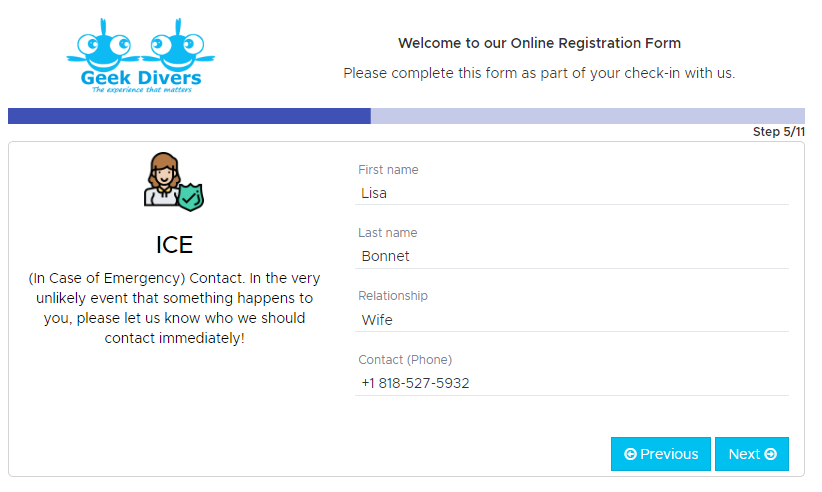
Step 6 - Certificates
This step collects the information related to the dive certifications that your customer already has. By typing the agency name in the first field, if you’ve saved some certificates in your Settings - General Settings - Certificates, these will be proposed and your customer can select one of them. If they don’t find the exact match, they can type the correct name. If needed, they can add their Nitrox certification and/or any additional certification. In the bottom part of this step they can add their number of dives and the date of last dive.
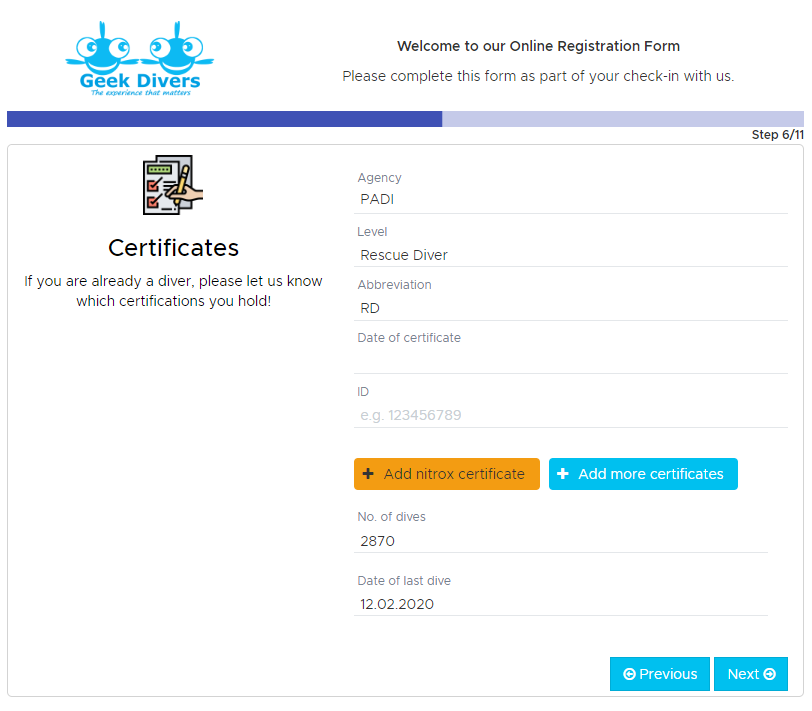
Step 7 - Accommodation
This step is about your customer’s accommodation.
Step 8 - Upload documents
This step allows your customer to upload any document that you might need or that you explicitly request in the customisable text on the left-hand side.
Step 9 - Equipment
In this step your customer can let you know if they are going to use their own equipment or if they need to rent some pieces. In case of equipment rental with a size, the form will ask to enter height, weight and shoe size. The most frequently used international units are provided.
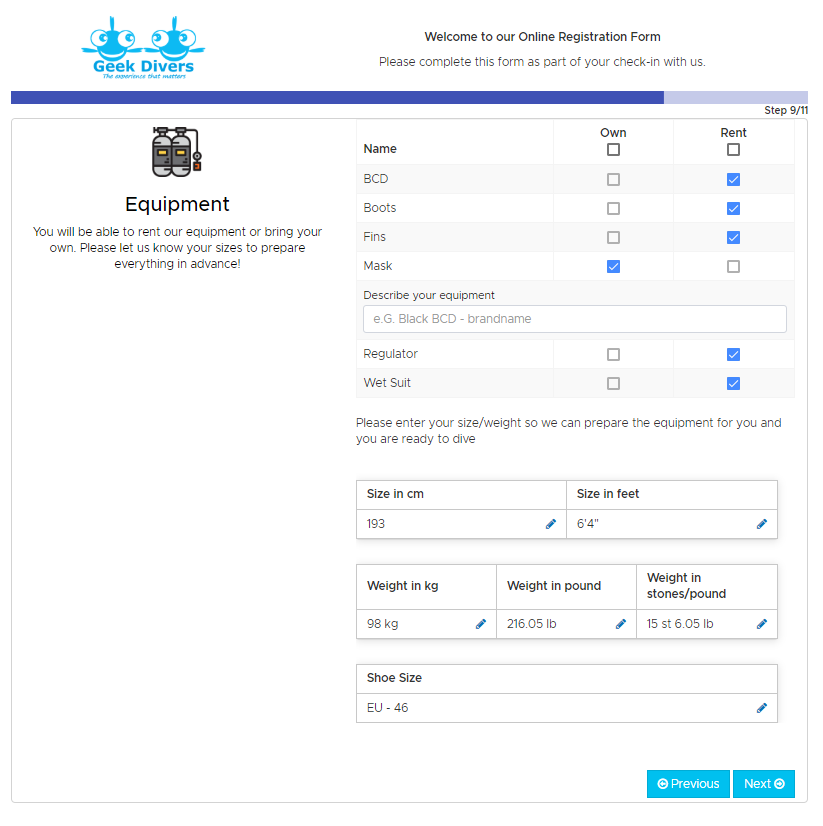
Step 10 - Custom text
You can customise this step as you wish: you can copy and paste your liability statement, house rules, packing suggestions, FAQ or anything else that you wish your customers to know before using your services. In your settings you can also choose to add an “I agree” checkbox, an electronic signature or both. If you use this step and either the checkbox or the electronic signature, once the customer registration is completed, you will find a pdf document named Registration Form in the customer’s profile, tab Documents.
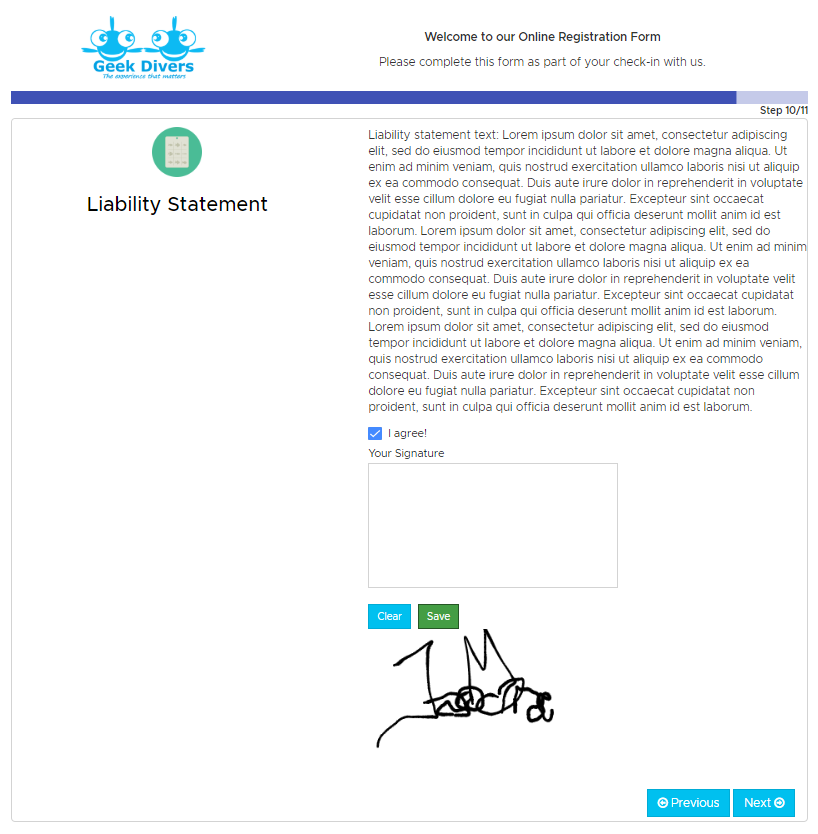
Step 11 - How did you hear about us
This step allows your customer to let you know how they heard about you / your dive center.
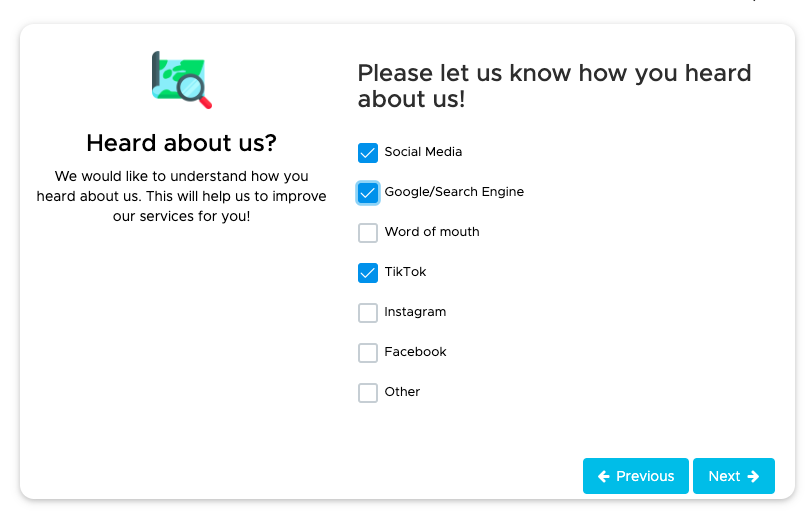
The customer's selection will automatically add the selected values as tags to the customer.
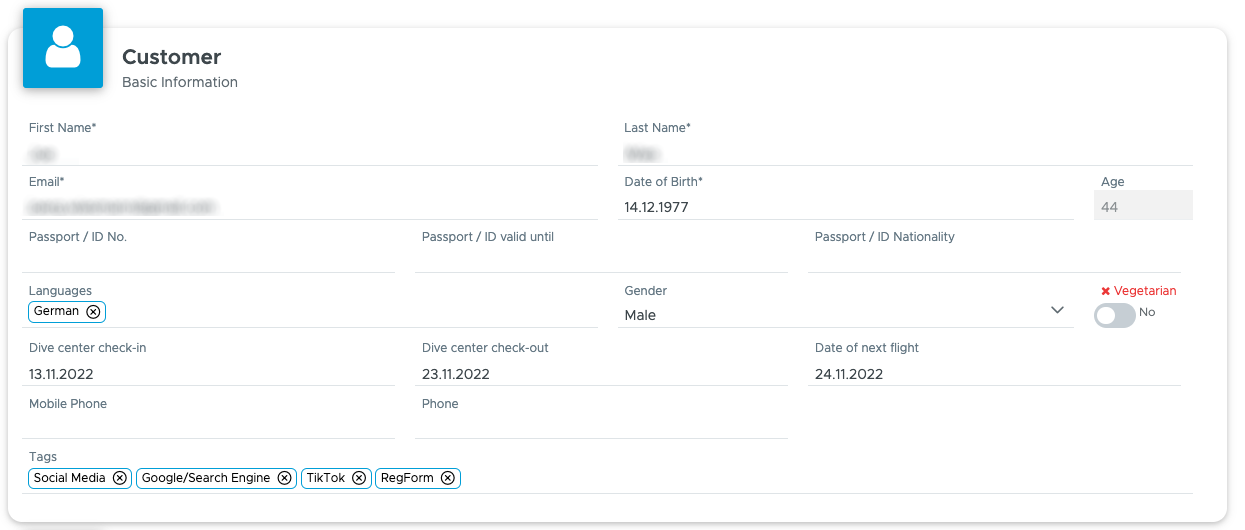
Step 12 - Notes
This step allows your customer to write you a message or let you know of their allergies or anything else that you ask them to share. In this last step you can also ask them if they wish to receive your newsletter or any third-party offer.
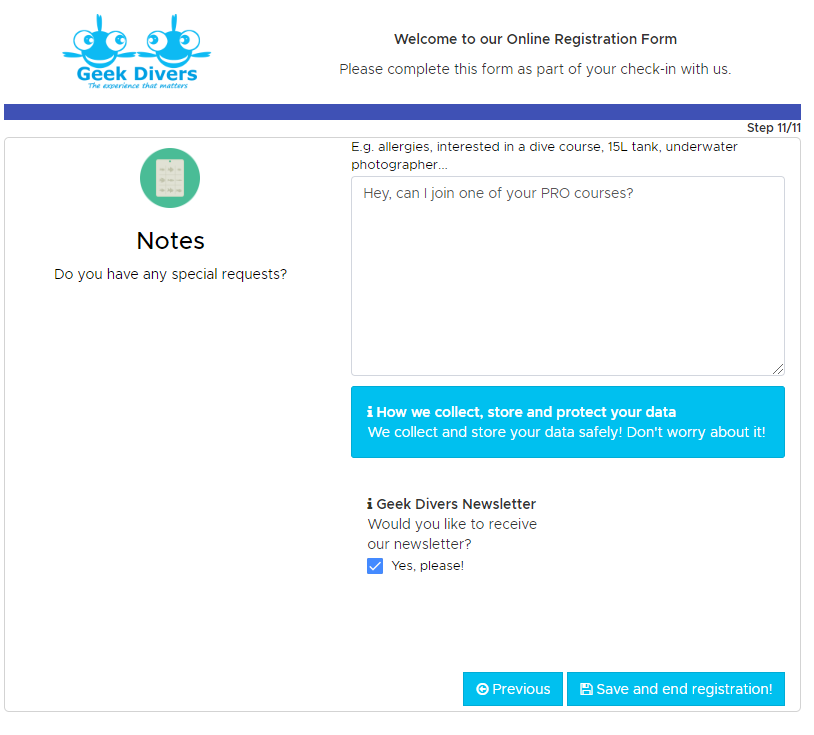
While you set up your online registration form in your Settings, click on the URL of your form to open it in a new tab. Every time you make changes to your General Settings - Registration Form, click on button Save Settings and then reload the tab with your online registration form to view the changes immediately.
14. Reporting
Starting from release 1.0.5 a new menu is available: Reporting. The only sub-menu available for now is Financial. More reports will be available in future releases.
Click on menu Reporting and Financial. This page is divided in 4 sections:
Each section is explained in detail in the following paragraphs.
14.1 Dashboard
The Dashboard will show you a summary of your yearly cash flow, most used expenses, highest expenses, cash flow in and out.
You can see some charts and change the dates to get a better understanding of what is going on in your dive center.
To compare 2 different date ranges just simply click on the + button and select another date. The chart will automatically update as soon as you select another date.

14.2 Financial
14.2.1 Profit & Loss
Click on Reporting - Financial to view the financial reporting page.
At the top of this page you will find the Profit & Loss section.

This section is divided in two parts to allow you to compare two periods of time. By default the left part of this section is set to the current month and the right part to last month. Feel free to adjust the dates and change the periods of time that you wish to compare. You don’t necessarily need to compare two periods of time: you can use just one part of this section to view the transactions of the current week or month as you please.
Once you’ve set the dates of your choice, click on button Update to view the sums of your financial data.
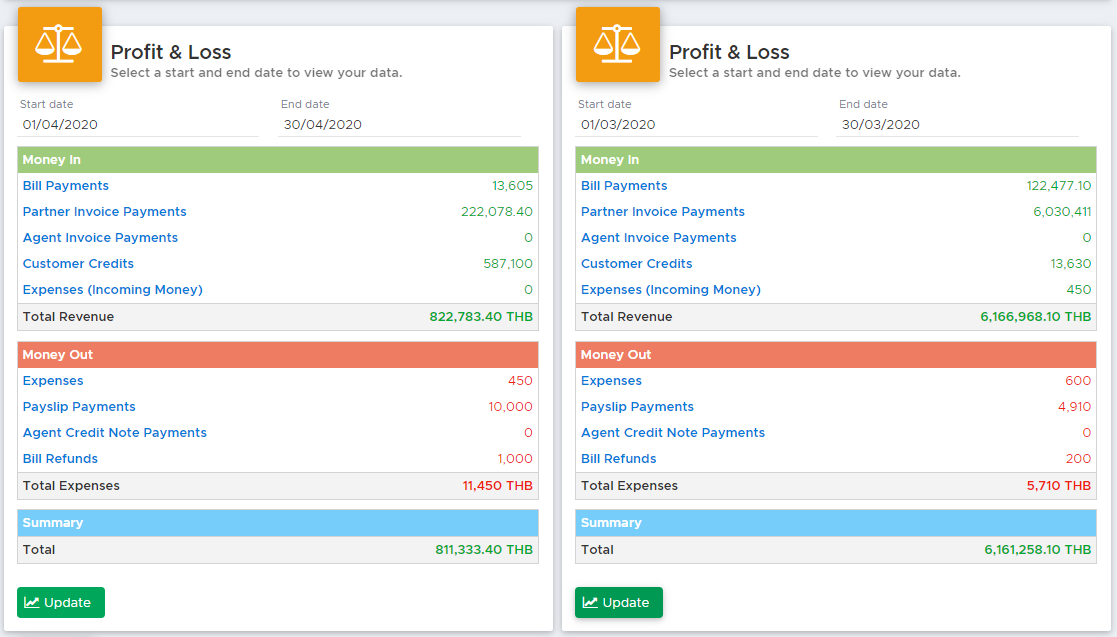
Your recorded transactions are divided into two tables: Money In and Money Out. In table Summary you will find your Total Revenue minus your Total Expenses. This number is shown in green if it’s positive and in red if it’s negative.
Money In
Bill Payments - this is the sum of all the bill payments (including payment fees) that were recorded in customers bills on a date between the start and end date.
Partner Invoice Payments - this is the sum of all the payments (including payment fees) recorded in partner invoices on a date between the start and end date.
Agent Invoice Payments - this is the sum of all the payments (including payment fees) recorded in agent invoices on a date between the start and end date.
Customer Credits - this is the sum of all the customer credits (including payment fees) recorded on customers profiles on a date between the start and end date.
Expenses (Incoming Money) - this is the sum of all the expenses (as Incoming Money) recorded on a date between the start and end date.
Money Out
Expenses - this is the sum of all the expenses recorded on a date between the start and end date.
Payslip Payments - this is the sum of all the payments recorded in payslips on a date between the start and end date.
Agent Credit Note Payments - this is the sum of all the payments recorded in agent credit notes on a date between the start and end date.
Bill Refunds - this is the sum of all the refunds recorded in customers bills on a date between the start and end date.
Each item of these tables can be clicked to view the list of transactions that make up the sum shown in the table.
You will see a sidebar in the bottom part of the screen showing all the appropriate transactions. You can export the transactions by clicking on button Export. Save the .csv file on your computer and open it as a spreadsheet.
14.2.2 Export Bills
Click on Reporting - Financial to view the financial reporting page.
You can export every bill position and payment position of any bill in a specific date range. Select a start date and an end date of your choice and choose if you wish to export all* your bills or just the closed* ones using the toggle.

*Before version 2.0, the bill export feature was divided into Export Closed Bills and Export All Bills. You will now find the exact same feature grouped into one section of the financial report page. Please set the toggle “Export only closed bills” to No to export all your bills. Set it to Yes if you wish to consider only closed bills.
Once you’ve set your dates and updated the toggle, click on button Update. You will see a table containing the complete list of bill positions and payment positions matching your filter. If you wish to export this list to a .csv file to open as a spreadsheet, click on button Export.
Export All bills
The results will include bill positions and payment positions with a date between your start and end date.
Export Closed bills
The results will include bill positions and payment positions that belong to bills closed on a date between your start and end date.
For every bill you will also find an extra position with type ‘Open’ that shows you the amount written in ‘Open’ in the closed bill. This list does not consider archived bills.
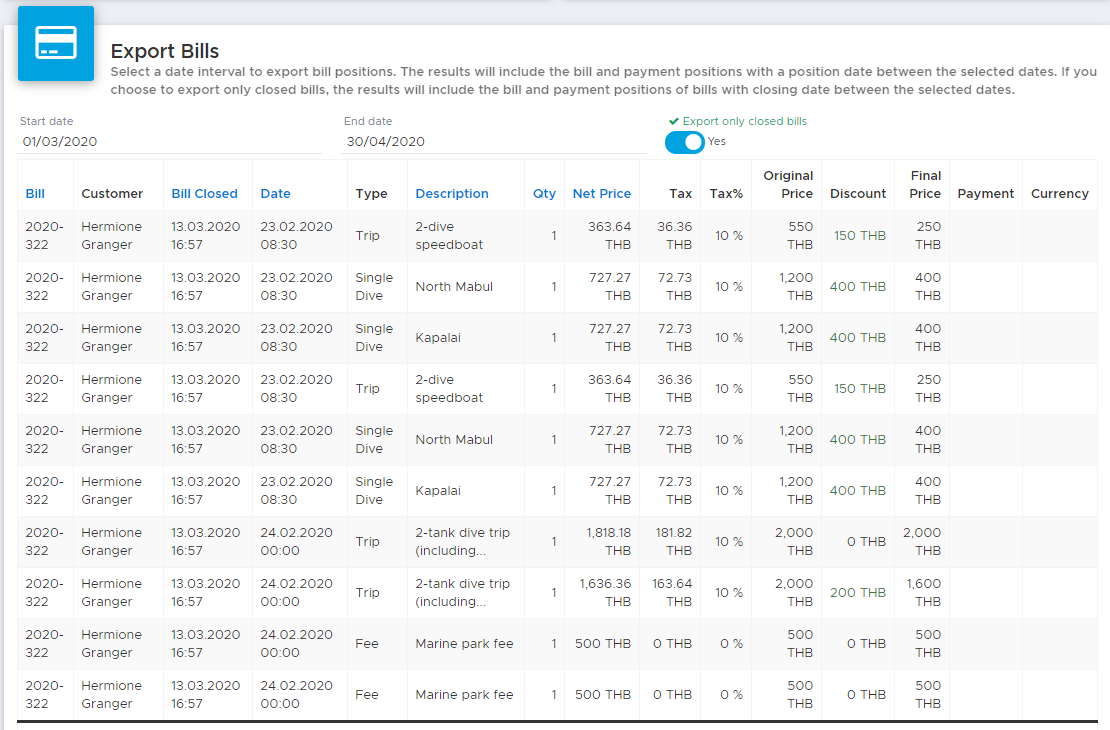
14.2.3 Export Invoices
Click on Reporting - Financial to view the financial reporting page.
You can export every partner invoice position and payment position of any invoice in a specific date range. Select a start date and an end date of your choice and choose if you wish to export all* your partner invoices or just the closed* ones using the toggle.

Once you’ve set your dates and updated the toggle, click on button Update. You will see a table containing the complete list of invoice positions and payment positions matching your filter. If you wish to export this list to a .csv file to open as a spreadsheet, click on button Export.
Export All invoices
The results will include invoice positions and payment positions with a date between your start and end date.
Export Closed invoices
The results will include invoice positions and payment positions that belong to invoices closed on a date between your start and end date.
For every invoice you will also find an extra position with type ‘Open’ that shows you the amount written in ‘Open’ in a closed invoice. This list does not consider archived invoices.
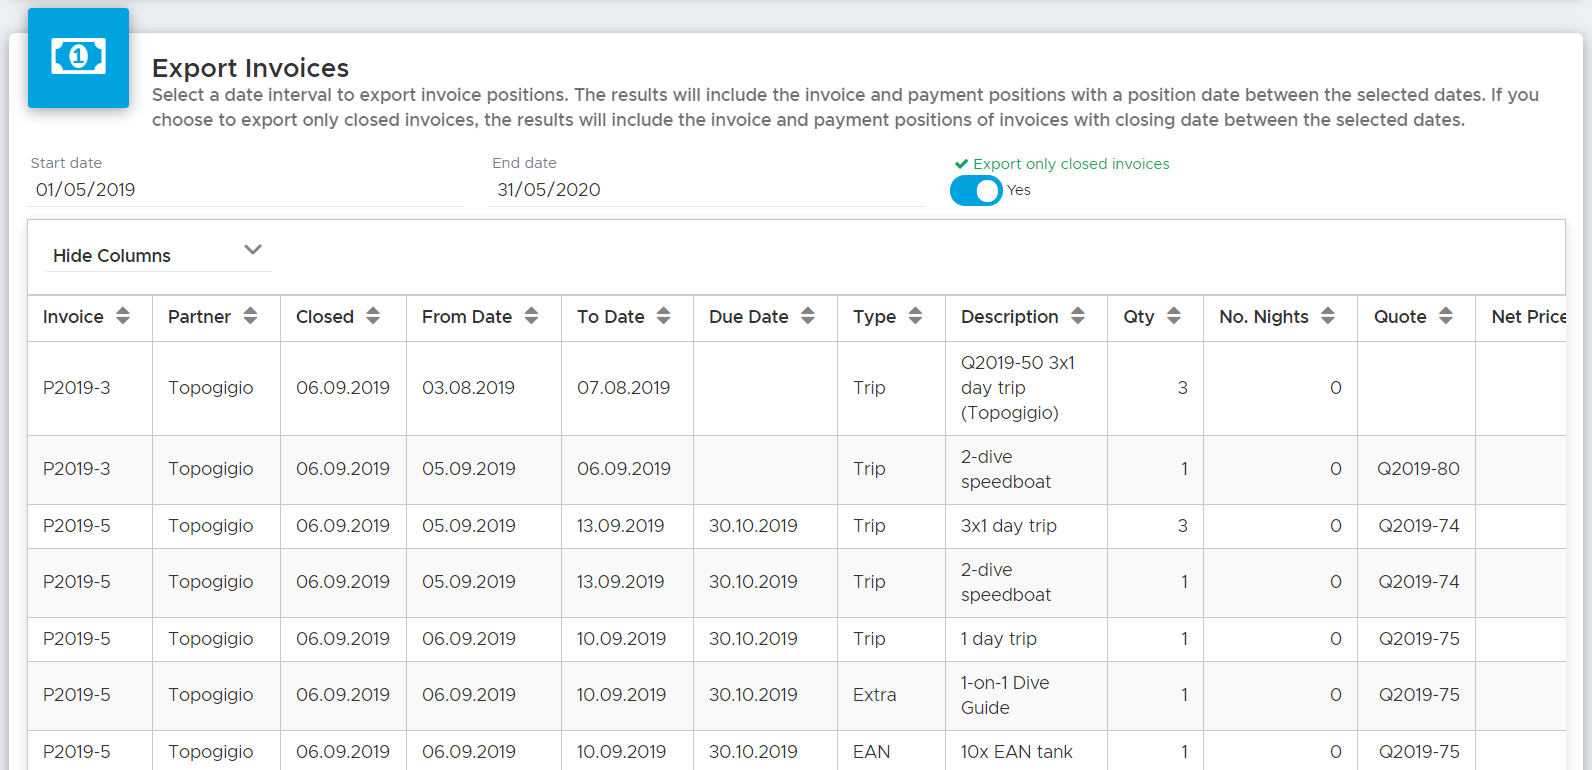
14.2.4 Existing Reports (Deprecated)
Starting with version 2.1 this part will no longer be maintained and turned off in a future release.
Click on Reporting - Financial and scroll to the last section of the page.
If you’ve already created your financial reports, you will see their names and the action buttons.
14.2.5 Create New Report (Deprecated, will not be maintained anymore starting with Version 2.1)
Click on button Create New Report to open the sidebar that will guide you through the creation of your report.
Start: Name and Locations
Write a name for your report and select the locations that you want to include. Please consider that you can always edit every report that you create, but you won’t be able to change the name of the report or add/remove locations. Also please consider that users who have access to the Reporting menu but do not have access to one or more locations included in the report, won’t see it.
Click on the button Continue.
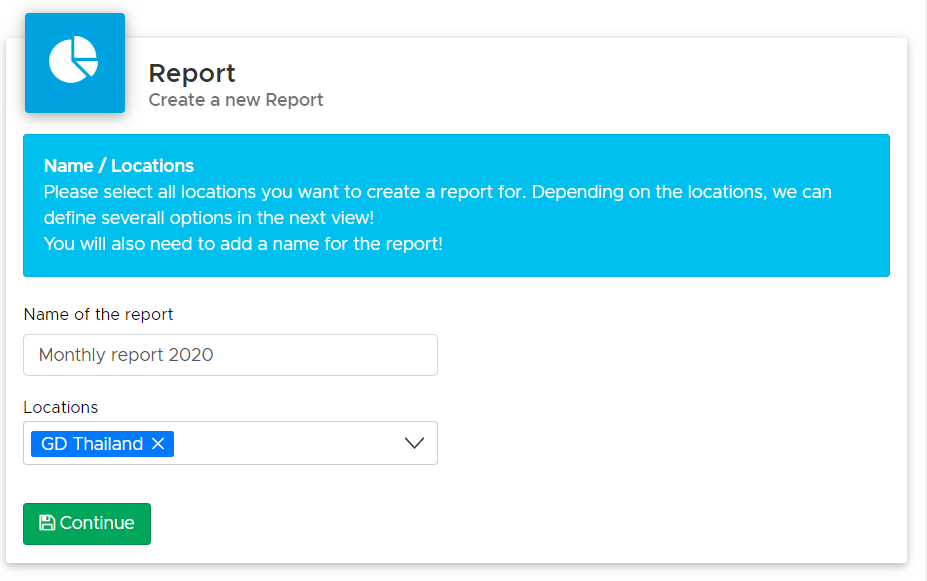
Step 1: Expenses
In this step you can select all the expense codes that you wish to include in your report. You will see a ‘No code’ at the bottom of your list of expense codes. In case somebody has entered an expense without selecting a code, you will see it in the report as ‘Manual’. If you wish, you can select three more checkboxes: Payslips, Agent Credit Notes and Bill Refunds. As it happens for the expenses, the payment or refund date will be considered in the report.
Please consider that your first location is automatically selected. If you wish to change location and repeat the same ( or different) selection for another location, you can do so by clicking on the location name at the top of the pop-up window.
After your selections, click on button Next.
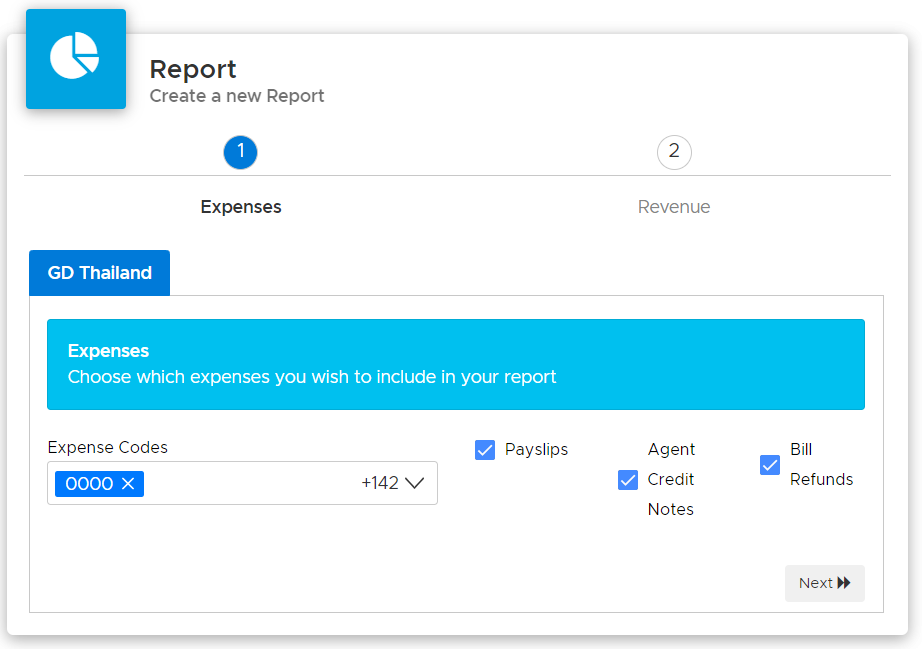
Step 2: Revenue
In this step you can choose to view your revenue grouped by type or name. The results will show either the types of price list items that you’ve sold or the names. In this step the revenue will be calculated based on your customers’ bill positions. The bill closing date will be considered for the revenue calculation. As you did for the first step, please change location and define your selection.
If you wish not to view revenue data for this report, leave the checkboxes empty.
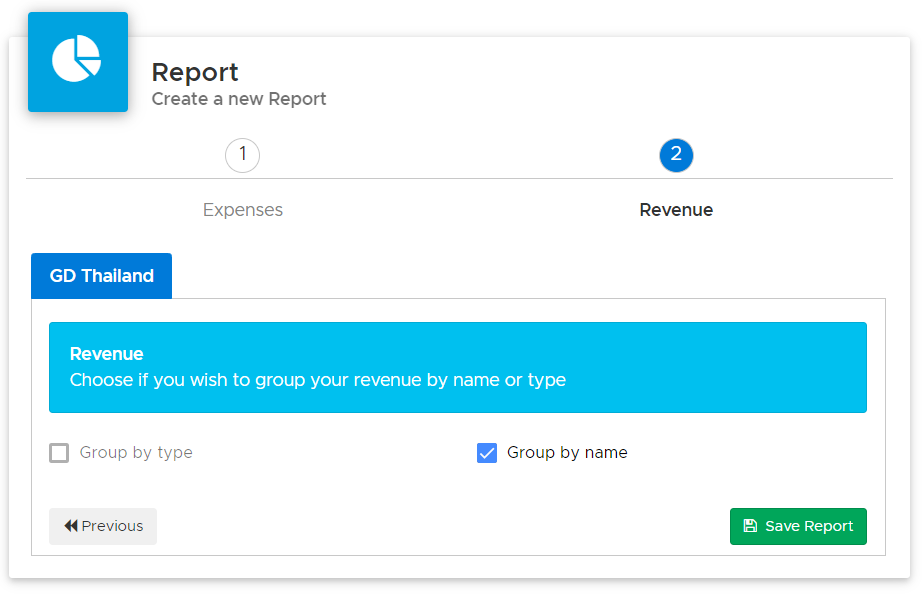
Once you’re ready you can click on button Save Report.
You will be redirected to the Reporting - Financial page and your new report will be visible among the Existing Reports.

You have now 4 options: Show Preview, Edit Report, Run Report, and Delete Report.
Show Preview
By clicking on this button you can preview your report and group your expense codes.
If you wish to group some items, please tick their checkbox and click on button Group Items:
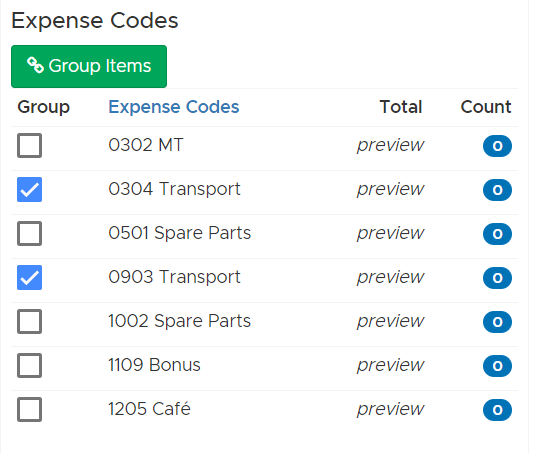
You’ll be asked to enter a name for the group:
Enter a name of your choice and click on button OK.
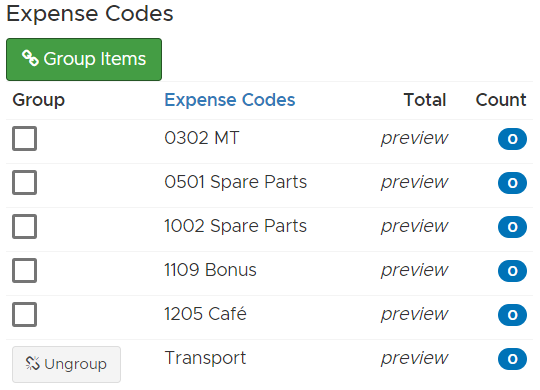
You can always Ungroup items by clicking on button Ungroup. Repeat the Group Items feature for all your Expense Codes.
Edit Report
Should you need to modify your report, you can always click on button Edit Report. You’ll be taken to Step 1 and from there you can move between locations and step 2 to make the appropriate changes. Please follow the instructions in chapter Create New Report. In case you make changes to the selection of your expense codes you might need to click on Show Preview to readjust the groups.
Run Report
Whether you have created only 1 or more reports, you can choose to run any of them at any time. Click on button Run Report next to the report that you wish to generate.
A pop-up window will ask you to select the date range for your report:

By default the current month will be selected, but you can change the start and end date. You can also choose to run your report with or without charts. If you wish to exclude charts, please untick checkbox Show Charts. Once you’re ready, click on button OK.
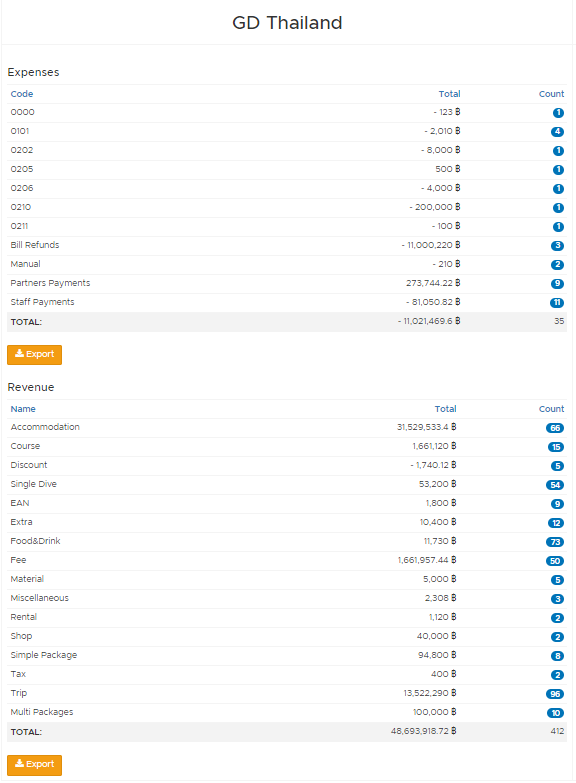
The above is an example of how the report looks like per location. In case of more locations, you will see them one next to the other. In that case you will need to scroll to the right to view the reports for all your locations.
The count column shows how many occurrences of the same item or type were found in the system.
Every section of the report can be exported in a .csv file for your records.
👀 Important!
The revenue section of this report will show either price list items or price list item types, depending on your choice in the second step of the creation/editing of your report. Only bill positions of closed bills with closing dates between the interval of dates of your choice will be considered for this report. If you wish to compare the numbers in this section of the report, you should have a match with Export Bills - Export only Closed Bills. The numbers in this section cannot be compared with the Profit & Loss report because they consider different sets of data: bill positions in this Revenue section compared to recorded payments in the Profit & Loss report. Both reports are correct and show the real data in the system. It’s up to you how you wish to consider your revenue data: by recorded payments or by closed bills.
Delete Report
Click on button Delete Report. You will see the following message.
If you choose button Yes the report will no longer be available.
14.3 Equipment
Here you can find out how many times you rented a piece of equipment and where it is for a specific date.
* 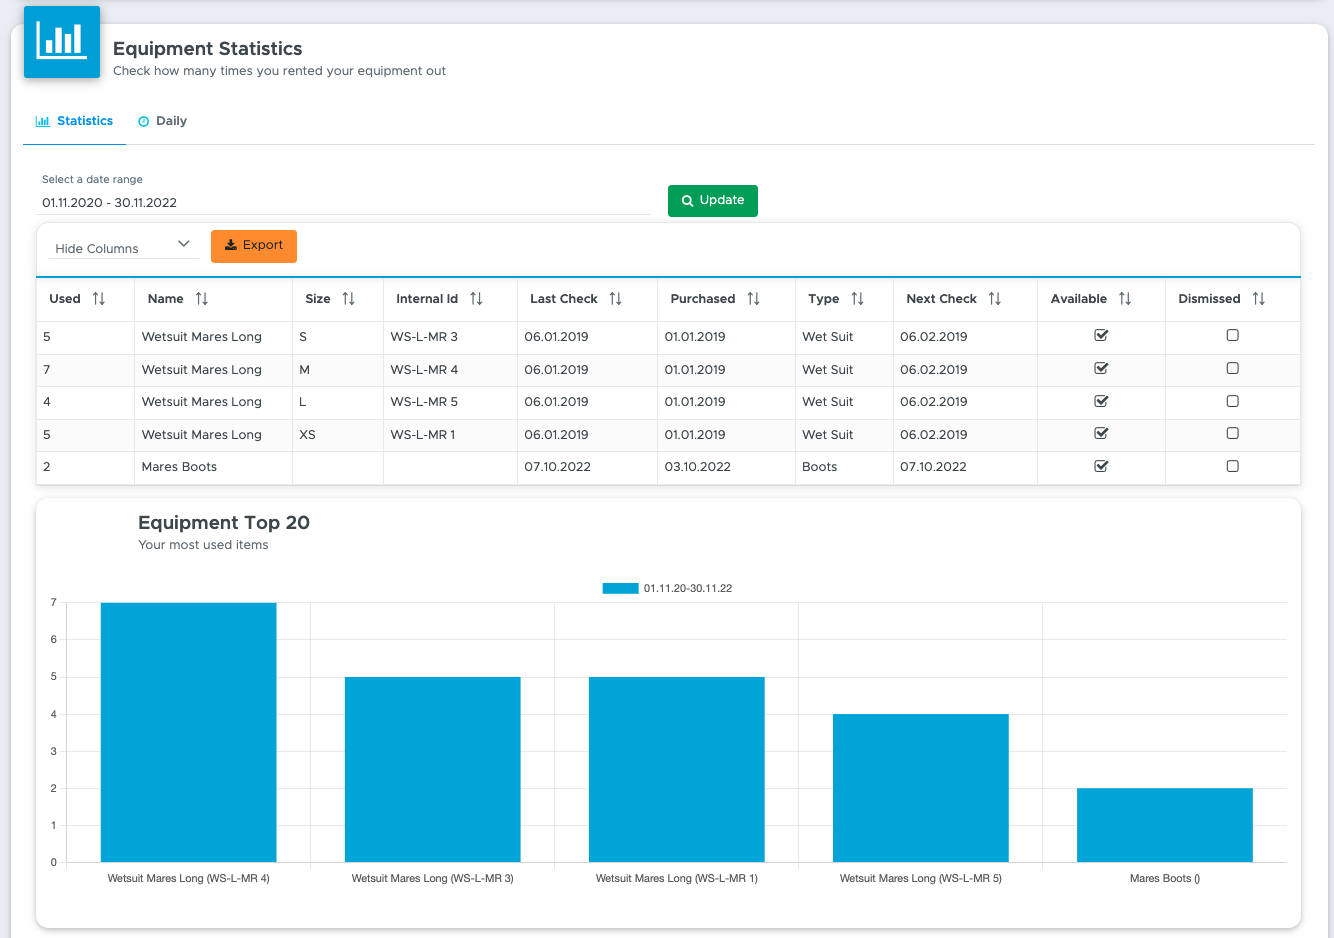
You can change the date range and export the data to view it as a spreadsheet.
On the Daily - Tab you can see who rented your equipment right now.

14.4 Accommodation
If you are using the accommodation module, you will find some statistics about your room rental here.
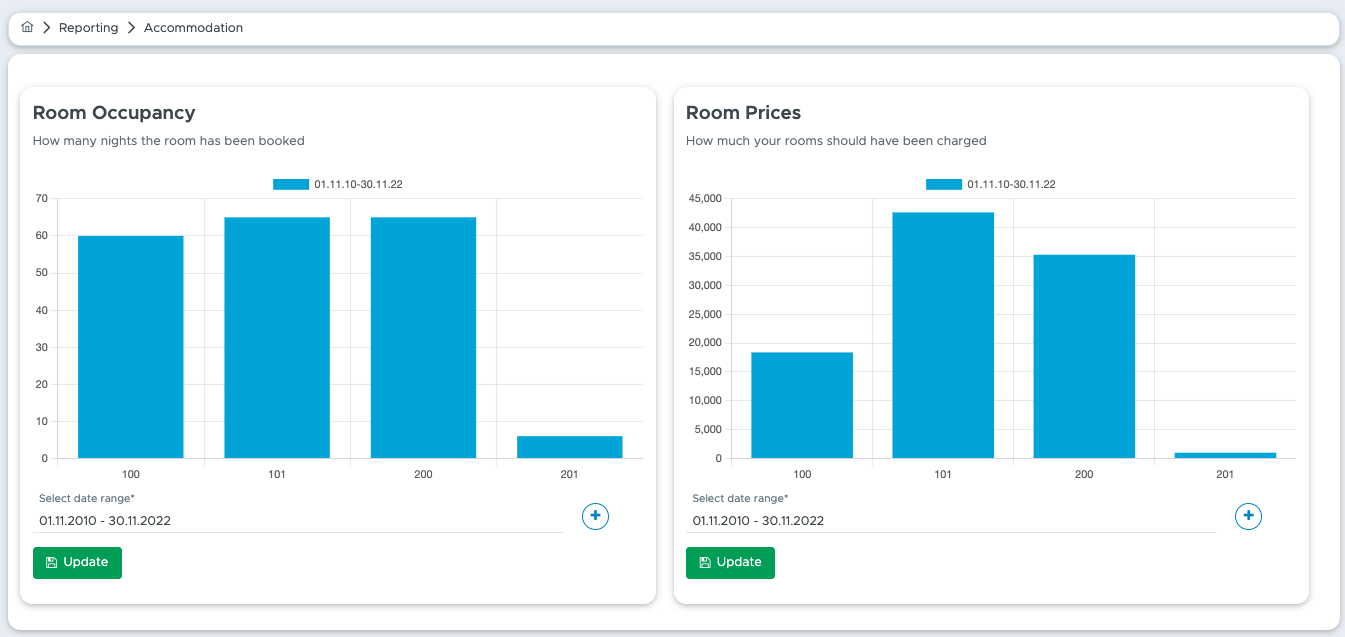
15. Booking
Starting from release 2.0 you will see a new menu: Booking. This menu can be used to manage the quotes that you generate for your customers and partners.
Every quote that you manually generate must be assigned to one partner or at least one customer (the assignment to more than one customer is possible) or to a partner and one or more customers. Every quote has a progressive number, e.g. Q2020-25 and therefore they are uniquely identifiable. Quotes are “global” documents in Geek Divers: they can contain your offer for one or more of your locations, providing that the default currency is the same. A quote represents a list of services that you wish to offer to your customers or partners (e.g. travel agents): you can modify it as many times as you need (as long as it’s still open), cancel or confirm it and track its status. You can generate as many quotes as you wish for the same customer or partner at any given time and proceed with the confirmation of only one or cancel them all.
A quote is not a bill or invoice and therefore you cannot record a payment linked to it in case you request a deposit from your customer. However you can do so in section Customer Credit. A quote that is assigned to a partner will automatically generate or update a partner invoice with the due date of your choice once it is confirmed.
All the above and more is described in detail in the following paragraphs.
The new menu Booking has the following sub-menus:
The explanations that follow in this paragraph are related to the kinds of quotes that you can find in each of these menus, their color-coded status and the possibility to cancel or archive a quote. The first time that you read this chapter it might sound a bit complicated. If this is the case, please jump to chapter 15.1 and the following ones first. Once you start working with your quotes, their status will start making sense and you can come back to this chapter for more information. In case you wish to have more details or explanations about this, please feel free to send a message to info@geekdivers.com.
New Quote
Click on this menu to create a new quote, either for your partners or customers. See chapter New Quote.
Open Quotes
Click on this menu to view the list of all your open quotes. The quotes in this page are all in status Open or Due. If they are in status Due, they've reached their validity period and it is recommended to take some actions like contacting the partner or the customer to ask if they’re still interested or cancel them.
Confirmed Quotes
Click on this menu to view the list of all your confirmed quotes. The quotes in this page are all in status Confirmed or In Progress. If the quote is in status Confirmed, all its positions will have status Confirmed.
If the quote is in status In Progress, its positions might have different status.
Confirmed - the quote position is confirmed and not yet used by a customer in their bill.
Voucher - the quote position has been applied to a bill as voucher (Apply Voucher button within a customer’s bill), but there’s no bill position matching this voucher position yet.
Applied - the quote position has been applied to a bill as voucher and there’s a match among the bill positions. The bill position is marked as a voucher (blue and green icon).
The positions of a quote In Progress might all have status Applied. This is because the bill(s) related to them are not yet closed. When the bills are closed, this quote will automatically change its status from In Progress to Applied and it will be available in menu Completed Quotes.
Completed Quotes
Click on this menu to view the list of all your completed quotes. The quotes in this page can be in status Cancelled, Applied or Archived. These quotes can no longer be modified, but you can always click on the quote number to view its content.
A quote in status Cancelled is a quote that was manually cancelled when it was in status Open or Due. Its quote positions are all in status Cancelled.
Cancelling a quote is an irreversible operation: the quote status cannot be changed back to its previous status. If you accidentally cancel a quote you can create a new quote with the same content and assign it to the same customer or partner.
A quote in status Applied is a quote that was confirmed, all its positions were applied to one or more customers bills as vouchers, all the voucher positions matched bill positions and the bills are now closed.
A quote in status Archived is a quote that was manually archived when it was in status Confirmed or In Progress. A quote can be archived only in one of the following scenarios:
All the quote positions are in status Confirmed, but you realise that the quote can no longer be used as a voucher because the check-in date is too old (older than 5 days).
Not all the quote positions are in status Applied and the remaining Confirmed quote positions will never be used in a bill (check-in date older than 5 days) or they are in status Voucher in a closed bill. The bills containing applied quote positions are closed.
In any other scenarios the quote cannot be archived. If you wish to archive a quote that is currently in menu Confirmed Quotes, please check that all the bills containing the quote positions are closed.
In general, you might want to archive a quote because you want to see a clean table in menu Confirmed Quotes. Here you only want to see confirmed quotes that belong to customers and partners who have booked for the future or quotes that are really being used right now by your Current Customers. Everything else should not belong to this menu. It is therefore recommended to do some spring cleaning in this menu and archive the quotes that are not going to be used in a bill.
What happens when you manually archive a quote:
The quote status will be set to Archived.
The quote positions in status Confirmed, Voucher or Applied will not change their status.
In case of a partner quote, the quote positions were copied into a partner invoice when you clicked on button Confirm. If the partner invoice is still open, when you click on button Archive the quote positions will be marked as deleted in the open partner invoice.
If the partner invoice is closed, when you click on button Archive, the quote positions cannot be deleted from a closed invoice. In this case, if you wish to refund your partner you need to manually add a position to an open partner invoice and write an amount < 0 to balance the content of the archived and unused quote. Geek Divers will not do it automatically.
Archiving a quote is an irreversible operation. The unused quote positions cannot be applied to bills as a voucher and the quote status cannot be changed back to its previous status.
15.1 Booking Settings
Before you start creating quotes you need to define your settings. Click on menu Booking and on Booking Settings and select Customer Quote Settings.
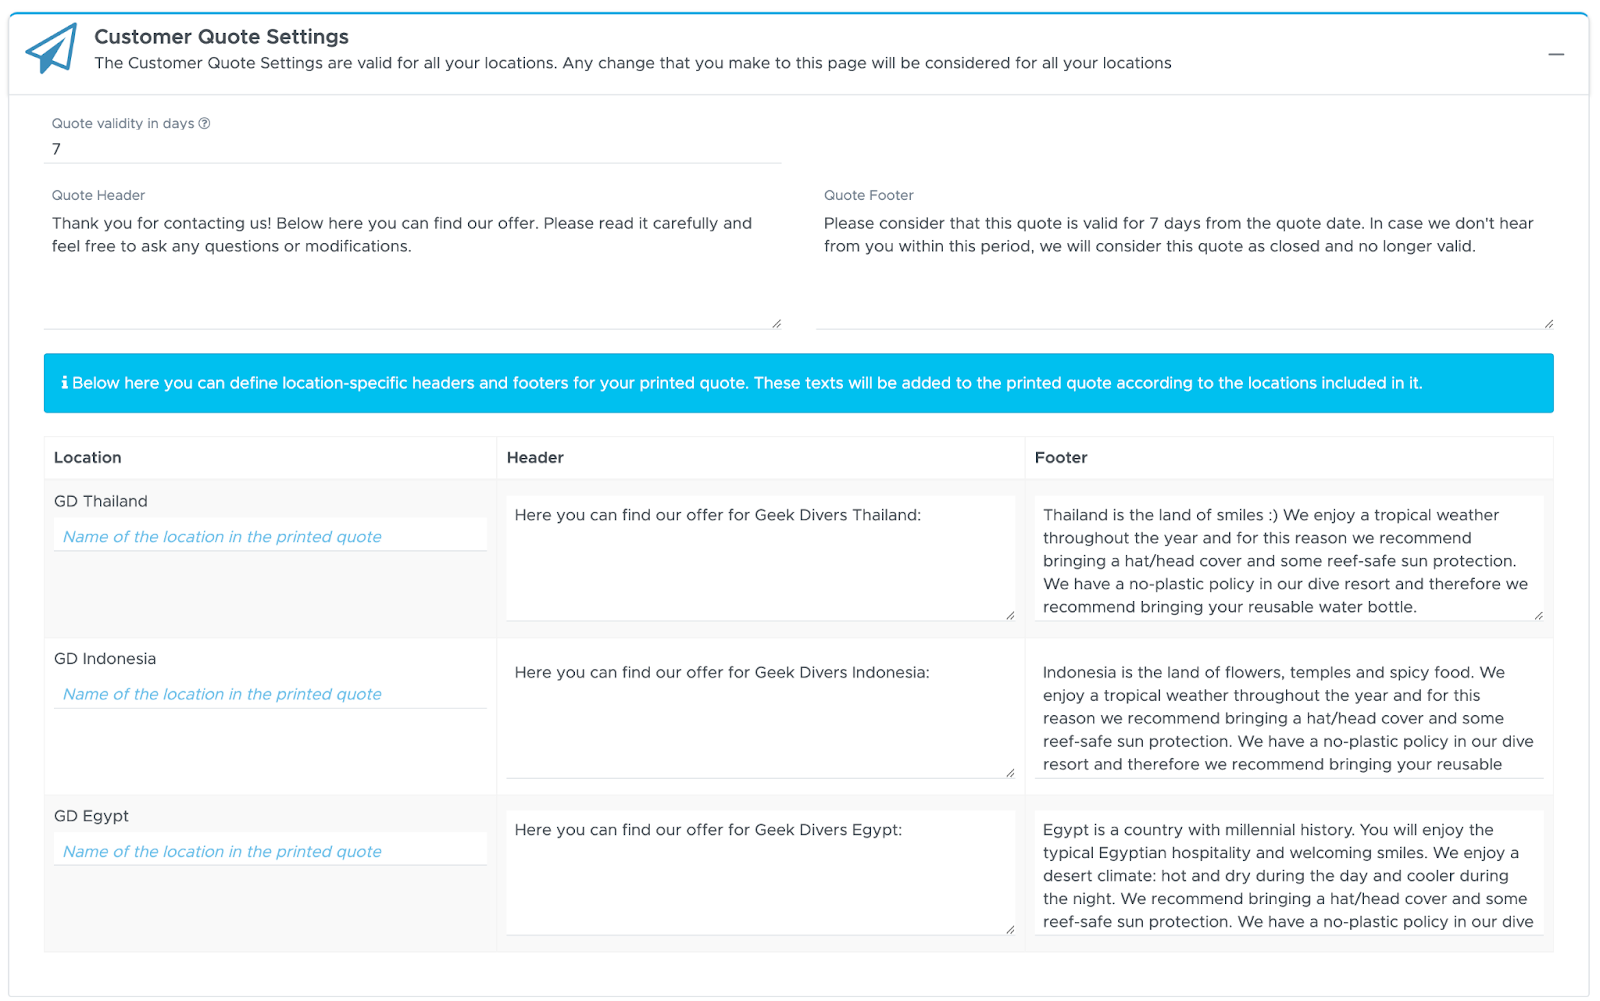
Here you can define the quote validity in days, the headers and footers.
The quote validity defines the color of a room reservation in the accommodation calendar (more on that in chapter Accommodation) and the color of an open quote. When you create a quote, this will initially be in status Open. As soon as the validity period is reached, the quote will turn to Due. There’s no substantial difference between a quote in status Open and a quote in status Due. However, the color-coding will give you a better idea of what to do with quotes that are open for too long.
The quote headers and footers will be available in the printed version of every quote. You can define a global Quote Header and a global Quote Footer. These will be printed respectively at the very top and at the very bottom of your quotes.
Starting with version 2.1 you can now also give a different name for the printout of your location.
If your Geek Divers account has more than one location, you can define a local header and a local footer for each of your locations. In the screenshot below you can see a section in blue for Thailand and a section in orange for Spain. Each section has a local header and a local footer. The local header will be written above the quote content for that location and the local footer will be written below the quote content for that location.
Please consider that one quote could include multiple locations. If this is the case, all the local headers and footers will be written in the printed quote.
The global header and footer are highlighted in the green boxes.
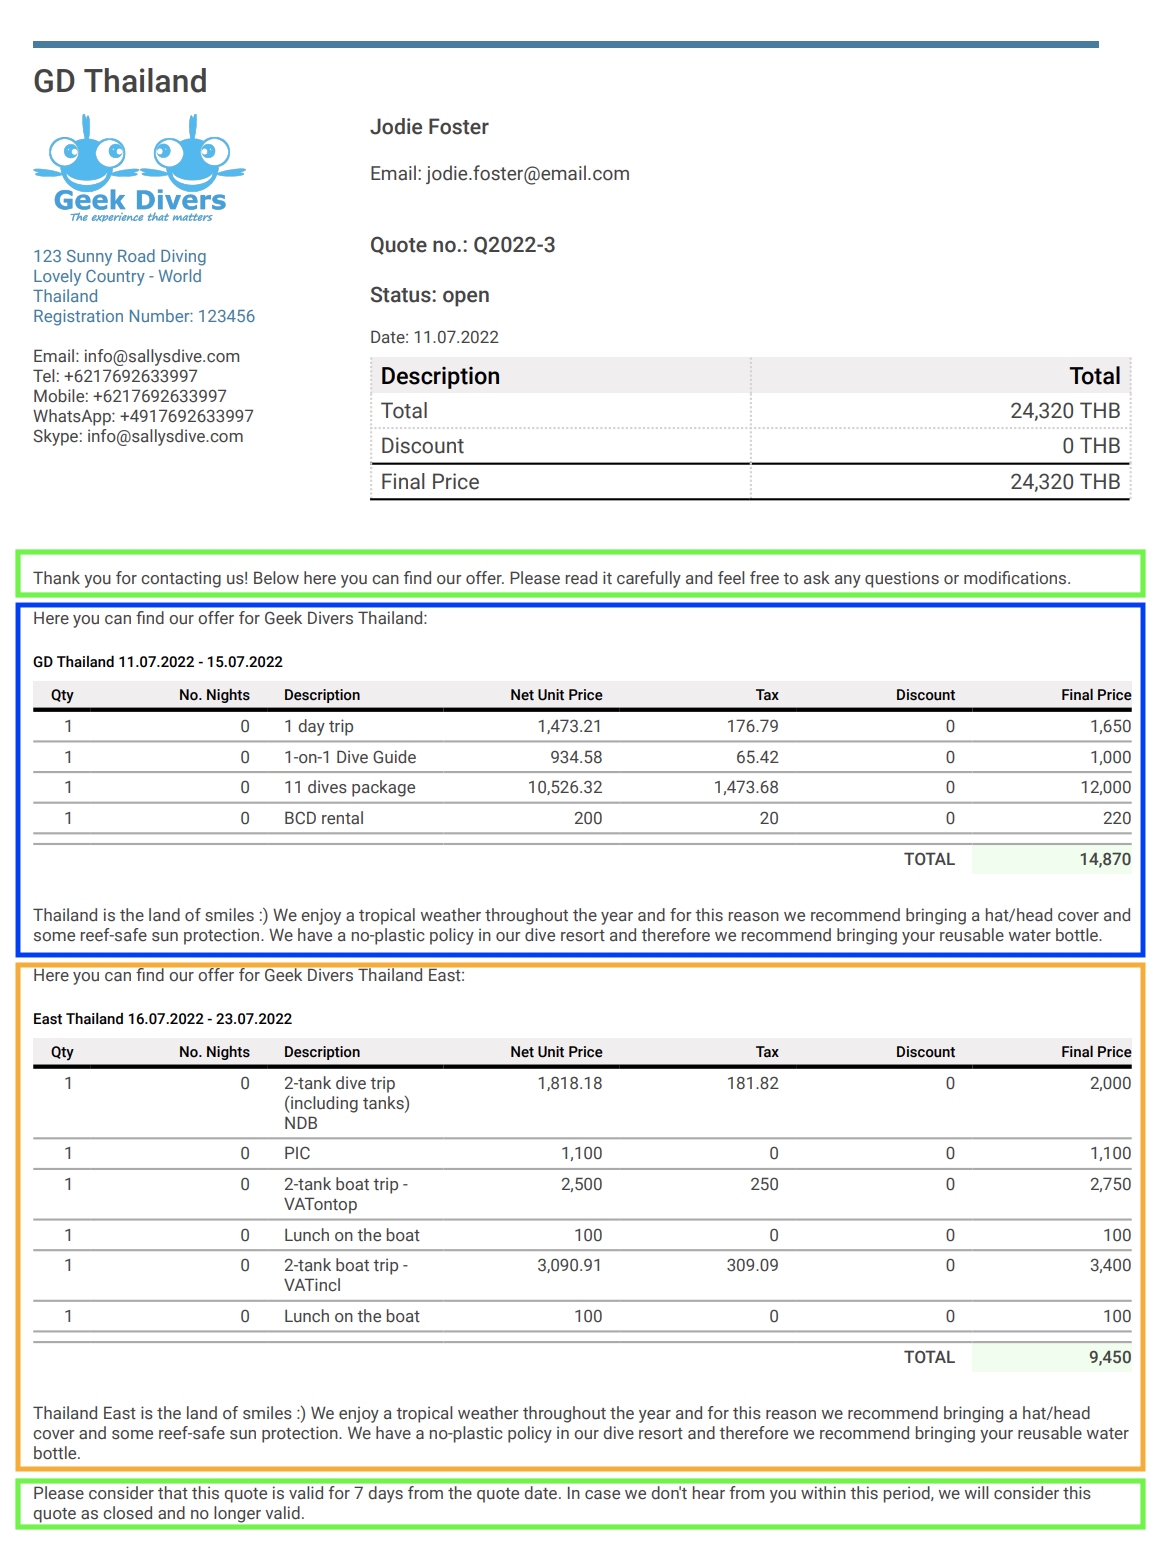
Feel free to play with these settings and create quotes for a test customer to view the printed format.
Don’t forget to click on the button Save once you’re done.
If you wish to use the booking module to send quotes to your partners, please click on Partner Quote Settings and repeat the steps described above. To test your settings you will need to create a new quote for a partner with an assigned price list. If you haven’t done it already, please check chapter Partner Price Lists.
15.2 New Quote
To create a new quote click on menu Booking and New Quote. Please consider that menu New Quote should be used only if you wish to add price list items. If you wish to make a room reservation, the quote should be created from the Accommodation Calendar.
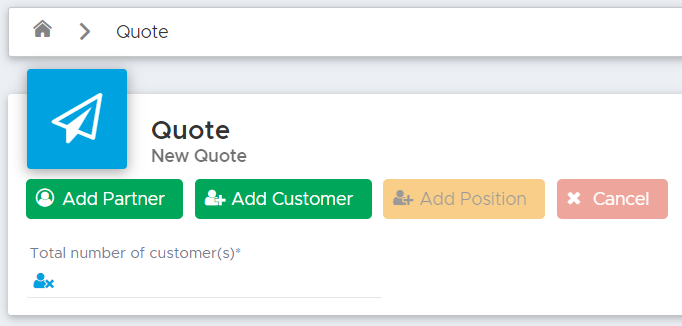
At this point you need to make a choice: is this a quote for a customer or for one of your partners?
If the quote is for a customer, Geek Divers will consider your default price list, while a quote for a partner will ask you to choose one of the partner price lists that you’ve assigned to your partner. If you haven’t done it already, please set up your partner price lists and assign them to your partners. See how in chapter Partner Price Lists.
15.2.1 Customer Quote
Type the total number of customers that you wish to include in this quote and then click on the button Add Customer.

If the customer is not yet in the system, you can add just the mandatory fields in this pop-up.
If the customer is already in the system, you just need to type a few characters for the name and last name and Geek Divers will show you the matching results.
Example:
Click on First name and type “e”
Use TAB key on your keyboard to move to Last name
Type “p”
Use TAB key on your keyboard to move to Email
At this point Geek Divers will show you the first 10 existing customers with an “e” in their first name and a “p” in their last name. If you don’t see the customer that you’re looking for, you might need to add some more information to restrict the results. Repeat the steps above typing more characters.

Alternatively, you could type the customer’s email address and move to the next field with the TAB key.
Click on one of the found customers and confirm it by clicking on the OK button.
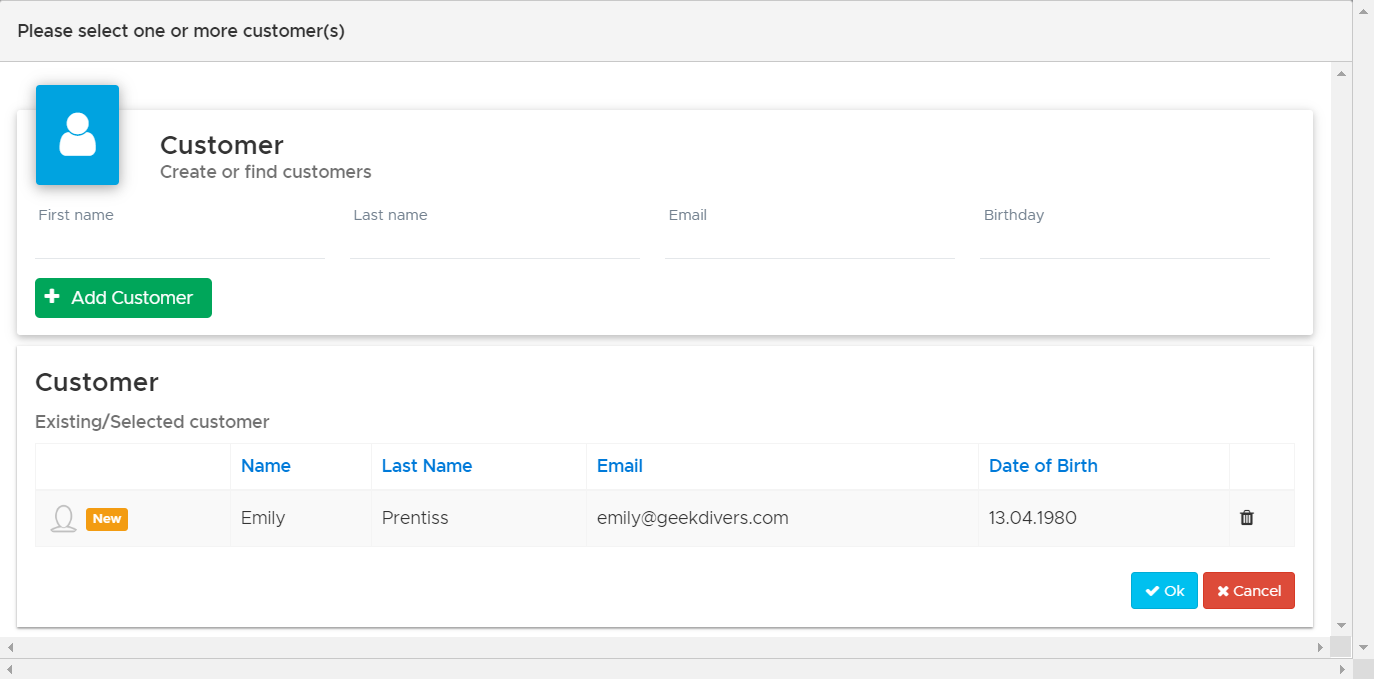
The customer is now assigned to the quote. You can repeat the above steps to assign more customers to the same quote. The first customer assigned will be considered the group leader. Even if you typed 2 in the total number of customers, you don’t necessarily need to add two customers to the quote.
You can now click on the button Add Position to enter items from your customer price list.

If your Geek Divers account includes more than one location, select the first (or only) location that your customer wishes to visit, a check-in date and a check-out date.
As soon as you select the location, you will see the customer price list (Default Price List). Don’t forget to set the correct check-in and check-out dates.
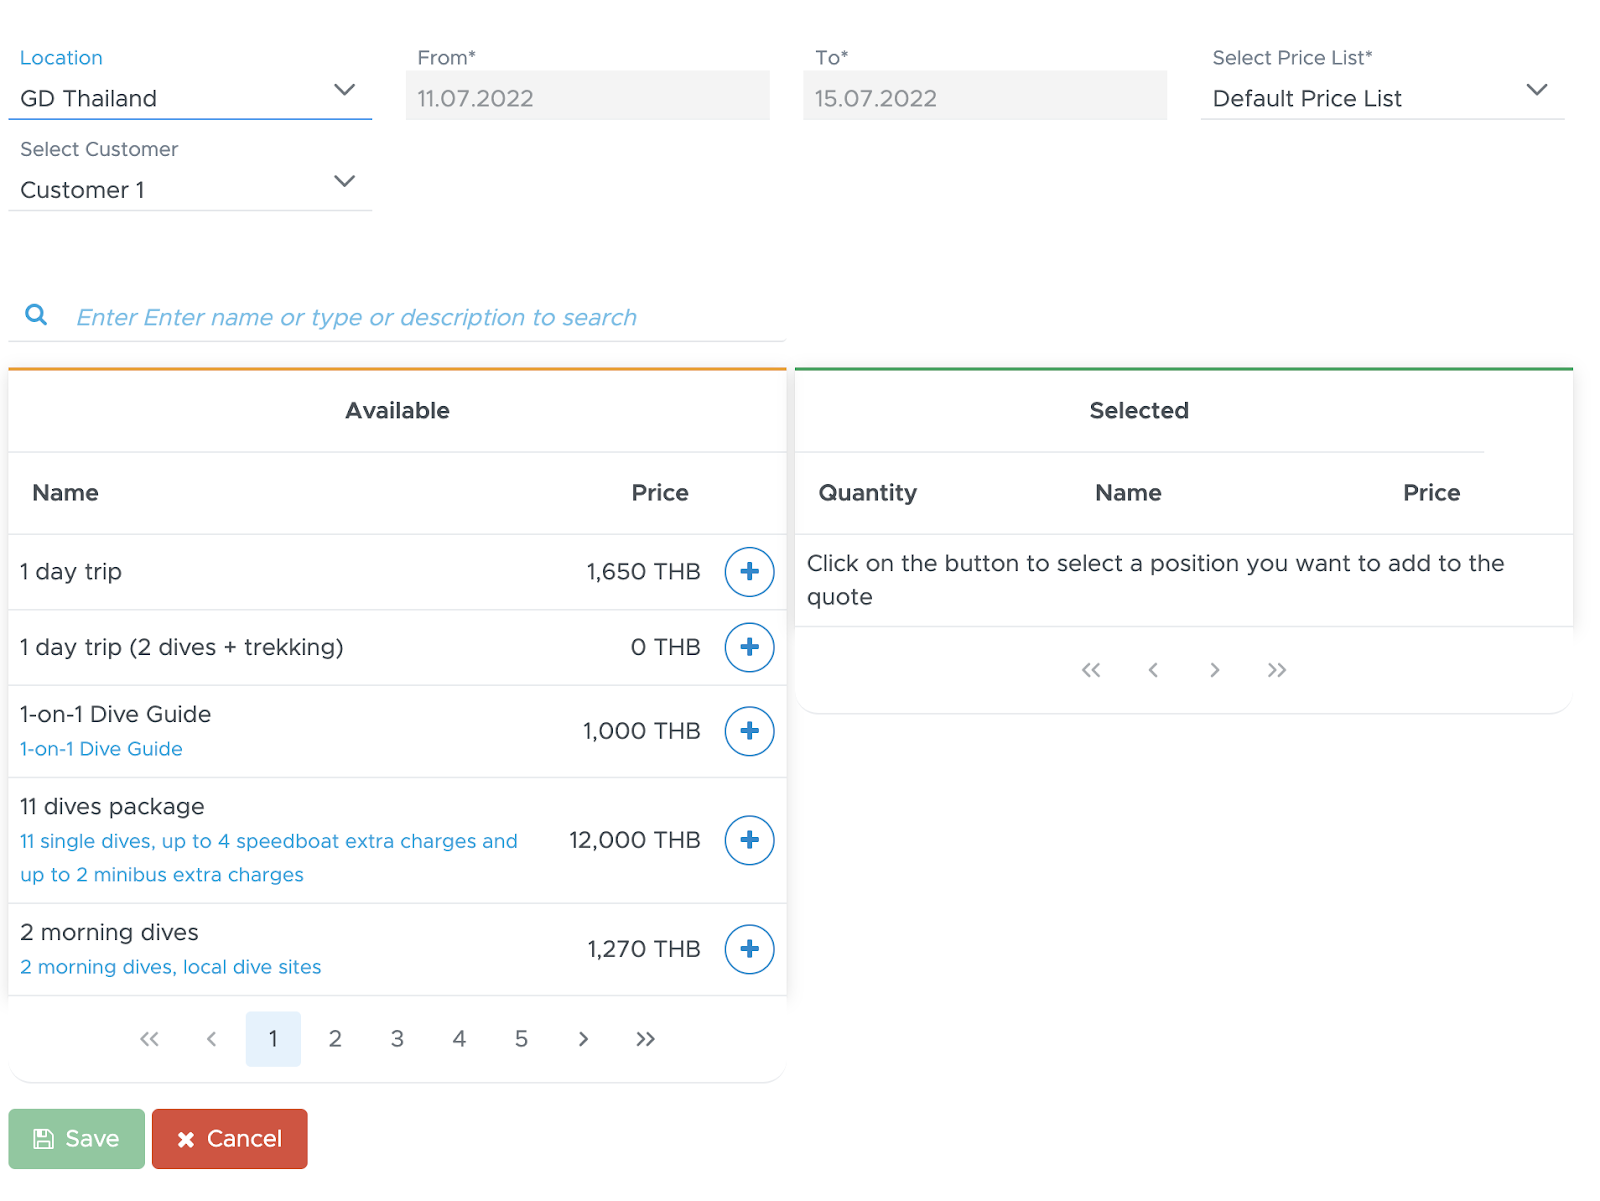
At the top of the sidebar, in the field “Select Customer”, select one of the generic “Customer 1” or “Customer 2”...etc. Search for the items that you wish to add to the quote in the Search string. Once you’ve identified the items that you are looking for click on the “+” button. You will see the selected items on the right-hand side.
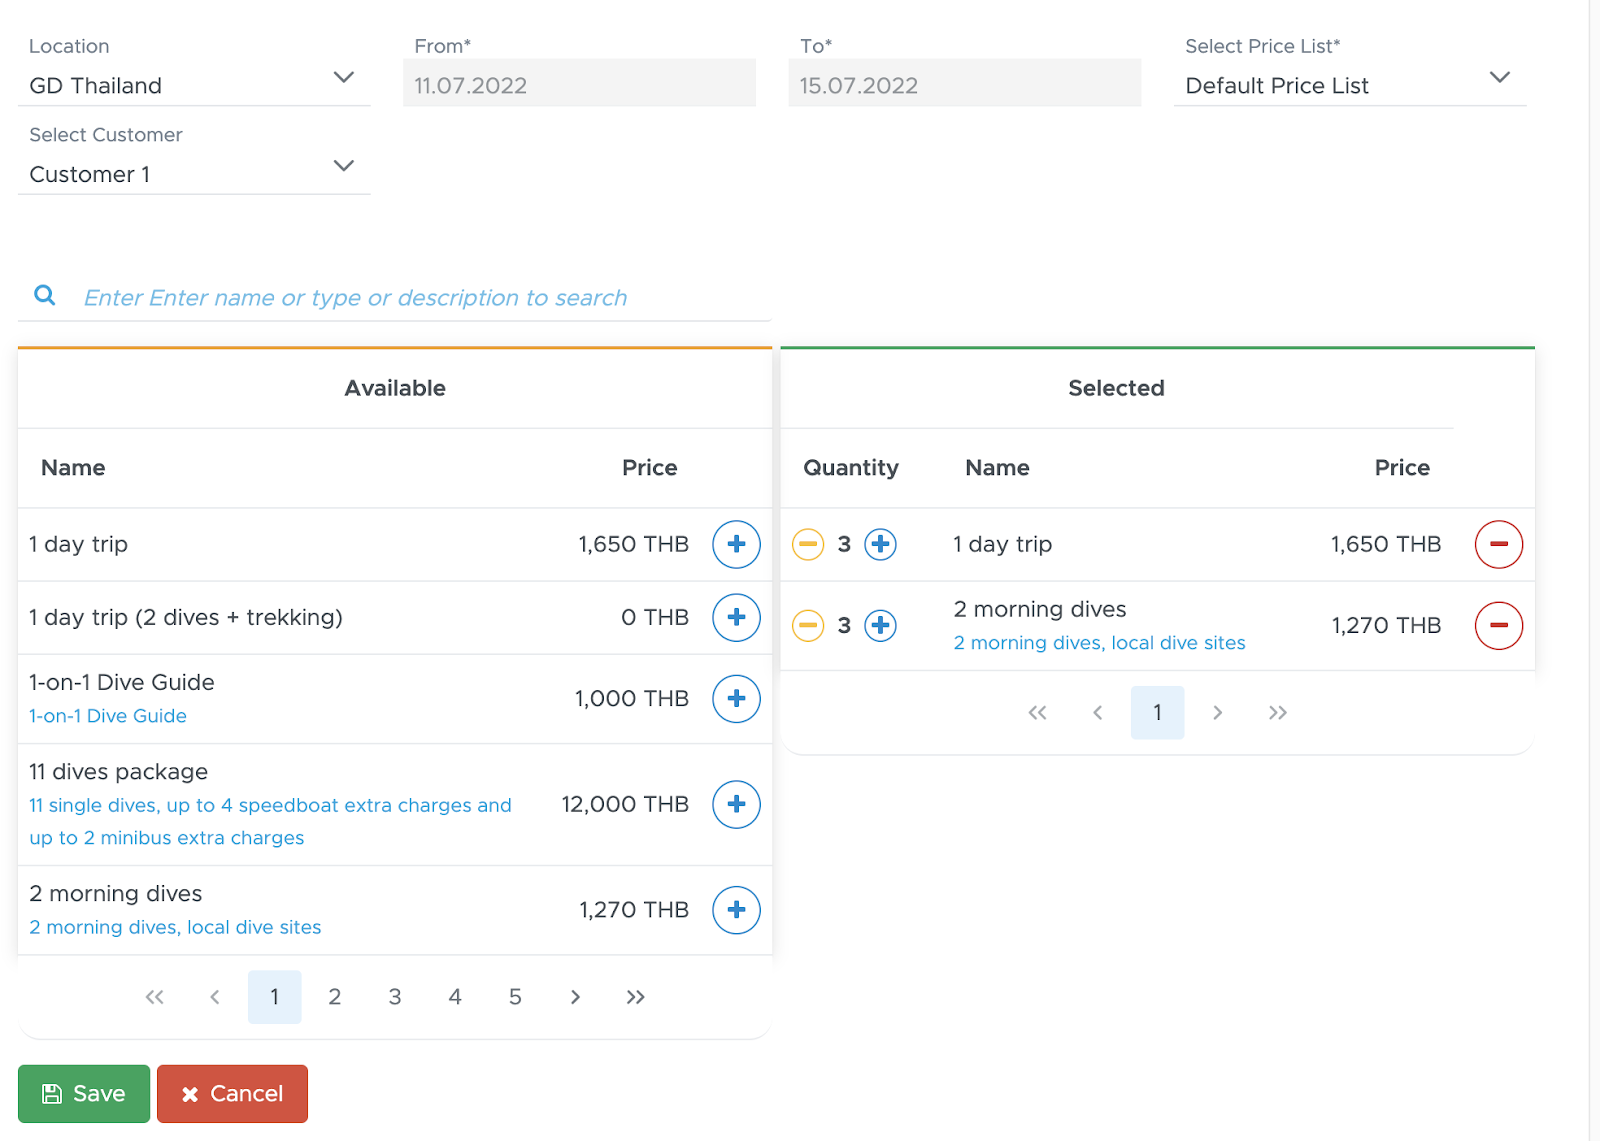
On the right side adjust the quantity (if needed) by clicking on the “+” or “-” button.
Select all the items that you need for the first customer, then switch to another customer and select all the items to assign to them.
Review the selected items on the right-hand side of the sidebar and in case of mistakes, click on the red “-” button bin icon to delete that item.
When you’ve added all the items that you need, scroll down and click on button Save.
You will see the items in the quote.
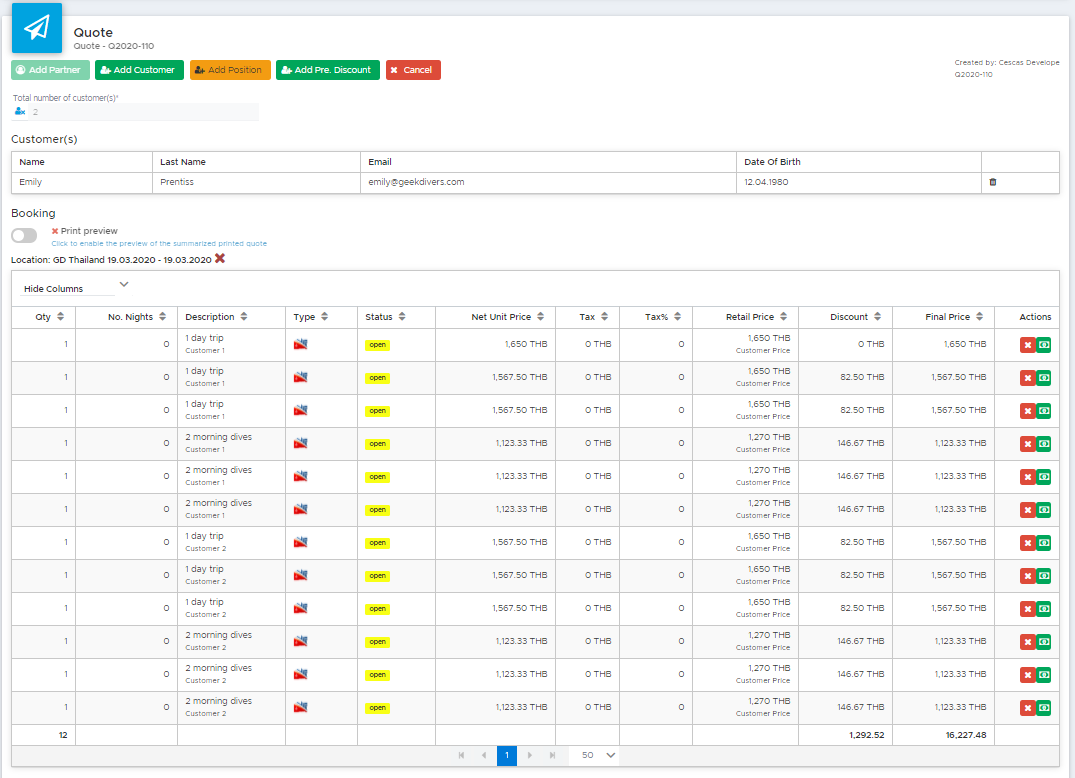
Each position in the quote will be assigned to the generic customer that you’ve selected and this will guarantee that the item package discounts won’t be shared.
E.g. 1 day trip in my price list has a price of 1650 THB for 1 unit. The second and third time, the same trip is discounted. To guarantee that these discounts are not shared among the customers in the quote, I need to assign 3x 1 day trip to Customer 1 and 3x 1 day trip to Customer 2. If you realize that something is missing, you can click on the button Add Position once again, select the same location and add other services.
If you wish to add another location, click again on button Add Position and repeat the above steps selecting a different location. You can select another location to add to the first one within the same quote only if both locations are set up with the same default currency. If your locations have different default currencies, you will need to create two separate quotes for your customers.
If you’ve made a mistake you can click on button ‘X’ at the end of a quote position to remove it. In case of automatic item discounts, these will be recalculated accordingly.
If you wish to add a discount to the quote, you can use the green button at the end of every quote position or button Add Pre. Discount at the top of each quote section. This button will show you all your predefined discounts that you’ve set up in menu General Settings - Predefined Discounts.
Once your quote is complete you can click on button Print to generate a pdf to send to your customer. The quote will be automatically saved and it will be available in menu Open Quotes.
15.2.1.1 Apply a predefined discount
If you’ve set up your predefined discounts in General Settings (Predefined discounts) you can apply them to your customer quotes.
Click on the button Add Pre. Discount at the top of a quote section and you will see a sidebar with the list of predefined discounts that you’ve set up in your General Settings. Please consider that predefined discounts are location-specific: the selected predefined discount will be applied only to the quote section that contains items for one location. If you wish to apply the same or similar predefined discount to other quote sections with items that belong to another of your locations, you will need to select the button Add Pre. Discount at the top of the other quote section.

Tick the checkbox related to the discount that you wish to apply and click on Apply Discounts.
You will see the applied predefined discount at the top of the page.
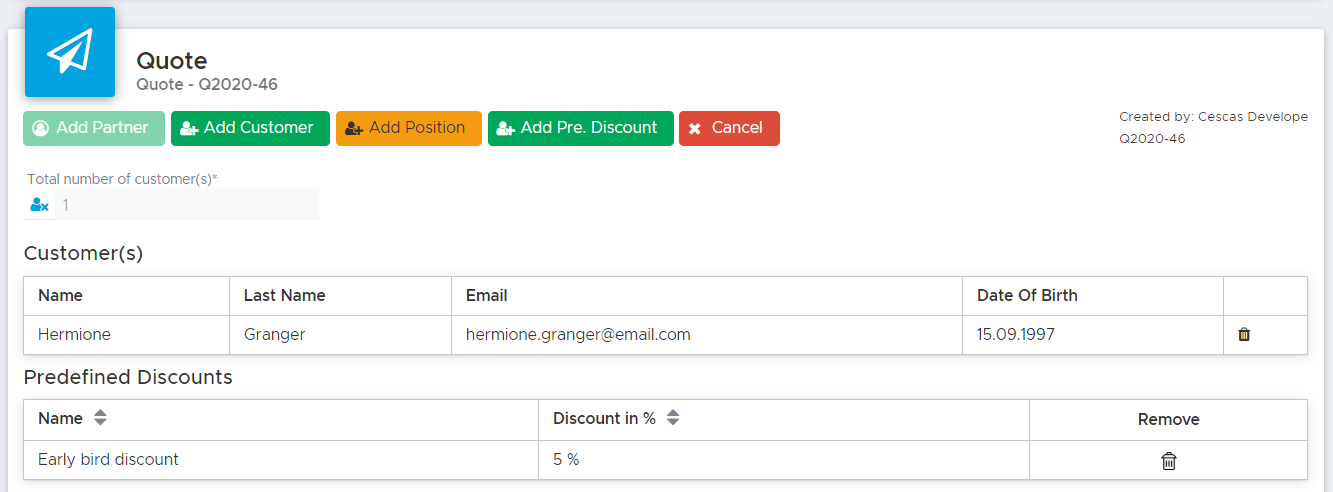
Additionally, all the quote positions that should be discounted according to your definition of predefined discount will show a calculated discount in column Discount. The predefined discount is always calculated on the final price. If a quote position already has an automatic or manual discount, the predefined discount will be calculated and applied to the discounted final price.
You can apply more than one predefined discount and the system will apply them in the order that you’ve selected them.
If the quote is for more than 1 customer, the predefined discount will be calculated on all the matching quote positions, regardless of which customer they’re assigned to.
If you wish to remove the predefined discount, click on the trash bin icon.
15.2.2 Partner Quote
Click on menu Booking and New Quote. Click on button Add Partner to select a travel agent.
If you’ve added any contacts in your Partner profile, Geek Divers will ask you to select one of them.
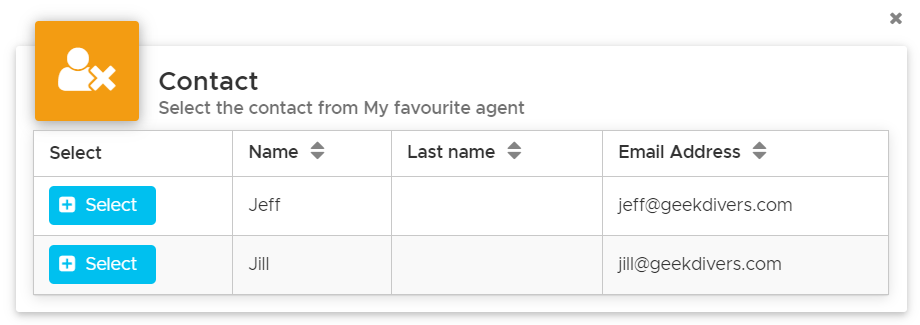
If your partner has shared the customer’s data (name, last name, email address and date of birth, you can click on the button Add Customer. This step is not mandatory.

Type the number of customers that you wish to include in the quote and click on button Add Position. Geek Divers will show you a pop-up to select one of your locations, the check-in and check-out date and the partner price list that you wish to use. If your Geek Divers account has only one location this will be automatically selected. If you have assigned only one price list to your partner for the selected location, this will be automatically selected.
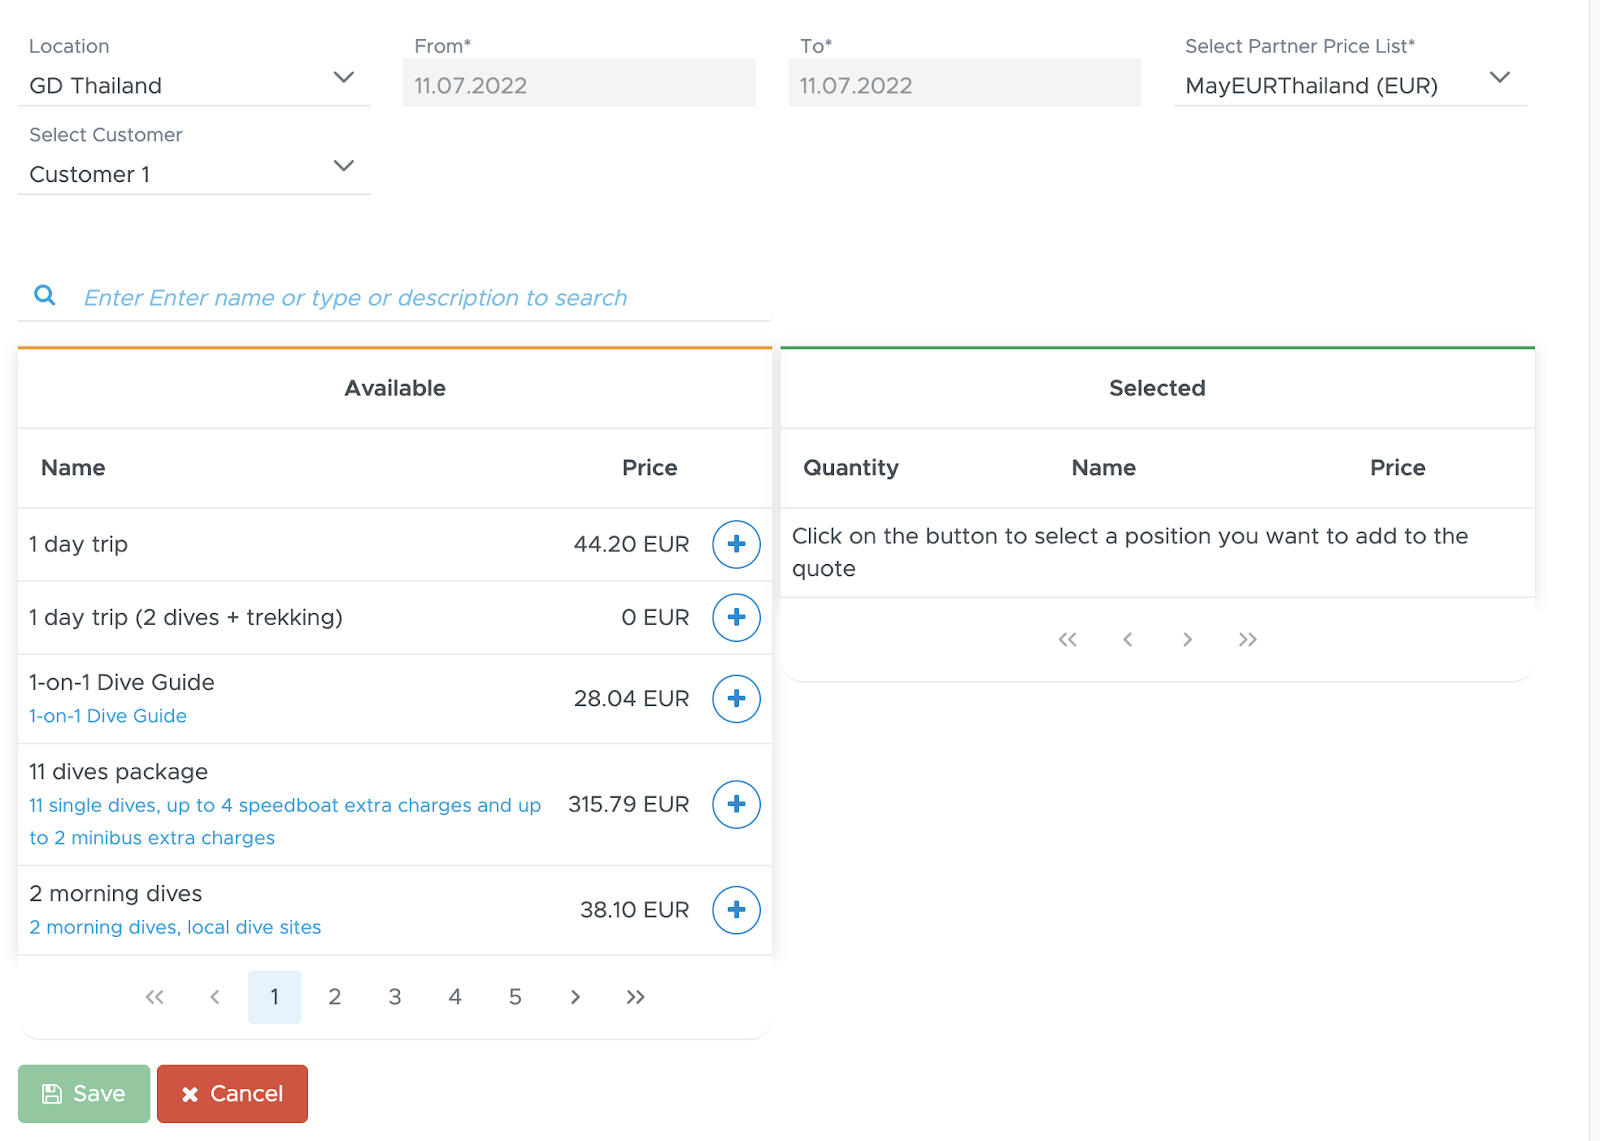
As soon as location and price list are selected, you will see the price list items that belong to the price list.
Select one of the generic customers from menu Select Customer at the top of the sidebar, search for the items that you wish to add to the quote and click on the “+” button. You will see the selected items on the right-hand side.
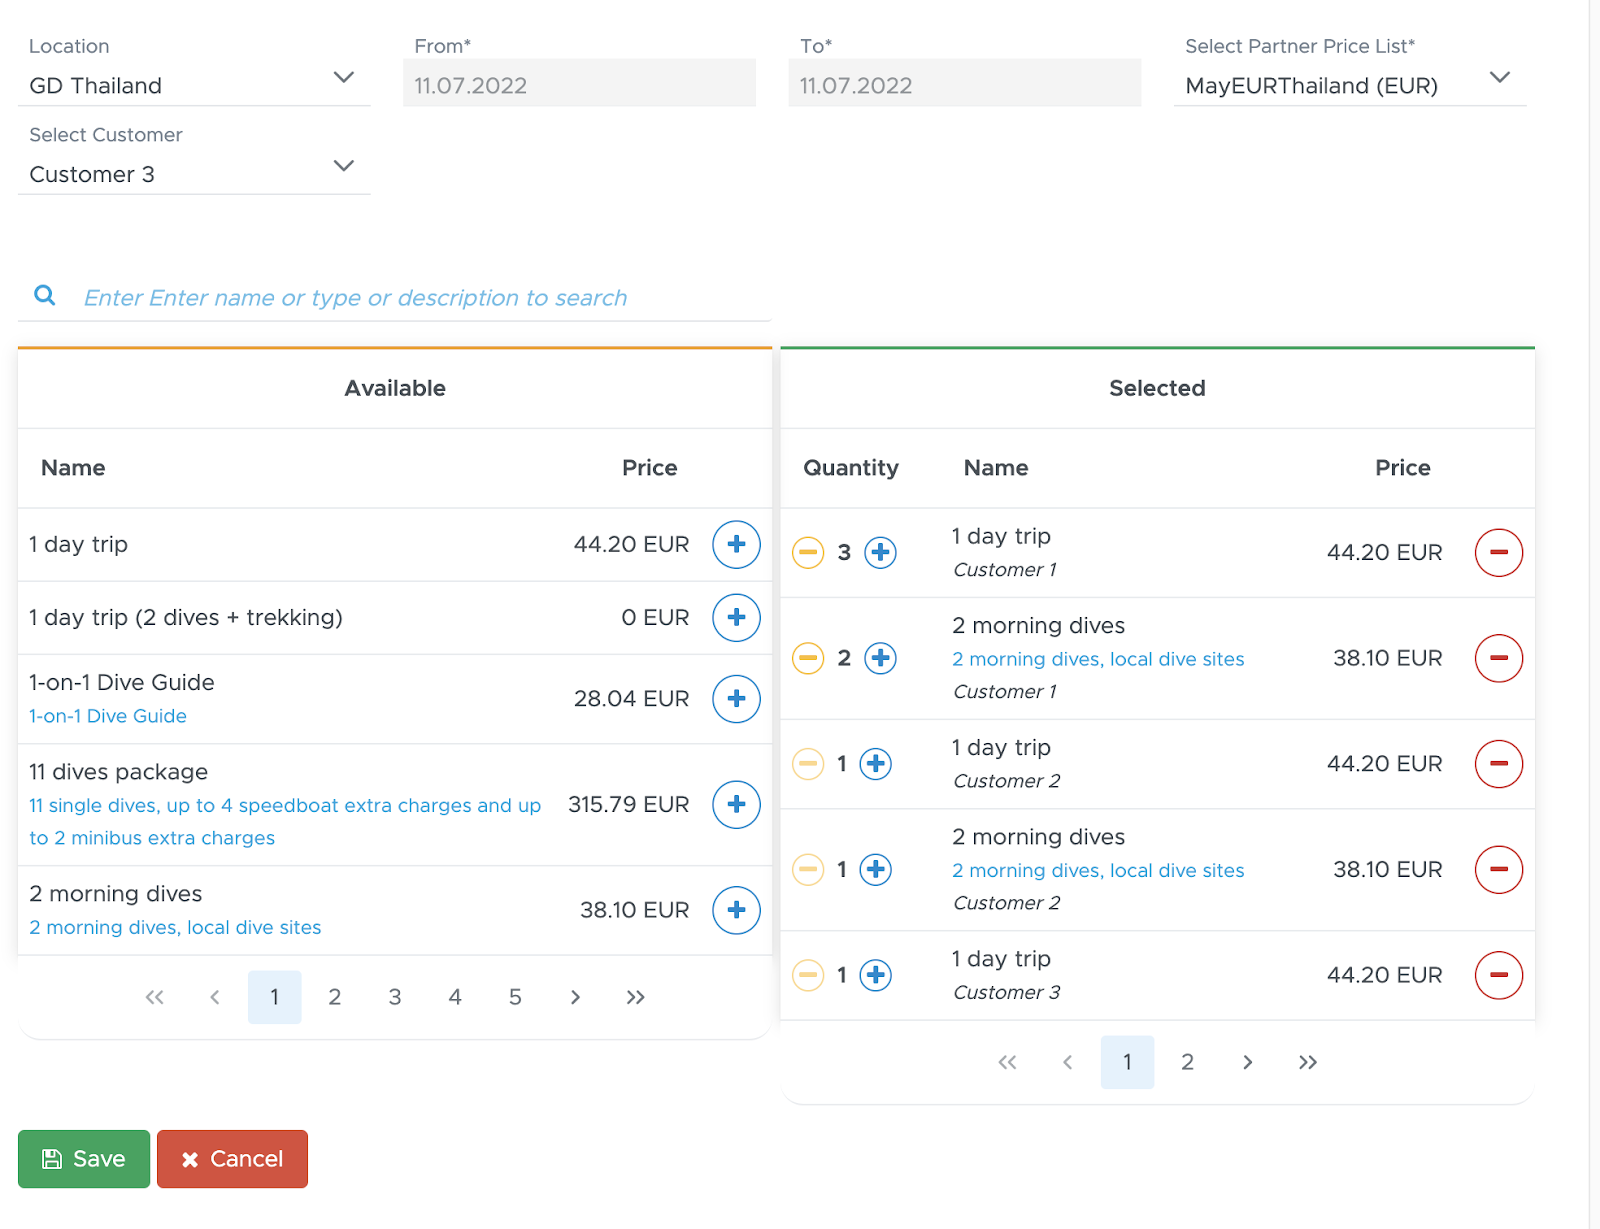
Select a different generic customer from the menu at the top and select items for them. Repeat for all the customers in the quote.
When you’ve added all the items that you need, scroll down and click on button Save. You will see the items in the quote.
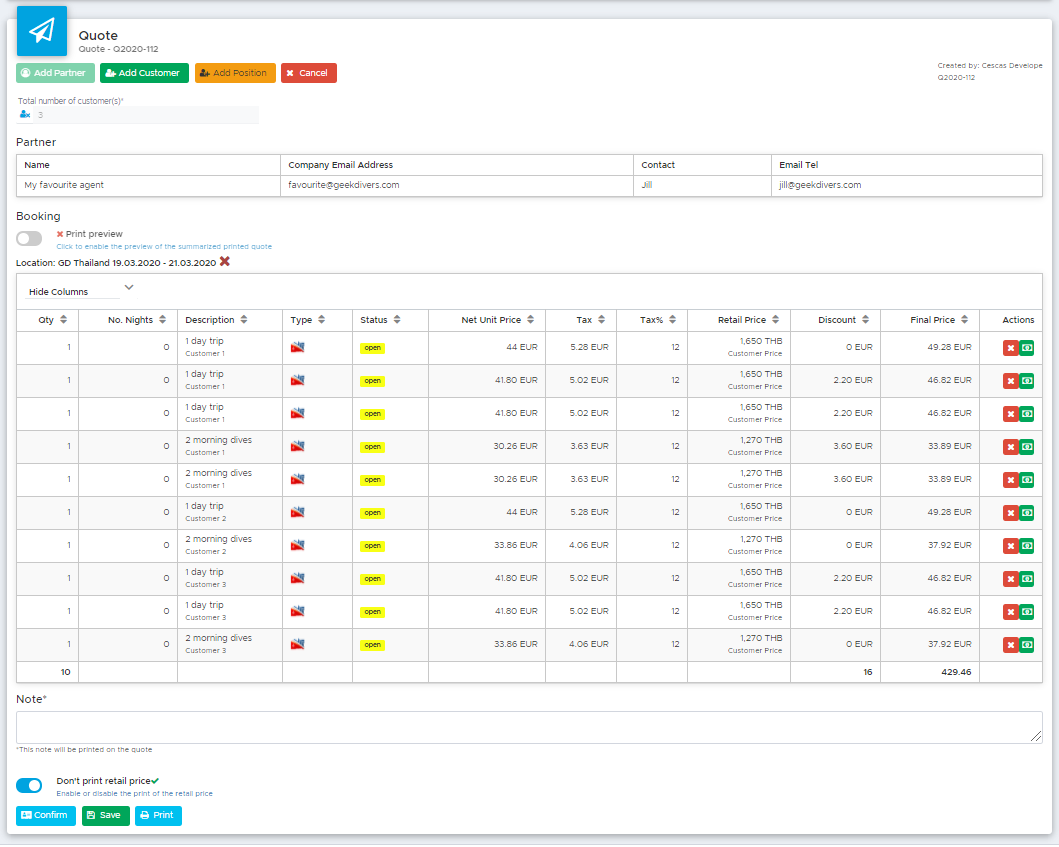
Each position in the quote will be assigned to the generic customer that you’ve selected and this will guarantee that the package discounts won’t be shared.
E.g. 1 day trip in my partner price list has a price of 44 EUR for 1 unit. The second and third time, the same trip is discounted. To guarantee that these discounts are not shared among the customers in the quote, I need to assign 2x 1 day trip to Customer 1 and 3x 1 day trip to Customer 2.
If you wish to add another location, click again on button Add Position and repeat the above steps selecting a different location. Please consider that within a partner quote you need to have the same currency. If you wish to add a location, you need to make sure that you’ve assigned a price list with the same currency to this partner.
If you’ve made a mistake you can click on button ‘X’ at the end of a quote position to remove it. If something is missing, click on button Add Position once again and select the same location to add more services to the quote.
Your partner discounts should already be defined in the partner price list that you’ve created and assigned to this partner. However, if you wish to apply an extra discount on the net price, you can use the green button at the end of every quote position.
Once your quote is complete you can click on button Print to generate a pdf to send to your partner. The quote will be automatically saved and you can find it in menu Open Quotes.
15.3 Modify a Quote
Click on menu Booking and Open Quotes to view the list of open or due quotes, both for your customers and partners.
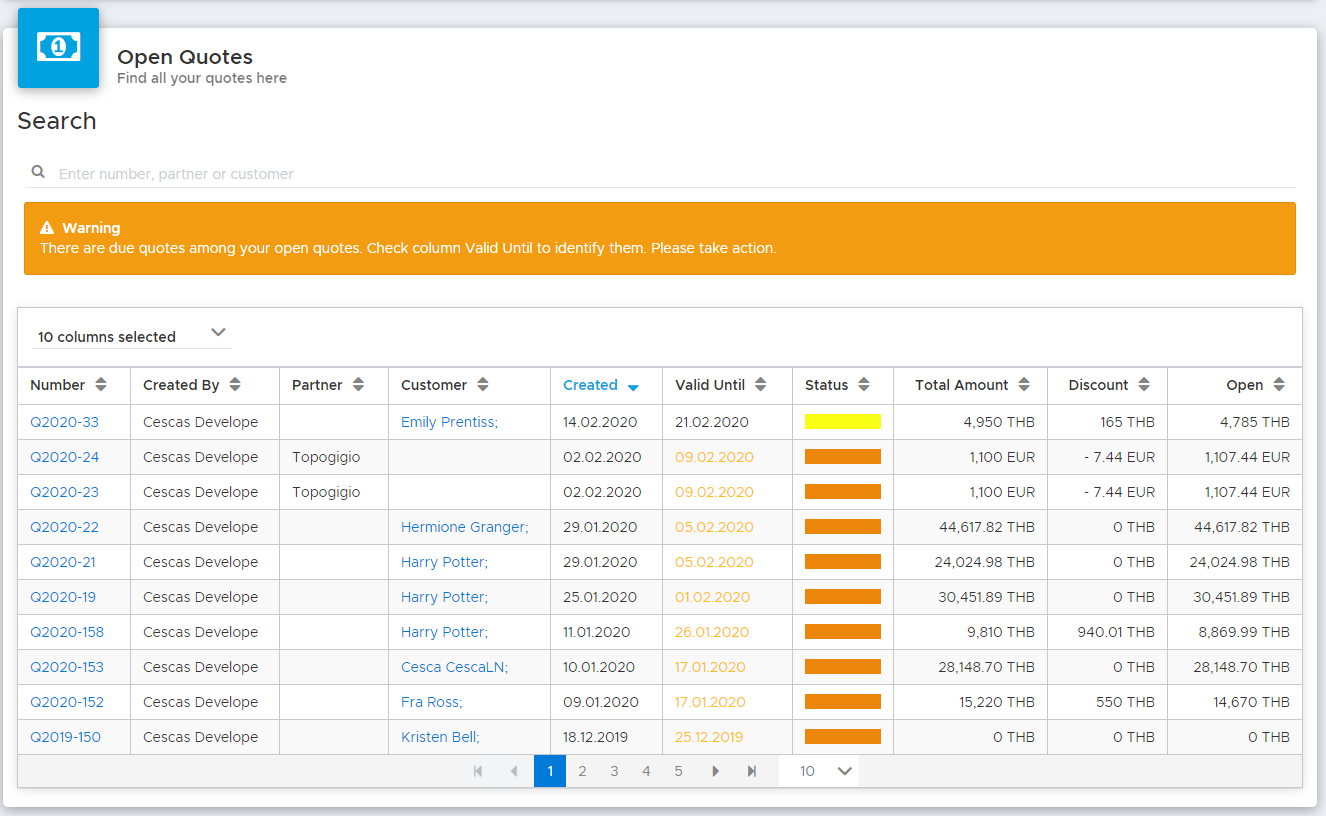
To find the quote that you wish to edit you can use the Search string at the top of the page and enter either the customer’s name or last name, the partner’s name or the quote number.
Alternatively you can click on a column name to sort its content.
Once you’ve identified the quote that you wish to modify, click on the quote number to open it and view its content.
In an Open or Due quote you can modify the following:
Remove a quote position by clicking on button “X” at the end of the position.
Add more positions for one of the quoted locations or add positions for another location by clicking on button Add Position.
Add a customer by clicking on button Add Customer.
Remove a customer by clicking on the trash bin icon.
Add or remove a manual discount by clicking on the green button at the end of every quote position.
Apply a predefined discount or remove it.
What you cannot modify in an Open or Due quote:
You can’t change the quantity of a position. You can click on the button Add Position and select the same item if you wish to increase the quantity or you can delete one or more items if you wish to decrease the quantity.
You can’t change the assigned partner. If the assigned partner is the wrong one, you can click on the button Cancel. The quote will be set to status Cancelled and you can view it in menu Booking - Completed Quotes. You can then proceed to create a new quote for the correct partner.
You can’t turn a customer quote into a partner quote or turn a partner quote into a customer quote. This is because once you’ve added positions to a quote, these reflect the content of a partner price list or a customer price list.
You can’t change the check-in or check-out date for a location that you’ve added to the quote. You need to click on the X icon next to the quote location and dates and click on button Add Position to enter the items again with the correct dates.
You can’t change the locations of a quote. You can either remove all the quote positions and then click on the X next to the location check-in and check-out dates or cancel the quote and create a new one.
You can’t add services for the same location in different periods of time. E.g. if you’ve already added an Open Water course in your location 1 from 1st Feb to 4th Feb, when you click on button Add Position to add more services in location 1, you can’t change the dates as they are already set to 1-4 Feb.
15.4 Confirm a Quote
When your customer or partner confirms a quote that you’ve sent them, you need to follow two slightly different procedures according to who the quote is assigned to. Every confirmed quote will be visible in the Activity Calendar by clicking on the blue and green icon at the top.
15.4.1 Confirm a Customer Quote
When you manually confirm an Open or Due quote you’re making the content of the quote available to be used as a voucher in one or more customer’s bills. Every Confirmed quote position in a quote in status Confirmed or In Progress will be considered in a customer’s bill when you click on button Apply Voucher, providing that the customer’s check-in date and the quote check-in date match (±5 days). Without this passage, you won’t be able to use vouchers in a customer’s bill.
To confirm a quote, go to menu Booking and Open Quotes. In this list identify the quote that your customer has confirmed. You can use the Search string to type the quote number or the customer’s name or last name.
Click on the quote number, scroll down and click on button Confirm. This will automatically set the quote to status Confirmed. Once the quote is confirmed, it can no longer be cancelled. You can however remove a quote position in status Confirmed. In case the quote is no longer needed, you can click on the Archive button. An archived quote can be found in the menu Completed Quotes. If you need to modify the content of a confirmed quote, create a new quote with the correct content and then archive the old confirmed quote.
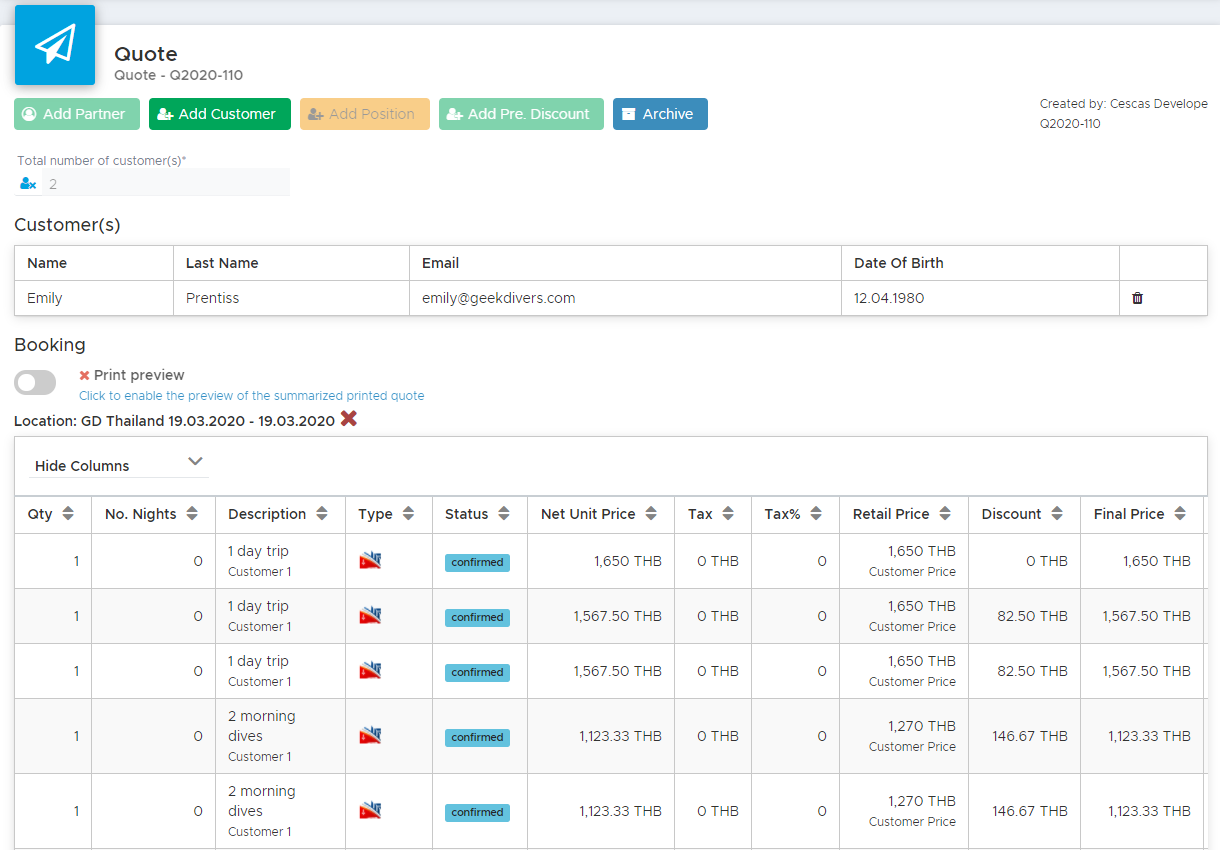
If you’ve received a deposit payment or a full payment from your customer, go to the customer’s profile and on tab Bill/Agents. In the Credits section click on button Add Payment to record the payment that you’ve received. Once the payment is recorded you can print it in pdf to send it to your customer as payment receipt.
15.4.2 Confirm a Partner Quote
Go to menu Booking and Open Quotes. In this list identify the quote that your partner has confirmed. You can use the Search string to type the quote number or the partner’s name.
Click on the quote number, scroll down and click on button Confirm.
At this point Geek Divers will search through your partner’s open invoices. If there is at least one matching the currency of your quote, you will see it at the top of the sidebar.
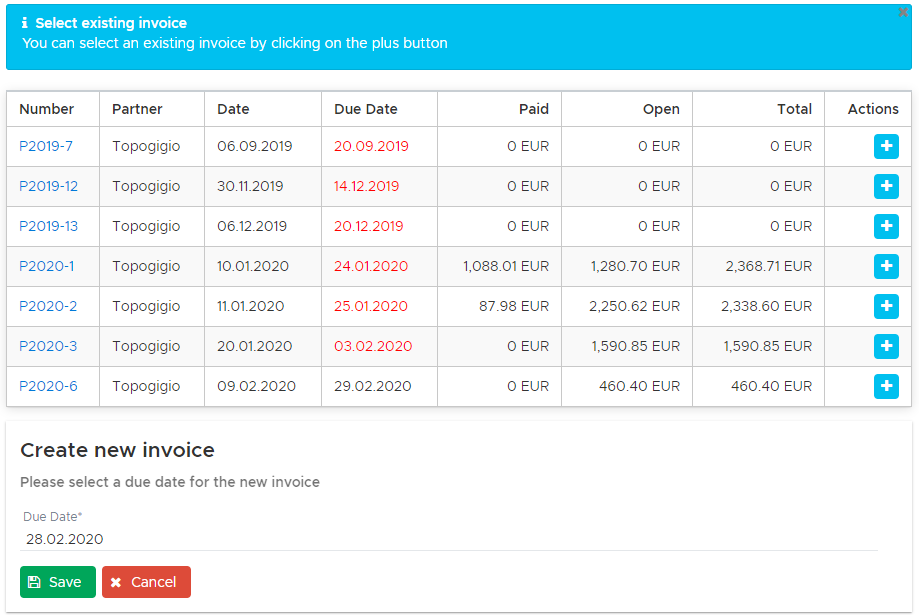
If you choose to add the content of the confirmed quote to an existing invoice, select the invoice of your choice by clicking on the plus button at the end of the row.
If there is no open invoice or if you wish to create a new one, you will be asked to enter a due date. The due date provided in the sidebar is 14 days from today. You can select the due date of your choice and click on Save.
Either way the sidebar will disappear and you will see the quote changing status to Confirmed.
Geek Divers will either create a new invoice with the due date that you’ve entered and copy the exact content of the quote into the invoice or add the content of the confirmed quote to an existing invoice of your choice.
To check your partner’s invoices go to menu Partners - Open Invoices.
👀 Important!
Partner invoices cannot be merged. When you confirm a partner quote and select an existing invoice or a new one, the content of the quote will be copied to the selected invoice and it cannot be moved to another invoice. You can however change the due date of an open invoice.
A Confirmed quote cannot be cancelled. You can however remove a quote position in status Confirmed. If the removed quote position was copied to an invoice that is still open, the corresponding invoice position will be removed as well. If the removed quote position was copied to an invoice that is now closed, no changes will be applied to the closed invoice. In case you need to modify the content of the quote or if the quote is no longer needed, you can click on button Archive. An archived quote can be found in menu Completed Quotes. If you need to modify the content of a confirmed quote, create a new quote with the correct content first and then archive the old confirmed quote.
When you confirm a partner quote, the content of the quote is copied into a partner invoice. When you archive a confirmed partner quote, Geek Divers will identify the quote positions that were copied in a partner invoice and if the invoice is still open, those invoice positions will be automatically marked as deleted (red strikethrough). If the partner invoice is already closed, no change is possible. In this case, if you wish to refund your partner for those confirmed quote positions that you are archiving or removing, you will need to do so manually. One possibility is to go to one of your partner’s open invoices and add a manual position with a negative amount matching the content of the archived quote.
15.5 Cancel a Quote
Only quotes in status Open or Due can be cancelled. Go to menu Booking - Open Quotes, identify the quote that you wish to cancel, click on the quote number and click on button Cancel. The cancelled quote will not disappear: it will be available in the menu Completed Quotes in status Cancelled. All the quote positions will show status Cancelled.
You might want to cancel a quote because:
It’s been in status Due for quite some time and you haven’t heard from the customer or partner.
You’ve generated a few quotes for your customer or partner and they’ve chosen one of them. You can safely cancel the others as they will not be confirmed.- The quote is in status Open or Due and your customer or partner have declined your offer.
The quote has a check-in date in the past.
Menu Open Quotes should be “clean” at all times: keep only the quotes that have a chance to be confirmed.
15.6 Archive a Quote
Only quotes in status Confirmed or In Progress can be archived. Go to menu Booking - Confirmed Quotes, identify the quote that you wish to archive, click on the quote number and click on button Archive. The archived quote will not disappear: it will be available in the menu Completed Quotes in status Archived. All the quote positions will maintain their status: Confirmed, Voucher or Applied.
You might want to archive a quote because:
In column Upcoming you see an X icon - this means that all the check-in dates in the quote are in the past (5 days in the past).
The customer or partner has requested a change in their confirmed quote and you’ve generated and confirmed a new quote. You can now safely archive the old confirmed quote.
Menu Confirmed Quotes should be “clean” at all times: keep only the quotes that are really going to be used as vouchers in your customers bills.
16. Accommodation
Starting from version 2.0 a new Accommodation module is available in Geek Divers.
With this module you can define your accommodation offer, both your own in your dive resort and the rooms or apartments that you can manage at local hospitality facilities (hotels, resorts, residences, bed & breakfast, homestays...etc). You can set up your meal plans and the variations in prices due to the seasons, the number of people in a room or the type of guests (e.g. children might get a special discount).
The Accommodation menu will be available to the admin logins for some time free of charge. After the trial period it will be switched off. If you wish to continue using it, please reach out to us.
If you don’t see menu Accommodation, please ask your administrator to add it to your user name.
Before you start using the accommodation module, you need to set it up.
If you intend to use the accommodation module for your business and if you offer both diving services and accommodation to your travel agents, before you set up your partner price lists, you need to set up the accommodation module.
Before you start the setup of this new module, please make sure that you have all the following information readily available:
The complete list of your rooms, their type (standard, superior, single, double...etc.), the maximum number of adults per room and the maximum number of people per room (e.g. max 2 adults, max 3 people: 2 adults + 1 child).
The list of your guest types if your room prices are per person. It’s important that you define different guest types if the room price per person changes according to the type of guest that reserves it.
All your room prices, per person or per room, single occupancy, prices per season and package prices.
Your meal plans, prices and package prices.
The dates of your seasons.
In version 2.0 the setup of dorm rooms is not available. However there might be workarounds. Please send us a message and we’ll suggest the best way to complete your setup.
16.1 Room Settings
Go to menu Accommodation and click on Room Settings.
On this page you will find 6 sections:
Guest types - e.g. Adult, Adult non-diver, Child 0-3yo, Child 3-12yo.
Room Area - e.g. Main Resort, Camping area.
Room Types - e.g. Standard Double, Superior Double, Budget Single.
Price Levels - e.g. High Season, Mid Season, Low Season.
Meal Plans - e.g. B\&B, HB, FB, All Inclusive.
Room Prices
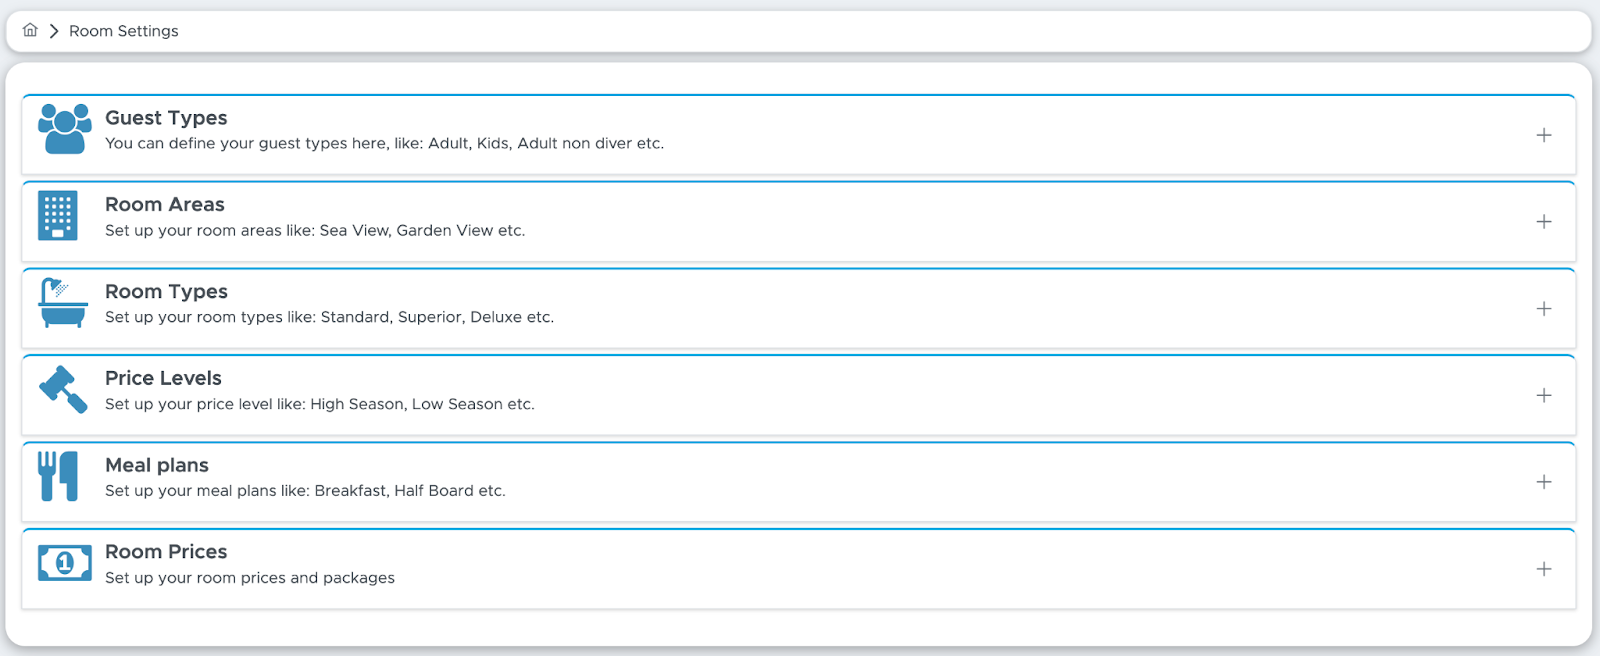
Below here you’ll find explanations and instructions on how to set them all up correctly.
16.1.1 Guest types
Guest types are defined as the type of guests who could rent one of your rooms. You should define different guest types if your prices depend on who rents your rooms and especially if your room prices are per person.
As an example, you might have a reduced price for a Diver as opposed to a regular Adult non-diver. Or you might offer a special price for children under 12 years old.
Write a name for your Guest Type, a Description and tick the checkbox Adult if appropriate.
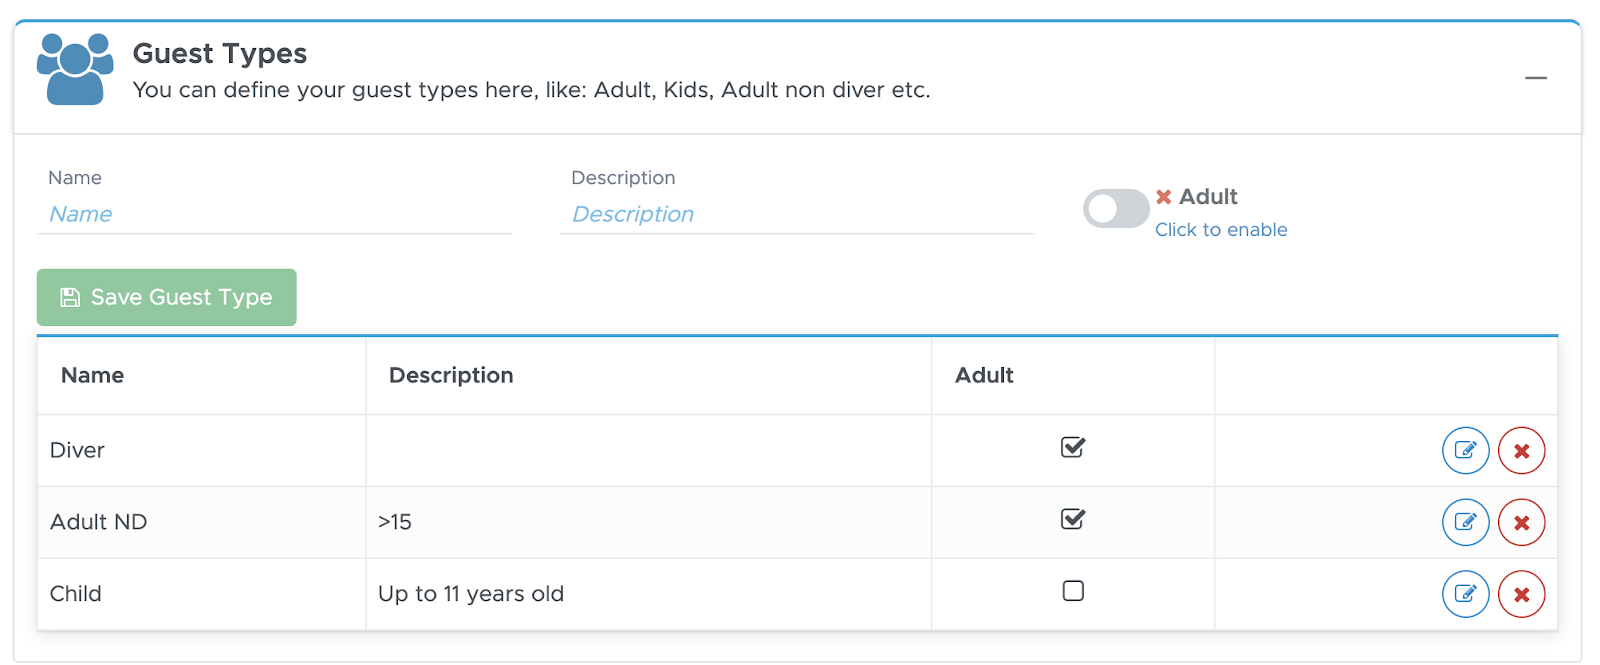
Click on the button Save Guest Type to see it in the table.
You can modify all the details by clicking on the blue button at the end of the guest row and then on button Update Guest Type.
Guest Type “Adult” is available by default. If your prices are per room, you don’t need to add any more guest types. You can however change the name of the only guest type.
You can delete a guest type by clicking on the red X icon at the end of the guest row. You cannot delete the default guest type.
16.1.2 Room Area
This section does not contain mandatory information. The room area describes where the room is in your resort or in a facility nearby. If you choose to use the room areas, you can assign an area to each of your rooms.
Examples of room areas could be: “Jungle”, “Pool”, “Beach” or “Hotel ABC”, “Apple Guesthouse”. The room area gives more information to the location of the room, but it does not change its price.
If you don’t need the room area, you can skip this paragraph.
To save a room area, simply write a name and click on button Save Room Area. You will see your room areas listed below.
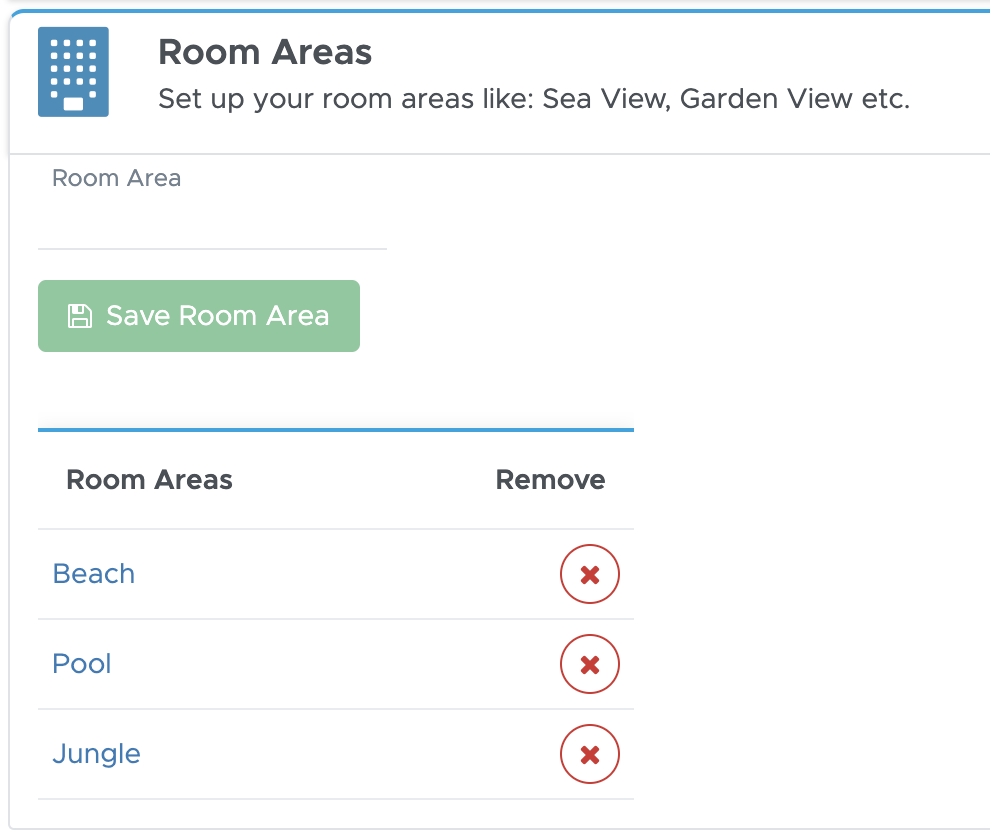
If you wish to modify the name of a room area, click on the name (in blue), make your changes and click on button Update Room Area.
You can delete a room area by clicking on the X icon next to it.
16.1.3 Room Types
In tab Room Types you can define your single, double, twin and triple room types.
Please remember that you need to define as many types as you need for your different prices. If for example a double room - pool view has a different price compared to a double room - garden view, you need to define both as room types.
To define a room type click on button Add Room Type, write a name, a description and at least one keyword.
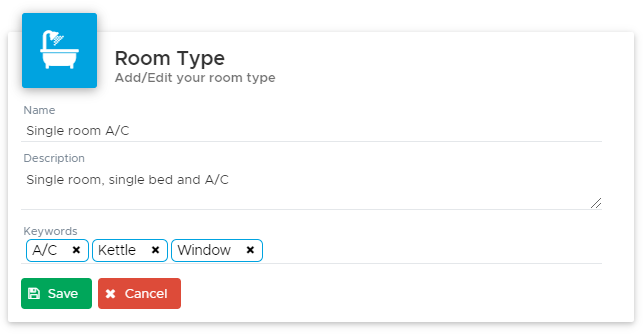
Once you’ve defined the room type details, click on button Save. You will see your room type in the list below.
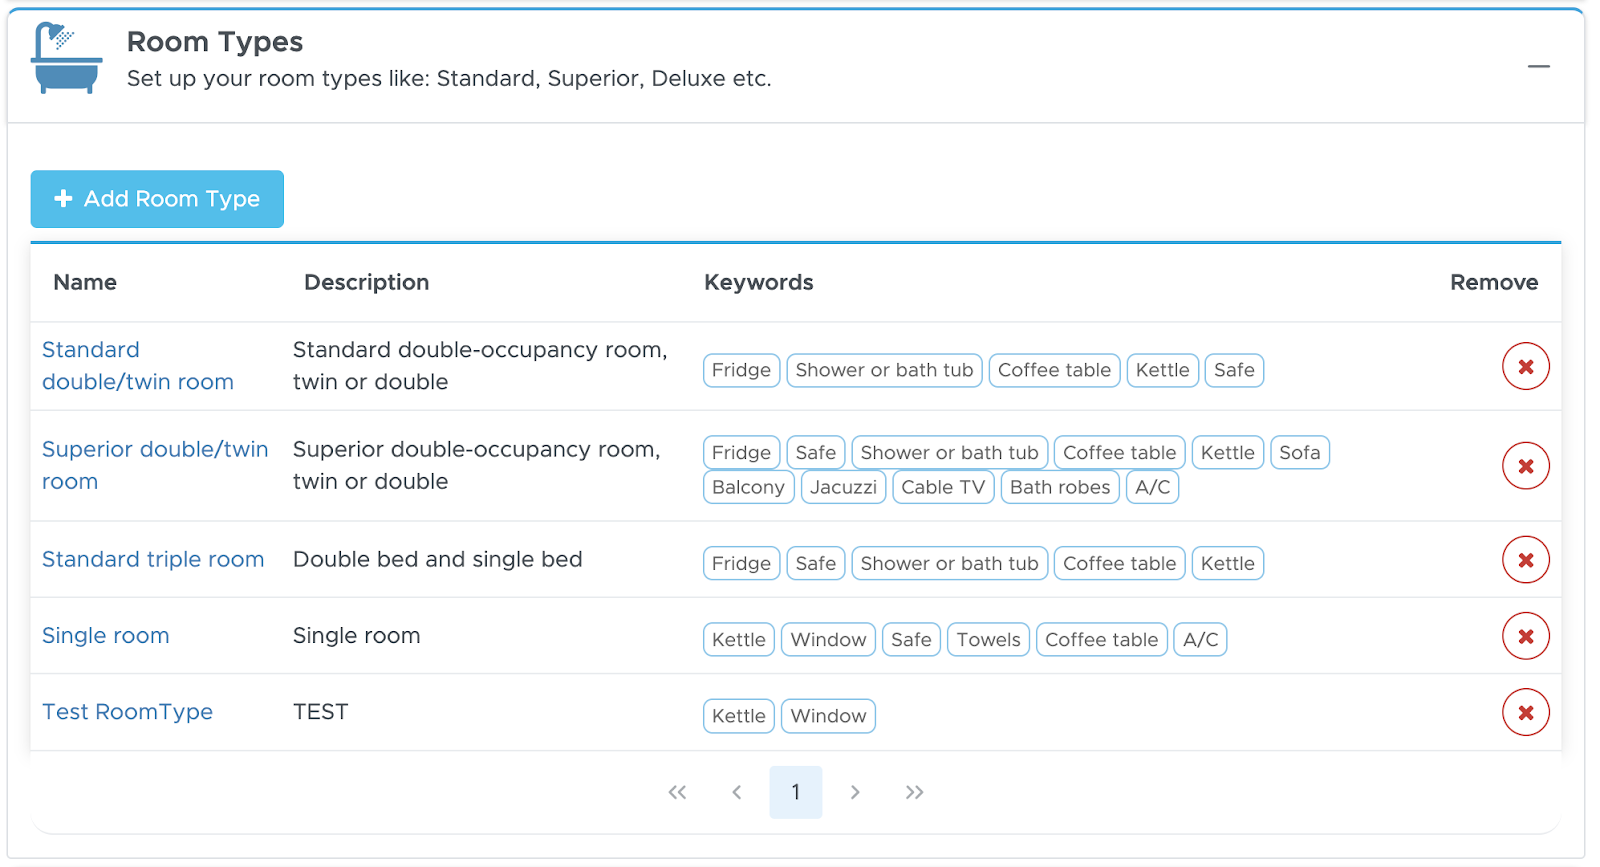
As soon as you add a room type, you will also see the following warning message:
This message is just a reminder for you to define the prices of the room type that you’ve just saved. During the initial setup you obviously haven’t defined your prices yet (we’ll get there soon!), but in the future, if you need to define new room types, this message will offer a good reminder to avoid selling a room for a price of 0.
Anytime you need to update your room type, you can click on the name (in blue), make your changes and click on button Save.
You can delete a room type only if none of your rooms are assigned to this type. To delete a room type click on the X icon next to it.
16.1.4 Price Levels
Price Levels in Geek Divers represent your seasons: High Season, Low Season...etc.
For each price level you can define a name, a description, a minimum number of nights and a background colour to use in your accommodation calendar.
Enter this information and click on button Save Price Level. You will see your saved price levels in the list below.
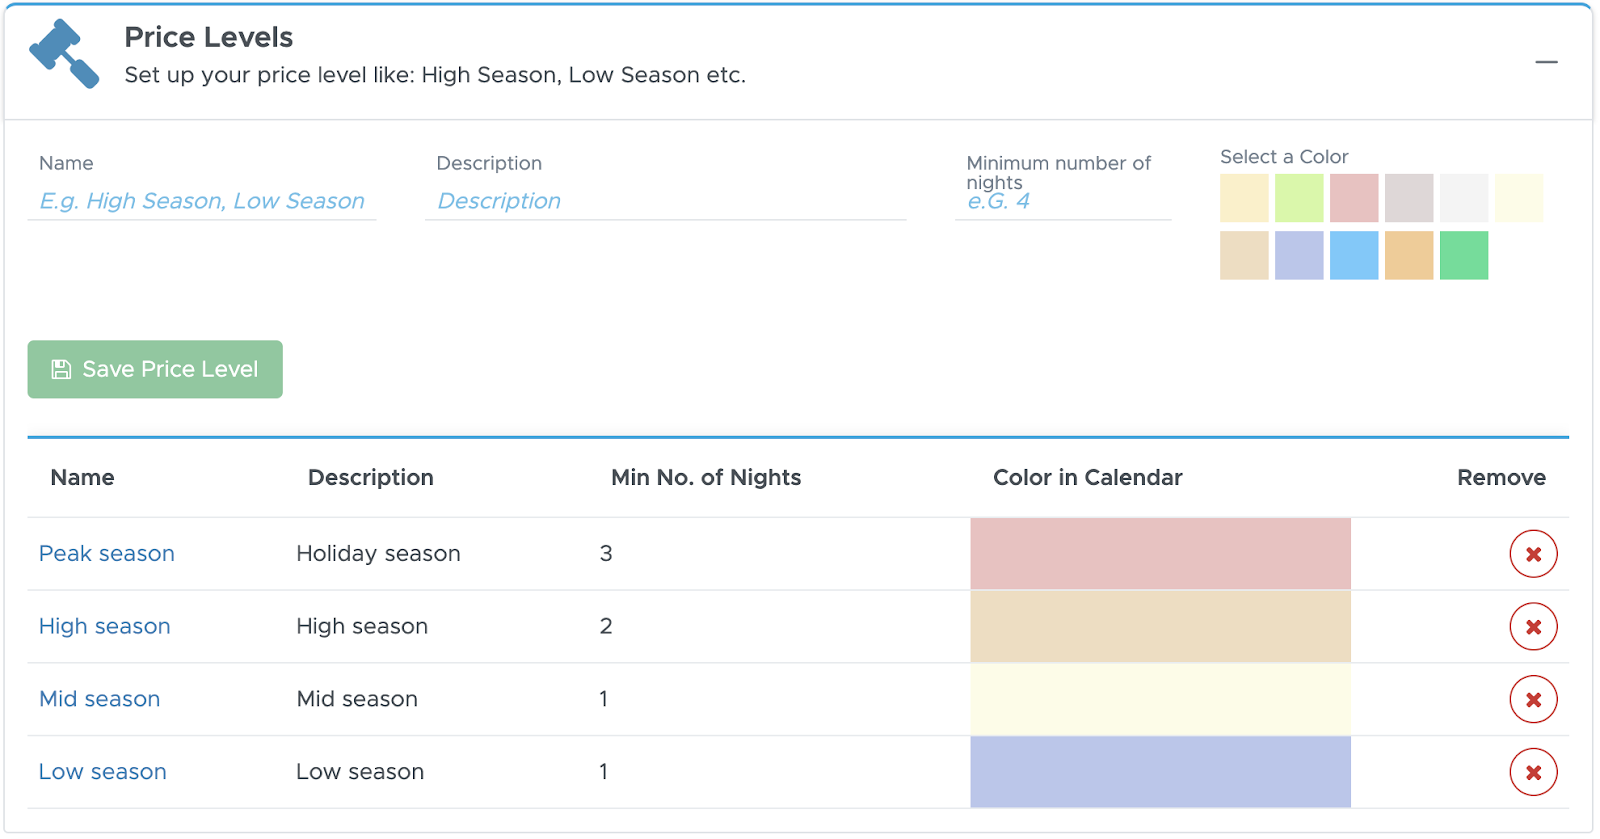
Any time you wish to update any information, you can click on the name of the price level (in blue), make your changes and click on button Update Price Level.
In the example above here, Peak Season has a minimum number of nights of 3 nights. A guest booking for 2 nights in Peak Season will be automatically charged for 3 nights.
16.1.5 Meal Plans
Here you can define your meal plans. The most frequently used meal plans are already available with “No Meals” as default. You can find the available meal plans at the bottom of this page. The chosen meal plan price will be added to the room rate.
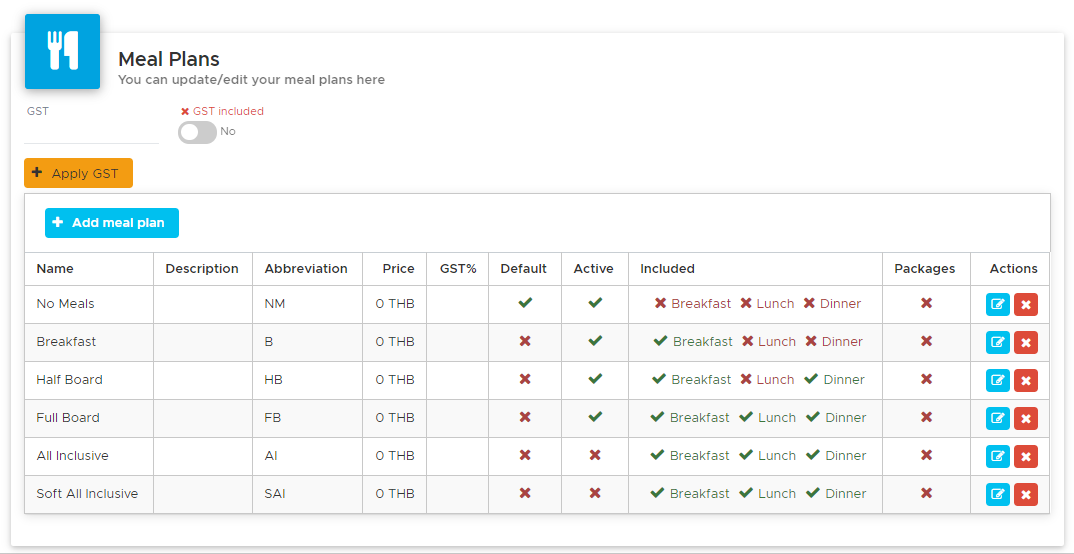
It is recommended to modify the available meal plans before creating new ones.
To modify a meal plan, click on the blue edit button.
Write a description, the price, add your VAT and choose if it’s included or not, tick the checkbox Active and click on button Update Meal Plan.
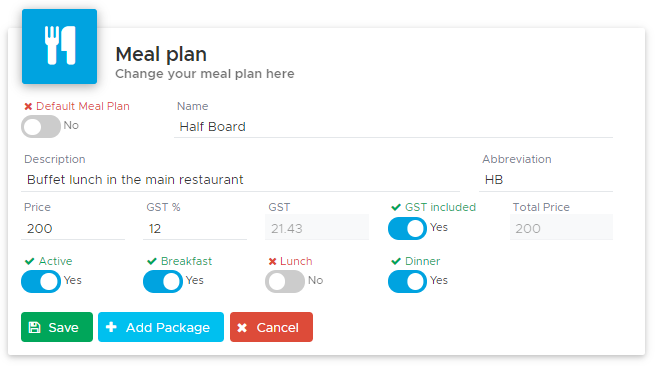
If “No Meals” is not your default meal plan, click on the blue edit button in your default meal plan and tick the checkbox. Click on button Update Meal Plan to view the changes in the table below.
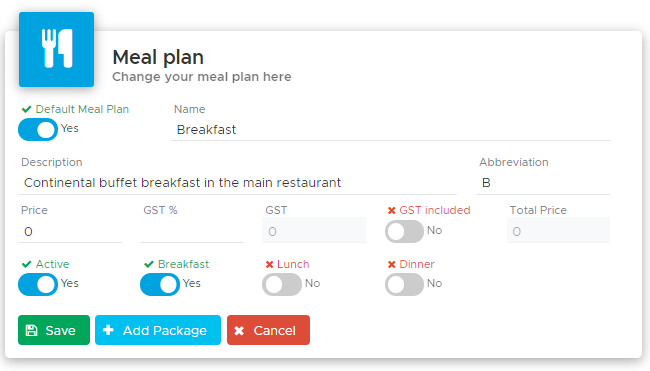
If you offer a meal plan that is cheaper than your default meal plan and you wish to discount the difference to your customers, you can enter a negative price that will be deducted from your room rate. In the screenshot below you can see an example in No Meals. In this case Breakfast is the default meal plan. If guests choose to book only the room without meals, they will receive a deduction of 50 THB per day per person.

Verify that only your meal plans have a tick in column Active. If you wish to delete the non active meal plans you can do so by clicking on the red button in column Actions. However there’s no need to delete a meal plan that is not active as the system will not use it.
If you wish to create more meal plans, click on button Add Meal Plan and fill out the fields in the sidebar.
If you offer package discounts for your meal plans, click on the edit button of the meal plan with packages nd on button Add Package.
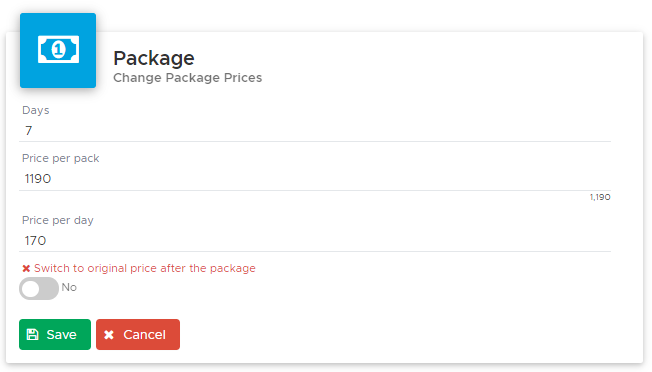
Define the number of days in the package and either the package price or the reduced price per day: Geek Divers will calculate the other price automatically. Click on the toggle button if you wish to charge your customer the original meal plan price after the number of days that you’ve defined.
In the example above, my meal plan will be reduced to 170 THB for room reservations starting from 7 days/nights. If my customer books a room for 8 nights the meal plan will still be charged 170 THB per day.
If I choose to switch to the original price after the number of days in the package, for a reservation of 8 nights, my customer will be charged 170 THB per day for 7 days and 200 THB (my original price) for day number 8.
Click on button Save to save your meal plan package and view it in the sidebar. The package meal plan will take the same definition of sales tax of your meal plan.
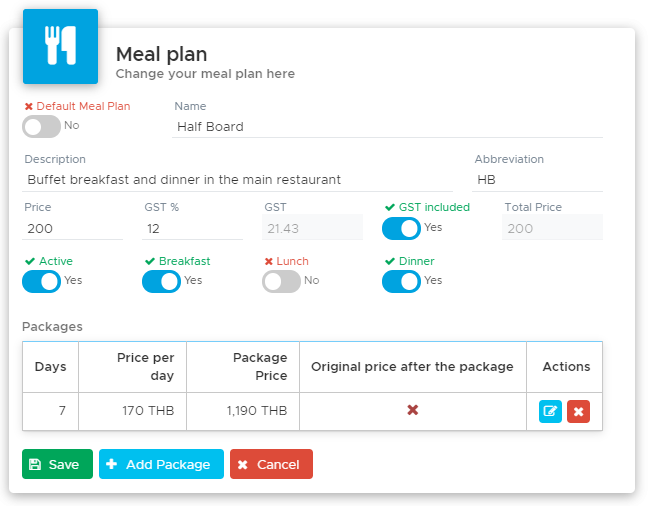
Click on button Add Package if you wish to add more packages or Save to save the meal plan and go back to the main page.
In the meal plan table you will see a tick in column “Package” if you’ve saved packages for a meal plan. You can save as many packages as you need for any of your active meal plans.
16.1.6 Room Prices
In tab Room Prices you can define the prices for your room types, guest types and price levels.
The first time that you click on this tab, if you haven’t defined guest types, room types and price levels, you won’t be able to set up your room prices.
If you’ve set up all the above, you will see your room types.
At the top of the page you can define your VAT in percentage and choose if this is included in the prices or if it should be calculated on top.

For each room type you need to choose if you wish to define prices per person or per room.

Please consider that if you manage rooms that belong to other hospitality facilities, you can define the correct room prices (per room or per person) for every room type. You can for example set up 2 room types with price per person and 2 room types with price per room. If you’re not sure of how to set up your accommodation offer, please feel free to contact the Geek Divers support.
16.1.6.1 Define Prices Per Person
If your price model is per room you can skip this chapter and go to the following one.
Click on “Define Prices Per Person” below your room type. You will see a matrix that includes your price levels and guest types.
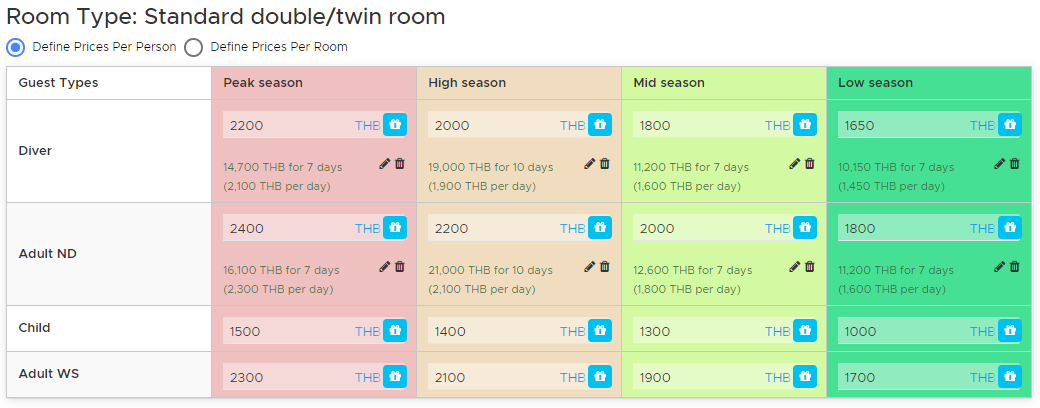
The matrix is composed of as many columns as the number of your price levels (your seasons) with the color of your choice and as many rows as the number of your guest types.
The currency that you see is your default currency defined in General Settings - Units. When you define your Partner Price Lists you can define a different currency for your partners. See chapter Partner Price Lists to find out how.
Fill out your prices according to the season and the guest type. If a guest type in a specific season can stay free of charge you can leave 0 in the respective field.
If you wish to add packages for one or more seasons, click on the blue button next to the price.
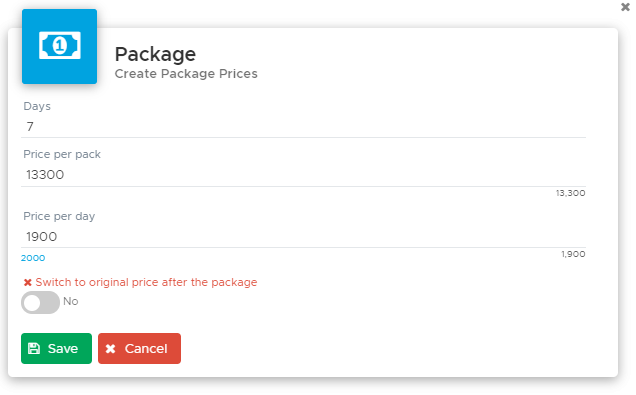
In the sidebar, fill out the number of days and either the price of the package or the discounted price per day in the package. Geek Divers will automatically calculate the other price.
Click on the toggle button if you wish to charge the regular price after the number of days in the package. In the example above a customer booking for at least 7 nights will receive a discounted price of 1900 THB per night. If the toggle button is activated, for a reservation of 8 nights my customer will be charged 1900 THB per night for the first 7 nights and 2000 THB for night number 8.
Click on button Save to save your package and see it in the matrix.
Repeat the steps above to set up all your package prices in your room prices matrix. You can set up as many package prices as you need.
In case of mistakes or if a package price is outdated, click on the pencil icon to edit it or on the trash bin icon to delete it. Once a package price is modified or deleted, the new definitions will be available in future reservations. Existing reservations won’t be updated.
Repeat the room prices definition and package prices definition for all your room types with price per person.
Before leaving this page don’t forget to click on the button Save at the bottom of the page.
16.1.6.2 Prices Per Room
If your price model is per person you can skip this chapter and refer to the previous one.
If you charge per room with/out a different price for single occupancy, click on “Define Prices Per Room”.
You will see a matrix with as many columns as your price levels with the colour of your choice and two rows: Room and Room Single Occupancy.
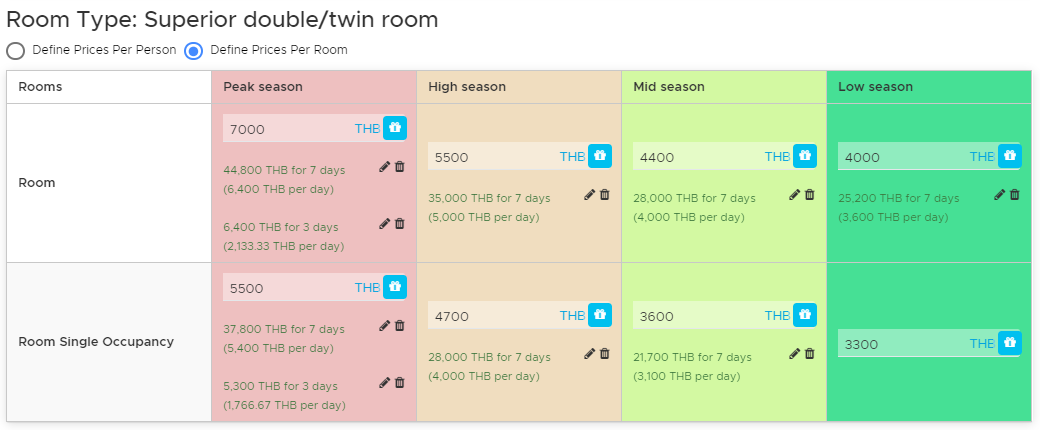
Enter your prices both for Room and Room Single Occupancy. If there’s no difference in price for single occupancy, please type the same price written in Room. If you leave 0 Geek Divers will consider the room as free of charge when it’s booked by 1 guest only.
If you wish to add package prices for one or more of your seasons click on the blue button next to the price.
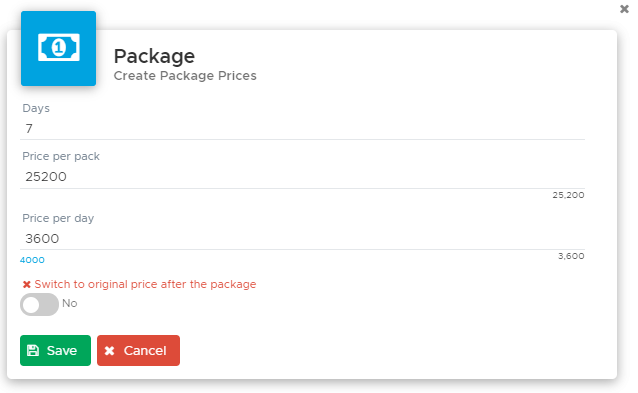
In the sidebar, fill out the number of days and either the price of the package or the discounted price per day in the package. Geek Divers will automatically calculate the other price.
Click on the toggle button if you wish to charge the regular price after the number of days in the package. In the example above a room booking for at least 7 nights will receive a discounted price of 3600 THB per night. If the toggle button is activated, for a reservation of 8 nights the room will be charged 3600 THB per night for the first 7 nights and 4000 THB for night number 8.
Click on button Save to save your package and see it in the matrix.
Repeat the steps above to set up all your package prices in your room prices matrix. You can set up as many package prices as you need.
In case of mistakes or if a package price is outdated, click on the pencil icon to edit it or on the trash bin icon to delete it. Once a package price is modified or deleted, the new definitions will be available in future reservations. Existing reservations won’t be updated.
Repeat the room prices definition and package prices definition for all your room types with price per room.
Before leaving this page don’t forget to click on button Save at the bottom of the page.
16.2 Calendar Settings
You can set up your accommodation calendar only if you’ve already defined your seasons in menu Accommodation - Room Settings - Price Levels. See chapter Price Levels to find out how.
Click on Accommodation and Calendar Settings in the menu on the left.
Now that you’ve defined your seasons (Price Levels in Geek Divers), you need to apply them to your accommodation calendar.
In this page you will see the price levels that you’ve defined and the calendar for the current year. Initially your calendar is set to gray: no reservation possible.
To assign a price level to your calendar, at the top of the page select a price level, define a start date and an end date. Click on Save Calendar Settings and you will see the selected time frame changing colour in the calendar below.
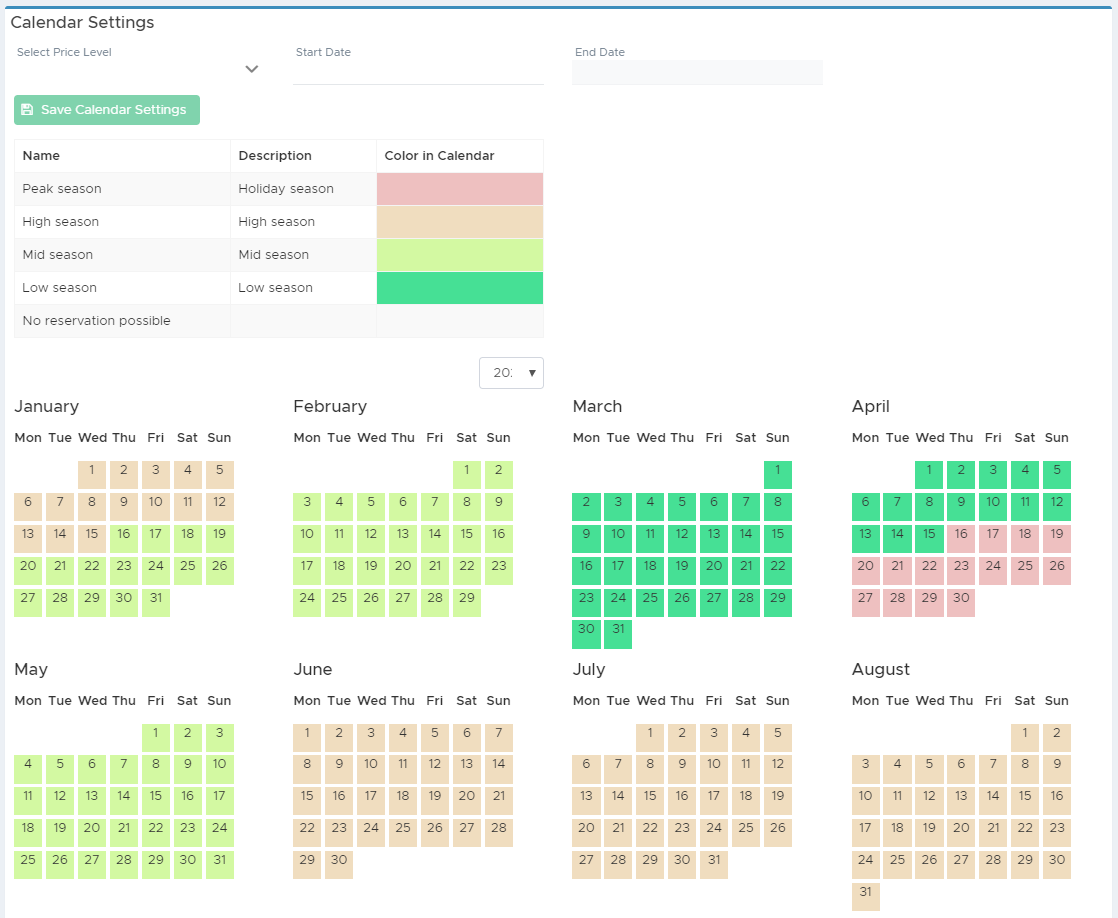
If you wish to set a period to “closed” (no room reservations possible) you can leave it in gray or choose “No reservation possible” from the drop-down menu at the top. If one or more days in your calendar are set to “No reservation possible”, in your Accommodation Calendar you won’t be able to make any reservation.
16.3 New Room
Now that you’ve completed your settings for the accommodation module, you can define all your rooms.
Click on Accommodation and New Room from the menu on the left.
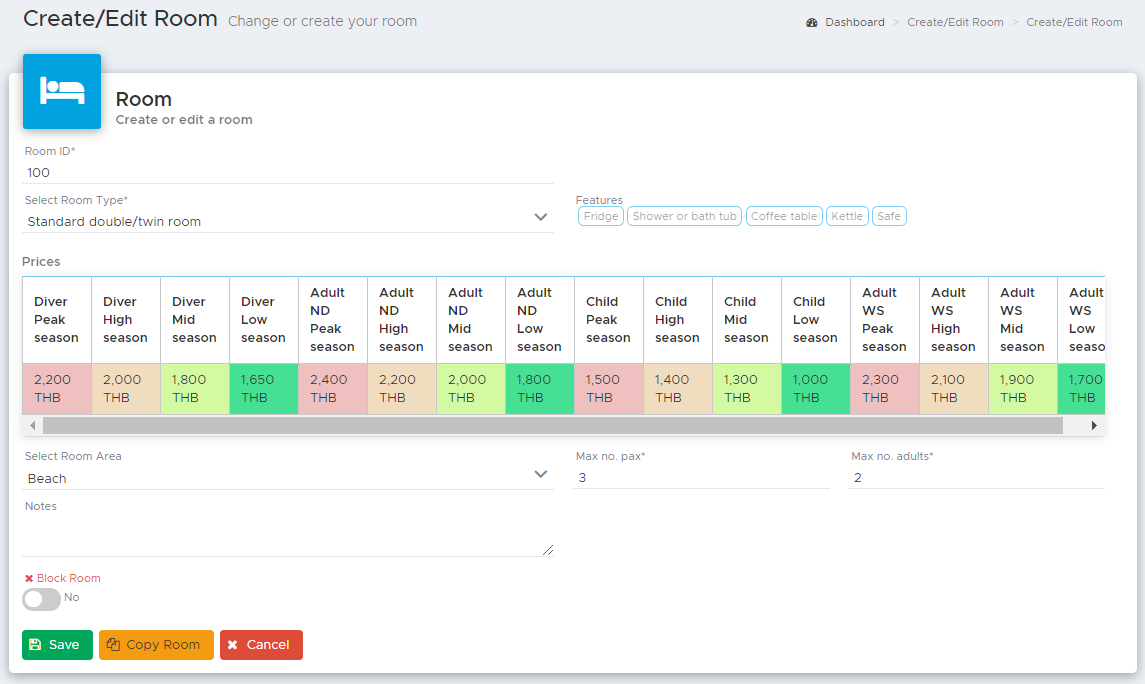
Fill out at least:
Room ID (room number or name)
Room Type
Max no. pax
Max no. adults
As soon as you select the room type you will see the room features that you’ve set up in Room Settings and the prices according to the price levels that you’ve set up in Room Prices.
Additionally you can set the Room Area (if you’ve set it up in Room Settings) and write some notes. Notes are only for internal use.
You can now click on button Save.
Your first room is now saved and you will find a button Copy at the bottom of this page. If you have other rooms with the same features you can click on this button to copy your selections to the next room. If you use button Copy you will only need to enter the new room ID.
If you wish to enter a different type of room you can click on menu New Room or you can change the type in the copied one.
Before saving the copied room, please make sure that all the data is correct.
16.4 Rooms
To view the complete list of your rooms you can click on the menu Accommodation and Rooms.
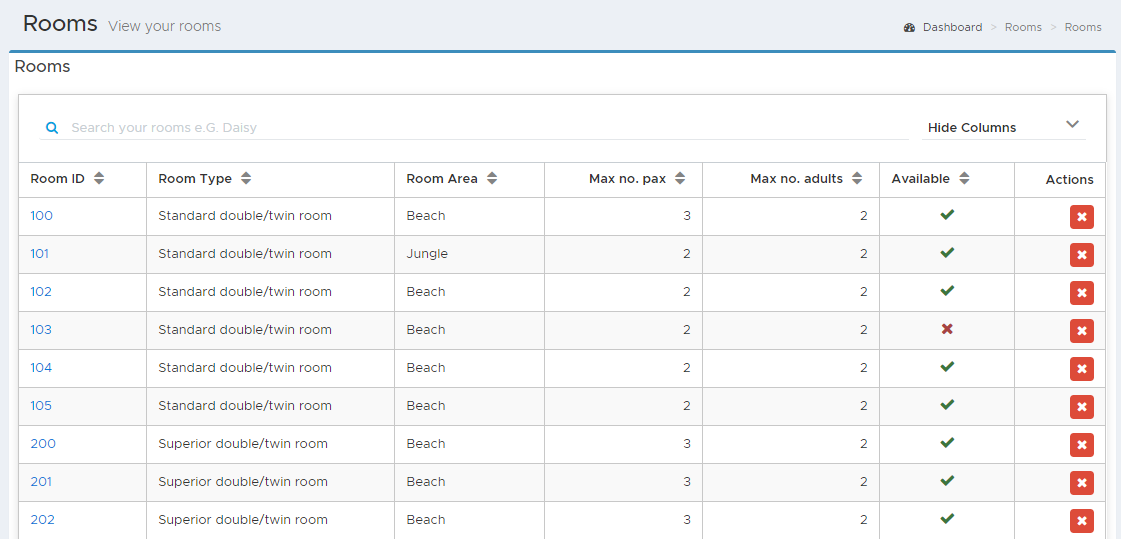
If you wish to see the room details you can click on the room ID.
If you wish to delete a room you can click on the X icon next to it. Please consider that if you delete a room, this will disappear from the Accommodation Calendar. If the room is reserved in the future you won’t be able to delete it. You will need to modify the existing reservation and assign them to another room.
If you wish to temporarily remove a room from your offer without setting an availability date in the future, click on the room ID (in blue) and use the toggle button at the bottom of the page: Block Room. Before you can click on button Save, you will need to enter something in the Notes. It is recommended to enter the reason why the room is not available. The room will not be visible in the accommodation calendar anymore.
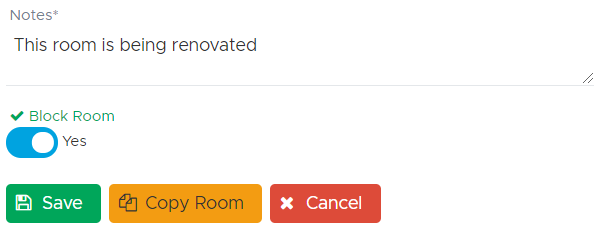
As for the room deletion, if there are existing reservations in the future, you won’t be able to mark this room as not available. See chapter Block a room to see how you can mark a room as unavailable in a specific period of time.
If you wish to unblock the room you need to go back to menu Rooms, click on the room ID and set the toggle Block Room to No.
16.5 Accommodation Calendar
Click on menu Accommodation and Accommodation Calendar.
If you’ve completed your room settings and calendar settings you will see the background color of your choice for the price levels.
If it’s the first time that you go to your accommodation calendar you won’t see any room reservation. However, if you’ve created your rooms in menu New Room, you will see the complete list of them on the left.
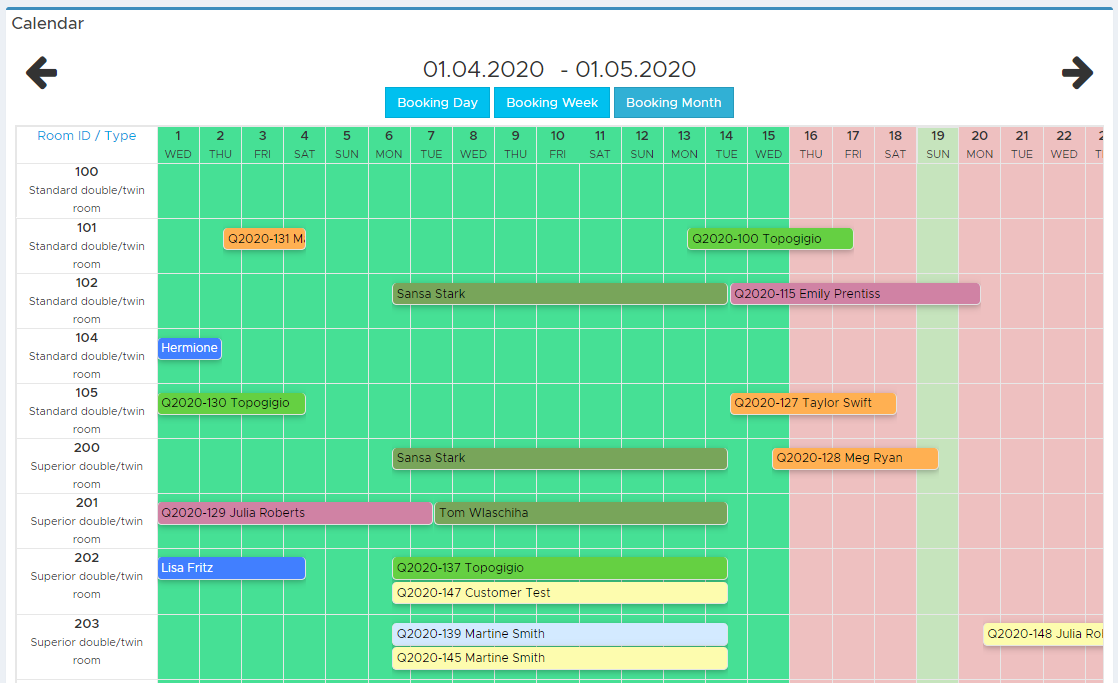
The day displayed in green in your calendar is today. You can choose to display your calendar in different views. Click on the blue buttons at the top to browse through the available views: Booking Day, Booking Week, Booking Month.
16.5.1 Make a room reservation
You can make a room reservation and add it to a quote (for both partners and customers) or to a customer bill, skipping the quote step if the customer is already on site.
Click on the calendar on a room and day corresponding to the desired check-in date. You will see a sidebar containing more information.
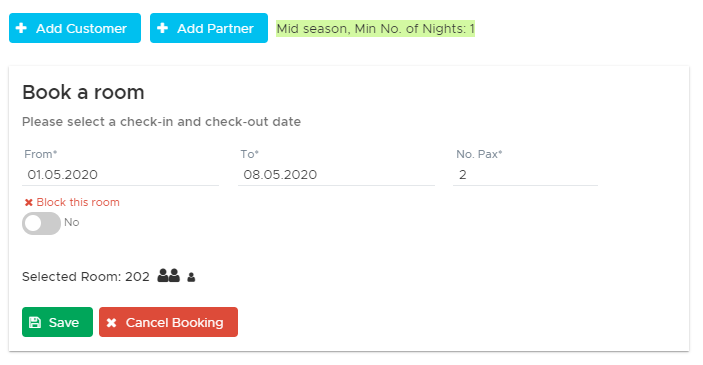
The check-in date is already written and it’s taken from your click on the calendar. Enter a check-out date and the number of guests. If the room is set up with a price per person, you will see your guest types. If the room is set up with a price per room, you will be asked to enter the number of persons.
Your default meal plan is pre-selected and you can change it, providing that you’ve set up more than one.
As long as no customer or partner is assigned to this room reservation, you won’t see any prices.
You can click on buttons Add Customer or Add Partner to assign this room reservation to a customer or to a partner.
16.5.1.1 Room reservation for one or more customers
If the room reservation is for a customer, click on button Add Customer. If the customer is already in the system, enter the first few letters of their name and last name to view the suggested matches. The system will show you the first 10 matching results. Alternatively, enter the customer’s email address and move to the next field with the TAB key.

Click on the correct customer (in green) among the suggested ones.
If the customer is not yet in the system, you will need to type the customer’s name, last name, date of birth and email address to save it.
Click on OK to confirm the customer or enter more customers above and click on OK when you see the correct list of customers.
👀 Important!
Please consider that you can fill out just the 4 mandatory fields in case of a new customer. If and when the customer chooses to confirm the room reservation, you can send them the online registration form and thanks to the customer merge feature, their profile will be updated in Geek Divers, providing that they enter the same name, last name, date of birth and email address.
Now the customer is assigned to the room reservation and you will see the prices in the table at the bottom of the sidebar.
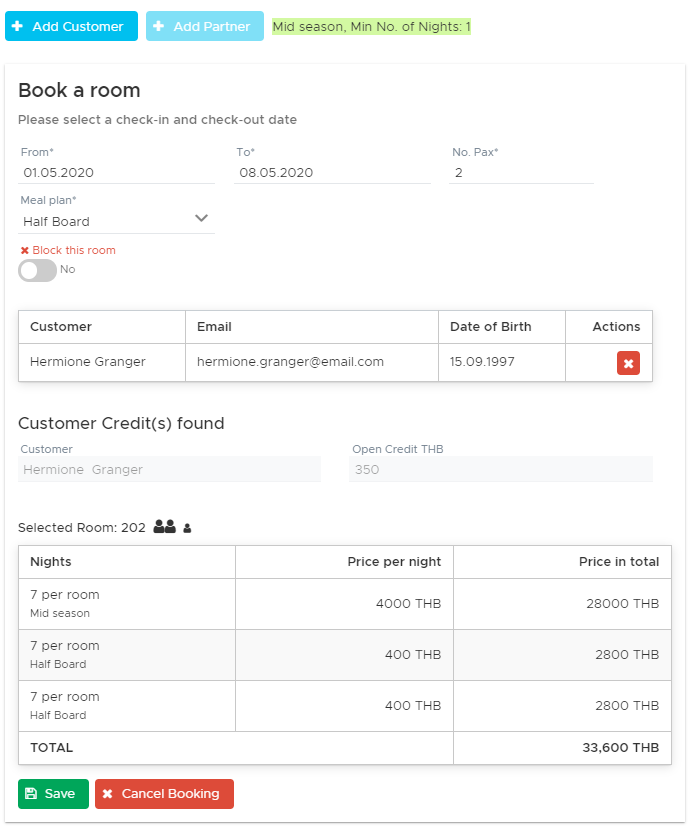
If you’ve set up package prices for rooms and meal plans, these will be automatically shown in the table. Additionally, if you’re making a reservation for a number of nights that is lower than the minimum stay for that season, the table will show you the charges for at least the minimum number of nights according to your setup in Room Settings. If you wish to modify the prices and add a discount, you can do so within the quote or the bill.
If the default meal plan needs to be changed, please do so.
If you realize that there’s a mistake you can click on button Cancel Booking and nothing will be saved in the Accommodation Calendar. If everything looks fine, click on the Save button. You now have the choice of adding the room reservation to a quote or to a bill.
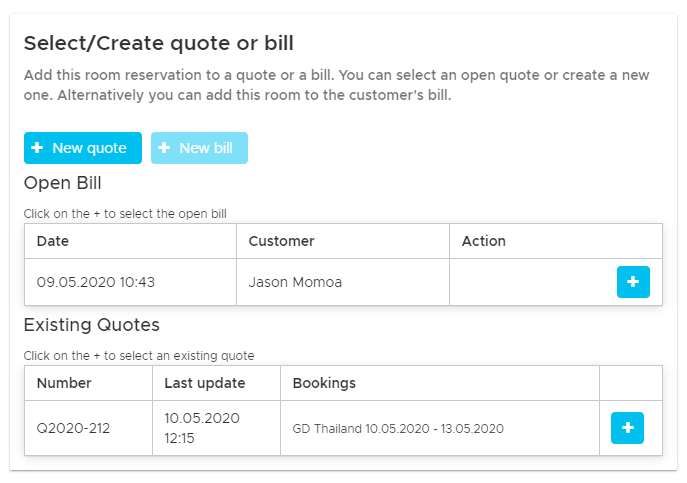
If you wish to add the room reservation to a quote, you can choose to create a new quote or select an existing one. If the customer has existing open quotes for the same location and same dates, you will see them in the sidebar. You can select one of the existing quotes to update it with the room reservation. If you wish to create a new quote, click on button New quote.
The sidebar will show you the content of the quote, including the room reservation and meal plan.
Alternatively, if the customer is already standing in front of you or they will come shortly, you can choose to add the room reservation to their bill. If the customer already has an open bill for this location, you will see it in the sidebar. If you click on the blue button in the existing bill the room reservation will be added there. If no bill is shown in the sidebar and you choose to click on button New bill, a new bill will be created and assigned to all the customers selected and the room reservation will be added to the bill positions section.
The sidebar will disappear and you will see a confirmation message that the bill was successfully updated.
16.5.1.2 Room reservation for a partner
If the room reservation is for a partner, click on the calendar on a room and date to view the reservation sidebar. The check-in date will be preselected according to your click on the calendar. Set a check-out date and type the number of guest types (if the room has a price per person) or the total number of guests (if the room has a price per room). Modify the default meal plan, if appropriate.
Click on button Add Partner to select one of your partners. In the pop-up search for the partner’s name and click on button Select next to the partner’s name.
If you’ve entered any contacts in your partner’s profile, select the correct one.
At this point, if you’ve assigned at least one partner price list to this partner, you will see the room prices in the table in the sidebar.
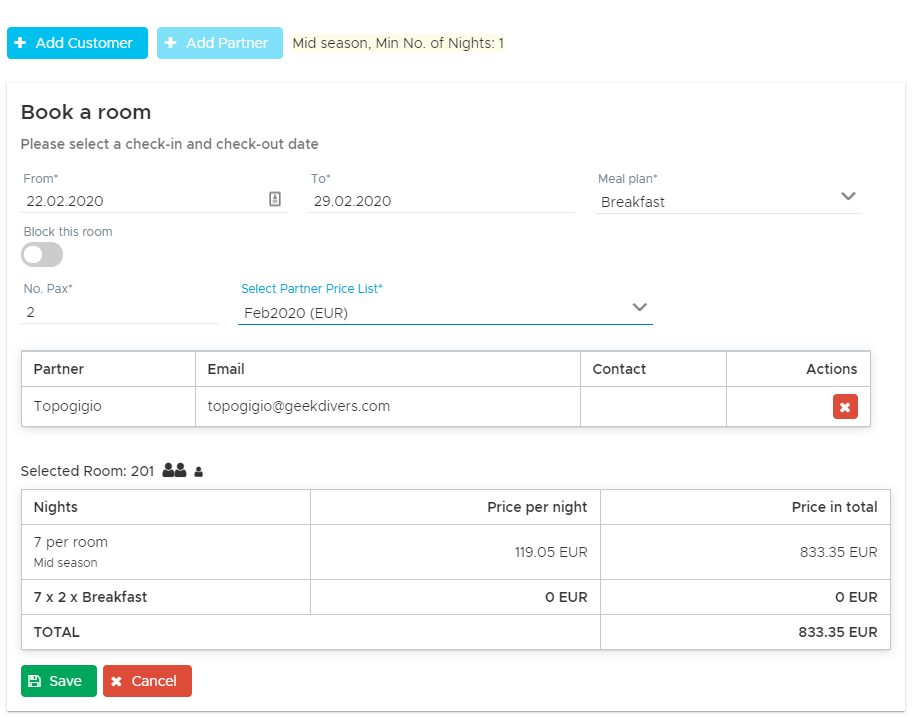
If you’ve assigned more than one price list to the partner, you can choose the price list that you wish to use in the field “Select Partner Price List”.
If you’ve set up package prices for rooms and meal plans, these will be automatically shown in the table. Additionally, if you’re making a reservation for a number of nights that is lower than the minimum stay for that season, the table will show you the charges for at least the minimum number of nights according to your setup in Room Settings. If you wish to modify the prices and add a discount, you can do so within the quote.
Before you click on the button Save, please make sure that dates, meal plan, no. Pax or no. of Guest Types and price list are correct.
In the next step, similarly to the room reservation for a customer, the sidebar will ask you if you wish to add the room reservation to an existing quote (if there’s any partner quote still open and matching the same dates, location and partner) or if you wish to create a new one. Button New Bill is disabled because a partner cannot have a bill.
Select an existing quote or click on button New Quote to add the room reservation to a partner quote.
The sidebar will show you the content of the quote, including the room reservation and meal plan.
16.5.1.3 Block a room
In the Accommodation Calendar you can temporarily block a room without assigning it to a customer or a partner. You can choose to block a room for maintenance or because you need to use it for a staff member or for any other reason.
Click on the calendar on the room that you wish to block and on the date the block should start.
The date in From is set to the date you clicked on in the calendar. Set the To date and click on the toggle “Block this room”. To block a room you need to provide some notes in the Notes text field below. This is because any of your colleagues checking the Accommodation Calendar needs to know why this room is blocked.
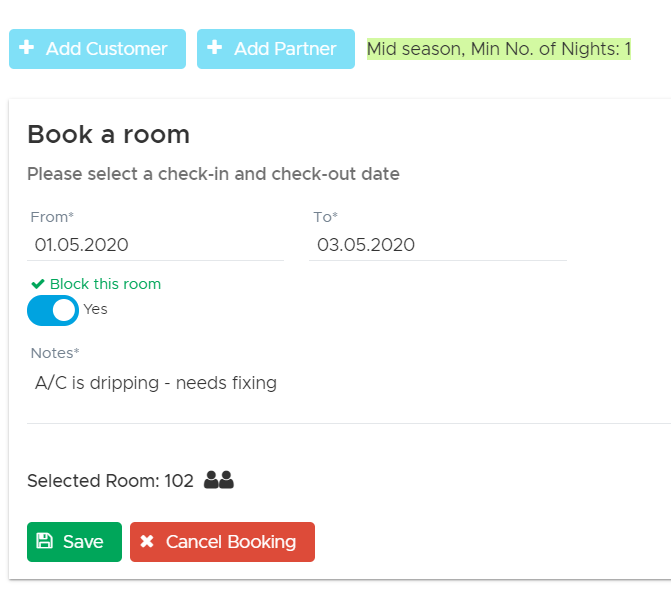
Click on the button Save to confirm.
16.5.2 Color-coded room reservations
In the accommodation calendar you will see room reservations in different colors. Most of the room reservation colors match the colors of quotes.
Yellow - the room is in an Open quote.
Orange - the room is in an open quote in status Due.
Light-blue - the room is in a Confirmed customer quote.
Pink - the room is in a Confirmed customer quote and the customer has a recorded credit on their profile.
Blue - the room is in an open customer’s bill and there are no recorded payments.
Dark green - the room is in an open customer’s bill with a recorded payment.
Bright green - the room is in a partner invoice or in a customer’s bill that is fully paid.
Purple - the room is temporarily blocked.
Gray - the room is currently selected by a user who’s making a reservation.
You can click on any room reservation to open the sidebar and view the content of the quote or the link to the bill.
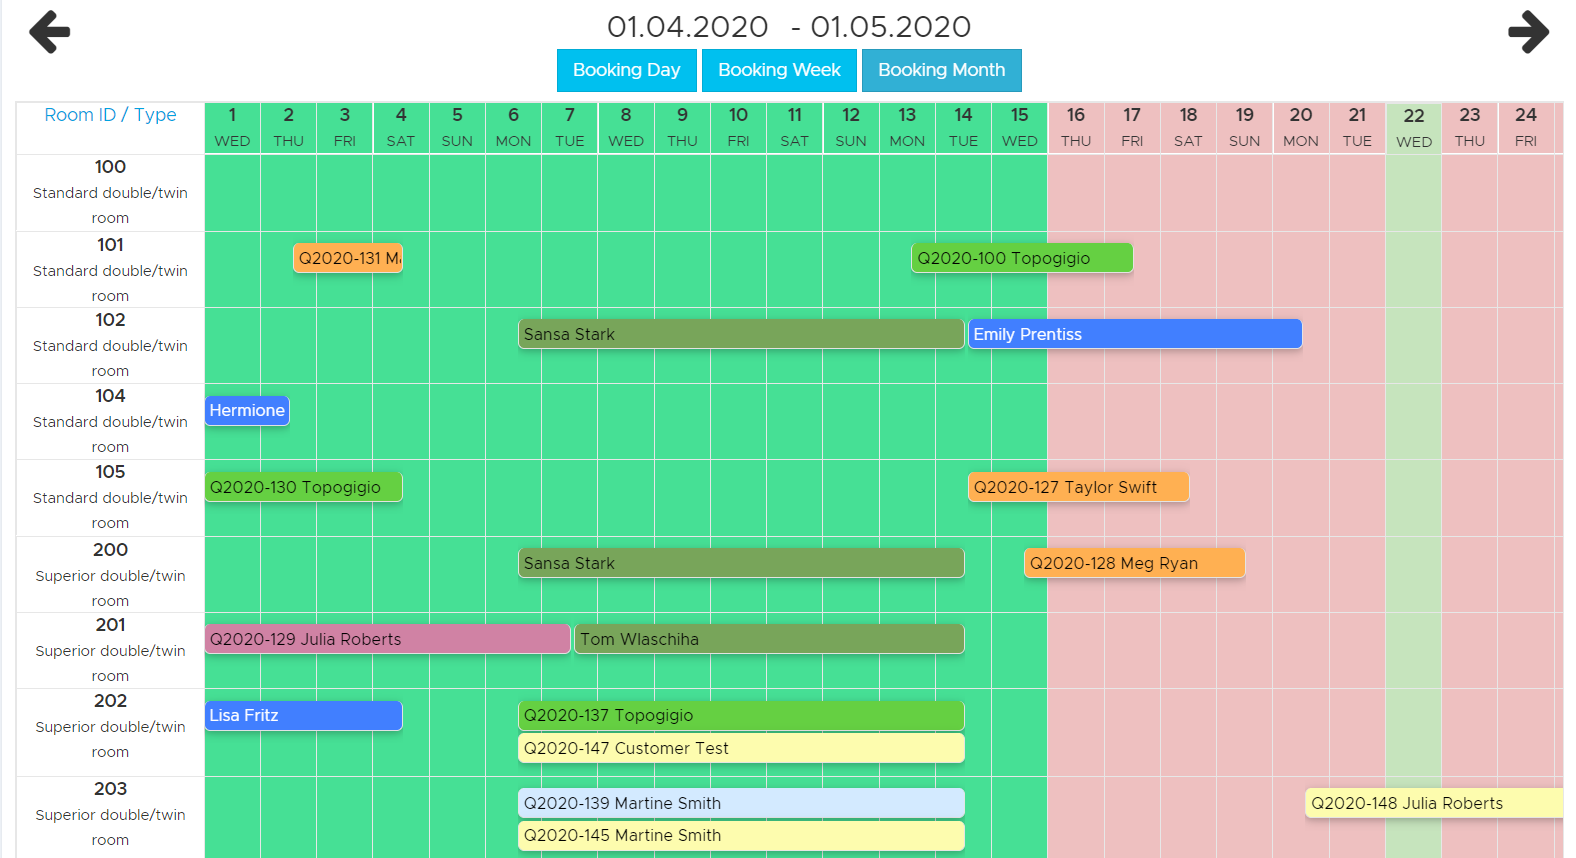
The Accommodation Calendar will allow you to overbook your rooms. Please check your reservations before confirming a quote.
16.5.3 Add position to a quote in the Accommodation Calendar
Whether you created or updated a quote for a customer or a partner to include a room reservation, in the sidebar you can click on the button Add Position to add your diving services.
If you’ve already closed the sidebar, you can click on a room reservation to open it again.
If the quote is not yet confirmed, you can still add your services. To do so, click on the button Add Position.
The sidebar will ask you to select a location (or your only location will be preselected) and show you either your default price list if you’re adding services to a customer quote or your partner price list if you’re adding services to a partner quote. In case of a partner quote, you might need to select the price list of your choice if you’ve assigned more than one to your partner. You can only select partner price lists with the same currency of the quote that you’re modifying.
Update the quantity and click on button Select next to the item of your choice to add it to the temporary cart on the right-hand side.
When you’re satisfied with your selection, click on button Save to add the selected services to the quote.
In case of mistakes you can click on the X button at the end of a quote position to delete that position from the quote.
Click out of the sidebar to go back to the Accommodation Calendar.
17. (NEW) Messages
Starting from version 2.2, coming with the online booking, you will find a new menu entry called Messages.
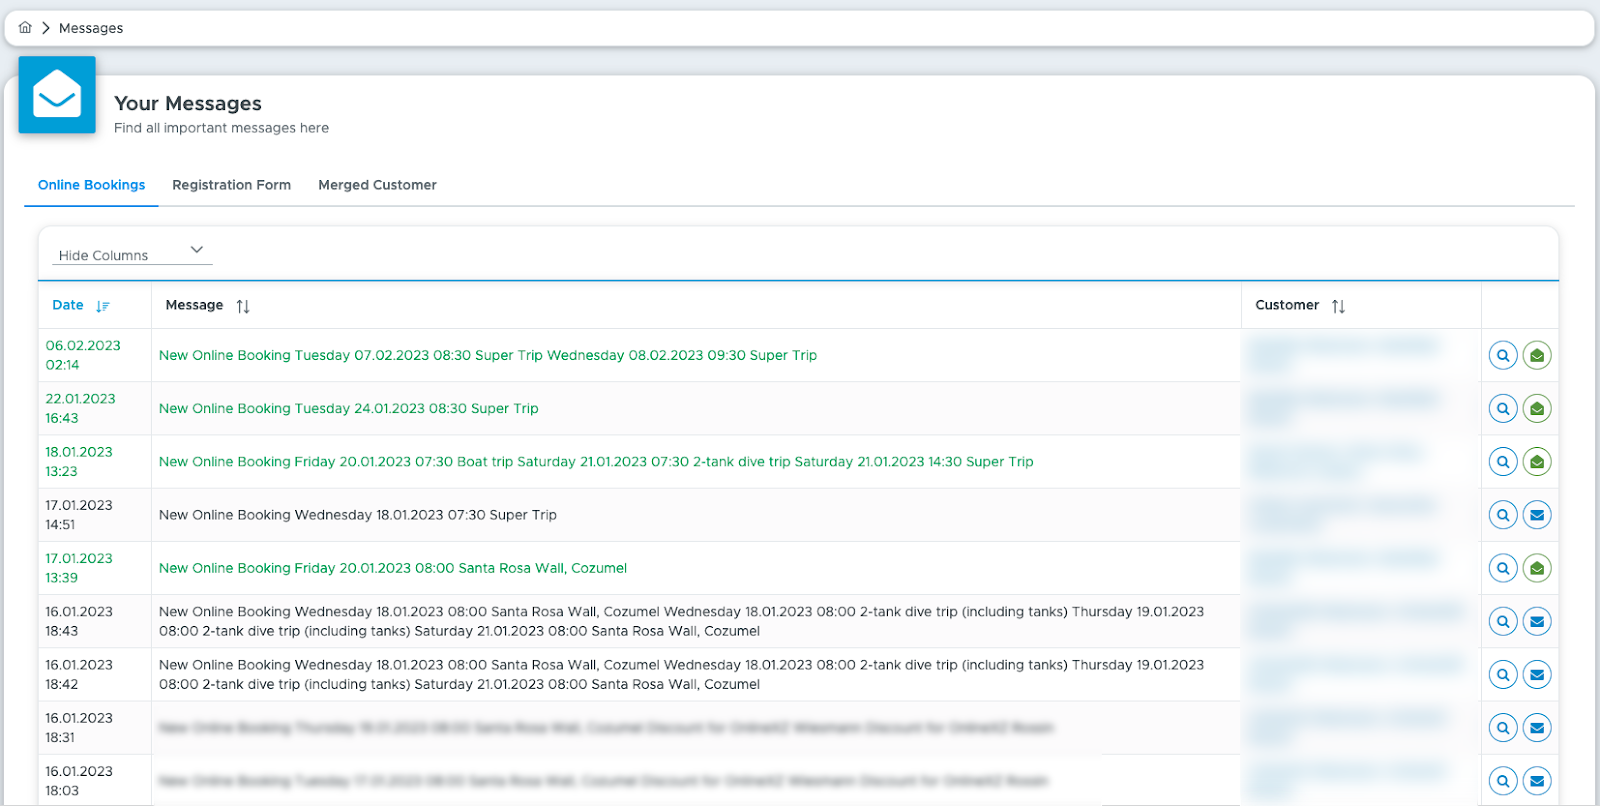
This will help you organize your online bookings, registration form, and merged customers. You can click on the magnifier to see more details and mark the message as read or unread. Whenever you receive a new online booking, a new registration form, or a customer is merged, you will find the message here.
17.1 (NEW) Online Bookings
The first tab will show you all your online bookings. Whenever a customer books online, Geek Divers will automatically add a message here. You can now easily follow up on it.

17.2 (NEW) Registration Form
The second tab now contains all the customers that filled out the registration form. You can see them here and check if everything is correct or if you need to follow up.
17.2 (NEW) Merged Customer
You can now also find the list of the merged customers here. A customer will automatically be merged if they fill out the registration form or the online booking form and their first name, last name, and email are already in Geek Divers.
Help
Thank you for reading the Geek Divers user guide! We hope that you’ve found it useful.
Do you have any feedback for us? Is anything missing? How can we make Geek Divers better?
Please feel free to drop us a message at info@geekdivers.com: we welcome your feedback!
 | Geek Divers info\@geekdivers.com www\.geekdivers.com blog.geekdivers.com WhatsApp: +49 1590 700 7654 Skype: Skype\@geekdivers.com Facebook - Instagram - Twitter - Youtube |